Watch Steve’s videos of Brian Brushwood’s Bizarre Magic from Nerdtacular 13 at youtube.com/user/nosillacast/videos. Eye-Fi Mobi review. Comparison of Collage Image Pro and Diptic to create collages with your Mac. In Chit Chat Across the Pond Bart takes us through Taming the Terminal Part 6 of n.
![]()
mp3 download
Hi this is Allison Sheridan of the NosillaCast Mac Podcast, hosted at Podfeet.com, a technology geek podcast with an EVER so slight Macintosh bias. Today is Sunday July 14, 2013 and this is show number 427. People told me that when I retired I’d be even busier and I thought they were joking. I have clearly brought this on myself but it’s crazy already. When you hear what Steve and I are doing you’ll understand. Next week’s show which would normally come out on Sunday the 21st will come out early, probably on Friday the 19th. I haven’t figured out if I’ll do it live or not, if so it would be Friday afternoon Pacific Time. If you want to join the live show, subscribe to the NosillaCast News or follow me on Twitter because that’s how I’ll advertise it. Maybe I’ll do it a bit early in the day so Europe can stay awake for it! Stay tuned. Oh that reminds me, if you want to help me out by sending in recordings for that show, it would be lovely. Let’s say get them to me by Friday 26 July and then I can have a relaxing vacation week with my family!
Steve has been a maniac producing videos from Nerdtacular of Brian Brushwood’s Freaky Magic. He’s got one where he eats fire, where he drives a nail through his tongue, performs feats of ESP, puts a nail in his eye (my personal favorite), makes himself into a human crazy straw, escapes a straight jacket and finally has a conversation with a disturbing character named Mr. Happy Pants. If you to go to our NosillaCast channel youtube.com/user/nosillacast/videos (link in the shownotes of course) they’re all at the top of the list. Steve’s been communicating with Brian and he’s loving Steve’s work. go check it out.
Silicon Valley Mac Users Group SVMUG
I wanted to tell you guys that if you’re in the Silicon Valley, I’ll be speaking (remotely) at the Silicon Valley Mac Users Group (SVMUG) on Monday night 15 July. I’ll be doing a presentation entitled Turbocharge your Mac Productivity. If you’re hearing this soon enough, hope you can come and cheer me on, it’s at 7pm on the Google Campus. Go to http://svmug.org for directions and details.
Tim’s Stuff
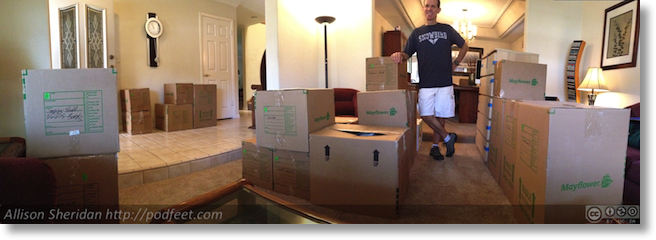
Now onto why we’re so busy on top of everything else. As you know Tim Verpoorten passed away a few months ago. I’ve been in contact with his wife Alice, and she was overwhelmed at the prospect of figuring out what to do his entire office full of computer equipment and software. She lives out in Wisconsin so it wasn’t practical for me to fly out there to help, so she decided to ship his entire office to me and Steve! You’ve heard me mention Dorothy, aka @maclurker in the chat room and on Twitter. She asked me if she could help me organize it. Why YES you CAN!
Saturday morning 22 giant boxes were delivered to our house, and Dorothy, Steve and I spent 6 hours opening them and trying to figure out what categories of stuff he had. At the very least we know he was obsessed with cables of all varieties, keyboards, font software, and computer bags. Ok, the last one is true about all of us right?
Our goal here is to get Alice some much needed money for all of this, and we have to make sure we make more than the $2800 she spent to have it shipped to us! This is where you come in. If you knew Tim through his podcast, the Mac Roundtable, and appearances on the NosillaCast, then I hope when we put all of this up for sale you’ll bid it up and buy stuff – even stuff you don’t need! Heck, pay more than you think it’s worth!
I haven’t figured out exactly how we’re going to do this, we’re still in the cataloging and pricing stage right now (which is actually kinda fun using RedLaser for barcode scanning on the iPhone). We’re using a Google Doc form for the inventory which is fun too. Katie Floyd’s advice was to use Amazon for selling rather than eBay because of the amount of the fees eBay charges. You have no immediate actions on this but save up your money for a big sale, probably in about 3 weeks. I put a few photos and even a video in the shownotes so you can appreciate the level of chaos we’re dealing with.

Let’s dig into some tech now shall we?
Eye-Fi Mobi
Two weeks ago, Asa mentioned an SD card he has for his camera, the Eye-Fi Mobi, and I decided to get one to see if it’s all that and a bag of chips like he said. Let’s start with the problem to be solved. You’re out and about with your “real” camera, maybe it’s a point and shoot with a good zoom, or even a DSLR that you’re using to shoot a conference or even a nature walk. You can take great pictures, but what if you want to tweet them or Facebook them in the moment?
I’ve been faced with this so many times. By the time I get back to my hotel room, pull the memory card from my camera, import the pics into Aperture, then compose a tweet with it, no one cares any more about that event because it’s pretty much old news. I find it especially annoying at something like Macworld or All Things D. The Airstash that Kirschen recommended got me 90% there, but it was still a pretty big hassle. As I explained last week, you have to pull the card from the camera, put it in the Airstash, turn the Airstash on (which creates it’s own wireless network), then change the network settings on your iPhone to pick up the Airstash signal, look through the photos to find the one you want, and then import it to the iPhone and then switch back the network to the local wifi if you’ve got it. It works, but that’s a lot of steps to go through.
Asa said that the EyeFi Mobi just automagically creates a network and the photos suck right into your iPhone. He’s never lied to me before so I took it on faith that this would work and bought the Eye-Fi Mobi from Best Buy right before going to Nerdtacular for $50, which is about what it runs on Amazon. I was all excited when I ran home with it, plugged it into my camera and then tried to see the wireless network it was supposed to have created…but it wasn’t there. I downloaded the Eye-Fi software to my Mac, thinking maybe I needed that, but still there was nothing. Hmmm…Took a picture with the new card, and STILL no network. I spent probably an hour and a half searching for trouble shooting tips on the card and found now help. It was time to pack up and go to the airport, so I shot off an angry letter to tech support and left.
While I was at the airport I kept fiddling with this thing, and realized that perhaps the EyeFi Mobi network only recognizes jpegs, and I’d been shooting RAW. I changed the settings on my camera to take a RAW and create a JPG (at the lowest resolution since it’s just for tweeting and such) and the INSTANT I took that jPG photo, the network appeared. So somehow it’s the actual existence of a JPG that makes it exist, which is super weird. I told the tech support folks that perhaps that’s a tidbit that should be included early in the instructions?
Now that it’s working, it truly is magical. With an iPhone or Android phone, you have two networks, your cellular network and a wifi network. If you have both of these active you don’t have to do ANY switching at all. I stood on a mountain, Took a photo with my DSLR, opened the EyeFi app on my iPhone and at incredible speed, all of the JPGS I’d taken flew into my iPhone. I didn’t have to (and couldn’t) select which ones to bring in, which was perfect for me. It’s much easier to see which one I want from the phone than on the tiny DSLR screen. Since the photo swooped over on wifi, I could tweet from cellular. There’s no way this could be any easier (unless my iPhone had a 200mm zoom lens with good glass of course). The next time I brought up the app, only the NEW photos sucked into my phone so they did that right too.
Now there’s a caution about this whole thing. Several times I forgot to turn my camera off, which meant the wifi network was active for a long time in my backpack. My camera actually got warm, and I burned through the battery on the first day of our trip to Nerdtacular. I’d brought a 2nd battery but even with that I didn’t make it through the last day of only a 5 day trip!
The camera I use is a Nikon D5100 (on the advice of Bart and Kirschen) and it is technically wifi enabled. In the settings on the camera there’s a switch to enable/disable the wifi on the card. I also get a nice wifi indicator when it’s broadcasting as expected which was nice. However, that doesn’t mean that you need a fancy new camera to get the Mobi to work for you. I found a page on the support site over at Eye-Fi (http://support.eye.fi/cameras/) where you can look up your camera make and model and it tells you if the Mobi will work. I looked up my previous camera, the Nikon D40 DSLR and a five year old Casio Exilim I found in my drawer and both of those will work with the Mobi. I’d still check the compatibility chart if I were you but I think there’s a good change it will work for you. Again, the card is called the Eye-Fi Mobi and it’s running around $50 at Amazon.
Collage Image Pro and Diptic
 I love taking photographs and I often want a way to show a collection of photos in a collage. For example, last weekend I had a BLAST waxing my friend Bill’s car and I want to show off the before and after comparison photos, but sending out 6 shots would be boring for everyone. I know you aren’t even wondering why I was waxing Bill’s car but it is a good story. Bill parked his car in his garage and went off on travel while his house was painted. The idiot painters spray painted the vents on the garage…thereby getting tons of overspray on his car. The worst of it was on the left rear quarter panel – his black car was nearly white! He asked if I knew how he could get it off, so he and his wife Diane brought the car over for diagnosis. A few quick slides with Mother’s Clay Bar and it was obvious I could get it all off. I explained thought that I just wouldn’t feel right if I didn’t wax the entire car, right? So I clayed all of it (the roof and trunk and rear bumper had to be clayed twice, and then used Meguiar’s cleaner wax with my lovely orbital polisher. Steve decided that he might as well polish the head lamps as they were looking pretty foggy and yellowing. When we gave the 9 year old Infinity back it looked like a whole new car!
But wait, this was supposed to be about collages, right? I went on a hunt for a good Mac app to create a pretty and creative collages on the Mac. I found two for consideration this week. The first is called Diptic, which is an app Steve Stanger told us about way back on Episode #309 but that was when it was only on the iPad. The second is Collage Image Pro from greatdy.com.
Diptic on iPad since Steve told us about it. It lets you do really cool crazy designs. They have a bunch of templates that have wild, unconventional swervy borders that you can mutate by moving these little control points around. It’s a little hard to figure out how to pan and zoom your photos within the templates, and you can add text to the images but there’s not a lot of options available on that. For $0.99 in the iTunes store it’s a lot of fun on the iPad.
When I first took a look at Diptic for Mac, I was disappointed that the crazy borders weren’t available. Diptic for Mac appears to be much more traditional with nice rectangular templates where you can drop in your photos. Don’t get me wrong, there are a GAZILLION options for those rectangular borders, but just don’t be thinking about any kind of crazy diagonals or anything. You can change the color of the borders, the width, and how rounded they are. They even give you some photo effects to modify like brightness, contrast and more. If you crave that diagonal thing, you can easily zoom/pan/rotate the photos themselves for a little excitement.
Diptic for Mac does pretty much what I need without a lot of flair for and it will only run you a dollar in the Mac App Store. Let’s switch gears now to Collage Image Pro.
Collage Image Pro is $9.99 in the Mac App Store so let’s see if it gives us enough more fun to be worth the extra money. By the way, remember when shareware was $30 and we were glad to pay it and now we think WOAH, $10??? Something to think about.
 Collage Image Pro starts by asking you what size image you want in the end game, but you can change that later on so don’t spend a lot of time worrying about it. Like Diptic it comes with a slew of rectangular layouts. Collage Image Pro is much easier to use specifically in laying out your photos. You just grab a bunch of them and drop them into the image well, or drag them right onto the screen and Collage Image Pro picks positions for them. You can drag and drop them around and it just moves the displaced image out of the way to another open spot. Diptic doesn’t do this nearly as well, you have to remove and add photos to the application.
The way you modify images in Collage Image Pro is a bit unusual but works well. When you select an image, you get four icons. There’s what looks like a Pixelmator icon which actually lets you preview and then apply all kinds of fun filters, an icon that lets you apply text with the ability to change color, font, size, add a gradient, or a background with rounded corners and transparency. Next you have the pan button – simply push on that and drag side to side to move the image inside it’s borders. I like how when you do that you can see the entire image (even if it’s cropped when you let go) so it’s easy to find the exact framing you desire. Finally you get a magnifying glass. That one is really weird. you’d think you’d tap it to zoom in and maybe option-tap to zoom out, but instead you push and then swing it around a point and in some positions it zooms in, some it zooms out and some it does nothing at all. I really found that a weird control but I could still get the job done with some fiddling.
Remember how I felt stifled by the traditional collage options in Diptic for Mac? Collage Image Pro lets you apply an image fill to the background with a whole bunch of creative designs, or you can do the solid background thing, or if you like a nice gradient you can go crazy there too. You don’t have to use the standard templates, just put up a background and simply throw the pictures up. Collage Image Pro will choose frames for each photo and casually arrange them on the screen as though you tossed real pictures on the floor. They’re easy to slide around, enlarge and shrink, change angles and play around with a myriad of frame options. you can be REALLy creative with Collage Image Pro.
Collage Image Pro also lets you output directly to Facebook, Mail or Twitter. I put an image in the shownotes that I created with Collage Image Pro of my car waxing masterpiece so you can go check it out. Bottom line time. If your needs are only to put images together in a pleasing rectangular grid with a nice background color to set the images off, Diptic for Mac for $1 is sufficient. If you want to get more creative and have more control over the look of each photo and it’s frame and background, I think you’ll be happier with Collage Image Pro for $10 in the Mac App Store. I’m glad I bought it and plan to have more fun than every with my car waxing photos!
Clarify
Donald Burr of Otaku No Podcast, the venerable developer of the NosillaCast app that lets you listen to the live show, chat in the chat room and even read and listen to past episodes of the show, wrote a note to me this week that he’d discovered something cool about iOS. For Donald to have beta testers, he needs a way to register with Apple the devices that are testing the app. The identifier Apple uses is called the UDID, and in the past we had to download an app to figure out the UDID to send to Donald (and to other developers). Donald wrote that he discovered an easy way to find out your UDID of your iOS device without a third party app. He wanted to show us how to do it, so what tool do you think he used? Why Clarify from BlueMango Learning of course! He dropped in some actual photos and some screenshots and then used the tools in Clarify to blur out some private information, threw in a few written instructions and then pressed publish so it flew up to the clarify-it.com server. I’m sure this took him only a few minutes but will save his beta testers TONS of time when we need our UDID in the future. I put a link in the shownotes to Donald’s tutorial so you can check it out. When you’re amazed and enthralled, go over to BlueMangoLearning.com and check out the free trial of Clarify for yourself.
Chit Chat Across the Pond
Security Light
Important Security Updates:
- Apple release Security Update 2013-003 to address three serious QuickTime bugs – http://support.apple.com/kb/HT5806
- Last Tuesday was patch tuesday – Both MS & Adobe get in on the action – http://krebsonsecurity.com/2013/07/adobe-microsoft-release-critical-updates/:
- Microsoft: Patches include fix for dangerous True Type Fonts (TTF) bug that’s being exploited in the wild – just loading a font could cause arbitrary code to run – so don’t delay in patching your Windows machines & VMs – http://technet.microsoft.com/en-us/security/bulletin/ms13-053
- Adobe: released patches include a dangerous Flash bug (http://www.adobe.com/support/security/bulletins/apsb13-17.html), and bugs in two lesser used and rather obsolete products, Shockwave and ColdFusion
Important Security News:
- Researcher discovers that Motorola is spying on users of some of it’s Android smart phone models – http://www.beneaththewaves.net/Projects/Motorola_Is_Listening.html
- Google have patched a major bug in how Android validates digital signatures in applications – the problem is that users are now left waiting for their vendor and/or their carrier to pass on the patch to them – if you run Android, give serious consideration to running AV – Sophos have a great explanation of how the flaw world, and how Google fixed it – http://nakedsecurity.sophos.com/2013/07/10/anatomy-of-a-security-hole-googles-android-master-key-debacle-explained/
- There is a worm spreading through WhatsApp that is mucking with people’s contacts ATM – don’t accept anything from a user called ‘Priyanka’ – http://nakedsecurity.sophos.com/2013/07/11/whatsapp-users-ignore-messages-from-priyanka-its-a-worm/ (if you use WhatsApp you should probably be aware the company doesn’t have a spotless security record: https://www.demworks.org/blog/2013/05/instant-messaging-smartphones-whatsapps-lack-security)
- AT&T will shortly start selling their customer’s data to advertisers – this is an opt-out rather than an opt-in program, so if you’re a customer, you should read this, and opt out if you find AT&T’s plans objectionable – http://www.macobserver.com/tmo/article/att-plans-on-selling-your-data-to-advertisers-heres-how-to-opt-out
Suggested Reading:
- Oklahoma & Nebraska join Mississippi to press Google to stop selling ads for illegal products – http://www.reuters.com/article/2013/07/02/us-google-advertising-states-idUSBRE96119620130702
- Intego have posted the second part of their blog series on how researchers analyse malware: Part 1 & Part 2
- Gaming company Ubisoft urges customers to change their passwords after data breach – http://nakedsecurity.sophos.com/2013/07/03/ubisoft-customers-told-change-your-passwords-now/
- Nintendo targeted by brute force attack for about a month, attack goes unnoticed for weeks, and over 23K Japanese accounts are compromised – http://nakedsecurity.sophos.com/2013/07/09/nintendo-cracks-after-month-long-15-5-million-strong-hacker-bombardment/
- Security firm reveals serious flaws in many US TV and radio emergency alert systems – many stations install these systems without changing the default authentication details, and the private key for the default SSH key for the root account has leaked – http://nakedsecurity.sophos.com/2013/07/10/did-brainless-flaw-in-us-emergency-alert-system-lead-to-epic-zombie-attack-warning/
- A potential up-side to FaceBook’s data mining – they might be able to help prevent suicides – http://nakedsecurity.sophos.com/2013/07/05/can-facebook-updates-predict-suicide/
- Followup – MS make the first payout in their bug bounty program – http://nakedsecurity.sophos.com/2013/07/12/microsoft-to-pay-first-bug-bounty-for-internet-explorer-hole/
- This is too funny not to include – fugitive arrested after tweeting “catch me if you can” – http://nakedsecurity.sophos.com/2013/07/10/catch-me-if-you-can-twitter-taunter-and-wanted-fraudster-nabbed-in-mexico/
Main Topic – Taming the Terminal Part 6 of n – File Permissions Ctd.
http://www.bartbusschots.ie/blog/?p=2525
Would you believe that the day after we recorded this episode of Taming the Terminal, I had a file up on my server that had the wrong permissions and I actually had a clue what I was doing!
That’s going to wind this up for this week, many thanks to our sponsor for helping to pay the bills, Blue Mango Learning at bluemangolearning.com makers of ScreenSteps and Clarify. Don’t forget to send in your Dumb Questions, comments and suggestions by emailing me at [email protected], follow me on twitter and app.net @podfeet. Check out the NosillaCast Google Plus Community too – lots of fun over there! If you want to join in the fun of the live show, head on over to podfeet.com/live on Sunday nights at 5pm Pacific Time and join the friendly and enthusiastic NosillaCastaways. Thanks for listening, and stay subscribed.
Hi Alison, I had given up on the Eye-Fi (shooting raw on Canon 60D) – as soon as I used a raw + jpg it worked.
Cheers
Stephen
So my review helped you get it to work? That’s awesome!!!
This is the second installment of Taming the Terminal (in a row) where people talked about using TextExpander as a way to simplify entering, without remembering, a long string of command switches (the characters after the “-” and before the file name in the shell commands Bart has talked about).
But since this is Taming the Terminal, I think we should explore a way of doing it using the capabilities of the *nix command shell itself. In particular, aliases
An alias is simply a shortcut string that can be used to represent a longer string. For example, suppose that, when you want to list files, you want to see the permissions, include hidden files, have file size be “human” (in kB, for example), sorted chronologically, and with the most recent at the bottom. You’d use this command:
ls -lhatr directoryName [the directoryName can be omitted for the PWD]
But that “-lhatr” is a lot to remember, and you’d rather simply want to remember something short, like “ll” (for “long list”)
To do that, you simply would type (in BASH):
alias ll=”ls -lhatr”
and from then on, any time you type the command “ll” it will be as if you typed “ls -lhatr”
Well, that’s nice for just the present session, but you probably don’t want to enter that alias command each and every time you pop open a new Terminal window. You want an automated method of issuing the alias command for each new shell session. Well, *nix has a facility for that, it’s called a resource file. It is a hidden text file that lives in your home directory and is invoked every time you start a new shell session. In the case of BASH, it is called “.bashrc”
There are many ways of creating that file, but the simplest (and easiest to maintain) for the new Terminal users is to create a text file using any editor (e.g., TextEdit) that includes the desired contents of the resource file, and then issue the Terminal shell following command to create it:
cd ; cat > .bashrc
[The first “cd” ensures that the second part is executed in your home directory, and the second part says, “Take any text I’m about to enter and save it to the file named “.bashrc”]
Then paste in the text (below) followed by a control-d key combination (to close it out).
The text you want to enter is:
#!/bin/bash
alias ll=”ls -lhatr”
plus any other aliases (or other commands) you want to create.
If you are using other shells (like my favorite, tcsh) the syntax of the alias command is different (tcsh uses a space for the delimiters instead of the equals sign, and doesn’t need the or quotes).
I hope this isn’t getting too far ahead of things (and I didn’t blow Bart’s lesson plan). I guess I’m a little bit of a Terminal “purist.”
Well actually Bart, technically the chmod command does not take decimal for the numeric representation of permissions, it in fact is using octal (base-8 numeric system, in other words comprised only of the digits 0-7).
Also, I don’t actually use the octal method of specifying permissions (generally speaking my mind doesn’t think in numbers). chmod also supports a more textual method of specifying permissions, which I think is easier to read and comprehend.
The format is:
chmod [ugo][+-=][rwx] file…
The “ugo” stands for [u]ser, [g]roup, or [o]ther (aka world). The “+-=” means [+]add permissions, [-]subtract permissions, [=]set permissions equal to. And the “rwx” stands for [r]ead, [w]rite, and e[x]ecute. So for example:
chmod ug+rx file
adds read and execute permissions for both the user and group
chmod go-w file
removes write permissions for the group and world
chmod go=r file
sets group and other permissions *exactly* to r (read only), removing any other permissions that were given to group or other, and leaving the owner permissions to whatever they happened to be set as.
I believe you can even string multiples of these together, for example
chmod u=rx,go-w file
sets user permissions to exactly read + execute, and removes write permissions for group and other.
You are of course right that the representation is technically octal Donald, but for numbers less than 8 there’s no difference, so why confuse things? 🙂
That’s a nice summary of the “other” way of using chmod – I did say there were two ways, and that different people prefer different ways. I don’t like the texty way because something as simple as setting 755 gets quite long:
chmod u=rwx,go=rx file(s)
It really is a horses for courses thing – I choose to teach the way I know best in case I made a silly mistake.
You have a point there 🙂 I’m just too much of a stickler for terminology to let that pass 😉
I point out the textual way of using chmod as an alternative, some may find “u=rwx,go=rx” easier to comprehend than “755”. Having said that, I now pretty much use the octal way of specifying permissions most of the time I need to do so, because I’ve memorized the common/most used permission sets (“755” = “user read/write/execute, group/other read/execute”, “644” = “user read/write, group/other read”, etc.) But I still sometimes use the [ugo][+-=][rwx] method if I need to apply some weirdo/non-standard permissions (which admittedly doesn’t come up very often).
The two methods of modifying permissions serve two different needs. “The Bart method” has the advantage of easily specifying the full mask. “The Donald method” has the advantage of easily flipping (or specifying) particular bits (while leaving the rest unchanged).
I usually find that I change permission masks (modes) to accomplish a particular task (such as enabling read/write access for specific groups or everyone), and don’t want to change anything else. So in most situations, I use “the Donald method.”
Plus, I find “the Donald method” easier to teach / explain. it certainly is more like the Finder permission controls (a good reference point for people). One never knows if, during an interview, Allison is pretending not to understand (to elicit a more audience-friendly explanation) or not. If not, in this case, I hypothesize that “the Donald method” would have been more tractable for her.
Different strokes for different folks!
[…] of n” of his “Taming the Terminal” series on Allison Sheridan’s NosillaCast episode 427. This covered the topic of setting file permissions and included details on how to compose and […]