Katie Floyd is running next week’s show while I take yet another vacation – send her contributions at [email protected]. Steve and I got Verizon FiOS and Bart helps us configure our network to allow the Airport Extreme to control things instead of the Verizon modem – see the tutorial here. HDA Bob is back with a review of Speedometer. Chris Morrison brings us a dumb tip on how to stitch photos together of a manual. In Chit Chat Across the Pond Donald Burr of Otaku No Podcast teaches us how to build our own Google Reader server – from scratch and for free.
![]()
mp3 download
Hi this is Allison Sheridan of the NosillaCast Mac Podcast, hosted at Podfeet.com, a technology geek podcast with an EVER so slight Macintosh bias. Today is Sunday August 11, 2013 and this is show number 431. I’ve been getting a lot of flack from people for saying I’m going on vacation. They seem confused on how you can go on vacation when you’re retired. They do make a good point, but if you actually leave your house and go somewhere and don’t have to do the dishes, do the shopping, empty the cat litter… That’s what vacation actually is. Speaking of vacation, Steve and I are going on our third vacation of the summer! Were going to take the kids wine tasting in Sonoma. When I had little kids, I felt badly for people with older children, because they weren’t getting to have all the fun I was having. Now I look at people with younger children, and feel sorry for them, that they don’t get to go wine tasting with their children!
One of the best vacations I’ve had was when we took the kids as adults to Disneyland. Don’t get me wrong, we still rode Dumbo and Mr. toad’s wild ride, but not having to search around for wondering toddlers was much more fun, and we could go have margaritas over at California Adventure!
Back to the podcast though, this means that I won’t be able to produce the show the weekend of August 18. Luckily, one of the best Mac broadcasters in the industry, good friend of the show and good friend of ours Katie Floyd has graciously agreed to host the show. We’re not been a torture her by making her do a live show, So there won’t be a live show on August 18. If you have copied the NosillaCast calendar URL from podfeet.com/live your calendar will automatically reflect this change. It would really help Katie out if some of you could do reviews for her show so she doesn’t have to create all of the content herself. Send Your reviews to me at [email protected] and to Katie at [email protected]. Thanks in advance for the help, I know you’ll love it when Katie does the show – she does a terrific job! Plus it’s great fun hearing her try to say “EVER so slight”!
Verizon FiOS
When broadband first came out, Steve and I got a whopping 1Mb/sec download from a company called @Home. It was all that and a bag of chips. Over time, the service actually got faster without them increasing the cost. Eventually though, our local @Home service was bought by Adelphia Communications. We were concerned, but guess what happened? The speeds got even faster, and the price still stayed the same. It was awesome! We didn’t have to call anyone or get new fangled services or anything. It turned out though that the founder, John Rigas and his son Timothy Rigas were charged with corruption and sort of ended up in prison and Aldephia went bankrupt. Now you’d think at this point that Steve and I would have to make a decision, but luckily Time Warner Cable swooped in and bought up most of the assets and they took over our service. Guess what happened? The speed increased and the price stayed the same!
For years I’ve heard people complain about Time Warner (including my friend Diane who has had the most horrific experiences) but for some reason we were in this protected zone where life was wonderful. Till about six months ago when they raised the prices…about 30%. The first time they did it I called them up and explained to them that I can get FiOS in my neighborhood so to cut this nonsense out, and they did, I ended up with instead an 11% drop in our bill. For a couple of months when they raised it again, a LOT.When I called them up this time though, they were unbending on their price. I should mention that our download speeds were 15 Mb per second down and 1 Mb per second up, but we paid $10 a month extra to get to entire megabits per second up. That extra megabit turns out to be really important for the live show. Without it we get dropouts, terrible stuttering, and sometimes it doesn’t even work. I kept arguing with the guy, and eventually he said he’d give us that extra megabit for no cost. I was still annoyed but it was better than nothing. Imagine my dismay when I went to do the live show that Sunday night and I was only getting 1 Mb per second up. I got on live chat with a representative from Time Warner cable and the guy asked me why I thought I should get it if I wasn’t paying for it? You can imagine how well that worked out for the guy. At this point I decided our ride was over, and it was time to finally bite the bullet and go to Verizon FiOS.
Many of you are wondering why if I could get FiOS I didn’t just go ahead and do it a long time ago. It’s because I knew it would basically be hell on earth to do the transition. I was assured by many of my friends that it would be easy, but you know these things never are. I decided to wait until after retirement to finally pull the trigger. I think I’ve mentioned before, that when you’re retired, the phone becomes your friend. You have the time to have an in-depth conversation with someone to make sure you understand exactly what’s going to happen. I looked on Verizon’s website and I couldn’t find a phone number, so sadly I started the live chat with a guy named Sean. I usually like live chat, but it was clear that Sean was talking to a lot of people at the same time. After 14 minutes, we had barely established that I did live where I could get the fiber optic service.
While I was live chatting with Sean, I decided to dig further for the phone number and eventually found it. I got Charlie on the phone and started working with him in parallel to my chatting with Sean. Charlie started spouting off prices that were double what I was seeing on their website. I should explain that I was going for triple play: Internet, phone and cable TV. He explained to me that I had to get that expensive service because I of course would want sports on TV. Not so patiently I explained to him that I never said I wanted sports. He got on my nerves enough that I told him I was happy the call was being recorded because now his supervisors would know that he lost the sale. I hung up.
By this time Sean is finally getting into the nitty-gritty of what I need to know. He gave Steve and I’ll link where we could look at the different options for cable TV service and we could choose our best option (we didn’t pick sports). Unfortunately a full hour had passed by this time, and I was running out of time before Pat Dengler was going to come over and let me wax her Mini Cooper. I begged the guy to give me some sort of transaction ID so that I could get back to this point without starting over. We went back and forth for another 10 minutes and I eventually had to walk away from him. See why I didn’t want to do this before I was retired?
Fast-forward a couple of days and I went back to the Verizon website and for some reason this time the phone number was right out in front where I could find it. And this time I didn’t get a snot like Charlie, I got my new little best friend Brandon. In about 15 minutes, thanks to some extent to the time I had invested with Sean, Brandon was able to fix me up with a package that met my needs. He knew all of the answers to my questions, and when we were done my bill came out if whopping $2.51 more than my bill with Time Warner cable, but now it was for 50 Mb per second down and 25 Mb per second up!
Overall I probably lost 2 hours of my life simply ordering this service. And of course when they gave the delivery time, they gave us a 5 hour window where we had to stay at the house. However, this worked out extremely well. Steve and I tag teamed who was at home, and we got super lucky. I happen to be there when the guy configured the router for Internet service, and Steve happened to be the one who was at home when all of the TV work happened. We have a division of labor in our house, I control the Internet, he controls the TV. Our new little best friend Edgar spent over 5 hours at our house, mostly working on getting the cable cards to work in our TiVo’s. it was very strange, they worked for absolutely everything except HBO. We also had one digital receiver box for a TV that doesn’t have a TiVo, and it got HBO just fine. I never heard how he got it working, but as I recall those TiVo boxes had to be rebooted, a lot of times, and they are at the snappiest boxes to reboot.
The good news is that after Edgar’s hard work we have amazing speeds. We’re getting at least what they promised and often faster than the 50 down 25 up. Verizon insists that you use their modem/router because it controls not just your Internet but your IP telephones. I suppose there’s nothing wrong with their router, but I paid a fortune for an AirPort Extreme so that I could control my network myself within interface that I like and understand. I went on the Internet to try to figure out how to bypass the Verizon router and use my Airport instead, but all I could find was people saying to put the AirPort Extreme into bridge mode. This basically means that you are emasculating the AirPort Extreme, not allowing it to perform DHCP, NAT, assign static IP addresses or anything else fun. I spoke to several people, and they said that was the only way to make this work, that you had to let the Verizon router control your network. The best they offered was turning off Wi-Fi on the Verizon router and letting the AirPort Extreme pass through the IP addresses it got from the Verizon router.
 At this point, it was time to bring in the big guns. It was time to call Bart. We tried doing a few email exchanges first and while the asynchronous nature of email allowed us to work better across time zones, it still was too hard. We got on Skype on Saturday and Bart actually figured it out. I’m really proud of what we put together, because you know that I created a Clarify document for it, right? Bart added a fantastic OmniGraffle diagram to it that really helps you see the overall view of what we did. I’m going to give you the basic steps, but our combined tutorial will actually help you the most if you try to do this yourself. First we turn off wireless on the Verizon router. Then we told the Verizon router to start serving out IP addresses at 192.168.1.10. this means we could use an IP address below that in the Verizon router would never step on it. Next, on the Verizon router again we enabled DMZ and set it to the IP address 192.168.1.2 (which is not within the range the Verizon router is allowed to use).
Next we went into the Airport utility and in the AirPort Extreme we gave it a static IP address of 192.168.1.2, the address of the DMZ on the Verizon router. This combination of steps allows the AirPort Extreme to continue to serve out IP addresses using DHCP and still allows the airport to do things like port forwarding. If we had not put the AirPort Extreme in the DMZ on the Verizon router, any time I wanted to do port forwarding, I would have to do it on both routers which would be tiresome at best and error-prone at worst. This configuration does create something called double NAT, So you’ll get a warning on your AirPort Extreme about that but it doesn’t actually cause any problems. Bart says he’s been running with double net for many years without any difficulty.
Executing these few steps allows me to have everything I wanted and I have to thank Bart yet again for finding a great solution for me. I’ve posted a tutorial on how to do this under the tutorial tab on podfeet.com, and I posted it back to the Apple forums where I found all those people asking the question. It’s so much fun to be able to create a guide for others.
HDABob on Speedometer
Honda Bob joins us with a review of an app he really likes:
 As many of you who are familiar with me, you know that I drive a lot in the Southern California area. This is Honda Bob and I don’t want to get a speeding ticket! Now that you know the problem I want to solve, let me tell you about a great app that runs in the background and helps me keep within the speed limits.
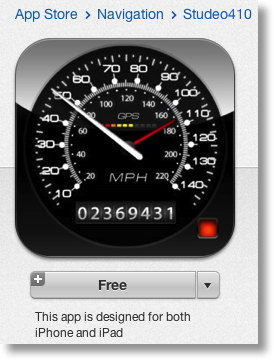
You can find it in the APP store…It’s called, oddly enough, “Speedometer”. From Stanislav D VOY CHEN KO.
What it does is allow you to monitor your speed with a large digital display that turns from green to red and emit a loud sound to alert you when you go over a preset speed. At night you can place your device on the dash to use the Heads Up Display function reflected onto your windshield to monitor your speed. Which is set, with easy-to-configure speed limits. When you are below the preset speed, it displays in green. When you go over the speed, it displays in red and sounds an alert. If you want to keep your phone in your pocket, you can do that, As well. With your phone in standby mode, the app will monitor your speed and let you know if you exceed your preset speed by a configurable audible alert.
You are able to set speed limits with 4 fast and configurable presets. Presets need only a single tap and is the safest way to set the limits quickly. Also, if you are stuck somewhere, the app tells you your current location. Then, can share it easily via sms/text, or email to emergency services, or friends. A trip meter tells you how far you have traveled, and the mileage, which is configurable for the price of gas and your vehicle. A GPS blackbox is also included in this app keeping point to point history of your location in GPS coordinates, speed and altitude by activating the “GPS Blackbox”. This might come in handy if you are stopped. A built in altimeter lets you see just how high you are up in the mountains. You can use this app on any iPhone or iPad with 3G. (For iPads with wifi only, An external GPS module is required.)
PLEASE BE AWARE THAT AS WITH ALL GPS APPS, CONTINUED USE OF GPS RUNNING IN THE BACKGROUND CAN DRAMATICALLY DECREASE BATTERY LIFE. This is why I always turn off the background mode when I am working, And turn it back on when I get ready to leave a site. The application is also able to play your choice of playlist on your device. There are other advanced features that are configurable to your individual tastes and driving style.
Now, let me describe the way I use it: Before I start driving, I start the app on my iPhone 5 and turn on the background mode. I usually have the speed limit programmed to 67 MPH when I am on the freeway. If I exceed that limit, I hear the alarm over my Bluetooth headset. This really gets my attention. The alarm is configurable too. This is the function where I think the Speedometer application really excels… When I go motorcycle riding, I set up the app to play my playlist on my iPhone 5 through my helmets bluetooth stereo headset. The phone stays safely in my pocket.
By the way, It is much easier to exceed the speed limit on a motorcycle, because the sense of speed is less evident. Speedometer lets me know with an audible alert when I exceed the preset speed. If my phone rings, the stereo stops and the voice control on my headset becomes active, so I can answer the phone without even touching anything… I just say answer or ignore. This is great when riding a motorcycle for sure. A lot less of a distraction than reaching for buttons with heavy gloves on. So far, I haven’t gotten any tickets.
Again, the app is called Speedometer and it’s free.
Thanks, this is Honda Bob….drive safe. HDABOB’s Mobile service is not affiliated with Honda, Acura or Honda worldwide.
I’m in favor of any app that helps people drive more safely. The coolest part of this app to me is the heads up display capability he described. He showed it to us – so simple really. The iPhone simply puts the speed in red letters (backwards) on screen and it reflects off of your windshield. I imagine this is less effective during the day but pretty cool at night. I wish it used the GPS to tap into the databases for what speed limits are everywhere so you didn’t have to enter it yourself – seems like that would be a bit problematic to do while driving. In any case, You can contact HDA Bob at (562)531-2321 or check out his website at hdabob.com.
Chris Morrison on a Dumb Tip
Chris Morrison is back this time with a dumb tip for us.
Chris needed to take a physical copy of a very old computer manual with him but wanted it on his iPad. Took photos of each page, opened them all together in Preview and then asked Preview to print to PDF, and voilà, he’s got a pdf of the manual for his iPad!
I love this idea, Chris. I don’t think I would have thought to do it this way asking Preview to put all the pages together. I have been known to use my iPhone to take photos of documents instead of dealing with my flatbed scanner. Then I stole Steve’s Scansnap scanner and now I use that pretty much for everything and it stitches the pages together for me and does OCR on them. If I didn’t have access to his scanner though I’d definitely be doing the photograph method! Thanks for a great tip Chris!
Spirit Levels
On last week’s show during Chit Chat Across the Pond, Bart mentioned his purchase of something called a spirit level. I said that I had never heard it called that and was curious where the name came from. Matthew Miller sent in the explanation of why they call them spirit levels. According to the Wikipedia article that he referenced, “Alcohols such as ethanol are often used rather than water. Alcohols have low viscosity and surface tension, which allows the bubble to travel the tube quickly and settle accurately with minimal interference with the glass surface.”
He also pointed out that since alcohol freezes at a much lower level so perhaps it makes a spirit level useful in lower temperatures than other liquids. I thought both of these explanations were pretty interesting, so I posted his comment and the link in the NosillaCast Google plus community. Jim Sewell commented back with another interesting idea. He wrote “I remember being a kid and my dad telling me not to drop the level because the bubble will break into smaller bubbles and he’d have to throw it away. I have seen some like that which were all but unusable. I wonder if the alcohol is less susceptible to bubble-breakdown.” I wrote back that I think it might be just the opposite actually. the low viscosity alcohol would keep it from sticking to the glass, but it would have lower surface tension I would think which would make it more susceptible to the bubble breaking up, hence his dad’s warnings.
I love the NosillaCast community because we talk about so many different subjects, and can get into fun debates. if you have enjoined the NosillaCast Google plus community check it out over at podfeet.com/googleplus. You too can weigh in on the controversial subject of spirit levels!
Clarify
You heard me talk earlier about how Bart and I reconfigured my network and I mentioned that I created a Clarify document for it. I knew that 2 weeks from now if I had a power outage that erased all my settings, I wouldn’t remember a) what I did and b) why I did any of it! By creating the Clarify document I knew I would personally read the benefits of it and it delighted me to know that I could help others right now who wanted the same solution. After Bart and I were finished figuring it out, I hung up from him and opened Clarify. Before I could forget where the settings were in the arcane web interface for the Verizon router, I had Clarify take screenshots, I threw in some annotation so I could remember where to click, and then I wrote up the notes that Bart had given me on why we did each step. I clicked the button to share the document, and Clarify gave me a copy link button. I pasted that into a direct message to Bart on twitter, and had him check it for me. He got back to me right away with some suggested changes, I corrected my work, again in just a few seconds. this time I used the copy HTML button, pasted it into a page for my website, and hit and publish. I hope you’ll take a few minutes, and head over to BlueMangoLearning.com and give the 14 day free trial of Clarify a try. When you do buy it, be sure to tell him that Allison sent you.
Chit Chat Across the Pond – Donald Burr on DIY Google Reader Clone
Donald Burr from Otaku No Podcast joins us again. He’s updated the NosillaCast App to include the new Borgchat server for chat and the new audio Icecast server. Download it here from the App Store for $1.99. Donald is also starting development on an Android version of the NosillaCast app so if you want to help in beta, please send Donald at [email protected] with your email address.
The Goal: (aka the Problem to be Solved)
To create an experience that matches Google Reader as closely as possible
- Ability to import my Google Reader data (OPML)
- Web app usable in any browser (including Fluid apps)
- Sync with desktop apps
- ReadKit ($4.99). Note: Reeder for Mac will soon be adding sync support; for now it has been pulled from the App Store. Keep an eye on this one.)
- iPhone: Reeder (now for the amazingly low price of Free!)
- iPad: Mr. Reader ($3.99) Yes, there is a Reeder for iPad; however I don’t use it because (A) I don’t really like the interface, (B) it’s been pulled from the app store until he adds sync support anyways.
Why?
RSS isn’t dead – at least for me it isn’t. I still find it the most convenient way to keep up on a lot of things — tech and anime news, what friends have been up to, etc. The way I think about it is, it’s kind of like a podcatcher for websites. (A particularly apt analogy since podcasts use RSS technology behind the scenes!) When I listen to podcasts, I don’t go to Twit.tv and stream from there, then go to Macosken.com and stream from there, etc. etc. Instead I load up Downcast, and boom, all of my podcasts are right there in one convenient place. Similarly, instead of opening up over 9,000 tabs to check up on all my websites of interest, I just load up my RSS client, and there they are, all in one easy-to-conusme location. I also use RSS in some unconventional ways, such as to keep track of other things (servers, latest open source code contributions, etc.) And since I am often out and about, I need to be able to consume this data on all of my devices — desktop, laptop, iPhone and iPad. Google Reader served all of these needs perfectly. Then they went and killed it.
People say that “social news” is the new black, to use services like Twitter, Facebook, etc. Doesn’t work for me. I have certain specific news sites that I need/want to follow. Can’t rely on Joe Random Follower tweeting out what I am looking for. Plus it’s really easy to fall behind on your tweet stream. This is the reason I never really got into Flipboard. Also Flipboard’s UI, though pretty, was too much for my tastes. I just want a plain jane text-based list of feeds and articles. Nothing fancy.
Many services have been proposed as alternatives to Google Reader: Feedly, Feedbin, BazQux, NewsBlur, Digg, AOL, etc. I tried a lot of them but found something I didn’t like about each of them. Either the UI was too busy (Flipboard-like), it didn’t work, etc. Feedly looked promising: although the Feedly app itself had the “busy” UI, you could use it through other client apps (ones that I already use, e.g. Reeder and Mr. Reader). I almost went to Feedly; however, their lack of clear-cut monetization plan made me nervous (perhaps a setup for another Google Reader-like shutdown in the future). (UPDATE: apparently they have just announced a “Feedly Pro” tier with additional features. Still my concerns remain: will there be enough people to adopt Feedly Pro to make the business model viable? Will they eventually kill the free service? etc.) In fact this has already happened: one of the free services that others have recommended, The Old Reader, has stopped accepting new accounts and is either closing or going private. (UPDATE: Apparently they have decided to remain open thanks to a contribution by some mysterious unnamed company. While welcome, this news still leaves me feeling a bit wary, especially since it appears as though the developers of The Old Reader have decided to sell out to this mysterious company.) Even commercial solutions aren’t a guarantee: just because you pay for something doesn’t mean it’ll still be there, the developers may sell out, etc. Case in point: Lala.
So I decided to look for a do-it-yourself solution using Open Source software. That way I could always remain in control. Plus it was geeky and fun to research/implement. 🙂
The Contenders
- Free/Open Source software, that you can either install on your own server or get an account on their server (free, but they ask for donations to help support the site if you find it useful)
- Has some rather complex server software requirements (JavaEE, openshift, etc.)
- Good for web-based reading; however not supported by any desktop/mobile clients (according to some their APIs are not suitable for syncing)
- Commercial software (not open source, it costs $30) that you buy and run on your own server
- Similar to most other commercial software (minor updates are free, you pay for major updates/new features)
- Pretty simple to set up
- Has some neat features to help manage large volumes of RSS feeds (it intelligently pulls out the “hot” news, de-duplicates it, etc.)
- Good for both web-based reading as well as syncing with mobile/desktop clients
- Makes me nervous (what if the guy stops writing/supporting it? Plus it “phones home” to check for updates — what else does it “phone home” about? What if the “phone home” check fails? Will the program cease to function, similar to what happened to the ill-fated DIVX video format, or what is happening now with the newly-released SimCity game?)
- Emailed the developer with my questions and concerns, but never heard back from him; this also made me very nervous.
- The guy is working on over 9,000 other projects, plus he is caring for his mom who is going through chemotherapy, so I’ll give him a pass.
- Still at least a “Hey, got your email, I’ll get to it as soon as I can” reply (even an automated one) would have made me feel a lot better about the whole situation.
- Free/Open Source software that you install on your own server (or on your own Mac, as we will soon see!)
- Not too complex (most webhosts already have the necessary software set up)
- Good web-based reading experience, very Google Reader-like
- Has a plugin that adds support for syncing with desktop/mobile clients
- The primary developer (Fox) as well as some of the core developers have a bit of an attitude and do not suffer fools gladly. There’s often a bit of hazing/ribbing going on in the TTRSS forums, but if you didn’t at least do the basic legwork to try and solve your problem (read the docs/FAQs, search the forum, etc.) then they are merciless with their scorn and ire. Sadly this seems to be a fairly common problem in FOSS projects. Do not post to the forums unless you have at the very least read the FAQs and the forum rules and at least tried searching for your problem in the forums, and/or are not afraid of a little hazing. (If you have any problems feel free to contact me and I can help out)
- This is the solution I went with.
How This Works
TinyTinyRSS is a Web app written in PHP, a common Web app programming language. You will need a web server to run this on. Usually that’s a Linux server sitting at some hosting company running the Apache web server software. You will also need a database server, MySQL being the most common. This combination of software (Linux, Apache, MySQL and PHP) is so common it has a name: LAMP. You’ll see “LAMP stack” mentioned a lot. So if you happen to have a Linux machine running at home, or have an account at a hosting company where you host your website/blog/etc. then you can probably run it there. But most people don’t. Fortunately there is a free solution that will let you run this on your own Mac, and it is called MAMP. MAMP is a free set of software that adds the Apache/MySQL/PHP server software combination to a Mac (hence the “M” in “MAMP”). You do not need the Server version of OS X – it will run on the standard consumer version of OS X. So find yourself a spare Mac to run this on. If you have a machine that you usually leave on (say a VPN server or a media center machine) that would be perfect. This software doesn’t use very much computing power at all so it won’t affect that machine’s other functions.
Bear in mind that this setup will install a Web server on your machine and will open it to the world. This software is pretty bulletproof, it has been well-tested by thousands. So as long as you pick reasonably good passwords (and don’t use the same password for this as you do with other sites, yada yada) you should be fine. Of course if you want to be extra careful, then you can eliminate the “set up port forwarding” step and only access this over your VPN connection; but that adds a little extra bit of complexity, you will need to fire up your VPN client every time you want to sync your RSS feeds. That’s the age-old “security vs. convenience” tradeoff for you. It’s up to you.
Stuff You Need:
- MAMP (direct download link)
- Tiny Tiny RSS (direct download link)
- Tiny Tiny RSS Fever plugin
- Donald’s nifty install script of doom (now with 20% more doom!) and the somewhat less doomy uninstall script of lesser doom
- Put all the above files in the same directory, then open a Terminal window and change into that directory.
First the Good News
Unlike my previous OpenVPN install, this install doesn’t go as deep into the operating system’s guts, so there is absolutely zero risk of it doing any weird things to your system. The nice thing about MAMP is that everything is contained within one directory tree, it doesn’t splatter its files all over your disk, so it’s extremely easy to uninstall (just toss the /Applications/MAMP folder in the trash). Nevertheless I have provided an uninstall script in the extremely unlikely event you run into any difficulty, or if you should ever want/need to uninstall this at a later date.
The Steps:
- Set up a Dynamic DNS host name for your Mac. (For directions see the VPN tutorial)
- Set up port forwarding on port 8888 to the Mac you will be running this on. (Again see the VPN tutorial for directions)
- Install MAMP.
- Pretty simple, just double click the install package.
- When you get to the “Installation Type” screen click “Customize” and uncheck “MAMP Pro” (you don’t need it)
- Run the MAMP app (in Applications/MAMP), then click “Start Servers.”
- Your web browser should open and show a “Welcome to MAMP” page.
- If this doesn’t occur automatically, click the “Open Start Page” button.
- If neither of the above steps shows the “Welcome to MAMP” page then something is wrong; check your above steps and/or try reinstalling MAMP.
- Make sure TinyTinyRSS and the fever plugin files are in the same directory as the install script, then run it from the command line
- Type: bash install-ttrss.sh
- Follow the script’s instructions; it will prompt you to set up passwords for the TinyTinyRSS database.
- When the script prompts you, continue with these installation steps.
- Now open a new tab, and browse to http://localhost:8888/ttrss/
- You should be directed to the TinyTinyRSS install page
- The install script should tell you how to fill out most of the requested information. (Check the Terminal window)
- For the “Tiny Tiny RSS URL” enter “http://YOUR-DYNDNS-HOSTNAME:8888/ttrss/”
- Click “Test configuration.” You should get “configuration check succeeded” and “database test succeeded.”
- Finally click “Initialize database”, and when that’s done, click “Save configuration”
- Browse to http://localhost:8888/ttrss/ again. Instead of the setup screen, you should now see the TinyTinyRSS login screen.
- Log in with the default account (login: admin, password: password)
- Change this password!
- In the upper right you will see an Actions menu, click on it then click Preferences
- In the “Personal data/Authentication” section, set a new password, then click “Change Password.” At the lower right corner of the screen you should see a “Password has been changed” confirmation message.
- Although you can use the admin account for the rest of these steps, it’s recommended that you create a separate account for your daily use.
- From the Preferences screen, click the “Users” tab, then click “Create User”
- A box will appear asking for a username. Fill one in (it should contain only letters and numbers, like the login names you pick for most websites, Twitter, etc.) then click OK.
- Your new user account should appear in the table. Click on it to set its password.
- Log out and log back in as your new user.
- Click “Exit Preferences” at the upper right of the screen.
- In the Actions menu, choose Logout. Then log in as your new user.
- From the Actions menu, choose Preferences, then click the Feeds tab.
- If you made a backup of your Google Reader feeds using Google Takeout, you can now import this data into TinyTinyRSS to get back all of your subscribed-to feeds. (Unfortunately now that Google Reader is history, you can no longer export your data this way; but if you exported your Google Reader data before Readerpocalypse, now you can use that data!)
- Find the “OPML” section, click “Choose File”, find your Google Reader data (it’s called “subscriptions.xml”, then click “Import my OPML”
- A window will appear showing you the feeds that it imported. Click the “Close this window” button.
- You’ll now see your list of feeds. It even keeps the folders that they are in, if you had them organized into folders.
- In the “Feeds” section, click “Feeds -> Subscribe to feed”, then fill in the URL to the feed or website you want to subscribe to. Lather rinse repeat.
- Still in the TinyTinyRSS Preferences screen, click the Preferences tab, and find then click on the “Plugins” section.
- Click the checkbox next to “Fever,” then click “Enable selected plugins.” When asked if you want to reload, say yes.
- Now a new “Fever Emulation” box should appear. Click on it, and you will be asked to set a password. This doesn’t need to be the same password as what you used when you set up TinyTinyRSS, but to minimize confusion, I just use the same password. Type in the password, then click “Set password.” You should see a “Password saved” confirmation at the lower right of the screen.
- Finally find and click the “Preferences” section, click “Enable API access” then click “Save configuration.”
- One other setting you might want to change here is to UNcheck “Automatically expand articles in combined mode.” This mimics Google Reader’s behavior of only showing you the headlines, but then showing the entire article once you click on a headline of interest.
- As you can see it’s very Google Reader like.
- It also works quite well as a Fluid app (single app browser). It even badges the Dock icon to show you when new articles arrive.
- ReadKit:
- Go to ReadKit menu -> Preferences
- Click the Accounts tab, and click the + (new account) button.
- Choose the Fever tab (looks like a stylized flame icon), and fill in the values:
- Domain: http://YOUR-DYNDNS-HOSTNAME:8888/ttrss/plugins/fever/
- Email: your TTRSS username
- Password: your TTRSS password
- Tap Settings, then Add Account. Choose Fever as the account type.
- For Server, enter http://YOUR-DYNDNS-HOSTNAME:8888/ttrss/plugins/fever/
- For Username and Password, enter your TinyTinyRSS username and password.
- Click “Done.” Reeder will attempt to log in to your server. If it fails, make sure you followed all the above steps, typed your password in correctly, etc.
- You will be taken to a screen where you can set some other preferences, like setting a name for this account (I called mine TinyTinyRSS), how long to keep read items, etc.
- Finally click Done.
- Tap the title of the list view on the left
- Tap + to create a new account. Choose Fever.
- For Description, fill in “TTRSS”
- For Server URL, enter http://YOUR-DYNDNS-HOSTNAME:8888/ttrss/plugins/fever/
- Turn on the “Is a Fever server clone” switch.
- In the Credentials section, where it asks you for the Email address, put in the username of your TinyTinyRSS account, then fill in the password.
- Finally tap “Login.”
That’s going to wind this up for this week, many thanks to our sponsor for helping to pay the bills, Blue Mango Learning at bluemangolearning.com makers of ScreenSteps and Clarify. Don’t forget to send in your Dumb Questions, comments and suggestions by emailing me at [email protected], follow me on twitter and app.net @podfeet. Check out the NosillaCast Google Plus Community too – lots of fun over there! If you want to join in the fun of the live show, head on over to podfeet.com/live on Sunday nights at 5pm Pacific Time and join the friendly and enthusiastic NosillaCastaways. Thanks for listening, and stay subscribed.
I still use NetNewsWire 2 since the dinosaurs, and I know it hasn’t got a fancy interface or huge functionality, but it still works really well. NetNewsWire 4 is in beta. but is paid, but, hey, it’s $10 at the moment. I might upgrade.
I’ve heard great things about NNW. What service do you hook it to now that Google reader is gone, or does it do it’s own hosting?
NetNewsWire handles RSS feeds internally, it does not sync with an outside service. Previous versions used to sync using iCloud but they ditched that because they couldn’t get it to work right. I think they are planning on adding some sort of sync support (probably their own home-grown sync like OmniFocus and Instacast did). Not sure if they have a Mac client yet (they used to, but I’m not sure if they’ve updated it recently). Sync is something I needed right away (lack of sync was a deal breaker for me) so that’s why i went with TTRSS. (well that and because of the cool/geeky factor 🙂 )
Concerning the Google Reader clone:
Great idea!
But I have a safety comment:
The MAMP-website states: “MAMP was created primarily as a PHP development environment for Macintosh computer and should therefore not be used as Live Webserver for the Internet. In this case, we recommend that you use Mac OS X server with the provided Apache or a Linux server.”
Would it not be safer to NOT forward port 8888 into your network?
I did not check the installation script. Have you taken any measures to make MAMP usable als Life server?
Instead, you could connect to your home network via VPN and then connect to MAMP (knowing, that then this setup does not work with any device anymore…)
Hi. Thanks for this chat about ttrss. I have managed to get it running on my ubuntu machine and it works perfect. The only thing I have to figure out is how to run the update daemon in the background when I’m not logged in to the ubuntu machine. Best Regards from sweden.
After closing MAMP and restarting it I get an error from MAMP. It does not pass mysqlcheck. I have tracked this down to the fact that I have changed my default password for the mysql server. Google Foo says to change a couple of lines in php and mamp directories in /MAMP/bin. Did this and still get the error. Have you seen this behavior?