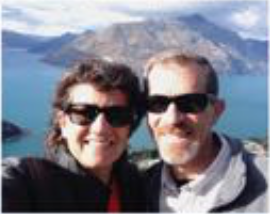
 It’s that time of year again, time to make the annual family calendar using iPhoto. Every year I learn something new about the best way to do this. I couldn’t have been more pleased when Apple decided to let us use the same database for both Aperture and iPhoto so I don’t have to copy photos from one to the other to make my calendar. My process is to keyword photos with calendar_2015 as I scroll through all photos from 2014 in Aperture and then make a smart album for that keyword. That makes it easy to open up iPhoto, navigate to the smart album and create my calendar from there.
After I spend a few hours arranging them all, I print the whole thing to PDF and send it off to Steve and my kids to see if they have any objections or would like to add in any different photos. Here’s where this year’s learning came in. The calendar when printed to PDF is over 200MB! Even with Apple’s new Mail Drop service that lets you email giant files that end up as links, that seemed just a tad overboard for my needs.
A few years back someone tipped me off to the cool option in Apple’s Preview app that lets you save your PDFs and other documents to a lower quality. If you open up a document in Preview, simply choose Save As, and under the completely unintuitive pulldown entitled Quartz Filter, you can choose from several options, one of which is Reduce File Size. Hot dogs, that sounds just like what I needed.
I opened my newly reduced file and instead of 200MB, it was only 945KB. Awesome, right? Wrong! I opened it and the images looked positively dreadful. I couldn’t possibly send the PDF out this way. I went hunting to try and find a way to change the behavior to create something maybe in between 200MB and less than 1MB.
I came across a Mac OS X Hints forum on Macworld.com with a post by someone identified only as zpjet that had exactly the answer I was looking for posted back in 2012. I followed the link on the name but Macworld hasn’t kept that part of the site up any longer so I wasn’t able to identify the author to give credit. Then I had an idea, maybe zpjet had kept their name when Twitter came out. Sure enough I found Josef Habr on Twitter @zpjet. Ok, now that I’ve given Josef credit, let me tell you about his clever solution.
Josef figured out that the Quartz filters are stored in the System/Library/Filters directory. He opened up the one entitled “Reduce File Size” and found the parameters inside the text file to set the compression quality and the maximum image size. He made three new files by copying the original, and fiddled with the settings until he found values that would create a good, better, and best option. He also figured out where in the text file the name was stored for the menu choice within preview. He modified that name for each file so he could tell them apart. He documented the compression quality numbers and the image size maximum all in the forum post. I’m reproducing his post right here on podfeet.com just in case MacWorld shuts down the discussion forum.
Compression Quality:
- Good: 0.25
- Better: 0.5
- Best: 0.75
ImageSizeMax:
- 842 (that’s A4 at 72dpi)
- 1684 (A4 at 144dpi)
- 3508 (A4 at 300dpi)
I decided that this called out for a Clarify tutorial so you can see where all of these values go and especially the Name Key value. I made the three extra files as Josef suggested, and put copies back in the Filters folder. I opened up my Calendar and sure enough I now have good, better and best versions of the Quartz filter for Reduce File Size. Remember my original was 200MB, the good one is 2.5MB and the images look a bit fuzzy, the Better one is 7.7MB and the images look just fine for this purpose, while the Best one looks a smidge better at 9.8MB.
In the shownotes I put a screenshot of the same image five times. The default Preview resize, then good, better and best according to Josef’s research, and then finally the giant 200MB file version that came out of iPhoto. To be honest, the better or best picture is pretty indistinguishable to my eyes vs. the 200MB version.

The great thing about Josef’s tip is that you an mess with the parameters yourself and see what works for you. I wrote to Josef on Twitter and we had a nice chat. He kind of burst my bubble when he pointed out that someone back in the forum had pointed out that you don’t have to edit the text files – you can change the default settings for Reduce File Size inside the Color Sync Utility. This is a better way to do it because the filters will be stored in your user Library instead of the System Library. If you upgrade your OS, you won’t lose your filters.
I took a look at the Color Sync app and sure enough you can duplicate the original Reduce File Size filter, rename it, change the default settings to Josef’s recommendations or to anything you like. Before using Color Sync, my user Library did not have a Filters folder, but after I duplicated one inside Color Sync I did have the Filters folder in my user Library.
I appreciate that Josef figured out some good settings to use as a starting point and even more that he pointed me to an easier way to do it than editing the System-level filters with a text file.
Of course I decided to make a Clarify tutorial on this but many thanks to Josef for figuring this out and making some recommendations. You can find his website at http://macspeaks.com/. MacSpeaks is a cool utility that takes text input and pronounces it in different languages and voices. I actually used it already – asking Josef how to pronounce his name with a Czechoslovakian accent!
I put a link in the show notes to the Clarify tutorial on how to do this yourself, or you can look for it under Mac Tutorials in the left side bar.
Did I see “FILE SAVE AS” in that dialog box?
Why, I can’t believe my eyes! There it is, back after its long hiatus after Snow Leopard.
Now back in retro-Mavericks, you know, the one where it is possible to read the system fonts?, there’s not File > Save > As in Preview.
And while it is possible to bring up the Quartz Menu options, and edit them in ColorSync, even get Automator to see them, the added Options don’t seem to appear in my menus.
Didn’t these options to set Quartz Filters in Preview used to be part of Preview?
Anyway, I can’t get it to work. And I’m interested in learning where else Apple has added Back my Beloved “File > Save > As !!!!”
did you go through the tutorial, George, or just read this blog post? I show the step by step in the tutorial, maybe you skipped a step?
The first step in the Tutorial”
1 Default Reduce File Size in Preview
Open a PDF in Preview and choose Save As…
There is no File>Save As option, as depicted in the Screebshot, with #1 in Mavericks.
Creating the new options, per the tutorial, worked in ColorSync. The new options, however, did not appear in the Quartz Filter pulldown on Save or Export.
They did appear in Automator, which I have learned will sometimes do things the GUI won’t, but the crash Automator.
If you hold down the Option key as you select the File menu, Save As … does appear — at least, it does that in Yosemite.
I wondered why Save As… showed up for me by default, makes more sense that it would be hidden. I’ve added a step: ”
You may need to hold down the Option key before you click on File to get the Save As… menu to appear.”
In Mavericks, and I just tried on two computers, pressing Option
(that’s the key with (alt at the top and Option at the bottom?), the one immediately left of the key on my new Air with A Four Leaf Clover and the Word Command – and on my old MacBook Pro with an Apple Logo and the Four Leaf Clover?
Does not Activate a “File > Save As” Option
The only thing it does is toggle between the default “Close Window” and an Option to “Close All.
Am running Mavericks. In Preview the Save As feature appears by default but I can’t get it to recognize the three reduce choices I made from your tutorial. should I delete the default Reduce size function in hopes that the three will be picked up? or wait for me to update to Yosemite. Something I may do but Yosemite does not offer a lot for me as I am running a mid 2010 iMac which does not have BT 4!
Thanks for the tutorial, hope I can get it to work as I combine a lot of jpegs into PDFs.
Now this is interesting. George does not see Save As with or without the option key but Bill sees it as a default, and you’re both running Mavericks. I remember George saying that he does all kinds of hackery to bring back old functionality when he does move OS’s so I’m going to put his lack of Save As down to that.
What I can’t explain is why you guys can’t see the new resize functions. The link from which I learned all this was in 2012, so it shouldn’t depend on Yosemite. Maybe it worked in Mountain Lion, stopped in Mavericks and came back in Yosemite???
Hi Allison, I didn’t see the new filters showing up and I’m running Yosemite on both Macs. I was not able to change the name of the filter either, the new name didn’t stick. I ended up with a new filter called “Reduce File Size kopie”. I’ve got a Dutch OSX version and they didn’t translate the Quartz filter names. So I edited the names in the files, as described by Josef Habr.
This did’t work either, I still was unable to see the new filters. After I manually copied them over from ~/Library/Filters to /System/Library/Filters I was able to see and use them.
Frank solved the problem: “After I manually copied them over from ~/Library/Filters to /System/Library/Filters I was able to see and use them.”
Did the same and everything works fine!!
Thanks, Frank
I had some difficulty in making the new filter names stick, too, until I hit the Return button after typing the new name; without that, the name simply wouldn’t stick in Color Sync.
I restarted my Mac, thinking perhaps that would make the new filters show up in Preview, but no such luck. After manually copying the new filters to System/Library/Filters, they did show up. BUT the names have now reverted to “Reduce File Size Copy” for all three — even though the Finder shows their changed names in the folder where I placed them. There’s no way to tell which one is which.
I know the answer to this one Sandy. Open the files in a text editor. Then look for this line and set the name the way you like it:
I’m a little worried why only mine are sticking in the user library. If you do these changes in the System Library you’ll lose them after an OS update and won’t remember when/how/why you did this! What could be different about MY ColorSync changes from all of yours?
Ooh – another oddity. I just reopened ColorSync and the names are all messed up, BUT they’re right inside my user/Library/Filters folder and show up correctly in my Preview app. hmmm…
Thanks, Allison — editing in TextEdit did the trick. I had to use the filter copies I’d saved in my User folder, since the System/Library folder wouldn’t allow me to edit the names. That made me glad I’d decided to save them in both places so as to have them again once the next OS update comes out.
I’ve also taken another look inside ColorSync, and the names are correct as edited — though I have two of each for obvious reasons. 😉
This is getting weirder and weirder. Now I can’t see the options in Preview either! Something fishy going on… I wonder if they don’t stick after a reboot?
I wonder if it’s because yours weren’t in the System Library?
“She Who Won’t Let Me Improve Her Mac” – which is therefore unmolested and exactly as Apple intended, has the ability to open File Save As using the Option Key.
I don’t. MAYBE because the File Save As is described in Apple propaganda as an unnecessary “explicit save.” Unnecessary since Apple added “Versions” to Preview, etc., and thus auto-saves your work as you work, Of “curse,” if you use Preview as I do for light photo edits, the “curse” of versions is they will overwrite your original file. Which you can only prevent by duplicating it before editing, insstead of editing and using File Save As to explicitly save your new version without overwriting your old, as Preview worked before Lion.
I found “Versions” a true curse, and used Apps to turn it off to the extent possible. Maybe that’s why I have no ability to Option back to FSA.
Not that the Option File Save As is reliable, according to this link:
Note that unless you have the save modification of original file setting disabled, you still may wind up saving over the original file as well, even if you use Save As, thus you may want to disable that – this is a interesting quirk of the Versions feature in OS X that has yet to be completely resolved in the default state.
http://osxdaily.com/2012/08/27/enable-save-as-os-x-mountain-lion/
Thanks to everyone with comments on how this didn’t work. I’ve updated the instructions to include how to move the files to the System-level library. Thank you guys for helping others!
http://www.podfeet.com/blog/tutorials-5/how-to-reduce-the-file-size-of-a-pdf-using-preview/
Hello all. If you’re like me and trying this on El Capitan you need to place the .qfilter file in /Library/PDF Services/ for it to show up in the quartz filter menu when saving the PDF. Anything in /System/Library is off limits
Thank you for sharing this! It worked for me! I am currently using Yosemite and what I did was Choose Export rather than Save As (which doesn’t appear in mine) then follow the procedures slowly and it worked fine smoothly. My pdf file was previously 63mb and it went down to 10mb after doing all these steps. The photos were all good and it wasn’t blurry at all! Thanks again!
Yay! Glad it helped you and thanks for taking the time to write back.
I thought I responded here to Reworked’ s comment. S/he’s right about the change in El Capitan. I updated the tutorial. If it weren’t for that correction, I wouldn’t have been able to make my own calendar this year.
Excellent responses regarding El Capitan – have been struggling with this for a number of hours. I just couldn’t get it copy over. Thanks for the direction.
For El Capitan, this worked for me: copy your filters from
/Users/YourName/Library/Filters/
to
/Library/PDF Services/
sorry, i can’t get the filter(s) to show up, thanks to /System/Library/Filters being off limits. i tried moving it to pdf services… still, same filters as before. how to get them to show up?! ludicrous that apple does this to me. it even shows up fine in color sync utility. it just will not show up in preview! i also tried filters inside my own home directory library. i’m cramming to send a client a pdf, and it has to be a manageable size. i cannot stand this stuff.
What version of the OS are you using? I haven’t tested this in Sierra yet, but the instructions are different for Yosemite vs. El Capitan so maybe they moved it again?
I’m on El Capitan but I don’t see a PDF Services folder in my library. Filters don’t work in the Filters folder either. Is there anyway I can get this to work?
Elaine – I’d love to try to help. Can you specify on which step number in the tutorial you’re getting stuck? http://www.podfeet.com/blog/tutorials-5/how-to-reduce-the-file-size-of-a-pdf-using-preview/
Copying to PDF Services works for me in Sierra (iMac (Retina 5K, 27-inch, Late 2015)). I compiled a storyboard, which consisted of bunch of jpegs, into a large PDF, and using the “Better” filter reduced it to ~6 MB. Thanks so much for this!
Excellent, Eric – thanks for the feedback. It’s little notes like this that keep me doing these tutorials. Love knowing I helped someone.
I’m trying this in El Capitan, and was having no luck at all even after following the tutorial to the letter, AND reading and applying the relevant ideas from the comments. The thing that worked for me (finally!) was to forget about going to Save As, and choose Print instead. Voilà! The Good/Better/Best filters appear at last. Only problem is, there’s no reduction in file size! Back to the drawing board…
That’s really curious, Ophelia. If you figure out what’s amiss please post back here!
When trying to put the filters into MacHD/Library/Filters, I noticed there was no Filters folder in that location. I created one, but as I mentioned they didn’t show up in Preview. Any idea why my Mac wouldn’t have had a Filters folder already in place?
I’m not sure, Ophelia, but I found this suggestion in a discussion forum. Easy enough to try just in case:
Copy:
/Users/YourName/Library/Filters/
to
/Library/PDF Services/
Thanks Podfeet / Allison for the useful info.
Feedback for anyone struggling with El Capitan.
Copying the new filters to the PDF Services folder doesn’t make them appear in Preview, but they do appear in ColorSync. I made the files manually and having them in the users filter folder and in pdf services, caused ColorSync to see them twice.
Having them in PDF services does cause them to appear when printing to PDF, but they don’t do anything, so I wouldn’t put them in there.
To make them appear in Preview for the Export / Save As function as required they needed to be placed in the /Library/Filters folder. The filters folder was not there before and needed to be created. So I just copied the ‘Filters’ folder that was created under my users folder. Upon doing this I was prompted to provide the admin password.
Please note, in the tutorial the image does not match the description. Do not follow the graphic, this shows the filters folder under users. If you use the ‘Go To Folder’ menu option in Finder (Shift+Command+G) and type in “/Library” with the slash, this will take you to the correct place which in the example would be Piggy/Libary/Filters i.e. /Library/Filters – this works. If you just type “Library” it takes you to the Library folder under Users and isn’t the same place.
This worked for me, hope that helps others. :O)
I work with a lot of PDFs that are far bigger than they need to be for reasons not worth going into (but involving Filemaker Pro). I also do a lot of scanning about the place, again for work.
I used to use an old version of Acrobat Professional to reduce the file sizes before I sent out my PDFs. Unfortunately it was so old that it required a PowerPC chipset, so when I upgraded my trusty old Macbook Pro to a new Macbook it didn’t work any more.
Made some new filters, played around with the settings a bit, now have one that does what I need, happy as Larry once again.
So thank you very much podfeet – and also Vikpaw for the additional notes for El Capitan.
Hi All, thanks for your help. Set up my system from scratch and thereby lost my quartz filters. Then could not get them to work under Sierra. Finally, I got them in user library to show up. With Allisons tutorial found the “hold down the option key” hint (first time in two years owning a Mac, how embarrassing…). And it worked fine.
However, when I chose the print to pdf option, it allows me to chose the quartz filters also. The progress bar is shown briefly but the pdf goes nowhere. Anybody any idea?
Ron – I don’t see the quartz filters from print to PDF. I only see them if I do a Save As (hold the option key down to get that in the men). Hope that helps, let us know how you get on with it.
Podfeet, the dialogue comes up when chosing print and then use the pdf option in the lower left corner (came across this one because I didn’t know about the option/file as possibility). When clicking on it, I can chose from the filters. However, in my case, the progress bar comes up, closes but I don’t find where the pdf has gone to. Probably screwed something up when trying to reinstall the filters. File as works like a charm, thanks to you…
Hi Allison, thanks for the tutorial. Some remarks that might help others. I’m on Sierra and I followed the tutorial but with some differences:
* I left the filters in /Users/youraccount/Library/Filters so no copying
* I too had to change the name of the filters by opening them in a text editor and adjusting the name in the bottom
* The filters are still available in Preview File > Save As
* They are NOT available in the Print > PDF > Save to PDF, but for my purposes that’s no problem
* I created 3 Automator services that copies the PDF to the desktop and reduces the file size based on the filter
Hope this is useful.
I have OS X 10.11.6 and found it was not possible to copy files into /system/library/filters due to System Integrity Protection. After I disabled it following these instructions:
https://www.howtogeek.com/230424/how-to-disable-system-integrity-protection-on-a-mac-and-why-you-shouldnt/
I was able to paste the updated filter files and see my new filters in Preview.
Hope this helps
hi…I’m trying to reduce a jpg to acceptable quality and while this isn’t exactly made for me…its close so I thought I’d try to ask for some help here. I have a logo file that when I reduce the size and quality and do the save as feature and lower the quality, it says the file size should be 5 kb…when I look at it in finder its 20kb…any thoughts? I need it 10kb
the only thing I can think of is that it might have something to do with the minimum block size in the file system. But I would have thought it would be a power of 2…
Thank you so much for the work around! Work life saver!