 A few weeks ago Eric from Durham, NC noted that we hadn’t had any Dumb Questions in a long time so he sent me in an assortment and told me I could use any of them I wanted. I thought this was a delightful idea, so of course I procrastinated on answering him for a few weeks.
Let’s start with his first question:
I have a 2010 Mac Book Pro with a 2.4 GHz Core 2 Duo and 4GB of RAM running Yosemite. With the exception of buying an SSD which I cannot afford right now, is there any other way to speed it up?
Great question. SSDs are dropping in price but they’re still expensive and might not be the best immediate investment for you right now. When you open an application on your Mac, it puts the application and the data into RAM. RAM is very fast and is essential to giving you a speedy experience. However, when you run out of RAM, say by opening 2 or 3 applications or more at the same time, you will run out of RAM. Rather than just saying, “nope, sorry Eric, I can’t do that” your Mac will use your hard drive instead of RAM. So instead of using the snappy solid state RAM, it’s accessing a physical, spinning disk to access this data, and immediately things will slooooowwwww down.
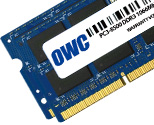
The solution and it’s relatively inexpensive, is to upgrade your RAM to 8GB. You can do that from Other World Computing for a grand total of $91US. The upgrade is so easy on these machine because it was before Apple started going crazy making them thinner and thinner so you can still get in there with a few screws and upgrade the RAM. OWC does install videos that walk you through step by step how to do it. It’s actually really fun too.
If you want to spend no money at all though, I have another idea. If you’e a geek, and let’s face it, if you’re writing to me you’ve probably got it bad, in the last 4 years you’ve loaded a lot of stuff on this very capable machine. I find that doing a nuke and pave can bring even bigger speed improvements than a RAM upgrade. By nuke and pave I mean this:
- Make a bootable clone of your hard drive using Carbon Copy Cloner or SuperDuper!
- If you have another spare disk around, make a backup of your data. One backup isn’t a backup, right?
- Make SURE you’ve got a backup of the elusive User/Library/Application Support folder, you’ll be amazed what gets stored in there when you’re not watching.
- The 2010 MacBook Pros have a recovery partition which you can access by booting up holding down Command-R. In here you can go into Disk Utility and erase the drive. I know, it’s scary but trust me, it’s awesome. Resist the temptation to just reinstall the OS. If you do that, Apple will courteously keep all of the cruft you’ve been shoving into the back corners for you, which is exactly what we DON’T want.
- From within this recovery partition you can install a brand clean version of the OS
- Once you boot to the new clean install, you can run Migration Assistant to bring your data back. I recommend NOT bringing back settings, JUST bring back your data from your backup drive
- Here’s the hard part – don’t bring back Applications either. My recommendation is to wait until you NEED an application to install it. Install it from scratch from a fresh download from the Internet too, so you know you have the newest and coolest version.
This is a long process but it’s kind of fun to figure out what you really need. I’ve tried to do this by deleting applications I don’t need but I only get rid of a half dozen, but if I put back what I do use, I end up cutting the number in half!
I haven’t given you every single step here; I’m assuming you know enough to fill in the blanks, but I hope this outline helps you to understand the basic steps of doing a nuke and pave. Every time I’ve done this my Mac is sooooo much faster, even one that’s only a year or two old will benefit dramatically from a nuke and pave.
I hope this helps you speed up your Mac, Eric, it’s a great machine and well worth the effort to shine her up a bit to make you happy!
Good advice!
Another tidbit is that Apple (and others) often show a artificially low limit for the amount of RAM a given unit can be upgraded to. For example, Apple claims the Mac Mini mid-2011 units can only be upgraded to 8GB of RAM, when in fact, 16GB is the actual upper limit. Most of the leading RAM manufactures (such as Crutial) will show the real amount you can safely upgrade to.
New memory is often flakey, so buy from a good reseller with a generous return policy, and test it well (using several passes) with a program like MemTest86.
Used RAM can be a very good deal if purchased from a good seller, as it has been “run in” for a good while and is tested prior to the sale.
I am reminded that we found some bad ram that we tested as “good” 6 months ago when purchased. We run memory tests here once a year. RAM usually does not go bad, but on occasion, we find a few that do go flakey.
Also know that RAM re-lablers (companies like “McMemory” just stick labels over other companies non-branded memory, claim it as their own, and advertise “lifetime warranty”. You may have trouble finding them 6 months down the road if you have issues with the memory.
PC and Mac memory are the same these days, so don’t choose the RAM for your Mac based on Mac-labing (as you will often pay more for the same sticks).
I might get in trouble for advertising if I mentioned that we recently upgraded 32 machines over Christmas, and I am sitting on a large pile of named brand (Crutial) 4GB sticks I need to get rid of, and they will end up selling for far less than $91 for two sticks. I guess I need to post that on eBay.
But will an 8GB upgrade speed up your system? Yes, most likely by quite a bit. It’s nothing your going to feel when starting your machine (in fact, it will probably boot slower), but it will run much smoother.
16GB will probably not make as big of an impact as moving up to 8GB for most users, but we tend to bump the limits around here, and for us, no amount of memory would ever be enough.
Memory “cleaners” and “reclaimers” are not so effective anymore, and may even be a detriment. Modern operating systems (OSX) can do a very good job of maximizing memory utilization, and “unused memory is wasted memory”. If your memory meter shows your low, try not to sweat it, as the operating system is probably just making the very best use of it possible. I see my Mac’s drop to a few hundred megs free, even when I am not doing very much. The OS is simply doing it’s job.
Finally, on hybrid hard drives (partially SSD’s, and so far, all have been 5600 RPM drives), for the Macs, I have noticed almost zero difference, having tested 8 drives and 3 brands. In fact, we found them to be often be slower than their non-hybrid 7200 RPM counterparts, and also noted users reporting McTrouble with one brand that works well with Windows.
If you want to see what a heavily modified Mac Mini 2011 looks like (with twin terabyte internal drives, modified to be swappable), take a look at my googler page:
https://plus.google.com/u/0/+JoeHecht/photos/photo/6100955205594165154?pid=6100955205594165154&oid=102020992993114748478
I hope this has been helpful to someone, and I hope you don’t mind that I recycle the post over on G+
Thanks for all yo do Allion!
TJoe(h^);
Lest they get lost in all that follows, if your Mac is running slow, begin with
Review the “Login Items” in your User Account in System Preferences. Any program that “Opens Automatically When You Log In” can slow your computer down.
Check for AdWare and MalWare. Removal tool at link below:
http://www.thesafemac.com/arg/
Consider running a full Virus Scan. Much less likely than AdWare, but rare as a Virus is . . .
Allison goes into depth here: http://www.podfeet.com/blog/tutorials-5/how-to-install-clamxav-anti-virus-for-mac/
—–
I’ve been “struggling” to keep using a beautiful, beloved, 2007 era MacBook Pro 15″ as my primary machine at work. (10.9.5 Mavericks)
I’ve taken it to the “unofficial” 6GB of RAM it will support.
I’ve added a third party SSD.
I didn’t do Allison’s full nuke and pave wipe and reinstall, only because I used Migration Assistant to duplicate onto the SSD a recently purchased Air that I built from scratch with only fresh installs.
You’d think it would zing. You’d be wrong.
The “old” hardware is just slower than what’s sold today. Slower memory bus. Slower SATA bus. Slower processor. The “best” feature of my old MBPro is its dedicated nVidia Graphics, and by today’s standards, that’s probably also slow.
Still, I’ve made a some progress. And here’s the report.
Be prepared for iconoclastic opinions.
And please don’t misunderstand. I’m only REPORTING what I’ve done and why for your consideraiton. I don’t use iOS. I have Dropbox and iCloud and Google Drive, but only access them on the web interfaces, when I need them so they’re not “spinning” and burning CPU cycles and bandwidth when I don’t.
Try some, try none. Everthying I suggest is point and click to do and reverse. There’s no hacks . . .
And If you’re excited about being able to answer your iPhone on your Mac (why?), much of what follows probably isn’t for you . . .
1. Maxing out the Mac’s RAM can’t hurt and should help.
How much can your Mac use?
http://www.everymac.com/actual-maximum-mac-ram/
2. Major brand SSDs have become really inexpensive, as low as $65 for 120 GB. We have a couple of older Minis at work booting off external SSDs connected via FW 800. USB 3.0 would even be faster. (Don’t bother with USB 2.0)
Booting your Mac, and running its programs from an SSD, even if the fastest port you have is FW 800, will speed it up. A lot. Oyen and OWC both offer very good dual FW 800 / USB 3.0 enclosures. Just go USB 3.0 if you have that option, and save considierably.
I don’t want to restart the religious war, but it is important to know that Apple is effectively blocking third party drives from TRIM in Yosemite. TRIM is the command that tells the SSD controller a file has been deleted by the User. Without TRIM SSDs gradually fill with cruft. One Mac-centric company says their SandForce controller drives don’t need TRIM. LSI, the Seagate Subsidiary that makes SandForce Controllers says they do.
http://blog.seagate.com/intelligent/can-data-reduction-technology-substitute-for-trim-in-an-ssd-and-drain-the-invalid-data-away/
Samsung’s SSDs are top rated, and Samsung provides software to “revive” them. Unfortunately, Samsung’s “Magician” is Windows only, but at least it’s available.
The problem, of course, is if you install even a Samsung SSD, and want to run the Samsung “Magician” program to speed it up, you’d probably need to crack open your Mac and pull the SSD to connect to a Win PC. Much easier if you’re booting from an external drive.
3. Allison’s “nuke and pave” and fresh install is the best route to the fastest performance. Not long ago I found zombies trying to “phone home” from the Intego Security Suite I had uninstalled years and computers in the past. Migration Assistant dutifully brought them forward.
HOWEVER, one thing to try after making your clone. Clone it back. The Carbon Copy Cloner process writes data to the clone target sequentially. Defrag is a side effect. Write your new clone back to your old HD, and your old HD will be defragmented. That will speed it up. Worth a try, and a good way to verify your clone works and reinstalls. You may not HAVE to re-register all your Migration Assistant transferred Software, but be sure you have your Microsoft Office #s (and probably Adobe) You would definitely need all of them if you go “nuke and pave.”
4. Now to “get off the rails”
The less “Apple” is on your Mac, the faster it will run.
Reggie Ashworth’s AppDelete will delete Apple Programs like iBooks, Apple Mail, etc. If you don’t use it, delete it, but for safety, use AppDelete’s “Archive” function to preserve a copy in case you want to go back.
5. Turn off every “Apple” Notification you can live without. If you have an iPhone, keep it with you, don’t degrade your computer’s speed by having the computer monitor for incoming phone calls and messges.
6. Turn off every Apple application click box that wants to automatically check for updates. Turn off iTunes “keep library organized.”
7. Log out of iCloud. Stay logged out. Use the Web Based version of any email program, including iCloud email. Works fine, doesn’t cruft up your computer. Doesn’t eat CPU cycles indexing, then writing the indexes to your drive.
Log out of the App Store, and stay logged out. Log back in, if you must, for updates or to buy, then log back out.
8. Here’s a GASPER.
Find the Spotlight Panel in System Preferences (I’m on Mavericks, but presume this works in Yosemite).
Disable Spotlight Index of any connected drives. Especially network drives. That made such a difference on my “old Mac” that I went further and disabled Spotlight index of ALL my drives, and now use Easy Find.App and FindAnyFile.app
Noticeably faster overall. Takes some getting used to.
(“Deeper.App” offers much control over Spotlight, including one to not display the Spotlight Menu Bar Magnifying Glass.
http://www.maketecheasier.com/enable-and-disable-the-hidden-functions-of-many-apple-applications/
Links to alternative local drive search:
http://www.devontechnologies.com/products/freeware.html
http://apps.tempel.org/FindAnyFile/
9. Disable Auto-Save and Versions. (Be sure to explicitly save your work if you do this).
http://osxdaily.com/2012/07/11/disable-auto-save-and-versions-in-mac-os-x/
Consider Tex-Edit Plus (donationware), which is a much more powerful “local only” Text Edit application than Apple’s. No versions! Has File>Save>As
http://www.tex-edit.com/
10. Don’t use Time Machine.
11. If you’re using a laptop, turn off the “Local Time Machine” feature. It should be off if you don’t use TM, but check anyway.
12. Turn off APP NAP.
13. Turn off ANIMATIONS.
14. Experiment with the effect of turning off OS X “Memory Comression” introduced in Mavericks and continuing in Yosemite. The Memory Compression feature uses CPU cycles to dynamically compress what’s in RAM, the idea being to avoid use of a presumptively slower Hard Drive as Virtual RAM.
Problem is, the “compression” process may bog down older, slower, processors, and with limited RAM (less than 8 GB) and a slow procesr, speed may be higher with Memory Compression Off.
My 2013 MacBook Air has a “slow” dual core i5 and only 4 GB of RAM . . .
Most of the settings in 8 through 14 are available through GUIs. Onyx, Maintenance, Deeper, Tinker Tool, and especially Tinker Tool System.
15. File Vault encryption dynamically encrypts and unencrypts programs and data “on the fly.” There’s not much hard data on the net, but when Anandtech Benchmarked a 24% performance hit when it tested FV 2 at the time it was introduced with Lion.
http://www.anandtech.com/show/4485/back-to-the-mac-os-x-107-lion-review/18
I have, regretfully, turned it off, and noticed the performance improvement on both my old MacBook Pro and 2013 Air.
16. When I turned off File Vault I created an encrypted local partition for data. I’ve given that up, too. Now I am storing my data files on an encrypted external SSD. I have no idea why OS X would seem slower managing an encrypted partition on an internal SSD than an entirely encrypted (FW 800) SSD, but it does. Regardless of “speed,” I’m keeping the external drive encrypted.
17. Little Snitch. Yes, it is a pain to learn and set up. But I’ve found using it contributes to speeding up my “old Mac.”
An astounding number of Apple processes and applications want to “phone home.”
There’s also a large number of incoming contacts, most from “push.apple.com,” I’ve also blocked. It takes persistence, but blocking those connections seems to have incrementally sped my computer.
Fortunately, it becomes obvious when I’ve blocked something essential, and it’s easy to reverse.
[…] Logic Dots Does In-Game Purchase Just Right Dumb Question Corner – How to Speed Up an Aging Mac with Minimum Investment […]