I thought it might be fun to pull back the curtain on how the magic happens after we stop recording the live show every Sunday night. Since this is a podcast for geeks it seems like it might be interesting. I have never written the process down before but I’ve done it so many times it just sort of flows out of my fingers.
To set the stage, Steve broadcasts the live show to YouTube from his iMac using a tool called mimoLive from Boinx. He’s broadcasting video from my webcam and his, audio from my mic and from my recording software Hindenburg Journalist, and video of Hindenburg. I send all of that to his mimoLive from an installation of mimoLive on my Mac. He’s also broadcasting the live chat window on Discord . While he’s doing all of that production, I’m recording the actual podcast using Hindenburg.
Well this is probably hard for you to picture in your head, this isn’t anything I haven’t told you about before. But today I want to describe every single thing that happens from the minute I wave goodbye to the live audience until the podcast shows up in your feed.
1. Automator Scripts to End the Show
I have two little Automator scripts I wrote one called Live Show and the other one is called Live Show’s Over. The first one turns off all of the cloud service syncing that I normally run, like any back up functions or dropbox, one drive, Google drive, etc. It also launches all of the apps that I will need in order to run the liveShow and do the recording. After the live show, I run Live Show’s Over to turn all of those cloud services back on, and to quit a few of the apps I use for the live show, but leaves some on because I need them for the production of the podcast.
2. Export the Audio

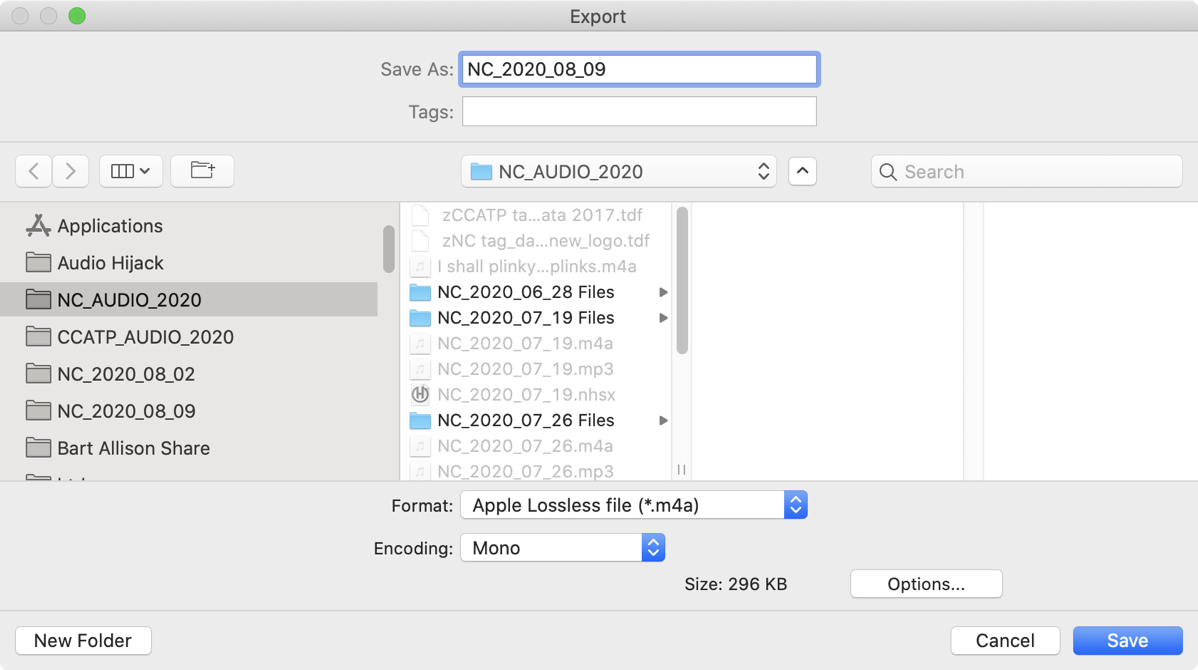
Hindenburg Journalist has been happily recording in its native format but I need to export the audio as an Apple Lossless M4A file. I’m going to be doing some processing on the file so I can’t export into mp3 just yet. M4A is smaller than an uncompressed format like WAV or AIFF but is lossless and saves the all-important chapter marks for the NosillaCast.
After exporting from Hindenburg, I usually sample the file a little bit to make sure I didn’t mute a track. It’s not a full sampling so problems do sometimes get past me, but I can live with that rare occurrence vs. listening to an hour or longer show of myself yapping.
3. Upload to Auphonic

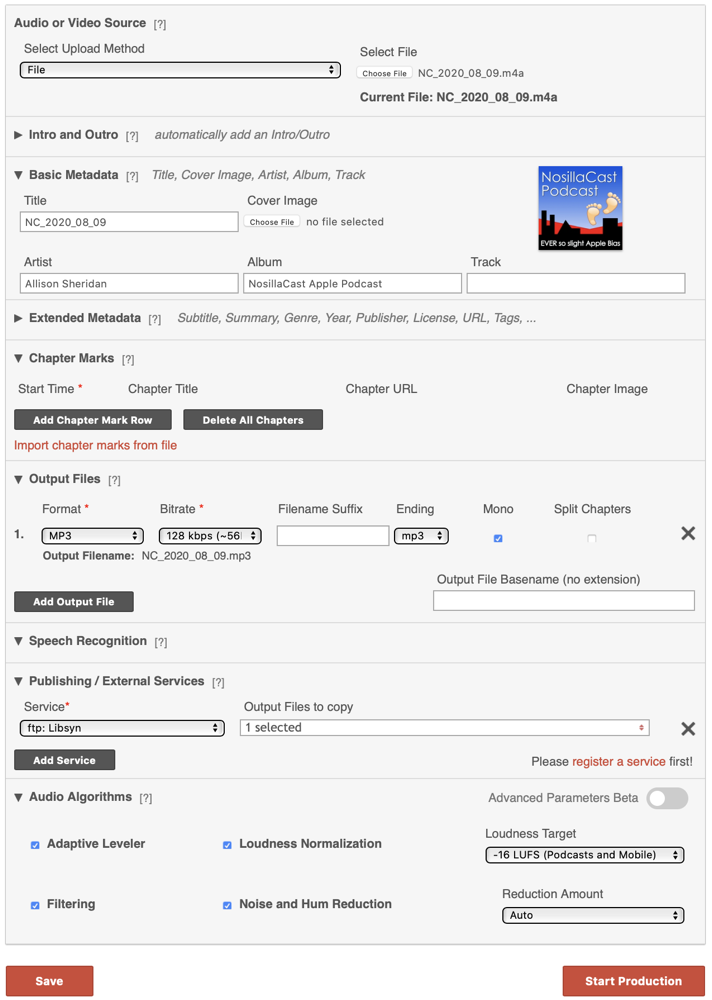
I then upload the M4A file to a service called Auphonic. This service provides several functions for you, the most important of which is to level my audio and bring the audio up to the loudness standards. I pay for this service online because the desktop version doesn’t preserve the chapter marks the way you like them. It then converts the audio to MP3 format.
It also adds the album artwork to the file and then does the file transfer from its own servers to Libsyn which is another online service where I host the files, and which is where you’re downloading from when you get the podcast. When it’s done doing these functions, it reveals a page to me with the wave form of the original audio and the wave form of the processed audio and a link where I can download the MP3. I think it’s mostly eye candy to see how much more even and at a better volume the audio files are but I love it. You can also play them from that window but I don’t find that necessary.
I click the download button and then the system Preference app Hazel automatically takes the downloaded MP3 out of my downloads folder and puts it into my NosillaCast audio folder on my Mac for the current year.
I have another Hazel script that watches that folder and when 2 weeks have passed, it copies the Hindenburg and downloaded MP3 to my Synology and removes them from my local drive. Before I added that automation I was always running out of disk space! Of course after the Synology gets the file, Carbon Copy Cloner running on a Mac on my network moves a copy over to the Drobo as a backup.
4. MarsEdit
I write my blog posts in an app called MarsEdit throughout the week and then make one post with all of the week’s links for the NosillaCast episode. I create this post before I go live. In order to get the links into MarsEdit for the blog posts, I use an Automator Quick Action I wrote that copies the title and the URL and then formats it nicely so you see the title but it’s a clickable link to the podcast episode, and its formatted as a Heading 4 for easy navigation.
5. Write Up in Feeder

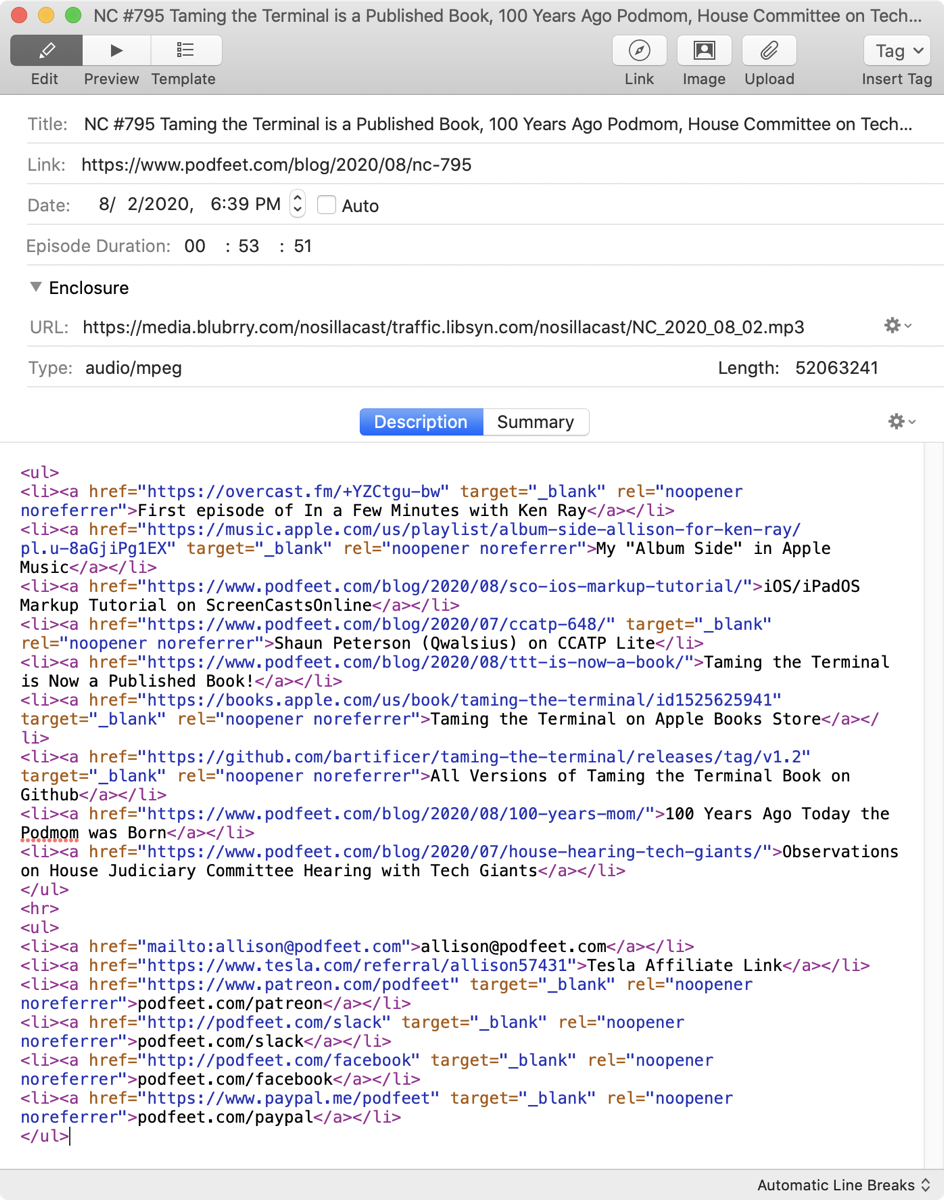
The real backbone of a podcast is the RSS file, also called a feed file. Without the feed file, this is just audio on the Internet and it would never get delivered to you in your podcatcher of choice. I use an app called Feeder to create the feed for you. Each episode is in what’s called an Item. The text in this item is what you see in your podcatcher if you look at the show notes.
First I copy the title of the episode from MarsEdit and paste it as the name of the episode into Feeder.
Then I plop in a TextExpander snippet that gives me the beginning of an unordered bulleted list and all of the standard links at the end to things like Patreon and our Slack community and how to email me.
Back in MarsEdit I copy each of the URLs in the blog post for the episode including their titles one by one. That puts them all into my clipboard manager Copy’em Paste. I flip over to Feeder and with another TextExpander snippet add list items to that unordered list I mentioned and then use Copy’em Paste to paste them each into Feeder. I’m betting there’s a more efficient way to do what I just described but I’ll work on making that more automated another day.
Feeder needs to know where the enclosure file is which in this case is the mp3 file up on Libsyn. I have another TextExpander snippet that puts in the URL over on Libsyn, but adds a little bit of info on the front to a service called Blubrry which gives me a little nicer view of number of downloads than Libsyn, and then the TextExpander snippet adds the podcast episode name which is the date in a known and consistent format.
In Feeder next to the URL of the enclosure there’s a dropdown and I choose “Fetch attributions from web”. This looks at the URL I entered, figures out the file type for me (audio/mpeg) and the length in bits. Last week’s show was 52,063,241 bits if you’re interested. If Feeder successfully finds that information and enters it, that lets me know that the file has definitely arrived on Libsyn’s servers from Auphonic’s servers. I also use the file length in feeder to compare to the file size on my disk to make sure I uploaded and linked to the right file. It is not uncommon for me to somehow get mixed up on this part so it’s a nice double check. I also look at the info on the file on disk to find out how long the episode is, so that I can enter it for the Episode Duration in Feeder. I do this for ONE listener who asked me to do it because he likes to sort his podcasts by time.
I should mention that Feeder can do the file transfer for you using its own built-in FTP client but for the reasons I explained I do it through Auphonic.
Finally, I enter the URL of the current blog post that doesn’t exist yet, but will be generated by MarsEdit. This is another dodgy point I should automate. I get lazy and just type “h” and TextExpander autofills the previous week’s entry for the NosillaCast. The URLs all end in /nc-XXX where the last digits are the episode number so I just change the episode number. But what I often forget is that earlier in the URL is the year and month and if I forget to change the month when it changes, then the URL won’t work. Luckily Tim McCoy is always standing by to let me know when I screw that up!
6. Publish Blog Post from MarsEdit
Now it’s finally time to finish up the blog post in MarsEdit. I use yet another TextExpander snippet to plop in the URL to play the podcast episode right from the web page in an HTML 5 player and a downloadable link because some people just like to download. And we’re here to please! This is a tricky TextExpander snippet though because I have one for Chit Chat Across the Pond and one for NosillaCast and I sometimes get them mixed up, but don’t worry, I check it before publishing.
At this point I push the blog post as a draft from MarsEdit to WordPress on podfeet.com. I point to the NosillaCast logo as a featured image, and make sure it has the alternative tags identifying it for screen readers. Then I do a Preview from WordPress, and scan the page for anything that looks dumb like an image too big or a missing link. I also click the audio player to see if it not only plays, but plays the RIGHT episode. If it doesn’t play at all, this is usually an indication that I used the Chit Chat Across the Pond snippet instead of the NosillaCast snippet.
Next I go back to the draft post and scroll to the very bottom and watch the Grammarly plugin go to work finding typos. I bet you’re surprised I run this since there are so often typos that get past me, but even Grammarly doesn’t find everything. After it tells me I forgot nearly all of the Oxford commas and finds other typos, I run one last preview and then hit the Publish button.
7. Publish the Feed
Now that the blog post actually exists, I can hit publish over in Feeder. At this instant, the podcast is live. I really mean instant. There is no “undo” at this point, all I can do if I messed it up is to redo the feed publication. If your podcatcher is quick about it, you’ll get the messed up one well before I can fix a problem. Just the name of the game.
8. Check Feed Using Downcast
Immediately after publishing using Feeder, I launch the podcatcher Downcast for Mac. This is the fastest way for me to see the podcast download, and I can check that it’s got chapter marks and yet again check to see if I actually uploaded the right episode!
9. Spam
If all things went well, and 92.6% of the time they do go well, it’s time to spam the Internet. I open the blog page for the podcast post and I run another Automator quick action that again grabs the title and URL but this time doesn’t combine them into an HTML link, it puts the title followed by the URL. Then I open Tweetbot for Mac to my Podfeet personality and paste in the title and URL. I simply drag the featured image from the blog post to the tweet and hit send.
I then flip to my NosillaCast account in Tweetbot and retweet the post Podfeet just made. You really don’t need to follow the NosillaCast account because all it is is retweets of the podcast stuff Podfeet does. Then again you don’t have to see photos of me and Steve giving our grandson a cakepop and a smidge of politcs. Your choice of course!
Now I open Facebook to the NosillaCast community page and paste in the same title/URL that I put in Twitter. I wait what seems like an interminable amount of time for it to expose the featured image and hit post. Then I hit the share button to share the same post to my personal Allison account on Facebook where people seem to enjoy seeing them. Or they’re just trying to make me feel good, hard to tell.
Time to hit our Slack community too and paste in the same title and URL to the show-announcements channel. I like that it’s a separate channel so that if you don’t want my spam you don’t have to subscribe to that channel.
10. Patreon

There’s one final step to the post production. I need to charge the Patreon supporters. They pay the bills around here – Libsyn and Auphonic and Podfeet hosting aren’t free, and neither are most of the apps I’ve described here, so you should really thank them for helping make all of this happen.
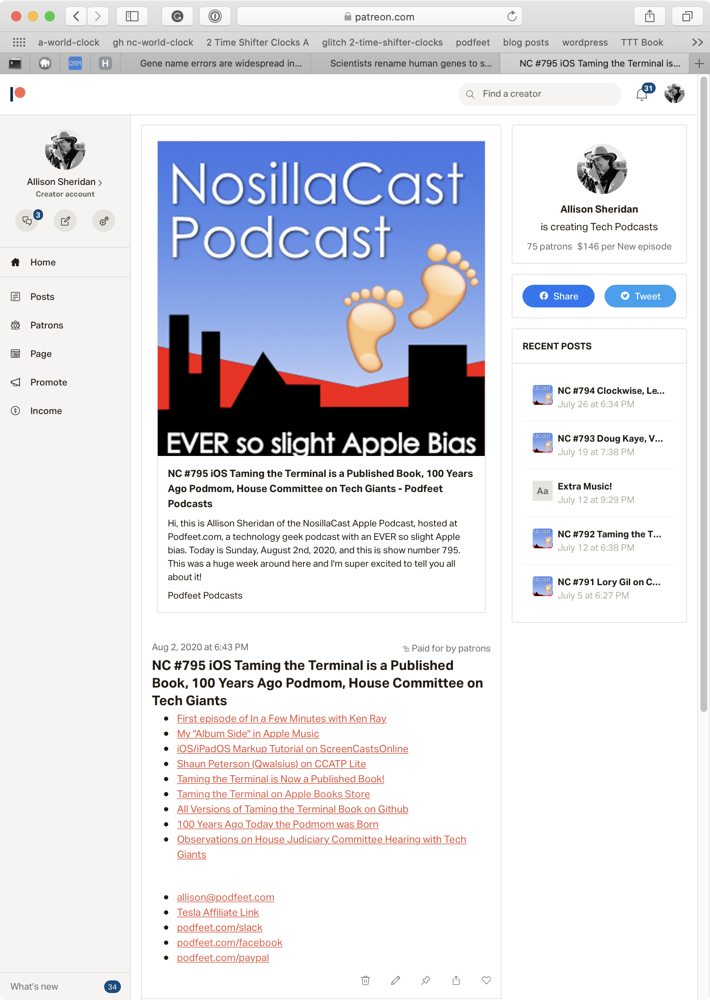
In Patreon I create a link-type post, and to fill it out I go to the published blog post for the episode. I copy the URL, and the title one by one from that page. Then I put Feeder into its Preview mode where the links all look pretty and I copy them. That puts all three of these pieces of information into Copy’em Paste.
Back in the Patreon page, I use Copy’em Paste to paste the links to the body, the title to the title, and finally the blog post link to the link field. I do that last because Patreon makes my featured image logo HUUUUGE on the page when it renders the link and I have to scroll a lot if I let it do that first.
And finally I check the little box that says Charge Patrons.
Bottom Line
I hope you enjoyed learning everything I do in post production for the NosillaCast. I’m kind of proud at how I do all of this and I find it kind of amazing that I don’t mess it up more often since there are SO many moving parts and so many different applications and services that are involved.
Guess how long it takes me to do this? Less than half an hour. Seriously, I’ve done it as fast as 15 minutes before!
