Ever created a PDF with images only to discover the file was huge? Using Preview you can shrink the file easily but the quality fo the images will be dreadful. Back in 2012, Josef Habr figured out a clever way to edit some System-level Library files to improve the quality of the images when using Preview to compress the files and posted them on http://hints.macworld.com. He spent some time coming up with some options for good, better, and best image quality too. After he posted this, someone else pointed out that instead of editing the System Library files, you could accomplish the same thing using the ColorSync utility. While using the ColorSync Utility is great for creating the modified filters, many have reported that you still have to move the filters into the System level Library to make them take.
Basic outline of the steps will be:
- Show how the default Reduce File Size option is accessed in Preview
- Use ColorSync Utility to create good, better and best filters
- Copy the newly created filters into the System level Library
- Verify that the new filters are available in Preview
One caution – when you reinstall or upgrade your operating system, these filters will be removed, so keep a copy of this tutorial and a copy of your filters as well so you can put them back for later use.
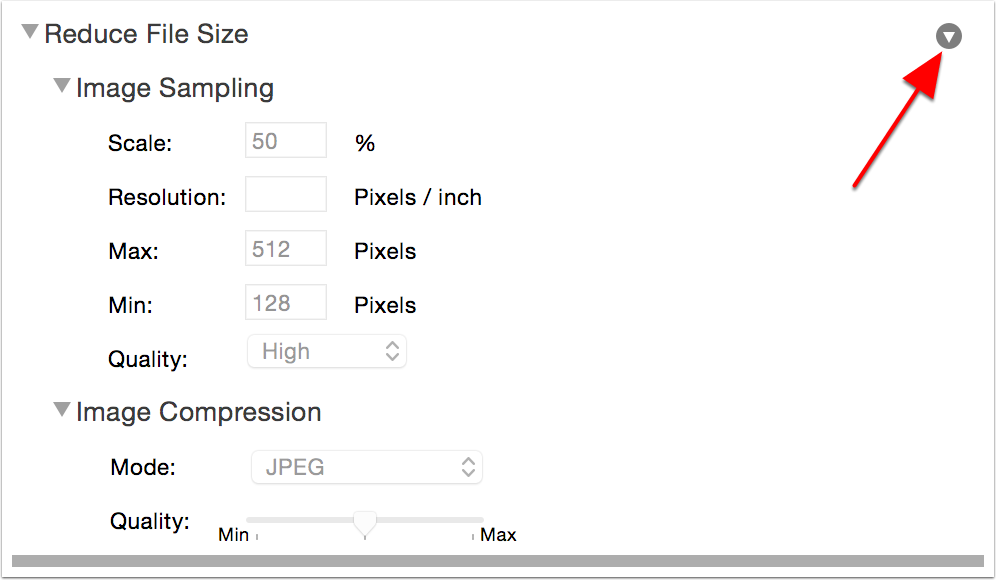
1. Default Reduce File Size in Preview
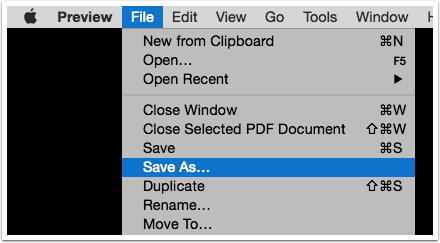
Open a PDF in Preview and choose Save As…
You may need to hold down the Option key before you click on File to get the Save As… menu to appear.

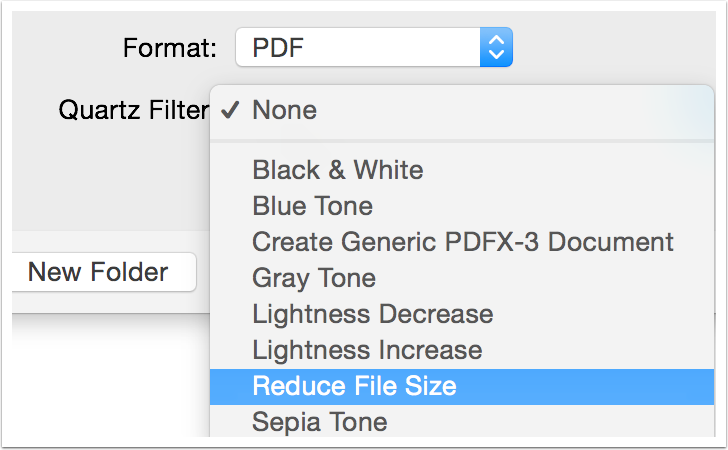
1.1 Tap on the Quartz Filter Pulldown
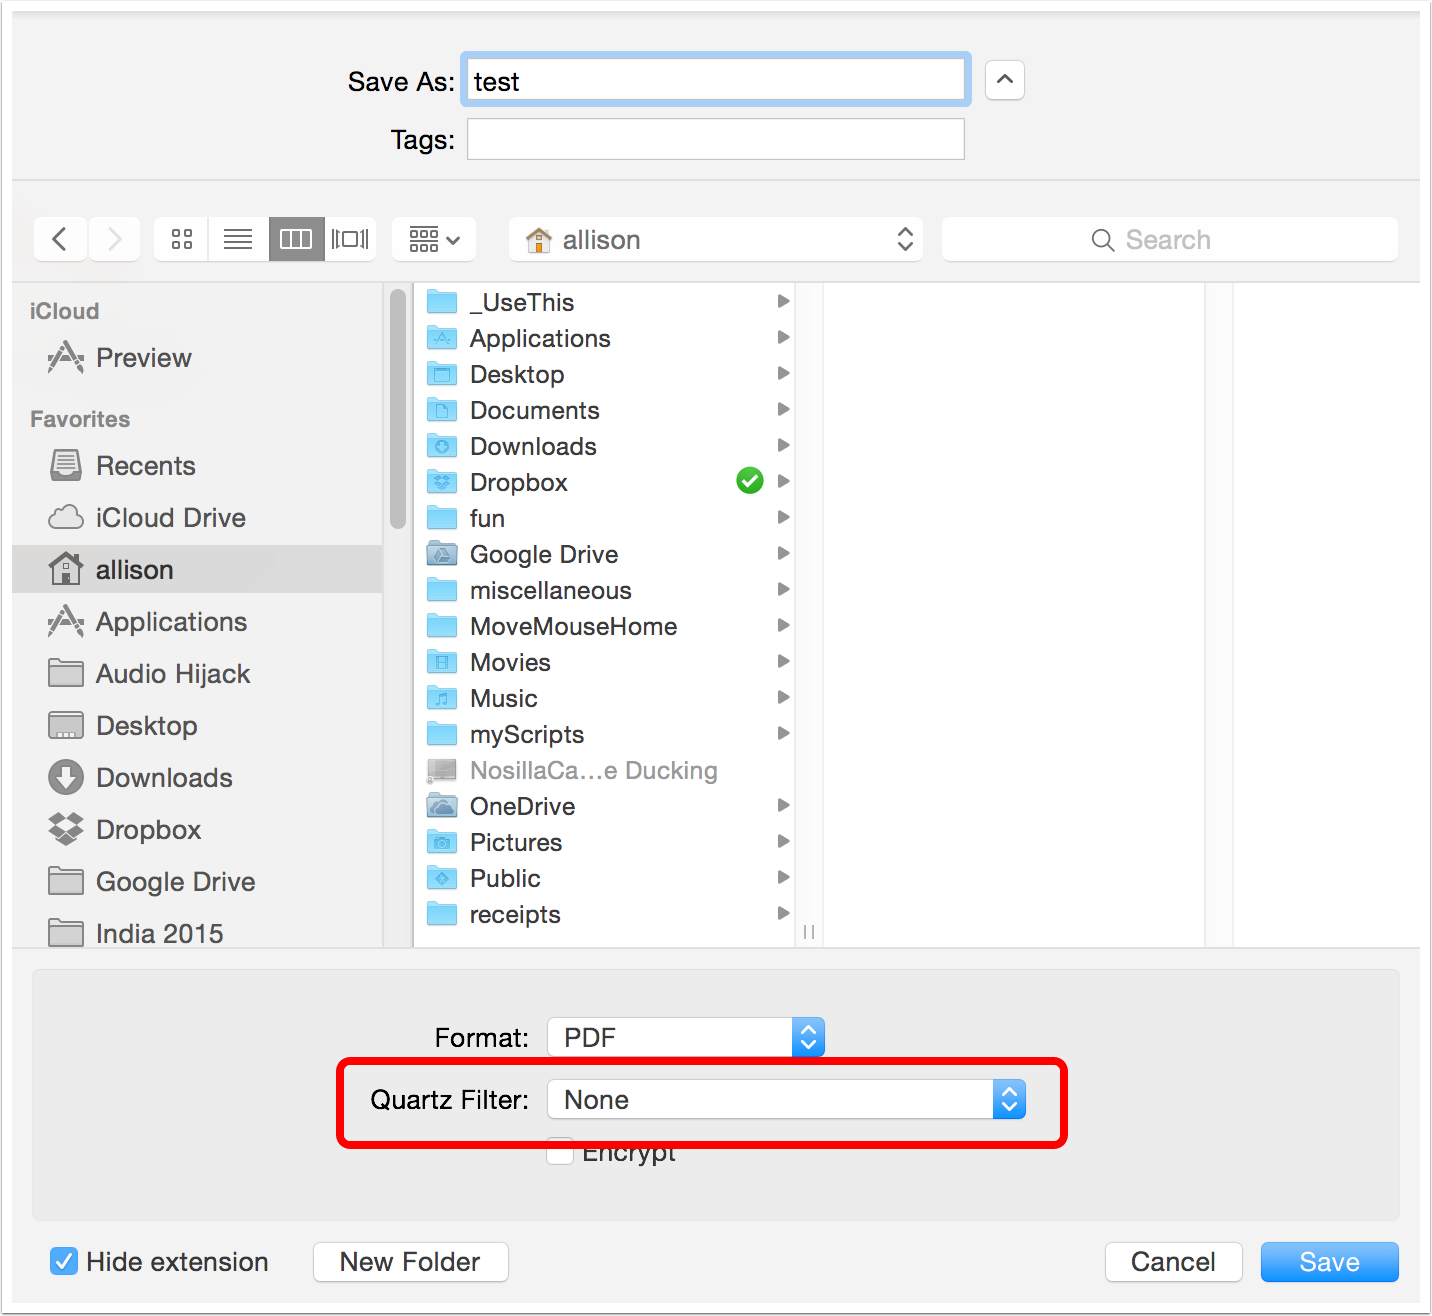
1.2 Choose Reduce File Size
This option might work for your need, but the image quality will be pretty poor. We’re going to add three more options to the list for Good, Better and Best, all of which will look much better than the default.
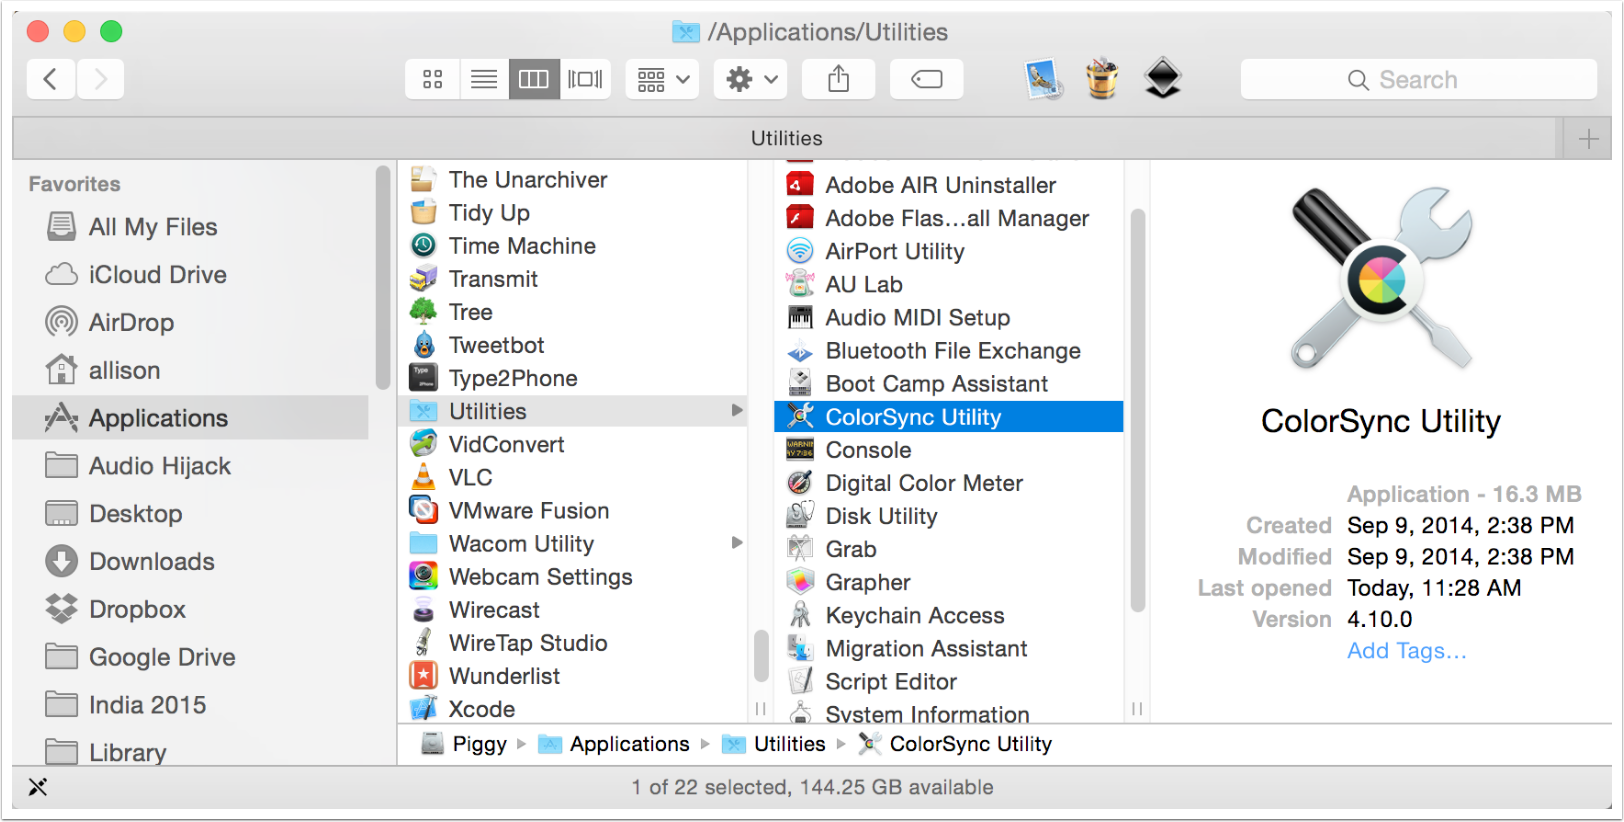
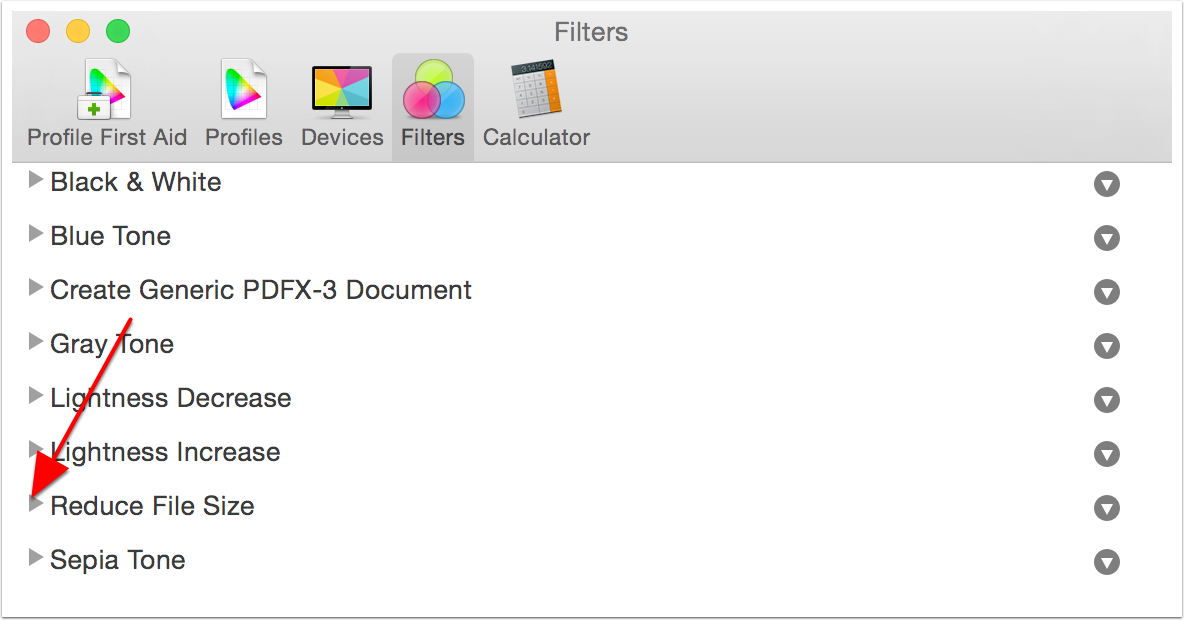
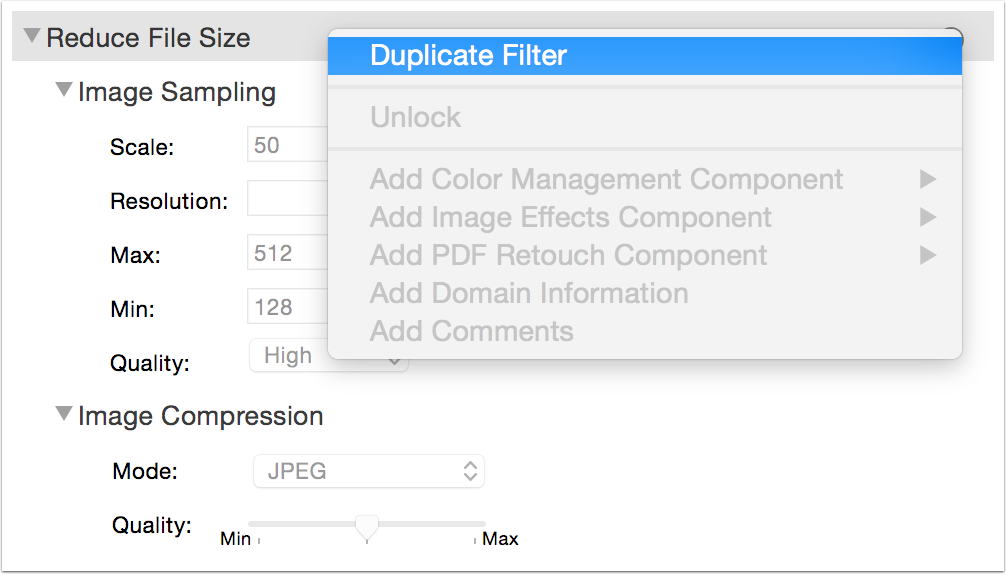
2. Setting Up ColorSync Utility
ColorSync Utility is hiding in Applications/Utilities
2.1 Reduce File Size (Default)
We’re going to make a copy of the default filter. Tap the disclosure triangle on the left to view the options.
2.2 Defaults for Reduce File Size
To duplicate the filter, tap the disclosure triangle on the far right.
2.3 Choose Duplicate Filter
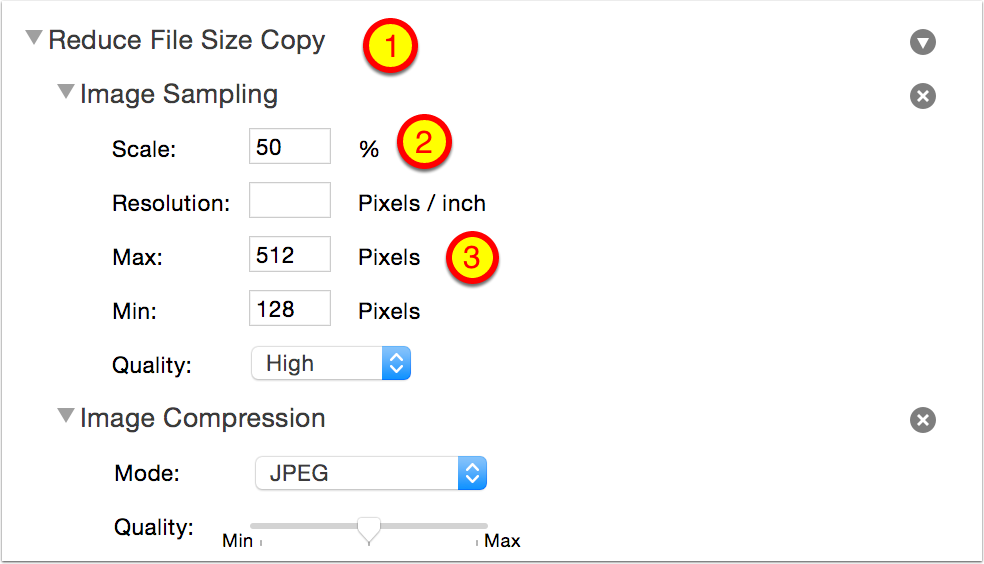
2.4 Open the Duplicate and Edit
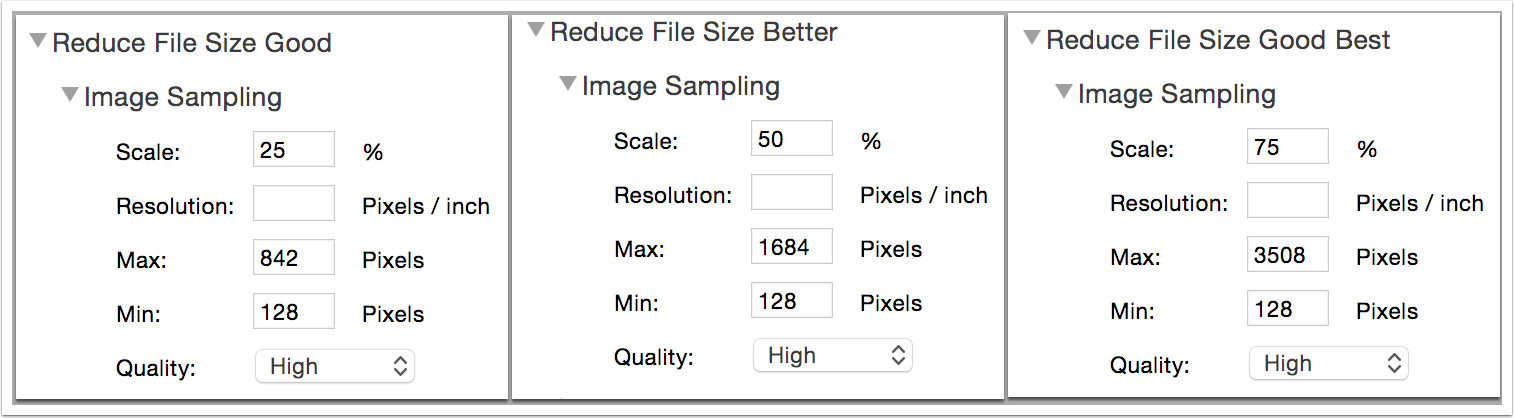
- Change the name to Reduce File Size Good
- Change Scale to 25%
- Change the Image Max to 842 Pixels (that’s A4 at 72ppi)
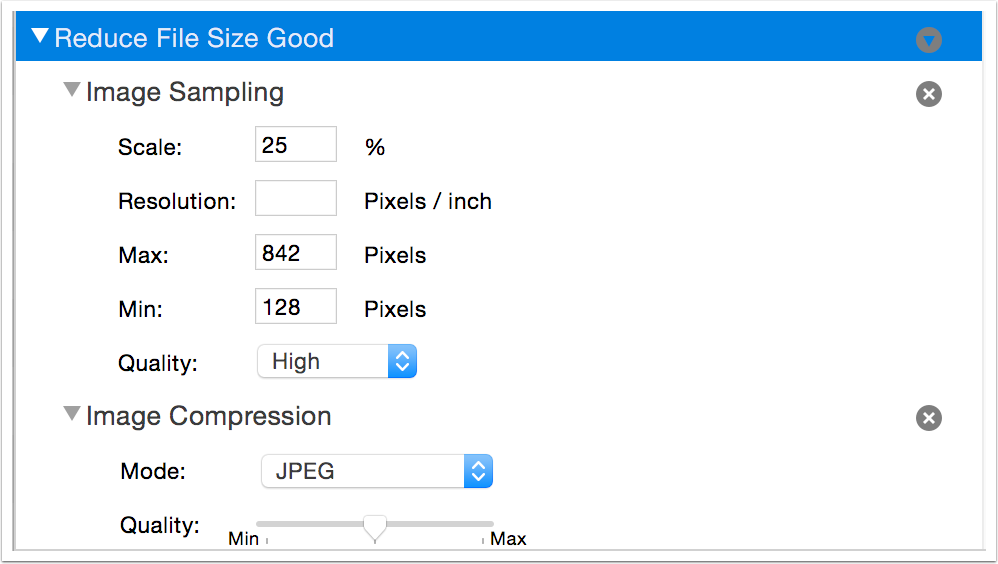
2.5 Good Filter
Your Good filter should look like the image below. Repeat this process two more times.
- Create a filter called Reduce File Size Better, set the Scale to 50%, Image Max Size to 1684 (A4 at 144dpi)
- Create a filter called Reduce File Size Best, set the Scale to 75%, Image Max Size to 3508 (A4 at 300dpi)
2.6 Three Filters
3. Moving Filters to Your System-level Library
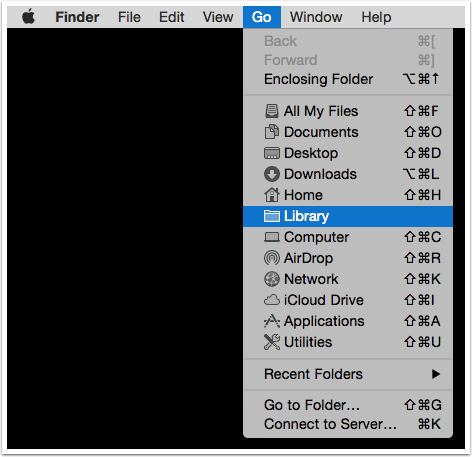
3.1 Navigate to your User Library
In the Finder, hold down the Option key and click on Go. The Option key reveals the Library folder allowing you to select it.
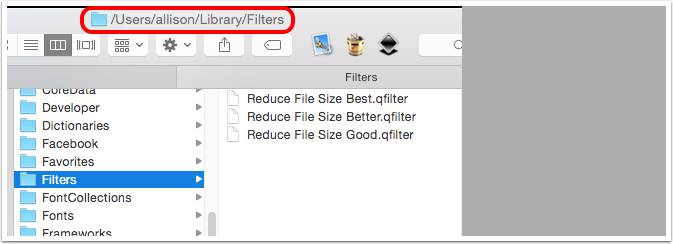
3.2 Navigate to the Filters folder
Inside your user Library you should now see a Filters folder with your three new filters. If you don’t, make sure that at the top of the window you see:
/Users/yourusername/Library/Filters
Note that this folder may not exist before you use ColorSync to create these filters.
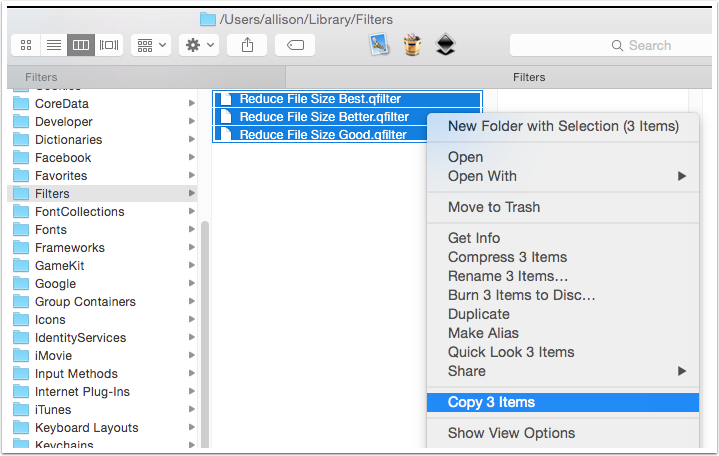
3.3 Copy the Filters From the User Library
Select the three new filters, and copy them.
3.4 Now We’re Going to Navigate to the System-level Library
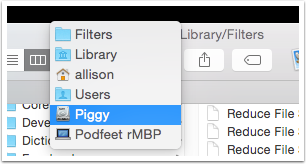
Hold down the Command key while tapping on the folder path at the top of your Finder window. This little trick lets you quickly navigate to your hard disk (mine is called Piggy, yours may be cleverly named or simply be called Macintosh HD).
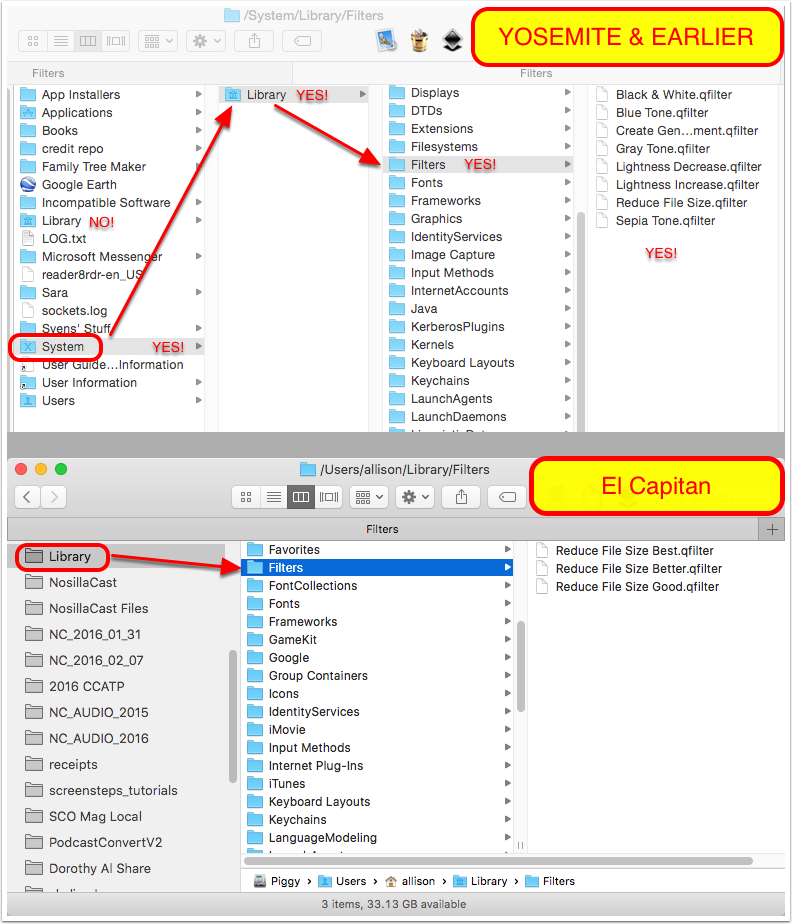
3.5 Navigate to /System/Library/Filters
In El Capitan, they instituted System Integrity Protection (SIP) which disallows messing around in the System level library.
If you’re using Yosemite or earlier, paste your new filters into the /System/Library/Filters as shown below.
If you’re using El Capitan, Apple instituted System Integrity Protection (SIP) which disallows messing around in the System level library, so instead we want to drop them into /Library/Filters as shown below. Many thanks to James at reworked.com or figuring this out and leaving a comment on the blog!
4. Verify – Open Your Document in Preview
Choose File, Save As…
4.1 Under Quartz Filter, You Should Now See Your New Filters
