Back when I was a user of NanoLeaf smart lighting products, I wanted to use one of their LED light strips on the back of my Apple Studio Display as a backlight. The trouble was how to mount the strip effectively. It is designed to curve, but not in the same plane as the lights. I’m sure it was possible to cleverly bend the corners, but I wanted a robust installation, and one that was properly symmetrical, too.
I ended up instead installing a strip along the back of my desk. This was a great improvement to my lighting, so I stopped looking at the monitor situation.
I later fell out of love with NanoLeaf lights due to reliability issues, particularly with their bulbs, and Allison and other NosillaCastaways assured me the Philips Hue brand was the way to go for reliable smart lights. After getting some bulbs for my ceiling, I saw the light, too. (Sorry.)
Looking again at the issue of a monitor backlight, I soon discovered that the Hue range includes many types of light strips, so I set about understanding them all. This is a task not helped by the product names, so you’ll need to play close attention.
 I’ve chosen to explain the products in an order that makes it easy to explain the differences from one to the next. However, the first product I will mention is actually the newest in the range. Things may change at any time!
The Hue Solo lightstrip is available in 3m, 5m, or 10m lengths. It is a flat strip, quite similar to the NanoLeaf one, that shines a single colour of light from LEDs along its entire length. The covering is clear plastic, which means you can see the LEDs. It cannot be extended, but can be cut shorter at specifically marked points. It starts at USD$99 for the 3m version.
The Lightstrip Plus comes in a 2m “base” length, and you can purchase optional 1m extensions to extend it up to a maximum length of 10m. It is cuttable, too. In other respects, it is like the Hue Solo — a flat strip that shines a single colour. The base strip is USD$149.95 and the extensions cost USD$49.95 each. This was the original lightstrip product in the range.
The Lightstrip Outdoor, as its name implies, is rated for outdoor use. It comes in 2m or 5m lengths and cannot be cut or extended. It has a thicker, rectangular cross-section with a translucent material that hides the individual LEDs and helps diffuse the light more evenly. When not in use, this means it just looks like trim. Lightstrip Outdoor shines a single colour and costs USD$214.95 for the 2m size. It comes with a suitable power supply as well as mounting clips.
Now we get to the more interesting products and the more confusing product names.
The Gradient lightstrip is the simplest of the multicolour range. It comes as a 2m base kit, and 1m extensions are available with a maximum of 10m in total. While extendable, these are not cuttable, so your installation has to be an exact number of metres in length. These are flatter than the Lightstrip Outdoor but do have a diffusing layer on them so you don’t see the individual LEDs.
The Gradient name describes what’s different about this lightstrip. In the Philips Hue app, you can specify a single colour, or you can specify three colours to create a smooth gradient. If I choose red, green, and blue, I get a beautiful rainbow from red at one end through orange, green, turquoise, then blue at the other end. There are two additional modes as well. In Mirrored mode, the same gradient of colours radiates from the middle of the strip. So red in the middle, blue on both ends, each with the intervening colours. In Scattered mode, you can pick up to five colours. Each LED in the strip lights up with the colours in order. On a 2m strip, a five-colour pattern is repeated four times and then the strip ends on the same colour it started with.
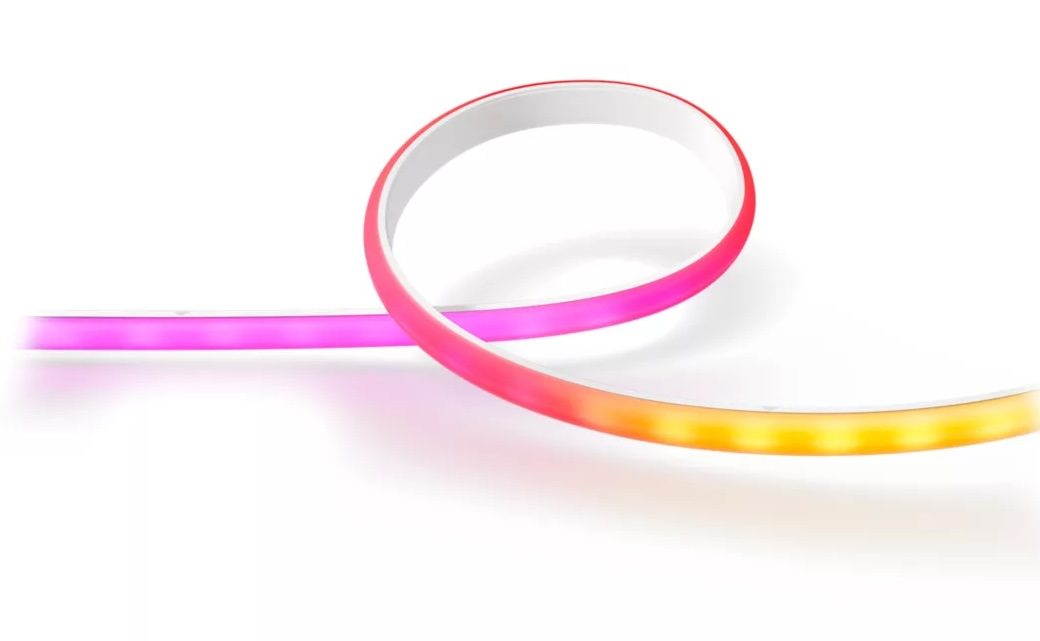
 All that’s left to describe now are the Play Gradient lightstrips. These are where you need to pay really close attention to the names when purchasing. First, these are a different shape than the plain Gradient lightstrip. The back of the strip is a 90-degree angle of black plastic. Inside this angle is a curved white diffuser. In cross-section, they are a quarter circle. This is because they are designed to be placed on the back of screens and will shine their light both back from the screen and also out to the sides.
Because of the shape and intended use, you also get special plastic guides. Where the other lightstrips are attached directly to a surface, with Play Gradient, you attach the guides to the back of your screen and the strip snaps into them.
Now the names. Play Gradient lightstrip 55”, Play Gradient lightstrip 65” and Play Gradient lightstrip 75” and larger are all intended for use on televisions. The size given is the size of the television each is suited for, not the length of the strip.
Play Gradient lightstrip for PC is intended for your PC monitor. Curiously, there aren’t different model names, but there are three sizes. One for 24-27” monitors, one for 32-34” monitors, and one suitable for use on three 24-27” monitors. This latter one is not three lightstrips. It is one, sized to span across three separate monitors that are placed side by side and with additional brackets to properly support it.
At this point, it’s worth explaining how the Play Gradient lightstrips are arranged on the back of screens. The strip mounts completely on the back side of the screen, some distance in from the edge. It starts in one of the lower corners, goes up that side, across the top, and down the other side. It does not go across the bottom.
None of the Gradient nor Play Gradient lightstrips are cuttable or extendable. They all have the same gradient, mirrored, and scattered modes as the basic Gradient strip.
Prices for the Gradient and Play Gradient lightstrips are changing constantly. At the time of writing, the basic 2m Gradient lightstrip is USD$259.95, the smaller Play Gradient for PC is USD$179.97, and the Play Gradient for 75” and larger is USD$509.95.
I initially kept my NanoLeaf strip on the back of my desk and purchased a Play Gradient for PC to suit my 27” Apple Studio Display. Following the supplied instructions, installation was quite straightforward, though I would caution to “measure twice, stick once”. In addition to sticking the brackets to the screen, there is also a small power adapter that needs mounting next to the strip. This accepts a proprietary cord, integral to the strip itself, on one side and a standard DC power cord to the supplied power supply on the other. The DC cord is plenty long enough to reach the floor even from my standing desk at its raised height.

In use, the lightstrip throws a bright, but diffuse glow against the wall behind my monitor that makes sitting in front of my screen more comfortable. Usually, I have it set to a bright white, as my wallpaper is a pale beige colour. Occasionally, I give it some fun colours when the mood takes me.
Not long after kitting out my monitor, I bought the regular Gradient lightstrip and replaced the NanoLeaf one along the back of my desk. This actually does more good than the monitor one in my view. This is for two reasons. First, it is not set back from the edge of anything, so I see much more of the light. Second, it runs the full 1.8m along the back of my desk, plus a little around each end, which is much more light than the approximately 0.8m on the back of my monitor.
Because my study is something of a light trap, I also purchased a 2m Lightstrip Plus and have mounted this at the top of the wall behind where I sit. This adds up to 1700 lumens of light to the room, which it sorely needs even though I have three 1300 lumen Hue bulbs on the ceiling.
You might be asking yourself, at this point, why I didn’t go for the Lightstrip Plus on my desk. The answer is whimsy. I’m a sucker for pretty lights. While my gradient lightstrips are usually displaying some type of white light, sometimes I like to let my metaphorical hair down (I don’t have enough to do it for real).
I use the Hue app on my iPhone to do most of my light control. Occasionally, I use Siri. But I also have an app on my Mac called Hue Sync, which is published by Philips. The reason the screen-based gradient lightstrips are branded with the name “Play” is because they know how to play! Using the Hue Sync app on Mac or PC, or an extra piece of hardware with your television, Hue lights can adapt to your entertainment. Either what is on the screen, or… my favourite… music!
I have a playlist on Apple Music called “Light Show”. It contains songs that I have found get a good response from my room full of Hue bulbs and lightstrips. As I write this, it is on shuffle. Old Time Rock and Roll has never been better.