Problem to be solved:
You’ve found an image in Apple Photos you want to edit in Affinity Photo, so you use the extension to open in Affinity Photo. You make some adjustments, add some layers, and then want to save in the native Affinity Photo format. However because you opened through the extension, Save will only save it back to Apple Photos, and Save As is greyed out.
Thanks to owenr in the Affinity Photo forums, there’s a trick using Snapshots to solve the problem.
Requirements: Affinity Photo for Mac loaded on your system.
Find Image in Apple Photos
Click the edit button (or hit enter).
This is me meeting Sal Soghoian by the way!

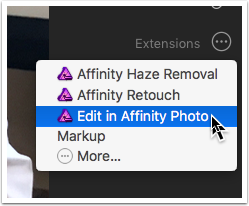
Select Extensions

Choose Edit in Affinity Photo from Extensions
If this option isn’t available to you, tap on More… and select the extension to be added to the list
Make Adjustments
In this example I duplicated a layer and added an adjustment layer.
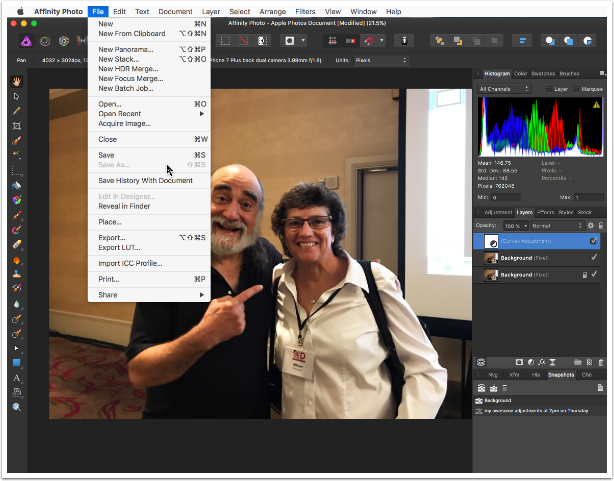
Not that Save is available (which saves back to Apple Photos, but Save As is greyed out.
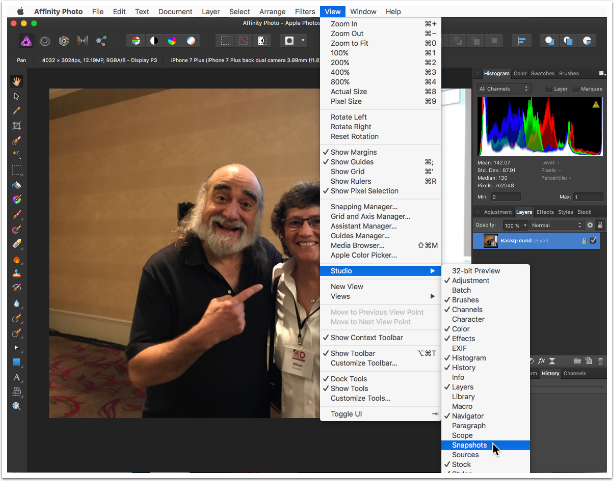
Turn on the Snapshots Studio
Go to View, Studio and turn on Snapshots if it’s not already available.
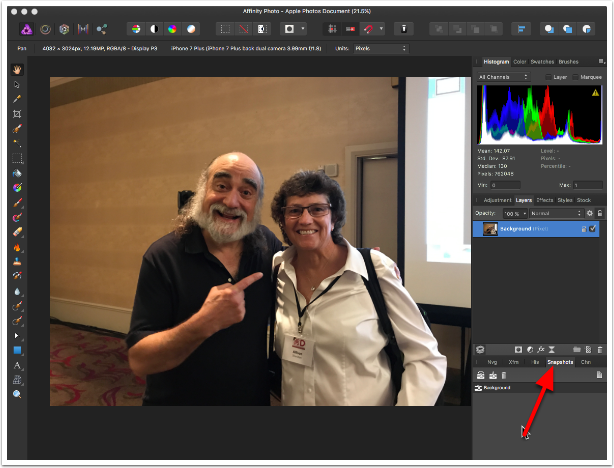
Tap the Second Icon to Add Snapshot
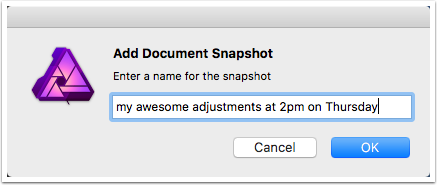
Name Your Snapshot
Alternatively you could leave the default name with the time and date
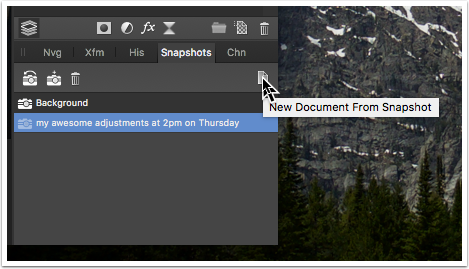
In the Snapshots Studio Select New Document From Snapshot
This will add a second document to your open Affinity Photo.
Save As is Now Available
Note that you still have your original document open that you can save back to Photos if you choose.
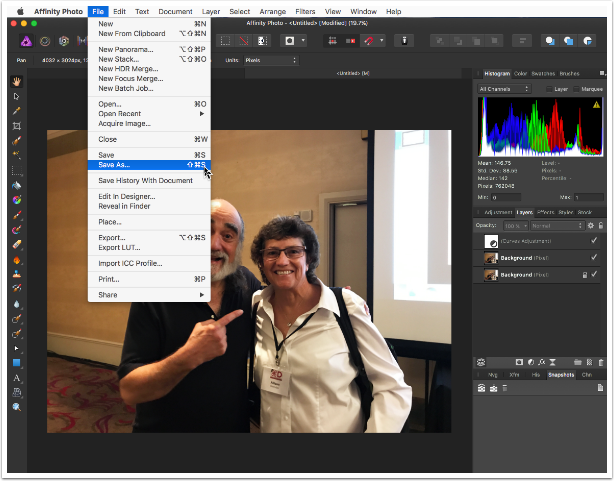
Save in .afphoto Format
Hope this helped you!
