Creating keyboard shortcuts for Automator Actions
by James Kocsis
Ever want to create a keyboard shortcut for tasks you do multiple times a day? Here is a really simple way to do it.
I use a combination of Automator and a utility called "Shortcuts" from: http://www.abracode.com/free/cmworkshop/. Shortcuts allows you to create keyboard shortcuts for contextual menu items in the Finder. And with Automator, you can add actions to that contextual menu.
In this example, we’ll create a keyboard shortcut that will attach a selected file to a new Mail message. This will eliminate the need to drag the file onto the Mail icon in the Dock or (god forbid) attach the document via a dialog box. Other uses can be: Quick upload of a file using Transmit, opening selected files in specific applications (instead of having to right-click and wait for a list of apps to show up), or testing web pages in multiple browsers (instead of opening the file in each browser manually).
I use this with TONS of workflows. It makes life bearable. In fact, between this and Quicksilver, I was able to COMPLETELY clear off my Dock (except for the Trash & Finder). Another reason to love the Mac.
Don’t worry, this shouldn’t be too advanced…
Step 1: Create an Automator Action to attach the selected file to a new Mail message.
Launch Automator.
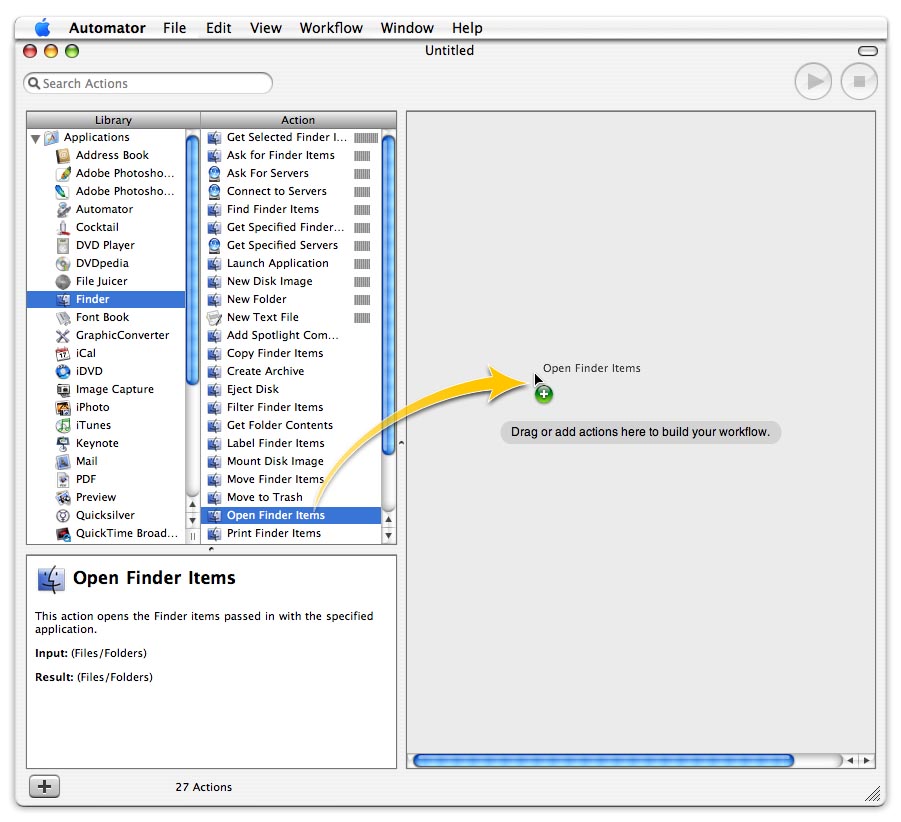
Under the "Library" column, click on "Finder" (Pic 1).
Under the "Action" column, drag "Open Finder Items" over to the workflow pane on the right(Pic 1).
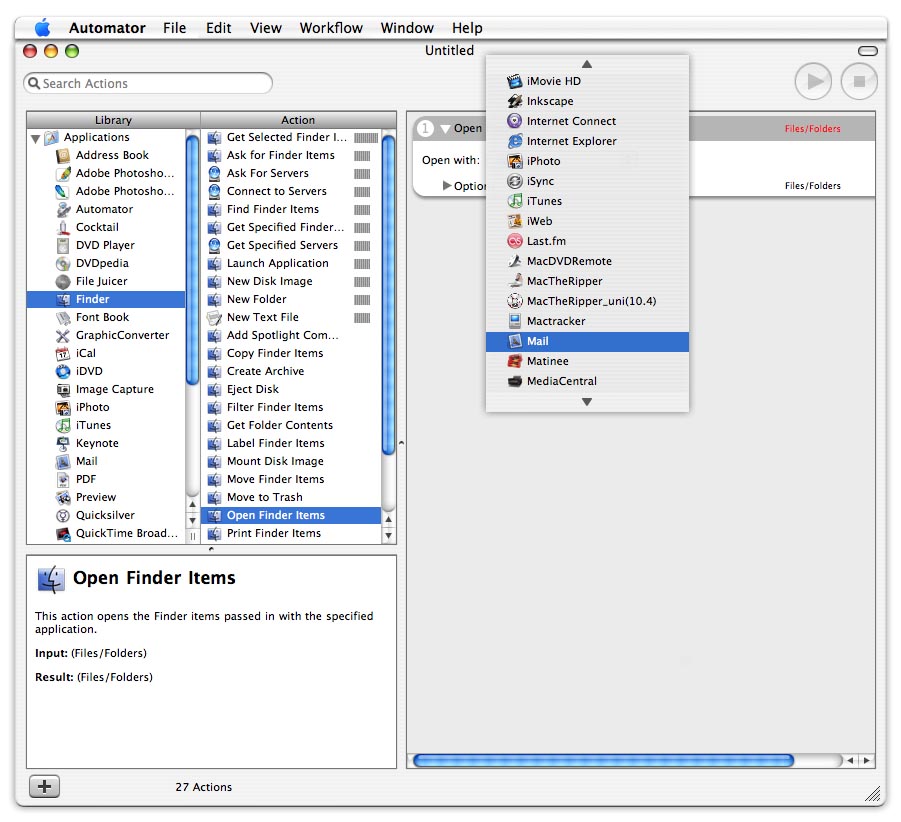
Select "Mail" from the dropdown menu (Pic 2).
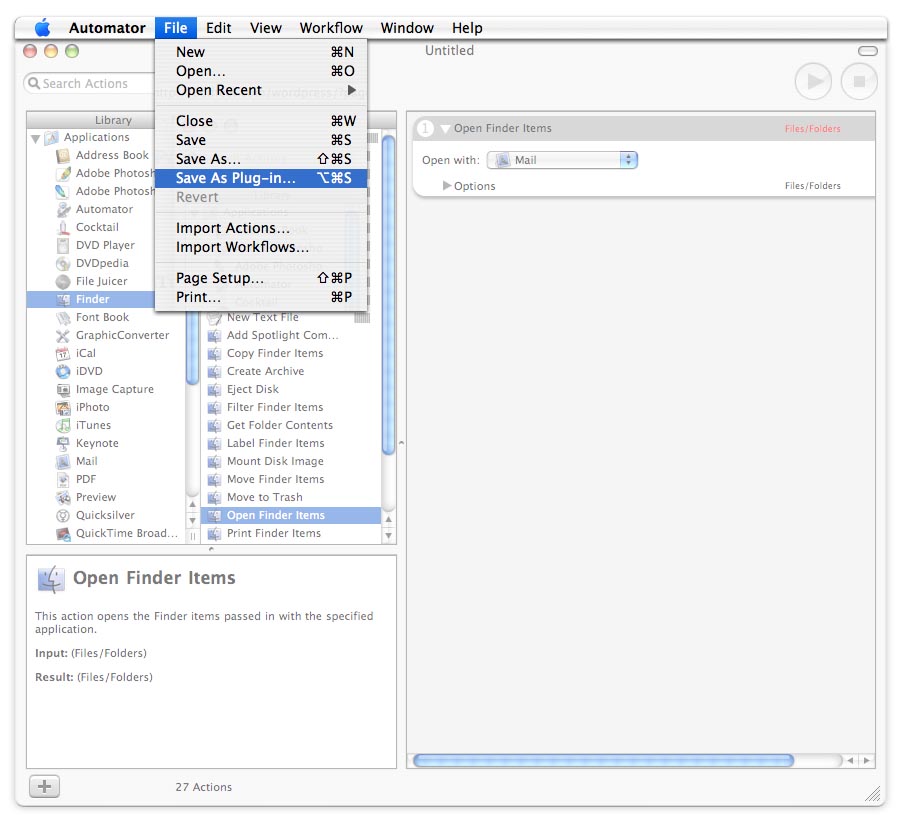
From the "File" menu, choose "Save As Plug-In…" (Pic 3).
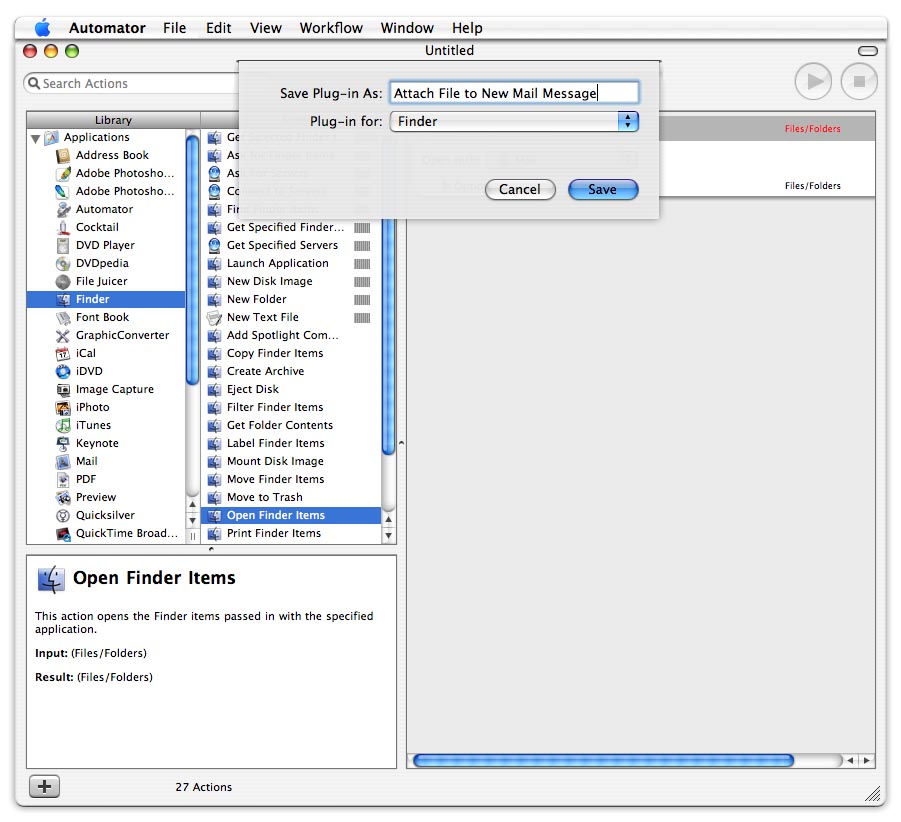
Give it a name like "Attach File to Mail Message" and leave the "Plug-In for" menu set to "Finder" (Pic 4).
Quit Automator
Step 2: Create a keyboard shortcut for the action you just created.
Launch Shortcuts.
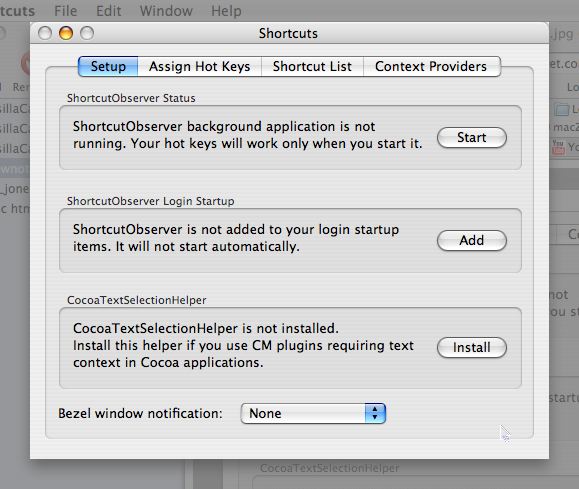
Click the "Setup" Tab and click the three buttons labeled "Start", "Add", and "Install". This will Start the ShortcutObserver so your shortcut will work in this session, Add the ShortcutObserver to your login startup items so your shortcut will work every time you login, and Install the CocoaTextSelectionHelper which assists in text selection (Pic 5a).
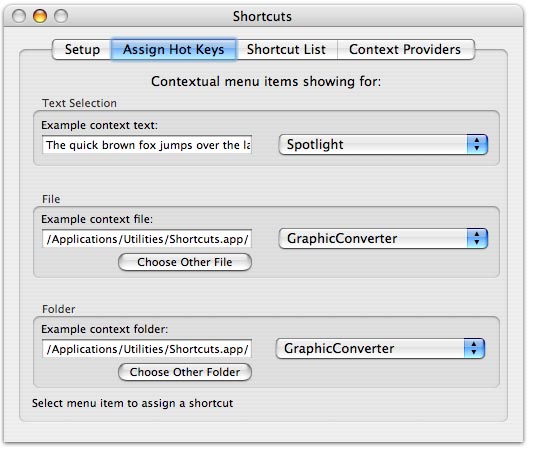
Click the "Assign Hot Keys" Tab (Pic 5b).
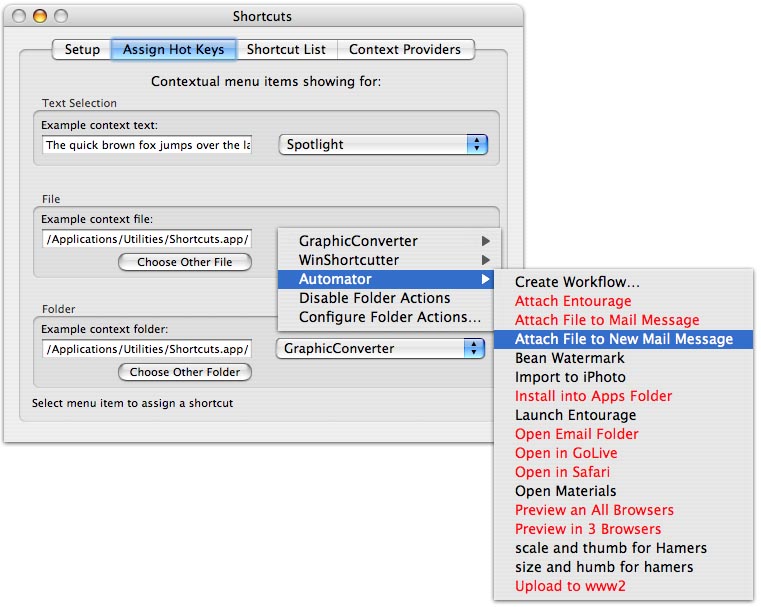
Under the "File" section, select the action you just created from the pulldown menu (it will be in the Automator fly-out menu) (Pic 6).
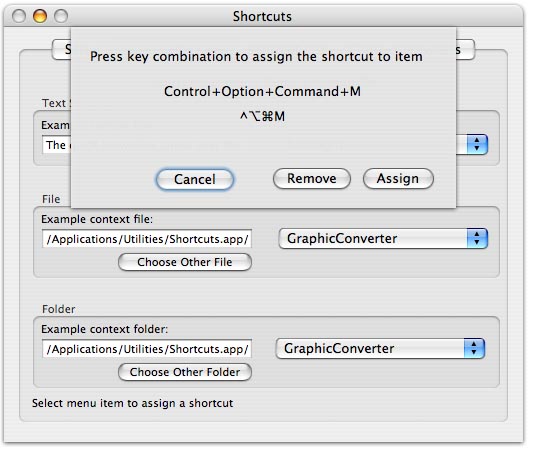
A sheet will drop down asking you to type in the keyboard shortcut you’d like to use. Type in the key combo. Make sure it doesn’t conflict with any other key combos in the Finder (Pic 7).
Click "Assign"
Quit Shortcuts
Step 3: Test it.
Go to the finder, highlight a file, hit the keyboard shortcut you created.
Watch as Mail launches and attaches your file to a new message.
Pat yourself on the back. You now rock as hard as me. Congratulations.
Good Luck!
If you have any problems, email me at: [email protected]
Is there any way to do this outside of MAIL app – can this be done in chrome//gmail?