Credit to Allister Jenks for the Instructions for iOS
Airport routers from Apple have a service turned on by default called NAT-PMP (Network Address Translation Port Mapping Protocol). This service allows applications and/or devices inside your network to automatically open ports in your router to make them accessible from the Internet. While this feature does make it easier to set up Internet of Things devices (doorbells, webcams, light bulbs), it makes your network more vulnerable to attack.
The recent (October 2016) Denial of Service attacks on the Domain Name System that pretty much broke the internet for a half a day were due to devices inside peoples’ networks being commandeered to act on behalf of the bad actors. In other words, having NAT-PMP enabled on an Airport router (or UPnP on other manufacturer’s routers) allowed these Internet of Things devices to be recruited into a botnet.
If you want to learn more, please see this Wikipedia article: https://en.wikipedia.org/wiki/NAT_Port_Mapping_Protocol
These instructions show you how to turn NAT-PMP off in an Airport Router using the Airport Utility on iOS. If you want to do it from your Mac, please see this tutorial:
https://www.podfeet.com/blog/tutorials-5/how-to-turn-off-nat-pmp-on-airport-routers/
If you have a Netgear Nighthawk Router, please see this tutorial: https://www.podfeet.com/blog/how-to-turn-off-upnp-on-netgear-nighthawk-routers/
Open the Airport Utility App on iOS
The Airport Utility App is available though the app store here: https://itunes.apple.com/us/app/airport-utility/id427276530?mt=8
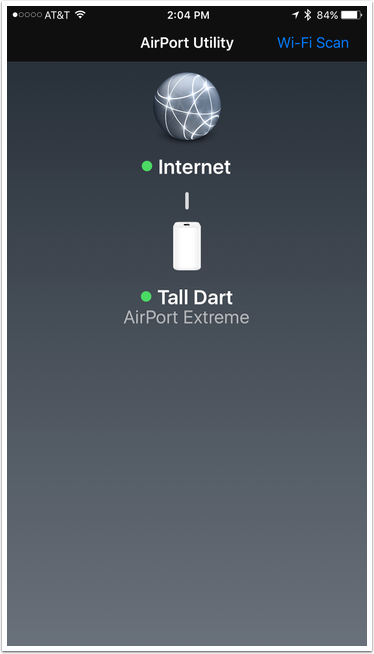
Launch the app and the display will show your network configuration.
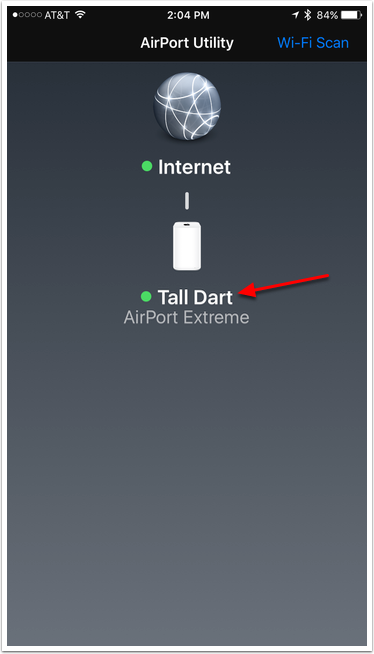
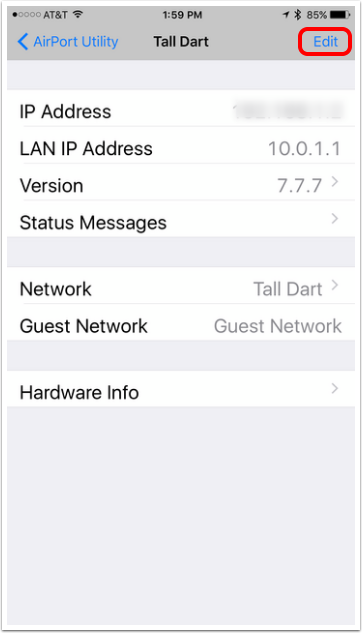
Tap on the device which acts as your network router, which should be the one nearest the "Internet" globe.
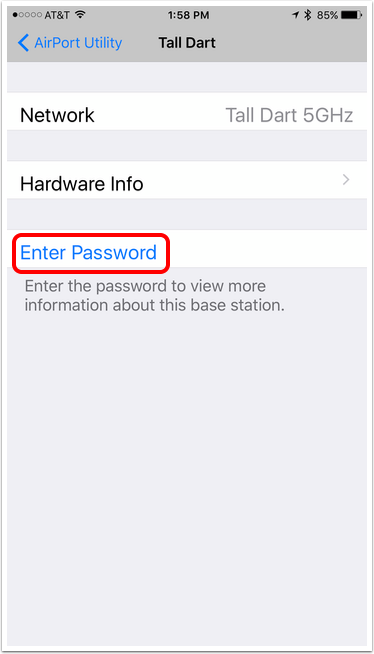
Enter Password
Since we’ll be changing the configuration of the router, your administrator password is required. This may not be the same as your WiFi password depending on how you have configured it.
Enter Device Password
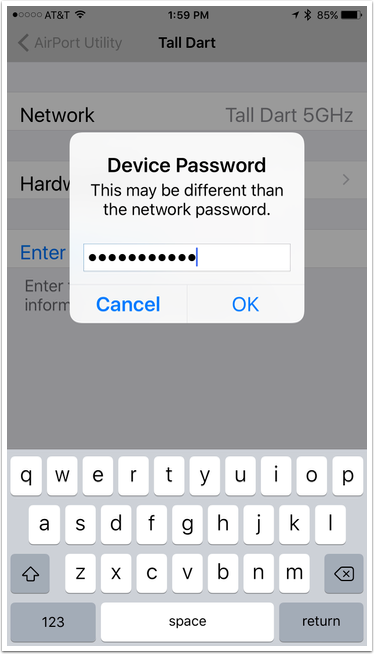
Decide Whether to Save the Password
I believe this will put the password in Keychain and possibly iCloud Keychain if you have that enabled. Personally I don’t use Keychain, I use 1Password to protect my passwords, so I choose Don’t Save. The choice is up to you.

Tap on Edit
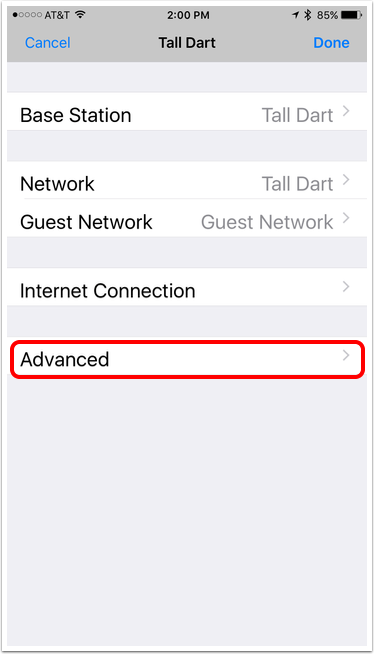
Now we can start editing the configuration of the router.
Tap on Advanced
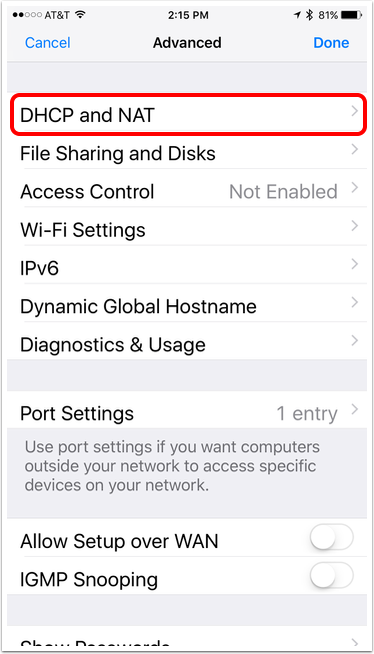
Tap on DHCP and NAT
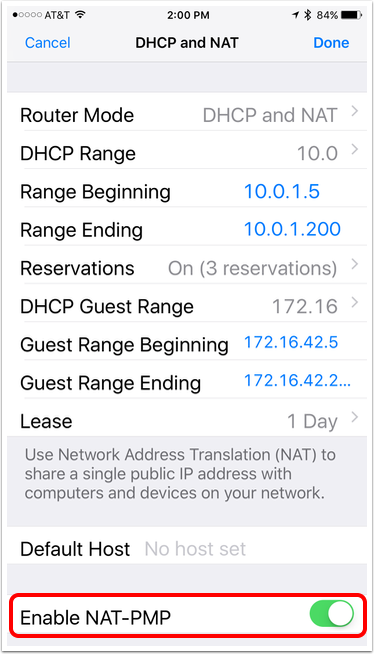
Toggle OFF the NAT-PMP Switch
If it’s already off then you don’t need to do anything more and can just tap Cancel three times to go back to the main configuration before exiting the app.
Otherwise, toggle the Enable NAT-PMP switch off and continue with the following steps.
Tap Done
Tap done three times on successive screens. After the third time, you will be prompted as in the next step.

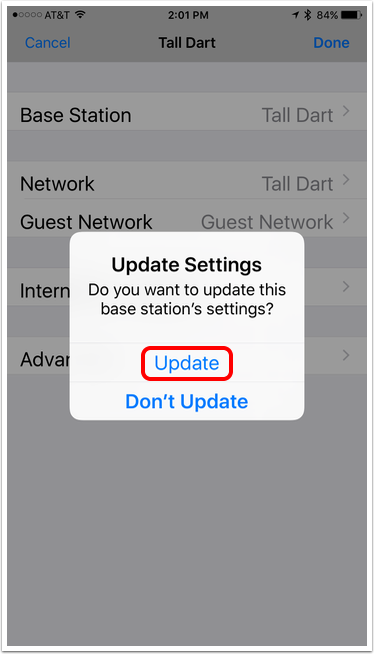
Tap Update – But Warn the Household First
Before you continue, note that this step will restart your router, meaning all devices which are connected to your network will lose connectivity for a short time.
When you’re ready, tap Update.
Wait Till Airport Utility Lights Turn Green
While your router is updating, you will see the status on the screen change and the light on the device will begin flashing orange before eventually returning to solid green after a short time (usually less than a minute). You’ll also see the indicator bubbles in the Airport Utility turn to green when the router has completed the restart and reconnected successfully to the network.
If any of your internal network devices stop working after NAT-PMP is disabled, contact their manufacturer. They should be able to tell you specific ports to open and how to do that. If they tell you that you must have NAT-PMP or UPnP enabled, you’ll have to make a decision for yourself on whether to re-enable it or get rid of a device that makes your network less secure.