We finally have a storefront to sell Tim Verpoorten’s equipment, so check out macroundtable.com. Then we start by a review by me of the new Leap Motion Controller, and then Ian Douglas reviews the Logitech K750 Wireless Keyboard. Knightwise of knightwise.com joins us with some music solutions for cross platform sliders. We’ll clean our palettes as Donald Burr of Otaku No Podcast is back with his review of the StarTech SuperSpeed USB 3.0 eSATA Hard Drive Docking Station. Mark Pouley of switchermark.com brings us our first Dumb Tip on how to fall asleep to music. In Chit Chat Across the Pond Bart tells us about the incredibly versatile Sigma 10-20mm f/4-5.6 lens he bought, the hot shoe spirit level he bought to prevent distortions, and the plugin PTLens he got for Aperture that helps get rid of keystoning from such a wide angle lens.
![]()
mp3 download
Hi this is Allison Sheridan of the NosillaCast Mac Podcast, hosted at Podfeet.com, a technology geek podcast with an EVER so slight Macintosh bias. Today is Sunday August 4, 2013 and this is show number 430.
Leap Motion Controller
 Have you guys seen this new Leap Motion Controller? I got one while I was on vacation and I’ve just not gotten to play with it. Problem to be solved? Finding a new way to interact with our computers. We’ve got the mouse, the trackball, the trackpad, and touch screens, but what if you could simply wave your hands in the air to manipulate things on screen? That’s where the Leap Motion Controller comes into play. This is a tiny little device, about the size of two fingers (If you want to get technical it’s 3x1x.5 inches) and it plugs into your Mac or PC (sorry Linux) via a USB 3 cable (compatible with USB 2). You place it between monitor and keyboard and it senses your hands above it around 8 inches up (you can adjust this too).
Before I get into the details, let me say that this is the coolest $90 I ever spent. I bought it as part of a Kickstarter and already I’ve gotten a lot of entertainment out of it. Friday night our friend Ron was over and I let him play a game called Dropchord with it and it was a BLAST. I have to say that as it exists today I don’t think it’s useful as a standard input device though, because it turns out controlling things in 3D space is a lot harder than 2D. Let’s walk through how to make the Leap Motion Controller work and then we’ll come back to that.
To get started with your Leap Motion Controller, you first go to leapmotion.com/setup and download a 200MB file for the Mac or Windows. This gives you the Leap Motion Control Panel. We’ll come back to the control panel later, but it presents you with an Orientation program at first that’s super fun. You finally get to start flicking your fingers around and get a slight feel about how it works. They give you visual feedback on how you move your fingers, one at a time and even multiple fingers showing a wireframe of what it sees to help you understand it.
The real fun is when you get to start playing with apps, right? This is where things get a little confusing…well for me they got a LOT confusing. There’s an app called Airspace. Airspace is a store, but it’s also a launcher. This confused me that it had dual purposes, but confused me even more because you can launch your apps just like any other app without using Airspace as a launcher. Let me give an example. Launch Airspace and click on Airspace Store. Find Cut the Rope in the Airspace Store. Download Cut the Rope. Now in Airspace you have the Airspace Store AND Cut the Rope. But you can also go to your applications folder or your launcher of choice, and launch Cut the Rope. I’ll have you know it took me 10 minutes to write what I just read to you because I kept getting tangled up in what Airspace actually IS.
The control panel has settings to allow web apps to use the Leap, allow background apps, and turn on automatic power savings. You can adjust the interaction height of the controller, which is how high above the controller you hold your hand in the air to use it. The default is 20cm which is around 8 inches and that seems to work pretty well for me. You can also let it do automatic detection but I wasn’t that bold.
I won’t take you through all of the tabs in the control panel but there are two settings that seem to be no brainers to set – there’s one for hand and tool isolation – that one helps to isolate visible hands, fingers and tools from heads and other objects. The other one is auto Orient tracking which automatically chooses the correct tracking orientation based on hands in view. Um, no, I don’t want it to pick the correct orientation, I should shut THAT off.
 The last tab is super fun – it’s got boring stuff like reporting software bugs, viewing software logs and a way to allow the Leap Motion Controller to work better with slower computers, but it’s also got a button to Recalibrate your device. That sounds boring but it’s fun because you point the Leap Motion Controller at your monitor and try to “paint” in the window with it. When I first started I got one small green blob in the window and a score of 8 (I think you need 80%+ to finish the calibration, so that explains why it was kind of dodgy at first). After a while I got the hang of moving it around to paint and got over 90%. It worked WAY better after that!
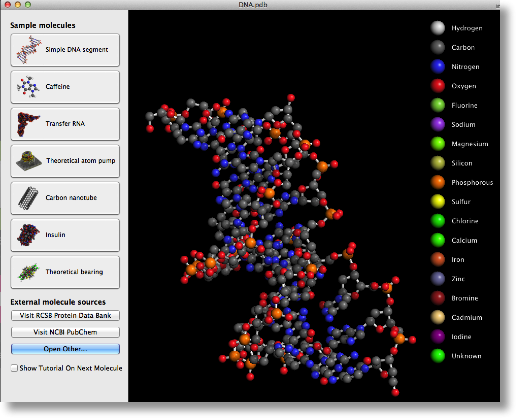
Now that we’re done setting things up, how about some apps to play with? I only did free apps so far to get the feel for it, and my favorite to show off the device is called Molecules. I like it because it’s as though you’re holding a model of a molecule in your hand and just turning it around and getting closer or farther away from it. In just a few seconds it’s very natural to know how to get it to zoom in and out and rotate. In stark contrast, the Google Earth app is TERRIBLE with the Leap Motion Controller. I’ve asked 3 people other than myself to try to manipulate the earth and all they can do is get it to spin out of control and either zoom to the center of the earth or throw it out into space so it’s super tiny and in every case it kinda makes you sick to look at it.
Cut the Rope is about Halfway in between, controlling the game is pretty easy but it’s not exactly natural. You have to really swipe quickly on-screen in order to actually cut the ropes. Because the placement of your hand in 3-D space changes the way the cursor works it makes a little hard to be accurate. I still enjoy playing it and I think I could get used to playing it in space.
Some of the applications in airspace are available only for the Mac, or only for Windows, and some are available for both. I found one called Touchless Control for Mac that actually allows you to control things on your Mac in all applications using the Leap Motion Controller. the training session was actually really fun. first they give you good on-screen instructions and they follow that with practice sessions that really help you understand how to control things. For example, with Touchless Control for Mac as you move your hand forward you can see a small circle where the cursor is. After you pass directly over the controller, the circle starts to turn green, and when you’re at the point you can actually select with it, it’s a very small green dot. it’s pretty intuitive, and after the training session it’s easy to understand how to manipulate it, but it’s actually incredibly difficult to be accurate in this way. Trying to close a window for example by touching in 3-D space where the red dot is, is just about impossible. I was able to use it for bigger controls, but I haven’t gotten good enough at it to have any kind of precision. You also have to kind of strike quickly with it which makes it even harder to be accurate. Scrolling is actually kind of fun using this tool, you put 2 fingers forward and when they turn green you just sort of flick down with your fingers and bring them back toward yourself. Again, it will take some practice to get accurate with it to stop the window right where I wanted to stop scrolling, but way easier than selecting things.
I mentioned earlier that the correct placement seems to be to put it between your keyboard in your monitor, but that introduces a problem if you’re using a laptop. I put the leap controller between my keyboard and monitor on my MacBook Pro, and after a while it started to act really wonky. When I picked it up, it was FLAMING hot. I’ll have to figure out another place to put it if I’m just using my laptop without an external monitor.
I don’t see the Leap Motion Controller as an essential device that you must run out and buy, but if you have 90 bucks lying around that you can do without, it’s a fun device that might give you a glimpse of where were going to be in the future. I remember a long time ago experimenting with CUSeeMe with my buddy Ron, and it was a terrible video calling application, but we both sat back and said whoa we can see the future. I think the leap motion controller is in that category, it’s not there yet but the future sure is good to be fun.
Knightwise on Music Solutions for Sliders
insert KW
I’m sure all you music buffs enjoyed that…and even though I don’t listen to music I always enjoy Knightwise (even if he does call me his digital mom which makes me feel ancient!)
Ian Douglas Logitech K750 Wireless Keyboard
Hello Allison and greetings Castaways — It’s Ian Douglas with a review of a keyboard I think you’ll just love — from Logitech.
Let’s start with the problem to be solved. I really like the wireless keyboard that came with my iMac, and I bought the same one for the Mac Mini at work. The layout matches precisely with the MBP and it’s easy to handle. But it always left a little bit lacking for me. Unscrewing that little battery cover all the time — yuk. Too fiddly. I was accustomed to a full 104 keys. I was considering those wand gimmicks to join it to the trackpad — I wasn’t ready to do that.
What I wanted from Apple was a full keyboard. And no wire. I like to hand the keyboard to folks across my desk at work. And with no PGUP or PGDN button (and adjusting to the backspace being labelled delete) it took a bit of adjusting for me to get comfortable. I was missing the END key. I found all sorts of wild key combos for the Mac and I got pretty fast at getting around. Being an old AS/400 user the idea of shift-arrow up to cause a page-down wasn’t totally beyond me — but wouldn’t it be great to have buttons for page-up & page-down?
Logitech solved all of these issues with their K750 — and a few more. Here’s a wireless keyboard with 105 keys, including the best Mac fn & command keys — plus the standard six block with Delete/Home/End/Page-Up/Page-Dn block familiar to everyone from Windoze. But don’t look for INSert — the Fn button had to go somewhere! They even got the colour scheme right — the top is brushed aluminium and the bezel & bottom are white.
When you plug in their Unifying Connector USB dongle, the OSX Keyboard Setup Assistant pops up, saying that it can’t figure out what keyboard you’ve plugged in. It’s asking for you to hit the Z first and the slash key — a bit confusing since they ask for the key to the right of the left shift and then the left of the right shift — you get through that pretty quickly. I’ve included the link in the show notes to their K750 Apps page Support + Downloads: Wireless Solar Keyboard K750 for Mac – Logitech — available on the Mac app store. They have three apps — the solar app which gives you the keyboard solar charging & battery status, the Logitech Control Center app, and the Unifying Software for their USB dongle setup.
When you press the sunshine button a green or red LED beside the smiley or frowny face light up telling you if it’s charging well or not, and if you’ve started the app in OSX it launches their Solar App. It evens reports how many LUX’s your keyboard is receiving — geeky & cool. I had to load the Logitech Control Center on the Mac Mini, but it seems to work fine on the retina MBP without it — go figure?
The keyboard has full expected functionality. It is really heavy and solid so it doesn’t bounce around when you type. It navigates well and I forgot how much easier it is to move around a spreadsheet with an END button. Page Up & Page Dn make life easier, and it’s wonderful having a full numeric keypad again.
Is there anything I don’t like? Well, I use the option-LeftArrow all the time to jump back a word — and now there’s a Control button beside the left arrow !!! That catches me all the time. And I hate wasting valuable USB ports with connector dongles — but for the MacMini where I’m going to leave this I am super happy to be rapidly navigating spreadsheets just like I could when I used Windoze. Can we hope for more? Yes, Logitech has a full solar wireless keyboard with backlit keys — but the K800 is not for us yet — only PC. And their K760 replaces Apple’s wireless keyboard — it’s both bluetooth & solar.
If you need the numeric keypad like I do, and hate the wire — the K750 is right for you. For the same price as the Apple Wireless Keyboard, this is probably better. Check out Allison’s Amazon affiliate link if you want one, and support the show.
I hope you’ve enjoyed my review of the K750 Solar Wireless Keyboard from Logitech. I’m Ian Douglas — with an idea worth sharing
Thanks so much Donald – if there’s one thing that Mac and PC and tablet people have in common across the board it has to be the constant search for the perfect keyboard! This looks pretty cool, and for the price of around $40US, the idea of having a constantly charging solar keyboard sounds pretty nifty. I always like your reviews so keep them coming!
Donald Burr StarTech SuperSpeed USB 3.0 eSATA Hard Drive Docking Station Review
The problem to be solved:
I’m the proud owner of a Drobo FS. No, that’s not the problem. My Drobo has been absolutely rock solid and performs like a champ. But at the rate I am downloading or generating new data, it frequently demands me to “Feed me Seymour!” So whenever one of the status lights goes yellow I shove in a bigger hard disk. That has left me with a pile of smaller, but still perfectly usable hard disks. So what do I do with them? I could sell them on Amazon or eBay, but that’s almost more trouble than it’s worth. Instead I keep them around, they’re handy for using as archival storage, offsite backups, emergency rescue boot disks, etc.
Of course it would be a real pain for me to have to take apart my computer every time I want to use one of these bare drives. So I got myself one of those hard drive docks. Basically this is a box that sits on your desk, and you can insert hard drives into it just like putting slices of bread in a toaster. You wouldn’t want to permanently run a drive this way, but for short-term use, say updating a backup disk that you take to your office, or storing an edited video project, that’s just fine.
Unfortunately today’s fast hard drives run really really hot. This isn’t a problem when they’re installed in a case or in your computer. But in a drive dock, there isn’t sufficient airflow around them, and so they get HOT. I mean REALLY HOT. Like “you can burn yourself if you’re not careful” hot. That can’t be good for the drive I would think! My previous solution to this was to run a cheap desk fan and have it blowing onto the hard drive, which worked, but looked kinda ghetto, and required extra space on my already-crowded desk. I also recently upgraded to the 2012 Mac mini, which supports USB 3.0, and so I wanted a new drive dock that ran at the faster USB 3.0 speed. As I was looking on Amazon at USB 3 docks, I came across the StarTech SuperSpeed USB 3.0 eSATA Hard Drive Docking Station with Cooling Fan, and figured I’d give it a shot. And I’m glad I did.
It looks pretty much like any of the other drive docks out there. It’s made of pretty thick plastic, not flimsy at all. Unlike some docks, however, the base is not weighted. So sometimes as you lift a drive out of it, you might find yourself picking up the entire dock. I must admit this is a bit annoying, but not a deal breaker as it’s an easy enough problem to solve: just use your other hand to hold down the dock while removing the drive from it. The dock has slots to fit both 2.5 inch and 3.5 inch SATA drives, and it’s pretty easy to slide either type of drive in; and the drive pops out at the press of a button. (You must manually eject the drive from Finder however) A built in light glows to indicate that the unit has power, and it blinks when the drive is accessed. There is a push button power switch on back of the unit.
Now let’s talk about the fan. I was worried that the fan might be flimsy, basically bolted on as an afterthought. Fortunately this was not the case. The fan and the drive dock itself are one solid piece of thick plastic, so there’s no way that this thing is snapping off. It is positioned so that it blows air onto the hard drive, exactly where it needs it, and there is a handy removable grille which makes cleaning dust and other crud extremely easy. However at first I thought the fan wasn’t working; when I plugged in a hard drive, I didn’t hear or see it spin up. As it turns out, the fan has its own power switch. In fact, not only can you turn the fan on and off independent of the drive dock, but you can also adjust the fan’s speed. And, it’s not one of those loud whiny fans – at full speed you can barely hear it. It’s still nice that you have the option of turning it down (or completely off), so, if you are recording a podcast or on Skype or something, there won’t be any chance of its noise getting in the recording. Even when it’s at a fairly low speed it still provides a decent amount of cooling. Drives that on other docks would be too hot to handle are merely lukewarm to the touch in this dock, even after hours of constant disk access. This thing provides excellent cooling.
USB 3 is a definite improvement, and I am glad that Apple is starting to include it in its latest machines. The speed of this drive dock is, in a word, phenomenal. I ran the Blackmagic Disk Speed Test on a 7200 rpm 1 TB hard drive and was getting consistent speeds of about 107 MB/s both read and write; and copying 1 TB of data took about 2.5 hours. Of course it also works just fine with USB 2.0, you just won’t get the super speed. And, as an added bonus, it also has an eSATA port.
The only downside (and this is a minor one) is that with the unit being completely black and all, it’s kind of hard to see the slot where you insert the drive, so I often find myself fumbling around trying to insert a drive into it, and I don’t line it up properly into the hole, and it takes me some fiddling around to get it slotted in properly. But I was able to come up with a solution. I simply placed strips of hot pink electrical tape to mark the dimensions of the hole. (Yes, I happen to have hot pink electrical tape lying about. Don’t ask.) Check the show notes for a before and after picture; you’ll agree that this definitely makes it easier to see where you have to insert the drive.
Before: drive_dock_before.JPG
After: drive_dock_after.JPG
All in all I am very happy with this drive dock. It’s nice and fast, and more importantly, keeps my drives running nice and cool. At $46.99, it may be a bit more expensive than other docks, but believe me, it is worth every penny. Check it out at the link in the show notes.
Only you, Donald would tape hot pink tape all over this device! I get the utility but it did make me giggle to look at the photos. I can verify what Donald said about drives getting hot. Steve took on the task of reformatting and writing zeroes to all of Tim’s drives so we can attempt to sell them. We had a dock of Tim’s to use for the operation, but it didn’t have a fan like the StarTech dock and they were WICKED hot after 8 hours of writing those zeroes. Thanks Donald for a cool solution!
Mark Pouley SleepTimer
This is Mark Pouley with a bit of a twist on the “dumb question” only this is “dumb tip or trick”. You know, its one of those tips you stumble upon on your mac or iOS device that’s been there forever, and probably everyone else is already aware of, but it’s so cool you want to share. Well this is a “dumb tip” I stumbled across last night, and there’s a problem to be solved.
I like to fall asleep listening to music. The problem is that I have over 2000 songs on my iPhone and I don’t want it playing through the night and into the morning. I also don’t want to have to turn it off before I go to sleep. That defeats the purpose. I want the music to end after an appropriate amount of time (say 30 minutes or so) At home I can use my iHome dock and set the sleep timer on the clock to shut off the music. On vacation I only have a set of portable speakers with no timer. That got me poking around on my iPhone and I discovered my dumb tip.
Did you know iOS has a built in sleep timer? Maybe you know there is a clock, alarm and timer app. Well that can be used as a sleep timer. Just go to the clock app, then select the timer. In the middle of the screen there’s a button labeled “When Timer Ends” and you’re offered a selection any number of alarm sounds. Well, I thought the selections were limited to alarm sounds. But if you scroll all the way to the end of all the alarm sounds you’ll find “Stop Playing” Select this option. Set the time (how many hours/minutes you want to play music) and push start. The timer will countdown and when it gets to zero the iPhone will automatically turn off what ever app is playing. I haven’t tested it with every app, but I know it works with the music player and Youtube. Well that’s my dumb tip. Maybe you were all aware of this, but I wasn’t and I know I’ll be using it a lot in the future.
I like the idea of Dumb Tip Corner Mark! This is a cool tip and I’m just glad you didn’t say you like to fall asleep to my podcast…
Clarify
You would think by now that I’d have run out of stories to tell about how I saved the day and used Clarify or ScreenSteps to help someone, wouldn’t you? Well it’s a testament to the products that every week it seems to solve a problem. Shai Yammanee tweeted me that he was thinking about swapping out his optical drive for an SSD like I did and asked if I had any particular advice. The one tricky bit about doing this is explaining to OSX that while your OS and your applications are on the SSD, the user account is way over on your Hard drive. It’s not difficult to do, but it’s completely non-obvious how to do it until you learn the trick. I jumped into Clarify, took a couple of screenshots, did a little bit of annotations and threw a few words around the images, and clicked share to Clarify-it and then pasted the url into the tweet back to Shai. He was delighted to find out how easy it was, and glad I’d been able to easily show him the trick. Well that’s all well and good, but a few days later Casper from Canada had essentially the same question and instead of recreating the instructions, I was able to just pull the Clarify doc from within Evernote and send him the url again. I love helping people learn what I know so this just thrills the heck out of me every single time. If you like to help people (or maybe if you don’t but you have to anyway), you can keep them out of your hair by giving them GOOD instructions so they don’t have to bother you again, check out Clarify from BlueMangoLearning.com either on their site if you want a cross-platform version or in the Mac App Store for only $30.
Chit Chat Across the Pond
Taming the Terminal Followups:
1) Listener Bert posted a comment to point that that cp and mv can be as dangerous as rm because they do not stop you copying or moving one file over another, hence destroying the file that was overwritten irrevocably.
2) Listener Steve Davidson posted a great comment outlining how you can use aliases to help you remember commands/flags you use often: https://www.podfeet.com/blog/2013/07/427-shwood-magic-videos-eye-fi-mobi-diptic-for-mac-collage-image-pro-taming-the-terminal-part-6/#comment-524687
Security Light
Important Security News:
- A few weeks ago we mentioned that there would be a talk at the Black Hat conference detailing how a fake charger could take over an iPhone without user interaction. The talk was given this week, and unusually, Apple have directly addressed a security concern to say that iOS 7 would protect users from this threat – http://www.macobserver.com/tmo/article/apple-fixes-threat-from-fake-iphone-chargers-in-ios-7
- A particularly nasty spate of misogynistic abusive tweets (including rape and death threats) prompt Twitter to add “report abuse” buttons to all tweets – http://nakedsecurity.sophos.com/2013/08/01/rabid-trolls-prompt-twitter-to-promise-report-abuse-button-on-all-messages/
- LinkedIn patch an OAuth bug that could have let people tinker with your CV – if you have a profile, perhaps take some time to check that it still says what you want it to! – http://nakedsecurity.sophos.com/2013/07/29/linkedin-closes-oauth-hole-that-could-have-let-people-tinker-with-your-cv/
- Panel of Security Experts give iOS7’s Activation Lock feature the thumbs up – http://www.intego.com/mac-security-blog/security-experts-to-help-apple-eradicate-ios-passcode-bypass-flaws/
Suggested Reading:
- NSA requested SSL master-keys from internet companies – thankfully most seem to have said “no!” – http://www.intego.com/mac-security-blog/feds-request-encryption-keys-from-web-firms-now-what/
- The Next Snowden Show Drops – this time the details of a program called XKeyscore is revealed. Effectively the entire internet is captured and saved for three days – read more: http://nakedsecurity.sophos.com/2013/08/01/newly-exposed-nsa-tool-xkeyscore-sees-nearly-everything-we-do-online/
- Black Hat speaker details attack on SIM cards that allows remote takeover of cellphones – thankfully this only affects older SIM cards that still use 56bit keys, but there are still a lot of those out there – http://nakedsecurity.sophos.com/2013/07/22/rooting-sim-cards-blackhat-speaker-says-he-may-be-able-to-own-your-phone-with-a-text-message/
- The rather bizarre tale of the Apple Dev Centre hack – http://nakedsecurity.sophos.com/2013/07/22/ibrahim-balic-takes-credit-for-apple-dev-centre-attack-but-will-he-shoulder-the-blame/
Main Topic – A Photographic Trio
This week I want to talk about three related photographic tools, two hardware and one software. In proper NosillaCast style, we start with a problem to be solved! I’ve been doing a lot of night-time photography in the last few months, and I’ve been frequently frustrated by the inability of the lenses I had to capture enough sky to do the constellations justice. I’d be somewhere beautiful like the ruins of Taghadoe church and round tower near Maynooth, and an iconic constellation or asterism like the Plough or the Summer Triangle would be perfectly positioned over the ruins, but I couldn’t capture both together. In short, I wanted to be able to capture bigger sky-scapes!
The obvious solution to this problem is to buy a wider lens. In my mind the idea lens would be a very bright 10mm prime lens that would not cost the earth. It turns out no such lens exists! Normally, primes are cheaper than zooms, and will give better images. They have fewer optical components, arranged in a simpler design, with fewer moving parts. But, when you enter the ultra-wide space, something strange happens, the zooms become cheaper than the primes, and in fact, you won’t find a 10mm prime for Nikon DSLR at all! You’ll also find it very hard to get a bright lens for less than a house payment or two.
In the end, the lens I settled on was Sigma’s 10-20mm f/4-5.6, which I managed to find in Ireland for a little over €400. At a widest aperture of just f/4 at 10mm this is not a particularly bright lens, but it’s the best I could do without getting a fisheye, or spending thousands of Euro. The Sigma 10-20mm gets a good score on DP Review, and is marked on the site as “Recommended” – http://www.dpreview.com/lensreviews/sigma_10-20_4-5p6_n15/
Since the primary function for the lens will be night work, I was sure to pick a lens with a distance scale so it is easy to manually focus it to infinity.
While the lens is not a fisheye, it’s not without distortions. If you keep the camera level, the distortion is not a problem at all, as show by the image below:
http://www.flickr.com/photos/bbusschots/9312051798/
But the moment you tilt it on any axis, the distortions become very dramatic very quickly.
http://www.flickr.com/photos/bbusschots/9252838424/
If you’re careful how you shoot, you can control two of the three axes in the field, but if your aim is to shoot skyscapes over landmarks, you can’t avoid tilting up!
Lets first look at keeping the two axes we can control in check.
The wider a lens is, the harder is to see whether or not you are level through the eyepiece. With a 10mm lens you haven’t got a hope of levelling it by eye, so you’ll need some help. Some cameras have built in levels, some tripod shoes have built in spirit levels, but if you have neither of these, there is a simple and cheap solution – a bubble level that fits into the hot-shoe at the top of the camera. I picked a three-axis hot-shoe level for less than £6 – http://www.7dayshop.com/7dayshop-hot-shoe-spirit-level-3-axis-triple-bubble-ref-hd1114a
Once you have the camera leveled, the other problem you can have is a flat surface that is not perpendicular to the sensor of your camera. If you shoot a wall at an angle with an ultra-wide lens the distortion will be horrible! The only thing you can do to avoid this is to set up your shot so you are perpendicular to any building you might want in the shot.
At this stage, you’ve done your best to minimise the distortion, and, you’ve made sure that the distortion from tilting up will affect the shot in a symmetric way. So what effect does tilting up with a wide angle lens have? It creates so-called keystone distortions:
http://www.flickr.com/photos/bbusschots/9259505188/
You can see in the above image that the top of the buildings is artificially narrow, and the building feel like they are being stretched towards the centre of the frame. You get the same effect when you use a projector at an angle to the screen.
Keystoning isn’t always a problem. Sometimes it adds to the feel of a shot – if you want to give people a sense of a building being very tall, or of looking upwards, then keystoning is actually helpful.
But, keystoning can easily become too extreme, to the point that it utterly detracts from your image, and this is doubly true for images where the building is off-centre:
http://www.bartb.ie/linkStore/CCATP/130804-PTLens/DSC_6099_tonemapped_TopazDeNoise_Blended.jpg
Clearly, this is too much keystoning, so what can we do to correct it? You can’t fix it in the field, so you’ll have to do it in post!
In general LightRoom and Aperture are very similar in terms of features, but one noticeable advantage that LightRoom has over Aperture is built-in lens and perspective correction (see it in action here: http://tv.adobe.com/watch/getting-started-with-adobe-photoshop-lightroom-3/lens-correction-perspective-correction/).
If you’re not a LightRoom user, don’t worry, there are plenty of affordable options out here, ranging form standalone apps, to Aperture plugins. I evaluated a number of the options, and settled on PTLens as the best value for money. It can work as an Aperture plugin or a standalone app, it’s cross platform (OS X & Windows), has built-in profiles for lots and lots of lenses, and costs just $25. There is also a free trial. For more see: http://epaperpress.com/ptlens/
The only ‘documentation’ I needed to get started with this app was the demonstration video linked on the PTLens site: http://www.youtube.com/watch?v=gZZsG9hWfEE
Just like the LightRoom Lens and Perspective correction tools, PTLens does two distinct things, one of which is can do automatically, the other you have to control yourself with a few sliders.
PTLens can read the EXIF data from your image, which will tell it what lens you used on what camera at what focal length. Assuming you’re not using obscure equipment, PTLens will be able to automatically correct the standard distortions lenses create on image, especially so-called barrel distortion. All you have to do to get this kind of correction on an image is open it in PTLens, it’ll do the rest for you.
Removing the barrel distortion is a nice start, but we want to tackle keystoning. This is called perspective correction, and is a manual process. PTLens lets you overlay a perpendicular grid with controllable spacing over your image, and then you use sliders to dial in the correct amount of vertical, horizontal, and rotational shits needed to get all straight lines to be straight, vertical lines to be vertical, and horizontal lines to be horizontal.
If you took the time to level the camera and stand perpendicular to buildings then you should not have to touch the horizontal or rotational siders at all, the vertical slider will be all you need.
When you make perspective shifts, you will lose space around the edge of your image as the bottom gets squeezed in, and the top stretched out to counter-act the keystoning. The output from PTLens will be something like this:
http://www.bartb.ie/linkStore/CCATP/130804-PTLens/DSC_6099_tonemapped_TopazDeNoise_Blended_pt.jpg
You’re not just a crop and a few Aperture adjustments away from a final image like this:
http://www.flickr.com/photos/bbusschots/9412182788/
While PTLens is very powerful, it’s not a miracle worker, the more you tilt, the harder it has to work, and the more of your image you will lose, so it’s definitely best to keep your tilt as low as you can.
You don’t have to use PTLens to remove all of the keystoning though – you can use it to just reduce it to an acceptable level where it gives a nice sense of looking up, without being overpowering:
http://www.flickr.com/photos/bbusschots/9394378461/
Here are two shots of Iridium flares that I took with the 10-20mm lens at 10mm, with the distortions tamed by PTLens:
http://www.flickr.com/photos/bbusschots/9385467375/
http://www.flickr.com/photos/bbusschots/9405185114/
I initially bought the lens only for night time photography, and I’m very pleased with the results it gives me in that arena. But, once the lens arrived I started to wonder what else it might be good for. It turns out to be a very fun lens to use out and about for everything from landscape and railway shots, to architectural shots, and surprisingly, even macro shots!
If you keep the horizon in the middle of your shots you won’t have problems with distortions, so you won’t need to go near PTLens. For architectural shots you’ll absolutely need PTLens to get all the lines straight, level, and perpendicular though, but it’s well worth the effort – the results can be stunning!
Before PTLens:
http://www.bartb.ie/linkStore/CCATP/130804-PTLens/DSC_7760.jpg
After PTLens:
http://www.flickr.com/photos/bbusschots/9321567247/
Some more architectural examples:
http://www.flickr.com/photos/bbusschots/9331158258/
http://www.flickr.com/photos/bbusschots/9365359427/
When shooting landscapes, you need to be very careful in your compositions to get something into the foreground of your shot.
http://www.flickr.com/photos/bbusschots/9352887180/
You’ll be astonished by just how close you have to get to things to get them into the foreground though! The flower in the above example were only about a foot away from my lens!
While the ultra-wide field of view make a good foreground essential, it also makes it easier to get, because you can move a surprising distance in any direction without significantly changing your background – this opens up wide variety of possible foregrounds for each background.
These two shots were taken about 20m apart – you can just make out the bed of orange roses in the distance in the first shot:
http://www.bartb.ie/linkStore/CCATP/130804-PTLens/DSC_7763.jpg
http://www.flickr.com/photos/bbusschots/9328069991/
Having taken a few landscape shots I was happy with, I decided to see if I could use the lens to make some interesting railway shots – yes, I could!
http://www.flickr.com/photos/bbusschots/9352929394/
http://www.flickr.com/photos/bbusschots/9372513850/
While experimenting with landscape and railway shots I noticed that the lens focuses surprisingly close – in fact, at 10mm you can focus to things just an inch or two in front of the lens hood! This opens up the surprisingly possibility of wide angle macro shots, which are both fun and rather unusual. We’re all used to seeing macro shots with very shallow depths of field, and utterly unrecognisable background. This is because most macros are shot with telephoto lenses of some sort (focal lengths greater than 50mm). Dedicated macro lenses are often around 105mm, and I shoot my macro shots with my 18-250mm zoomed all the way in to 250mm. Any lens that has a focal length greater than 50mm will magnify the background more than the foreground, so in effect you get a very small area of the background stretched out across the field of view. This makes the background very blurry and often totally unrecognisable. This has the effect of removing all context from the shot, and allowing the subject to dominate the shot. When you shoot macro shots with an wide angle lens (i.e. with a focal length less than 50mm), the opposite happens, the background gets zoomed out, not in, so we see more of the background than is natural. This means that if you get right in close to a butterfly or a flower, you’ll see it in great detail, but, with lots and lots of recognisable background behind it – giving a wonderful mix of detail and context.
Here’s a regular butterfly shot:
http://www.bartb.ie/linkStore/CCATP/130804-PTLens/DSC_1178.jpg
And here’s a wide angle macro taken in the same garden at 10mm:
http://www.flickr.com/photos/bbusschots/9323039556/
Although the daisies are different colours, and the butterflies are different species, both species of daisy and both species of butterfly are about the same size as each other.
Note that you have to get VERY close to do this kind of macro work, so while this is easy with flowers, it will only work on very timid butterflies! To my surprise though, even out in the wilds of Kildare, there are a few timid wild butterflies, including this chap who was feeding on a nice big bunch of wild Valerian along the banks of the Royal Canal:
http://www.flickr.com/photos/bbusschots/9345322557/
The vast majority of my butterfly shots are taken along this canal, but this is the first one where I’ve managed to retain a sense of place in the shot.
Finally, I stumbled across one more feature of this lens that makes it a lot of fun to shoot with around sunset – it produces really beautiful sunbursts! Most lenses produce sunbursts that are quite featureless, like this example taken with the 18-55mm kit lens that comes with the Nikon D5100:
http://www.flickr.com/photos/23966421@N06/8207258924/
The Sigma 10-20mm is very different though – it gives a six-pointed sunburst, where each of the six big points is made up of six thin lines – it really is very pleasing on the eye!
http://www.flickr.com/photos/bbusschots/9370970131/
http://www.flickr.com/photos/bbusschots/9388183188/
I’ve only had this lens for two months, and already I’ve shot some of my very favourite photos of all time with it. I think it’s fair to say that I’ve fallen in love with it!
That’s going to wind this up for this week, many thanks to our sponsor for helping to pay the bills, Blue Mango Learning at bluemangolearning.com makers of ScreenSteps and Clarify. Don’t forget to send in your Dumb Questions, comments and suggestions by emailing me at [email protected], follow me on twitter and app.net @podfeet. Check out the NosillaCast Google Plus Community too – lots of fun over there! If you want to join in the fun of the live show, head on over to podfeet.com/live on Sunday nights at 5pm Pacific Time and join the friendly and enthusiastic NosillaCastaways. Thanks for listening, and stay subscribed.
CCATP was great fun and prompted me to share that I also purchased a new lens this summer….the Sigma 10-20. As Bart said when we discovered we were both playing with the same new toy, “cool – great minds …. or fools seldom.” I totally agree with Bart on this one. This is a fantastic lens that does so much more then I expected. I wanted to share a few of my recent shots that illustrate the discussion.
My very first “keeper” from the lens was shot the day it arrived in the mail and I took it out for a test run. The image is one of my current favorites and demonstrates just how close you can get to a subject and still get the background. Here the lens is literally in the bed of clam shells:
Shells on the Shore http://www.twinlakesimages.com/landscapes/e6f456e39
While I’m not capturing stars like Bart, I love the ability to photograph a very dramatic sky and still have an excellent foreground.
Clouds http://www.twinlakesimages.com/landscapes/e6c0bd889
http://www.twinlakesimages.com/landscapes/e6a92f5f9
http://www.twinlakesimages.com/landscapes/e62be9d30
This is a really fun lens and, like Bart, I’m having a wonderful time experimenting with the new opportunities it offers me.
Ok, that is pretty cool Mark. This episode might end up costing Steve a lot of money.
Very good review of the Sigma 10-20mm lens Bart. I liked hearing how much more versatile the lens is than you originally thought. You’re review is going to cost me, I’m sure of it.
You made the comment that “If you keep the horizon in the middle of your shots you won’t have problems with distortions …” That got me to wondering why that is. I think it’s because we have such a strong sense that the horizon should be relatively flat and level, assuming you’re not in space or at very high altitude. After all, the horizon is often our reference for many activities. So if the horizon is not relatively flat and level, things in a scene will look askew. However, other objects in the view that are off of the horizontal center line will be distorted by the lens. I think those distortions are just not as noticeable as a distortion of the venerable horizon.
Nice post!! I am impressed by your blog you wrote here very informative information about Logitech keyboard. Thanks for sharing this information.