
In Programming By Stealth with Bart Busschots we just passed a big milestone, not only reaching 100 episodes, but we also completed the section on learning JavaScript. Our final project for this phase was to create a web app with a very specific kind of clock on it. I had so much fun doing the design and coding on this project that I want to walk you through what I designed, how it was implemented and to talk through some of the user interface design decisions.
I promise I won’t get into the nitty-gritty of the code itself. This might be enough to tease you into learning to program yourself, or at the very least it will help you think about what goes into making web pages interactive.
My project is called Time Shifter Clock and you can find it at podfeet.com/time-shifter-clock – because everything good starts with podfeet.com, right?
The problem I’m trying to solve with my clock is how to tell someone in a different timezone what time you want to meet with them. This comes up in podcasting all the time, but I bet it comes up for you too. Maybe your company spans timezones and you can never figure out whether your co-worker is in the part of Arizona that follows Daylight Saving Time or the part that doesn’t. Maybe you’re trying to plan a family Zoom to stay in touch. In all cases, you spend a lot of time and energy trying to figure out how to explain a future time in two different timezones.
As I’ve mentioned at least 238 times before, I have a lot of trouble with addition and subtraction due to my earliest education being hampered by New Math in the 1960s. Arithmetic using the number 8 seems to be even worse than most numbers. So when Bart, who is 8 hours away from me most of the year says to meet him at 11 pm, there’s a really good chance I will show up at the completely wrong time.
You may be yelling at your podcatcher that there are a zillion services out there that will provide you with the current time in two timezones. That is absolutely true. But they all tell you what time it is now, not what time it will be if you shift forward in time. That is the problem my clock solves.
Bart added a twist to this for us. I had planned on making a web app that would tell me what time it would be in my time and someone else’s time zone and then I would manually go type it in an email or text to that person. He upped the ante by telling us to figure out how to have this little web app create a URL you could send to someone and when they opened it in a browser it would show them the time. That made the game a lot more interesting.
Classes and Instances Avoid a Bad Smell
For my Time Shifter Clock, I wanted to show three clocks as a minimum:
- The current time in your timezone, with the seconds indicating that the time is being constantly updated
- Two clocks that will shift in time, but will not update every second like the current time
There are two ways to do this in programming. Option 1 is I could create three clocks, where the code for the two shifting clocks were replicants of each other and the current time had some of the same replicated code. Replicated code is what Bart says is called a “bad smell”. That bad smell means that if you decide to make a change or find a bug in one place, you have to remember to fix it in the replicated code.
Option 2, which is what all the cool kids who have made it past PBS 94 know how to do, is to use what are called Classes and Instances. The basic idea is you create a Class for a clock that has all of the basic bits and pieces that will exist in every clock, and that every variant is an Instance of that clock Class.

For example, my clock Class has a function that checks what timezone has been specified and fetches the time. I don’t need to write that function three times because it’s in the Class. But I do need to be able to represent different timezones in the different Instances of the clock Class.
To do this, you create what are called Instance attributes, and each Instance of the class can have different values for the attributes. I can assign a different timezone to each clock and then the function to find the time can be written only once but returns three different values for the three different clocks.
One of the attributes I put in my clock Class is called timeShifted. If the instance of my clock Class has timeShifted set to false, then it will be unaffected by any user interface element I create that tries to shift time. If it’s set to true, then that particular Instance of the clock will shift time when directed to. This is how I have one clock showing the current time in your timezone, and two clocks that shift in time, all without replicating code to show three clocks.
I think that’s really cool and powerful. I may have been overzealous about Class attributes though. I can change the background color, whether there’s a border and all kinds of other nonsense that really doesn’t matter very much. I’m pretty sure I have some attributes in there that I never even use. It’s on my ever-lengthening to-do list to clean that up.
Search Boxes for the City
I wanted the user to get to choose what cities would be represented in the two time-shifting clocks, so I gave the clocks an Instance attribute of whether to have a search field (the local time doesn’t get one), and I prepended a pretty little icon of a magnifying glass to the text input box to give the user a hint that they were supposed to search. That little magnifying glass comes from a really cool service called Font Awesome, which Bart is wild about. In fact, I’m pretty sure adding the magnifying glass was his idea.
I decided the clocks would make more sense if they had a default city in them, so I set the first one to Los Angeles and the second one to Dublin. I know that’s selfish because it means for me to work with Bart I don’t have to search, but hey, I did all the work, I get to choose the defaults!
Event Handlers to Shift Time and More

On a web app like this, if you want a user to be able to change things, you add what are called Event Handlers. That’s a fancy way of saying, “If the user pushes this here button, go execute that there code.” It’s pretty obvious that I would need a few of these Event Handlers.
The most critical one to the whole design was an Event Handler that would allow the user to shift time into the future. I decided to use what’s called an input with type=range. In English, that means a little slider bar you can drag to shift time.
When the page first loads, the two clocks that will shift get populated with the time. So let’s say it’s 4:13 pm in Los Angeles and 12:13 am in Dublin when I first render the page. Those times will be frozen waiting for me to shift them, even though the current time will advance with each second. That’s a little weird, but shifting a changing time is too head bendy for me.
In designing the time shifter slider, I had to decide what increments of time the user should see and how far into the future they would see. I decided granularity of a half-hour and seeing a week into the future would be a nice sweet spot. Implementation of this created another UI design decision. If you launched this web app at 4:13 pm, would you want a half-hour increment forward to be 4:43, and then 5:13? Probably not, because you’re not likely to ask someone to meet you at such a weird time.
So in my code, I decided to round the time down to the nearest hour as soon as the person starts to slide. So if it says 4:13 when you load the page, when you start to move the slider, it first would round down to 4:00 pm and then advance forward from there. This might be a little confusing to the user, but later on, I’ll explain how I solved that possible confusion.
Remember upfront I said that we had to create a sendable URL that when received by someone else would show them the time you wanted to meet? That is triggered by another Event Handler. It was great fun writing the underlying code to make the magic happen when you click the big red “Copy URL to Send Times” button on my web app.
Bart also thought it would be useful to allow the viewer to choose whether to see the times chosen in 12 or 24-hour clocks. For that Event Handler, I chose a little toggle. I like this feature because my brain can’t 24-hour clocks. I find myself always thinking, “Wait, 1300 hours, that’s 13 minus 8, carry the 2, move the decimal place…” But I can send Bart the time in 12 hour using my Time Shifter Clock and when he receives it he can change it to 24-hour to see it the way he likes it.
After the user makes all of these decisions, choosing the two cities, dragging the time shifter forward in time, setting 12 or 24 hour as the format, they then hit the big Copy URL button and send it to their partner. Now here’s the really fun part. When the other person receives this URL and opens it, they’ll see the whole clock interface I’ve been describing, and if they don’t like the time you chose, they can slide it to a different time, copy the URL and send it back to you. I think it’s a great way to collaboratively decide on a time that’s right for both people.
Bootstrap Collapse

Another challenge in the design of my Time Shifter Clock was how to explain it to the user. Like I said upfront, this tool does something different than all of the other timezone websites out there. I knew I needed an explanation, but have you ever gone to a website where there’s a ton of words to explain it and you just start pushing buttons instead of reading? I needed a way to explain it but only if the user asked for it.
My first idea was to use a Font Awesome icon like a little “i” in a circle, and if you hovered over it, you’d get a popup that showed you an explanation. This turned out to be a hot mess. While it worked ok on the desktop, it was a disaster on mobile. On an iPhone held in portrait position (vertically), tapping on the information icon would pop up the message, and instantly it would disappear. But if the phone was held horizontally in landscape position, it worked just fine. I have no idea why it didn’t work in only one orientation.

I posted a question about it in the Programming By Stealth channel in our Slack community and Marianne suggested I set the trigger on the popup to click instead of hover. Made sense since there isn’t really a hover option on mobile devices. While this successfully stopped the disappearing act, there was an even worse side effect. If you got the information window to pop up, it covered the icon so you couldn’t tap it again to make it go away!
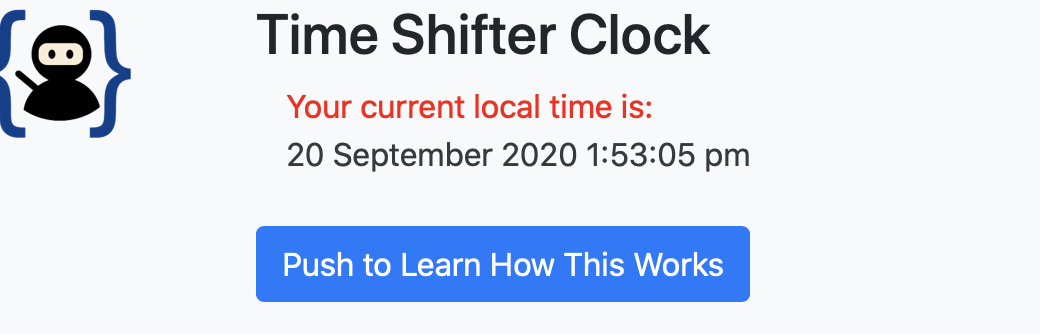
I started hunting for a better way. Most of the heavy lifting of creating the nice layout of my clock web app has been accomplished using a plugin called Bootstrap. There’s a feature of Bootstrap called Collapse. Basically you can create a click handler on a button that slides down a section of text and then collapses it back up when you tap it again.
It’s very elegant and works perfectly. When you look at my Time Shifter Clock there’s a giant blue button that says “Push to Learn How This Works”. Click it once and a short explanation elegantly slides into view, click it again and it rolls up out of the way. I’m so happy with this solution because it’s clear, it’s there when you need it and it’s gone when you don’t and it works beautifully on both desktop and mobile.
I was so enamored of this Bootstrap Collapse technique that I added another one. Remember I was explaining how the time shifter rounds the hours down to the nearest hour before advancing forwards in time? I thought people might be confused by that. Right above the slider, I added a little question mark from Font Awesome with the word Help next to it, and if you tap it, a little box slides down to reveal the explanation of how the feature works. Again, informative and elegant.
Navbar During Development & Why

When I first started developing my fancy Time Shifter Clock, I was constantly studying documentation to learn how to create the elements of my design. In particular I needed to learn how to use some plugins for Javascript that would do all of the excessively complex time math. Those two plugins are called Moment.js and Moment Timezone.
I also needed to look things up in the Programming By Stealth show notes, and the easiest way to do that has been by using Dorothy’s awesome PBS Index. In all, there were 8 different places I was constantly going to on the web to look for methods, and it was getting tedious opening them all of the time.
One feature of Bootstrap allows the developer to create what’s called a Navbar at the top of the screen. I added a Navbar to my web app to include what I call “Helpful Resources”. On a big screen, my Navbar shows links to the timezone documentation across the top, and then a dropdown menu of PBS resources.
The cool thing about using Bootstrap is it makes it easy to have adaptable menus for the small screen too. When you look at my Time Shifter Clock on a mobile device, all of these menus collapse into a cute little hamburger menu.
While this Navbar was super helpful for me in the development process, if you look at my web app right now you might find it curious that they’re even included.
Future Enhancements
I’m planning some future enhancements right now, and one of them is to get rid of my lovely Navbar. I’ll certainly do a new one on my next project while I’m working on it for my own use, but now that my Time Shifter Clock is officially released, I think it just takes up space with no value.
The bigger enhancement I’m working on right now is to give the ability to add more cities. Right now you can only see the time in two timezones, but what if you’re trying to coordinate three people or more?
Remember how I said that I used Classes to create my clocks, and how that made it easy to have multiple clocks without replicating the code? Well…it turns out the way I implemented this idea caused me to sort of hard wire some bits and pieces. While as a developer I could make there by 3 clocks pretty easily, allowing the user to do it with a push of a button isn’t possible.
Dorothy has been helping me noodle out where I need to make some fundamental structural changes to the code, which has been super helpful. I know what I need to do and I think I even know how to do it. That said, it will probably be months of entertainment for me to try and execute on this task, without breaking the time or the date or the time shifter slider…
Bottom Line
I hope you enjoyed getting a little glimpse behind the curtain of what goes into the design of a little web app like mine. I have had such fun designing this, making the decisions on the user interface, and building a truly useful app that solves a real problem. I hope you’ll go give it a try over at podfeet.com/time-shifter-clock. If you want to see the real guts under the hood, of course, it is released as open source at github.com/NosillaCast/a-world-clock.
I’m feeling quite the little developer now – there are now THREE whole web apps at podfeet.com/webapps – my Time Shifter Clock, My Currency Converter and my Guess a Number Game!