With a lot more working from home lately — I’ll let you figure out why — I discovered that my study (you North Americans may call it a den) just wasn’t a nice place to work for an 8-hour day. Part of that was not having much room to move — it is half the size of a standard bedroom — but most of it was my tiny desk. A diminutive 1.2 × 0.75 metres, it barely had room for the basics, and it had no means of adjustment except one of those keyboard tray thingies that sagged to almost, but not entirely, exactly the wrong height, and which had wicked sharp workings underneath that could do… correction did do serious damage to knees.
There was also a contraption underneath passing itself off as a foot rest, which I didn’t need, but was not removable. In fact, the foot rest completely prevented me from putting my feet flat on the floor, which is where they should generally be. It had served its purpose — I’ve had it about 25 years — but it needed to go. Imagine my luck when, in mid-October, my employer negotiated a few “work from home” equipment deals with some local suppliers and one of them sold desks. But not just any desks.
I have been seeing a physiotherapist through most of 2021 for problems with my back. I’ve just about beaten the problems, but I emailed him and asked, “would you recommend a standing desk for my situation?” His answer was an emphatic “Yes!” I only had two weeks in which to order the desk, so after some procrastination and okaying the significant cost with my ‘financial director’ I placed the order. There was just one thing standing in my way: the new desk is 0.8 metres deep, but 1.8 metres long. It would fit in the study — with a little work.
Let’s just say I’ve been meaning to clean up my study for a while now. Ten years is a fair estimate of how overdue this task was. It had become a kind of “room of requirement” in that it probably contained what I was looking for, but most things put down more than a few weeks ago ended up in a parallel dimension. I started working on clearing it out in anticipation of ordering the desk and finally, a month later, had cleared it enough to remove the old filing cabinet, and the old desk, and assemble the new desk in place.
Loctek Pricing and Options
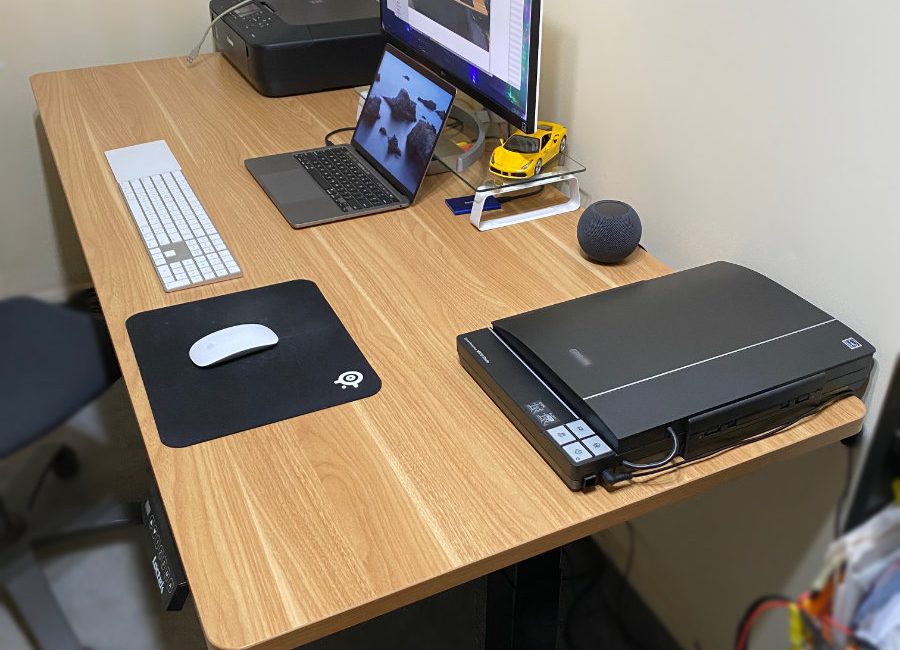
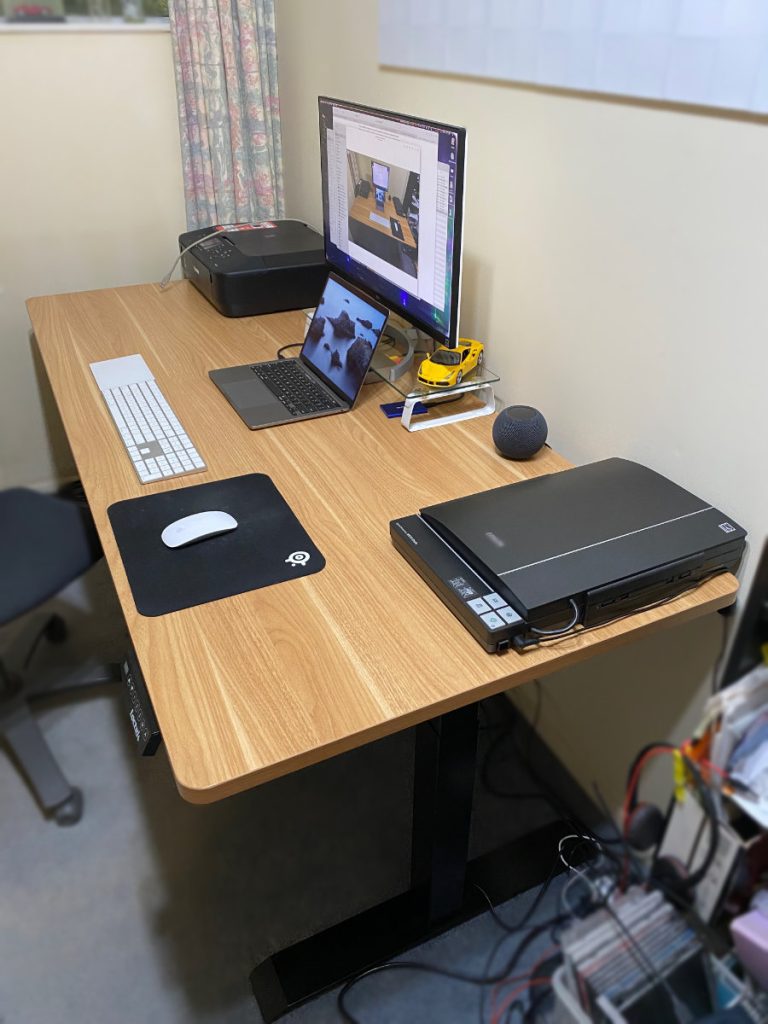
The desk is made by Chinese company Loctek. I could not easily find a US supplier — Amazon don’t seem to carry them — but there are several in New Zealand, so I expect it will be available in many places around the world at local outlets.
With my employer discount I saved NZD$100, which was almost exactly how much the shipping was, so I paid NZD$817.70 in total for the Loctek ET203IB. By my calculations, it should be around USD$400 before tax. There are different desktop sizes — mine is the largest — and there are three colour choices for the frame and legs, and different wood looks for the desktop.
In fact, on the manufacturer’s site there are loads of options including numerous accessories ranging from a cable tidy to a monitor arm to an exercise bike to sit on while working! My choices were limited to the size and either black or white frame, for which I chose black. The desktops were all the “Honey Oak” veneer finish, which I find very pleasing. There are also different models with functional differences like a single motor or an advanced control panel.
Design and Assembly
The basic design has two sturdy inverted-T shapes for the legs, where the vertical part contains the extension mechanism with a motor in both sides. These meet the equally sturdy under-frame at the midpoint of each end of the desk, leaving most of the space under the desk unencumbered, and nothing to challenge your knees.
At first, I thought this centred design would make the desk unstable, but it is very steady. If you bang the desk with your fist, it vibrates, rather than wobbles. Assembly was straightforward with everything you need provided, though I opted for a ratchet screwdriver set over the provided combination Philips/Allen key.
The hardest part was moving it into the study, as the two packages (one for the desktop, and one for all the other parts) totalled 69 kg! The under-frame came already attached to the desktop, and the two legs just slotted into place to be secured with screws. The control panel then plugged into the control box (that sits in the centre of the under-frame) and was affixed to the underside of the desktop with screws. That’s it! There was a bit of cable routing to do, through provided channels, but the assembly only took my son and me about 20 minutes.
Operation
Operation of the desk is by the control panel which sticks out from under the front of the desk at one end. It has 7 buttons and a three-digit LED display. The display usually shows the current height but is also used for some other functions.
The height shown is the distance from the floor to the top surface of the desk, in centimetres. The panel is dormant by default, but pressing any button wakes it up, showing the height and making the buttons active. The buttons are one each for up and down, three preset position buttons, numbered 1, 2, and 3, a memory button for defining the presets, and an alarm button. The alarm can be used to remind you to regularly change position. My physiotherapist recommended changing from sitting to standing and back often throughout the day, and the alarm’s default time is 45 minutes.
I have preset 1 set to 71.9 cm which, with my appropriately adjusted chair, gives me the right ergonomic height for my Magic Keyboard. For standing, I have preset 2 set to 120 cm which gives me the same elbow-to-keyboard position as when seated and, happily, is high enough for me to push my high backed chair underneath the desk. It takes about 12 seconds to motor between those two settings, meaning it moves at a speed of 4 m/s. You can also just push the up or down buttons to any position, but now I have the presets set right, I don’t find myself using them.
The anti-collision feature will stop the desk moving if it detects resistance. It defaulted to its highest sensitivity which seemed to cause the desk to stop itself every time I sent it up or down, even though there was no obvious impediment. I initially turned it off but have now set it to the least sensitive setting because I know I will forget to remove my chair from underneath one day.
So far, it seems to go up and down between my presets just fine. Speaking of which, there is a duty cycle for the motors mentioned in the instructions. It says the motor should not be operated for any more than 2 out of any 20 minutes. Given I can go up and down 5 times in 2 minutes, this seems unlikely to be an issue.
Bottom Line
That’s pretty much it. It is a big, sturdy desk that’s pleasant to look at from any angle (including underneath!) and lets me easily switch between sitting and standing when I choose. The one significant caution when using a standing desk for computing is that cable management takes on a whole new dimension! The trick is to raise the desk before adding an item that requires a cable to the floor. You’ll still need to make sure lowering the desk doesn’t cause it to get caught for the next raising. I have a couple of devices that have power bricks that do not reach the floor, which I have solved for now by placing a suitable box against the wall for them to sit on.