When we left our hero at the end of Part 1, he… I… had a working set of controls for my NanoLeaf lights. Once I had my buttons working, I decided I wanted to have some nice images to place on them to make the actions clear, and which were nice to look at.
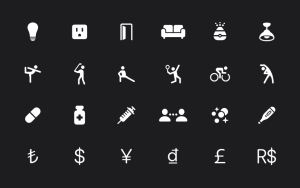 The icons provided as standard in the Stream Deck software are very limited, so I decided to look at the third party icon pack add-ons which can be accessed through the Stream Deck app. When I looked, there were 61 packs available, but many, even most, were either geared towards particular applications, like Adobe After Effects, or followed some kind of theme like the “Horror icons” pack. I looked at a few packs and none were taking my fancy. Then I spotted a quartet of packs based on Apple’s “SF Symbols” iconography.
If you pay attention to Apple’s WWDC, you may be familiar with these. Apple’s software and many third party applications on Apple platforms use these icons which are part of the Apple operating systems. The four sets available for the Stream Deck comprised the four different colour styles offered by Apple. I downloaded the monochrome and colour versions.
SF Symbols contains over 4000 icons so there are plenty to choose from, and these were, in fact still are, my go-to icons for initial setup. However, for my lighting buttons I wanted something much more representative of the devices themselves, and of the subtle differences the buttons represent. Something that clearly shows the resulting light modes. For this, I decided I needed to create my own.
I have long opined that “Photoshop” is a poorly named piece of software. I no longer use it, but when I did, I very rarely used it for photos. What I used it for a lot was graphics work. These days my choice is the Photoshop competitor, Affinity Photo, although in this case Affinity Designer is the better tool.
The reason Designer is better is that the graphics on the buttons need to be simple and clear and using vector shapes and tools is a better fit to achieve this. If you only own Affinity Photo, it has enough shape tools to get by but, for example, you cannot combine shapes with boolean operations — an operation I needed to get one of my key designs to look right.
![]() After a little sleuthing I came up with a button size of 72 pixels square. Affinity Designer can actually size its documents in pixels which makes the final exports very simple. You can also switch to pixel mode to get an idea of how the final result will look, although they are only about 13 mm square on the Stream Deck so you can get away without worrying about this as long as you don’t use fine lines.
After a little sleuthing I came up with a button size of 72 pixels square. Affinity Designer can actually size its documents in pixels which makes the final exports very simple. You can also switch to pixel mode to get an idea of how the final result will look, although they are only about 13 mm square on the Stream Deck so you can get away without worrying about this as long as you don’t use fine lines.
I won’t bore you with how I created my designs — they range from simple combinations of coloured squares to represent the NanoLeaf Canvas panels, to more involved designs to represent my spotlights that hold the main three NanoLeaf Essentials bulbs. If you have any skills with a graphics application, I strongly recommend you have a go at creating your own. In many cases the buttons will be more pleasing, and more obvious in their function.
The next problem I decided to solve came in the form of my day job. I currently work from home 3-4 days a week and doing so involves spending a fair amount of time in Microsoft Teams. I have a love-hate relationship with this application. It is, on the whole, quite superior to what came before it in our company, but at the same time it has a significant number of “paper cut” issues that bug me daily.
The first problem may not be the fault of Teams but, for whatever reason, the mute button on my headset, which had worked consistently for months, recently decided it sometimes wouldn’t. The light on the headset cord, the mute indicator in Teams, and whether or not anyone can hear me, all seem to have a tenuous relationship, such that I am never sure if I am muted or not if I use the headset button.
The solution is to use the mute button in the Teams window, but this can be hard to hit accurately and is next to other buttons I do not want to click by accident. It does have a keyboard shortcut, but that is a bit of a handful and only works if Teams is the current application. When I am on a call this is often not the case. What if I could have a button on my Stream Deck that would mute and unmute Teams no matter what?
While it is possible in macOS to send a keypress directly to a specific application — and this is something I will delve further into in part 3 — I discovered a simple hack that did the job. Mostly. Many applications will, if already open, respond to an Open request by becoming the active application.
My mute button strung together three actions: Open Teams, Delay for 50 ms, then press ^⌘M. The 50 ms delay was needed to give Teams time to become the active application. There is a caveat with this approach that I am fairly sure applies ONLY to Teams. Teams is… special. It doesn’t behave like most Mac apps in that its response to being activated is not always to show its main window and accept input.
I’ve seen this even with a simple ⌘Tab keypress where the menu bar will change to show Teams is the active application, but macOS does not switch to the only Space that has a Teams window. Some internet sleuthing suggests this is caused by Teams having an invisible window that it uses for call notifications. I first tried this technique with another application and for that it worked without fail.
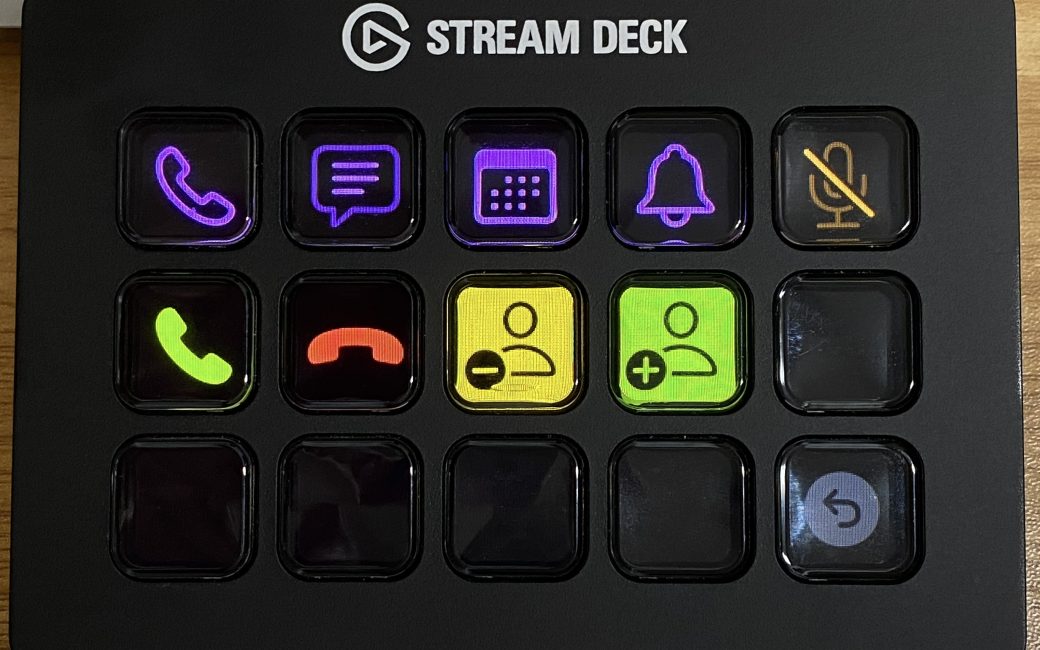
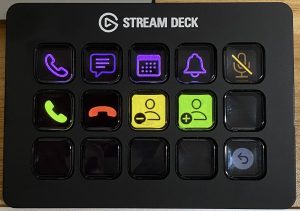 Having got my mute button working, mostly, I set about finding other keyboard shortcuts in Teams that I could place on my Stream Deck. I added buttons for answering and hanging up calls, sharing my screen, and switching to four of the main areas — calls, chat, activity, and calendar. Those were all set up the same as the mute button, just with different keyboard actions on each. Then I decided to try addressing another issue I have — setting my ‘presence’ status in Teams.
When in the office, I habitually lock my Windows laptop as I leave my desk. This is easily done on Windows by pressing the Windows key with L. This also automatically sets my Teams status to Away. When I’m working from home, there is no need to lock my Mac and I am not in the habit of doing so. When I remember, I manually set my status to Away before leaving my desk, and then inevitably forget to set it back to Available when I return.
Achieving the necessary clicks to change status is fiddly, so I had learned how to do it via the keyboard. Pressing ⌘/ invokes the command field of Teams (usually), where simply typing “Away” or “Available” — or in fact, just the first two letters of either — and then pressing Enter changes my status. But I’d still forget quite often when returning to my desk.
The buttons I created to achieve this were quite similar to the earlier ones, but with some extra steps. As before, they started with “opening” Teams, delaying for 50 ms, then pressing ⌘/. Then I added another delay of 50 ms to allow time for the command field to become active, and finally added a Text action to type in the necessary text of either “Away” or “Available”. The Text action has a checkbox that I checked to make it press Enter after typing the text.
So now, subject to Teams responding like a normal application, a single button press would set my status. Having two buttons on my Stream Deck seems to make me forget way less often. Except… sometimes Teams just stops responding to the ⌘/, even if I type it myself.
A final button in this set is simply set to open Teams, in case I haven’t already got it running. For the icons, I have so far just used SF Symbols though I will eventually spend some time to come up with some more recognisable images.
At this point, I still felt like I’d only scratched the surface of the things I could set my Stream Deck to accomplish. I mentioned previously about looking into targeting keypresses directly to applications — something I have since achieved — but there are many other areas to be delved into including presenting live information on buttons and having them react automatically to changes on my computer. Believe it or not, part 3 barely touches on this aspect, so there may yet be a part 4!
[…] the end of Part 2, I had a really useful set of buttons, many with nice button faces, and I was looking into how to […]
[…] in January of 2023, I contributed a three part series to the podcast, called “Stream Deck — Down the Rabbit Hole”. In that, I mentioned I […]