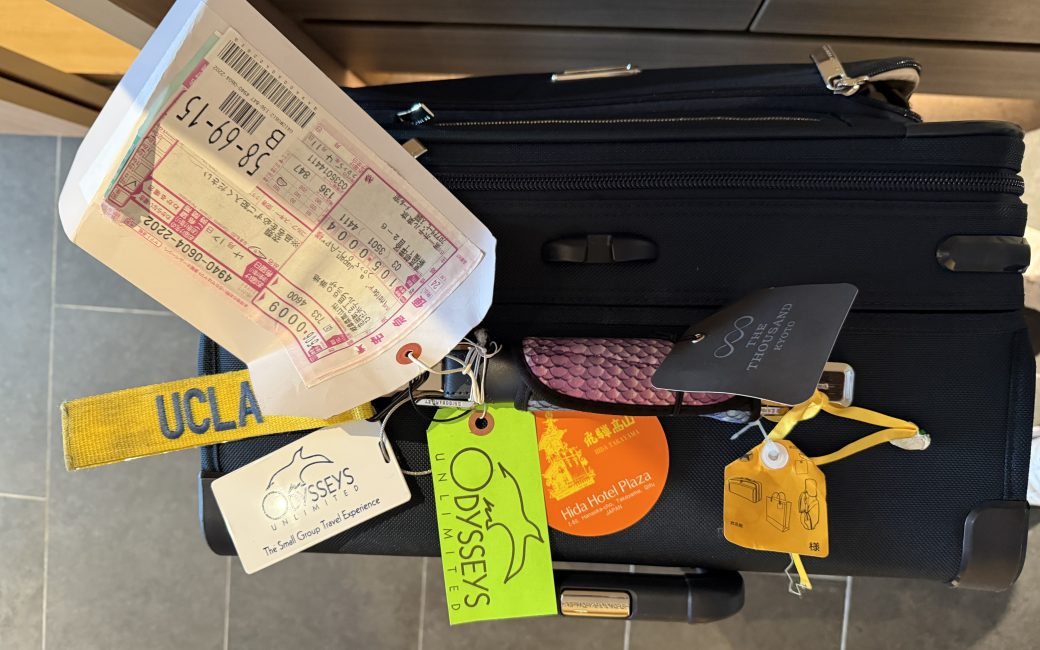
I’ve mentioned before that while Steve and I are on our grand adventures around the globe, I write a daily travelogue email to around a hundred people. Every trip, when I mention it, more people sign up, so they must be in some way entertaining. I guarantee the travelogues will be low on facts and high on silliness, and I think I deliver on that promise. Imagine sentences like, “Here’s a picture of a statue of some guy who evidently did something cool.” There are also lots of pretty pictures, so you don’t even have to read.
I’ve finally created a web page with links to PDF versions of all the travelogues I’ve written over the years. I’ve buried it a little bit since it’s not mainstream tech. If you go to Podfeet.com, one of the buttons says “Special Pages”, and the travelogues are one of those special pages. Or you can go to the link in this very article. It’s called: Travelogues of Our Adventures.
I wanted to talk a little bit about the process to create these and the tech behind making the final product in PDF form.
Taking Notes
Organized tours always have an itinerary (which is sometimes more of a guideline), but it will be listed by Day Number, not date. This allows the tour companies to reuse the itinerary for any start day, but Day 3, for example, will always be in the same city regardless of the date. This day number ends up being critical to trying to keep track of what we’ve done on our trips.
Whilst out on adventures, we’re usually with a tour guide who will tell us things like the name of the city we’re visiting and what we’ll be seeing for the day. I start with a folder in Apple Notes for the entire trip, and I create a new note for each day. There’s often spillover between the notes because you’ll find out on Tuesday what you’ll be doing the following day, but I don’t worry too much about organization at that point.
There’s a reasonable chance I know what day number we’re on in the tour, and I make that the title of the note. For example, I have a note entitled Day 14 Myajima and the notes say:
- Ferry peer 10 min ride
- Half a day
- Famous for shrine world heritage site floating on the sea.
- Unagi is endangered (fresh water in river)
- Anago is sea eel
- Small boat to the pier near A bomb tower
- Make paper cranes
That’s not much to go on to write a travelogue of the day, but it reminds me where we were and what we were supposed to find interesting. Once we’re out and about, I jot down more cryptic notes of things I’m finding interesting. They are by no means full descriptions, but they’re enough to match to the photos I take during the day to remind me what we saw.
Shared Photo Library
A key component of my letters is having good photos, and Apple’s new Shared Photo Library makes this much easier than it used to be, as long as you have good Internets. Good friend and NosillaCastaway Norbert Frassa showed us a nifty trick on how to make them work well for us.
I complained to Norbert that while we love Shared Photo Library when we’re on trips, when we get home, Steve ends up with photos of serial numbers on the back of electronics that I’ve taken, and I get photos of the tree outside our house from him because we forget to turn it off. Norbert explained that you can set Shared Photo Library to only turn on when you’re away from home.
On your iPhone, in Settings, scroll down to Apps, select Photos, and under Sharing, select Shared Library. On the next screen, below Participants, select Sharing from Camera. If you turn it on, you can then choose to share automatically as we do, or share manually. But the magic toggle Norbert pointed me to says “Share When At Home”. By default, turning on Sharing from Camera will toggle that on, but we wanted it off, so we only have shared photos while traveling.

For us, there are many advantages to using a shared photo library while traveling. One of the biggest is that Steve and I no longer compete for photos of the same darn thing. If I see him take a photo of a sign as we enter an area, I know I don’t have to take that photo to remember where we were. We still compete in being creative taking photos of waterfalls and beautiful scenery, but when we get back to the hotel, unless we pay close attention to the number in the photo title, we can’t tell who took which one anyway.
The Hard Part — Writing Every Day
The hardest part is setting aside time to write the travelogues every day. If I get behind by more than a day, the memories already start to fade, and it takes super-human effort to do more than one until I catch up.
Most trips include some downtime, and while normal people take naps or casually stroll the local environs to relax, we head to the hotel and I’m head down writing until I run out of time. Each trip is different in how hard this is. Antarica had a fair amount of downtime, but the cellular Internet service was pretty bad, so moving photos between me and Steve was challenging. Japan was a lot easier with just the right amount of downtime, with good Internet. I remember sitting on deck on the small boat we took to the Galapagos and while everyone else was relaxing reading a good book or soaking in the sun, I was typing away furiously to take advantage of the tiny bit of Internets we had available.
So it does take discipline. Luckily, I have readers like Norbert who give me a hard time if I don’t deliver on schedule, so that helps.
People laugh at me that I carry my laptop on these crazy adventures (including places like Machu Picchu in Peru), but it’s the only way I can efficiently write these letters. When we were in Chile, traveling long hours by bus between telescope sites, I remember I tried to do it using my iPad Pro. Even using the Magic Keyboard to type, it was arduous and clumsy to move photos from my library into an email, and I gave up on the idea.
I do the writing in the Mail app on macOS, which allows me to choose an image size. In Antarctica, I had to choose the nearly postage-stamp small size because of the slow pipes, but medium seems to work in most more civilized locations.
When I’m done with my masterpiece for the day, Steve usually has time to check my writing to make sure I didn’t miss something important or get some minor fact completely wrong. At that point, I address the email to Steve and BCC a list I have in Contacts called Vacation Emails.
I’ve given up on trying to keep up with Steve on social media, so as he writes his Facebook posts, he may generously “borrow” from what I’ve written in the letter.
Smart Folders in Photos, While in Different Timezones
Now let’s back up to a bit of clever organization I do within Photos. Our trips are pretty much always to different time zones, and if we’re enough time zones away, that can wreak havoc for figuring out what day a photo was taken. For example, when we were in Japan, we were 16 time zones ahead, so nearly always on a future day than California. I have an organizational technique to solve this problem, but it must be executed when I’m in the travel timezone, not when I’m at home.
I create a folder structure in Apple Photos by year and quarter for normal events but the important subfolder to that is one for the entire trip. My folder for Japan is entitled “2025 04 Japan”. Inside that folder, I’ll be creating a new album for each day. Note that you can search your Photos library by words in album names, but search will not search words in folder names.
Now for the trick. Using our Japan trip as an example, let’s say we’ve completed Day 5 of our itinerary, which for Japan was April 11th. I create a placeholder smart album inside my folder for the vacation, and for this day, it will simply be called “5”. The rule for the smart album on Day 5 is simply Date Captured is 4/11/2025. This is a placeholder album because when I get home to my home time zone, the matched photos to the rule will actually change.
Right after making the smart album, I create a “real” album and entitle it with the year, month, date, and the day number of the trip (5), along with some hints of what we saw that day.


You might be wondering why I named the smart album a simple number. The main reason is for simplicity of figuring out if I’ve incremented it for the next day. So on Day 6 of the itinerary, I can see that the smart album still says 5, which tells me I haven’t yet incremented it to look at April 12th. I could title it with the date, but that’s a lot more typing than just changing 5 to 6. It takes some rigor to keep the date and day number in sync, and I don’t always succeed, but it’s good to have goals.
Working with Pages
Each day after sending the email travelogue, I copy and paste the content of the latest email into one long Pages document. Keeping up with this is also important because if I wait a few days, the inevitable responses to the email telling me how clever and entertaining I was (or how many mistakes I made) muddy up trying to find the original email to copy and paste.
The hard part is formatting the text and images so they look good in a Pages document. The first step in the process, I suggest you follow if you choose to do anything as nutty as this, is to have Steve do all the editing and formatting. It’s really very simple if you do.
But in all seriousness, there are a few tricks I’ve learned with Pages to make the formatting easier. I’ve recorded my process in Keep It from Reinvented Software, the application I use to help future me when solving the same problem. By adding it to this blog post as well, there’s a good chance some day in the future I’ll be searching the web for, “How do I …” and find this article on podfeet.com.
Bold vs. Title vs. Heading for Table of Contents
When I first started working on one of these Pages documents, I made the title of each day’s entry bold and a big fat font. But then it occurred to me that it might be of benefit to readers of these tomes if they had a table of contents. Pages can auto-generate a table of contents, but there’s a trick to it. Every time I work on one of these documents, I think that the trick is to make each day title a Subtitle in the formatting menu. But that is incorrect. Each day title has to be a heading, not a title or subtitle.


Remember the table of contents when it comes time to turn this into a PDF because there’s yet another trick you need to know or it will disappear!
Formatting Pictures
If you have infinite patience, I suggest you spend some quality time on each image experimenting with the five different methods to arrage objects within your body of text. You can choose automatic, around, above and below, inline with text, or none. There’s a handy graphic to show you what each one means, but I find the behavior of each one unpredictable. This gets back to why Steve formats my Pages documents!

There’s a fabulous video going around TikTok with a caption that says something like, “what it’s like moving an image in Microsoft Word”. It applies perfectly to Pages as well. The videoshows a woman with a small table in a living room and she wants to move it six inches closer to the window. She slides it a couple of inches and every single other piece of furniture in the room moves to a completely different location.
Back to beating images into submission in Pages. It seems that the least annoying, but also probably least interesting arrangement is Inline with Text. As far as I can tell, this option doesn’t wrap text around the image, but you also don’t have infinite flexibility in how to move the image around.
I don’t know if you’ve noticed, but about a year or so ago, I stopped right and left-justifying my images and wrapping text around them in my blog posts. It was a lot of work to make them look good, and then I discovered they usually looked awful on mobile where most people view web pages. I was so happy the day I abandoned the idea, and went for centered images with text above and below … just like Inline with Text in Pages.
There’s one big problem with Inline with Text images in Pages. Once you choose this option for an image, you cannot drag it to center it. It will stay firmly left-justified.
I discovered that Steve had overcome this limitation in pages by using spaces to center the images. As long as any images on the page are the same size, using the same number of spaces will make them look the same, and you can simulate centering if you have a good eye.
I spent some frustrating time looking through the various formatting options with the image selected, and there truly was no way to center an image. But then I decided to “phone a friend” and asked ChatGPT the question. It said:
In Apple Pages, when your images are set to “inline with text,” they behave like a big text character—so to center them horizontally, you need to center the paragraph they’re part of.
This is the clue we need to solve the problem. It went on to tell me to select the image and then center it (which does not work.) But knowing it was the paragraph I needed to center, I tried putting my cursor to the right or left of the image, and then the text formatting options appeared, allowing me to select Center. Boom, my image was centered.
These documents have a zillion images in them, and I wasn’t looking forward to clicking next to the image and then clicking the Center button, so I was very happy to discover that ⌘-Shift-| will center text and hence our inline image.
Once the image is centered, you can now select the image, and use the grab handles to shrink the images so maybe two fit on a page if they’re in landscape format. The process is still tedious, but it’s at least repeatable.
Creating the PDF from Pages
We’re nearly done but there are two more tricks. Remember that table of contents we’re so fond of? We have to make sure it survives the creation of the PDF. If you’ve been on the Mac for a long time, you probably know that if you select print from the menu in most, if not all apps, you’ll see a button at the bottom that says “PDF” and it’s a dropdown. From there you can choose many options, one of which is “Save as PDF…”

If you want to skip the dropdown, tapping on “PDF” instead of the dropdown chevron will Save as PDF without other options.
However, this is not how you create the PDF if you want to preserve the table of contents! I can’t tell you how many times I choose Save as PDF and them I sit there baffled why my table of contents has disappeared.
Get this, the right way to create a PDF from Pages is to go up to File, and choose Export To and from the dropdown choose PDF…

When you choose a save location, you can open the new PDF in Preview and if you choose View → Table of Contents, by using the sidebar dropdown, you’ll see all of your hard work has paid off and the table of contents should be visible.

I definitely recommend opening your PDF in Preview, not only to verify that the table of contents is there. I need to open mine anyway because the resulting PDFs from all of my shared wisdom in text, plus the many entertaining images turn out to be simply massive. Even with medium-sized images created by Apple Mail, the PDF from our two weeks in Japan was 66MB! Maybe that’s not too big for a lot of people these days, but what if I can create a PDF that’s a lot smaller and doesn’t degrade the images much?
Once you have a PDF open in Preview, you can again go to the Export menu, but on the save dialog box, there’s a new option. With the Format set to PDF, you get a Quartz Filter dropdown, and one of the options is to Reduce File Size.

I haven’t done a serious pixel-peeping side-by-side comparison of the before and after versions of my travelogues, but they look good to me after the Quartz Filter to reduce file size has been applied. The file for Japan went from the original 66MB down to 36MB so it was worth that extra little step.
Quartz Filters — Roll Your Own
I knew you wouldn’t let me get away with not explaining what is actually going on under the hood when you choose Reduce Quartz Filter. To be honest, I got curious about it too. I did a bit of reading on Apple’s support pages, and what I read started to ring a faint bell. The more I looked into it, the louder the bell got. It was ringing so loudly because I’ve already explored and taught this before!
Sure enough, I searched podfeet.com and found a blog post and a static page with a tutorial on how to do it. I wrote these way back in 2015, and the instructions include how to do some of the steps in Yosemite and earlier, but I also give instructions for the fancy new El Capitan! A few of the steps look a bit dated, as you can imagine, but the tutorial is still valid:
How to Reduce the File Size of a PDF Using Preview
I’ll give you the Reader’s Digest Condensed Version (kids, ask your parents what that means). These Quartz Filters are managed using a system utility called ColorSync. You can find it in the Utilities folder inside your normal Applications folder. One tab is dedicated to filters, and you get a little dropdown next to each one to see the under-the-hood settings.
The current settings for Reduce File Size have changed a bit in the last decade. There are two subsections. Under Image Sampling, the quality is set to high, there’s no scaling, the resolution will be set to 144 pixels/inch, and the size will be constrained to no bigger than 2400 pixels. Under Image Compression, you’ll get JPEGs with a quality setting of 80%. These settings are more than good enough for embedded images in a PDF, and it explains why I didn’t notice much, if any, degradation of the images.

The tutorial is still useful because I walk you through how to create your own Quartz filters, starting with one of the embedded ones.
My travelogues will have variable quality in the images because of how I originally created the emails to accommodate sometimes less-than-stellar Internet connectivity. The images were so small and low resolution on our Antarctica trip that Steve went back through the entire document and found every photo in its original form in our library and swapped them out for higher resolution versions!
Bottom Line
Now, what was the point of this article again? Oh, right, it’s that I’m delighted I finally got around to publishing all of these travelogues on the web. I’m still looking for a few of them, because I know there are more but my filing system over the years was pretty bad. I’m finding remnants in places such as the Pages directory inside iCloud Drive, or randomly plopped into my Documents folder at the top level. I even found a folder for one trip inside the folder for another one.
I’ve posted the travelogues for Japan, Africa, Antarctica, Chile, and Paris, and I’m working on cleaning up the ones from the Galapagos Islands and Peru, including Machu Picchu. I’m pretty sure there’s one from our crazy trip to the UAE, India, and Nepal in 2015. I’ve found pieces of the one from our trip to England, Ireland, and Belgium when we met Bart in 2010, and if I find them all I’ll post that one too.
Years ago, Wally Cherwinski suggested I make these into photo books … but that will have to wait for another day because that’s a LOT more work!
When organizing photos, how diligent are you in setting the time zone on your Big Girl camera? I don’t typically assemble photos until after the trip, at which point the iPhone photos and my Sony photos are out of sync by many hours. Luckily, I can use Apple Photos “Adjust Date and Time” option on the Import batch to bring the sets roughly in line… assuming I remember to do that.
Great question, Charles. I had a few trips where I forgot to change the date and seriously regretted it. My organizational trick with the smart album doesn’t work at all if the Big Girl Camera can’t play. I didn’t bring her to Japan but I did set it properly for Antarctica, Iceland, and Africa and it made things much easier. I don’t have geotagging on the Olympus but I take enough photos with the phone that I can grab the location from it for the Big Girl photos.