When last we left our heroes, Chris Cooke and I were trying to figure out how I could record a video for her presentation at Macstock. She’ll be talking about how she uses a tool from Pneuma Solutions called the Remote Incident Manager to connect to another person’s computer to provide them technical support, all through the use of VoiceOver on the Mac.
Our goal was to capture video of the target computer (my Mac), along with audio of her voice, my voice, and VoiceOver. The problem we ran into was that any attempt to record the audio on my Mac caused a feedback loop to Chris where she would hear her own voice 3-5 seconds after she said something. It wasn’t possible for her to perform the demo with this kind of feedback.
Eliminating the Audio Feedback the Easy Way
In my previous post about our attempts to record, I explained the incredibly convoluted process we developed that required 3 Macs, 3 Microphones, 3 sets of headphones, and one iPhone to achieve our goal. I sent the article to Pneuma Solutions along with even more details about the problem. A gentleman named Jack from the support team wrote back with a good question. My article explained that to record the audio from Remote Incident Manager, I was choosing to capture System Audio. Jack asked whether I could try capturing just Remote Incident Manager instead of all System Audio.
I have the tools to do this, and after kicking myself for not thinking of it as a possible solution path, I set it up. My recording was being done with the screencasting software ScreenFlow from Telestream. It’s designed to record the screen, and I can add as many audio input devices as I like. But applications, like RIM, are not audio input devices. With the help of Loopback from Rogue Amoeba, I can create virtual audio devices out of applications. This means that I can assign the audio output of Remote Incident Manager as an audio input to ScreenFlow.
In Loopback, I added a new Device, and named it “rim”. I used the plus button to add a new source, and from the Applications dropdown, I chose Remote Incident Manager. By default, when you add a new application, Loopback mutes it when capturing. This messes me up every time I do this, so I immediately flipped open the Options chevron and UNchecked Mute when capturing.

Once you create a virtual device, it now simply exists on your Mac. You can (and should) close Loopback and start to use this new device.
In order to capture VoiceOver, it also needs to be added as a virtual audio device using Loopback. I did it so long ago that I entirely forgot that it wasn’t normally exposed to applications for recording. When you create a new device and choose Application from the source list, there’s a section entitled Special Sources. From there, you can choose Background Sounds, Finder, Siri, Sound Effects, Spoken Content, System AirPlay Receiver, or VoiceOver.

Now that I have my two virtual audio devices, I’m ready to set up ScreenFlow to record. Under New Recording, I selected my built-in Retina Display for the video, then the three audio devices: my Wave XLR mic interface, VoiceOver, and my RIM virtual device.

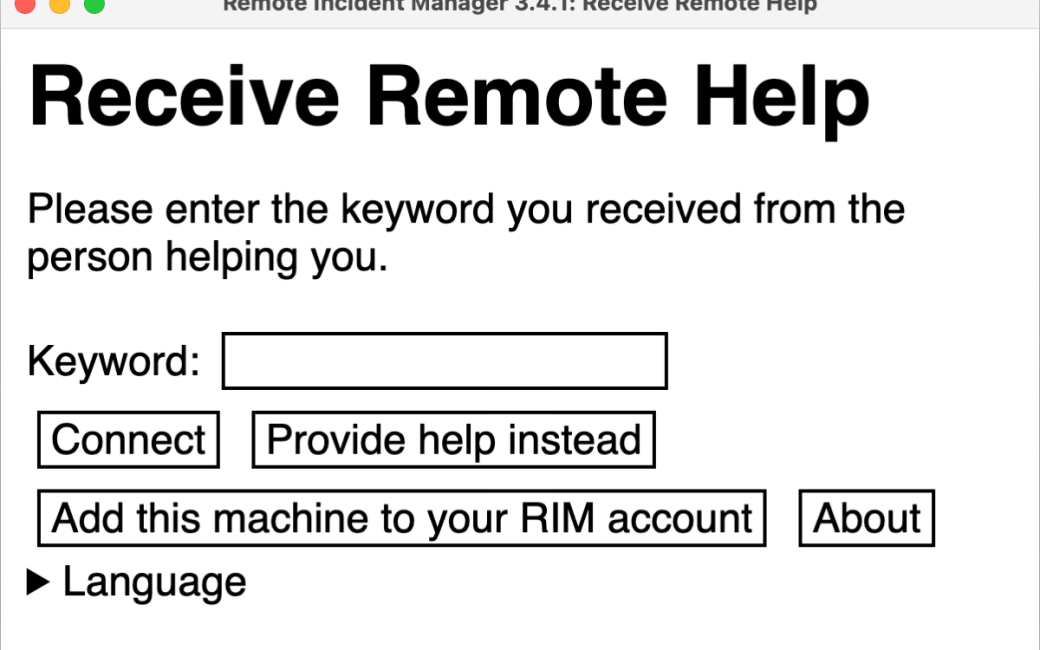
Now all I needed was someone to test with, and since Shawn from Pneuma Solutions had just emailed me, I wondered if he was online. I asked him for a play date, and he readily agreed. He launched Remote Incident Manager and created a Keyword. I entered the same Keyword on my Mac in Remote Incident Manager, and instantly, he was connected to my machine. He could navigate my Mac with VoiceOver, hear my voice, and I could hear his.
Now for the moment of truth: to try recording the session. I told ScreenFlow to record, and he did not get feedback on his Mac! We solved it! But are we sure that’s what fixed it?
If you’re a good scientist, you know that a good experiment minimizes the number of things changed. While we had changed just one thing on my end, we had no idea how his Mac might be configured compared to Chris’s Mac, including what microphones and headphones and software she was using.
But I could change this one thing back and have a good experiment. I changed ScreenFlow from recording just Remote Incident Manager to recording System Audio, and asked Shawn to talk. Within a couple of seconds, he said he heard his own voice reflected back to him. I flipped back to recording Remote Incident Manager instead of System Audio, and the echo disappeared. Now we have good experimental evidence of success.
After we confirmed our success, I went into ScreenFlow and verified that I had 3 independent audio tracks and one video track. It’s clear I’ll need to do some work on the audio levels, but the experiment confirmed success.

Demonstrating RIM in Zoom
A normal person would have hung up on Shawn at this point, but we got to chatting about why Chris and I wanted to do this. He explained that he’s tried to present Remote Incident Manager in a Zoom meeting before, and it caused what he called a “feedback tornado”!
He’s been a Windows user for years, but since Pneuma Solutions started supporting macOS, he’s had to learn the Mac. He’d played around a bit with demo copies of Audio Hijack and Loopback but didn’t really know the tools. Well, I couldn’t pass up the opportunity to teach a FOURTH blind person to use Rogue Amoeba software, could I?
I started with Audio Hijack, and he very quickly caught on to the concept of the little blocks you drag into a grid, and why you’d want some in parallel and some in series. But to fix his feedback tornado in Zoom, I suggested a possible path to success using Loopback.
Let’s say his co-worker Jack initiates a RIM session with Shawn’s Mac as the target. Shawn joins the Zoom call. My suggestion was to create a virtual audio device using Loopback that combines three sources: his microphone, VoiceOver, and Remote Incident Manager. Using VoiceOver keystrokes while he listened to me navigate through Remote Incident Manager, I created this virtual audio device using Loopback. (I was kind of proud of myself for being able to do that!)
Once I had the new virtual audio device built, I opened Zoom, and without going into a meeting, I changed my audio input settings to this new virtual source that combined the three inputs. I spoke, and the little meter in Zoom moved. I had Shawn speak, and again the meter moved. I had Shawn move around on my Mac to trigger VoiceOver to talk, and again, the meter moved.
This isn’t a complete experiment since I didn’t get on a real Zoom call, but I’d bet dollars to donuts that this would work for him without any feedback tornadoes. I left Shawn with the promise that if he ever wanted to play around with Rogue Amoeba tools again, I’d be glad to help him out. He was quick to learn, interested in figuring things out, and he laughed at my jokes.
New Hurdles — VoiceOver Lag
A few days later, Chris and I sat down to record the demo with the new, simpler process. Now that I was recording just RIM and not the entire system audio, I was confident we could do the demo without the audio feedback to Chris.
The good news is that Chris no longer experiences feedback of her own voice. The bad news is that we had a whole new problem. Instead of hearing VoiceOver from my machine in near real time, it was taking 5, 6, to 7 seconds for VoiceOver to get to her! Imagine trying to do a demo where the video is 7 seconds behind.
We disconnected and reconnected several times, but still there was this terrible lag with VoiceOver. My first thought was that perhaps Remote Incident Manager was somehow struggling with the amount of video being presented, as I had my external 32″ 6K display attached. I disconnected it, which caused a lot of logistical problems because everything routes through it, and finally just attached a second microphone to my MacBook Pro.
This did not fix the problem. We disconnected the call and gave up for the evening, but continued to swap ideas over the next few days while we did more experiments.
Chris ran a network speed test of her WiFi, and as expected, the speed was far less than if her computer had been hardwired. I suggested using Ethernet, but she hadn’t ever connected that way on her home router, so she wasn’t sure where to plug in. She called me on FaceTime so she could show me her T-Mobile WiFi router, and on the back, there were two open Ethernet ports. I was confused that there was no network cable going into her router. She managed to focus her phone on the model number (which 98% of sighted people could never do), and I looked it up. It’s a 5G router using cellular, which I should have realized from the name “T-Mobile”. That explains why there was no network cable going in.
She bought a USB-C to Ethernet adapter and an Ethernet cable, and hardwired her Mac. We confirmed that the interface order in System Settings → Network had Ethernet at the top. That gave her much faster speeds, but it didn’t fix the lag in VoiceOver coming back to her.
I asked her to check her Activity Monitor just in case there was something aggressive running on her Mac, and we found that Carbonite was chewing up 17GB of RAM. But disabling it didn’t affect the lag in VoiceOver.
I read online that a VPN could affect the Remote Incident Manager. I run Tailscale all the time, which is sort of a VPN, so I disabled it, but that did not fix the problem.
Timing on Enabling of VoiceOver
I finally came up with what we think was the root cause, but I hesitate to confirm since I’ve been wrong so many times before.
Chris usually helps her blind students with their computers, who are already running VoiceOver, when she connects using Remote Incident Manager. Remote Incident Manager is designed such that the target machine doesn’t need to be running VoiceOver to function, and since I’m sighted, I don’t have it running when Chris connects using Remote Incident Manager.
Without VoiceOver on my Mac, the RIM connection brings up a visual VoiceOver panel in the bottom left of my screen, but I can’t hear VoiceOver. If I can’t hear it, that means I can’t record it for the demo. What we’ve been doing all along is as soon as Chris connects to my Mac, I toggle off VoiceOver, which kills that little panel graphic, and then toggle it back on to enable full VoiceOver on my Mac.
After eliminating all those other potential causes of the delay, I wondered whether my toggling VoiceOver off and back on again had anything to do with it. We disconnected yet again, and for our final test, I enabled full VoiceOver before Chris connected. She poked around on my Mac a little bit, and she said the 5-7 second lag was down to maybe a second, which she said she could live with. I think we found the root cause, or at least the predominant cause of the lag problem with VoiceOver.
Video Production
We were finally ready to record. Chris’s demo was to show me how to open a website in Safari, copy the URL, open Notes, write a quick note, select some of the text, and then create a clickable link to the website on that text. So her steps were:
- Navigate my Dock to find Safari
- Note that if you have VoiceOver enabled, you can type a couple of characters to jump to an icon, which, as sightlings, we cannot do
- Open Safari
- Navigate to Applevis.com, a great website for learning how to do things on the Mac and iOS with low or no vision
- Bring up a panel that shows her all of the available headings
- This is why headings are important in long-form content on the web. Don’t just make section titles bold and big, make them true HTML headings
- Navigate through the headings and select an interesting section on getting started on macOS and iOS
- From this section, find a link that looks fun, and copy it
- Back to the Dock
- Type “no” to get to Notes and open it
- Create a new note and write some text
- Select the text and hit ⌘K to bring up the Add a link menu
- Paste the link and hit OK
- Quit Safari so she’s not cheating since the web page was still up
- Back to Notes and hit the link to open it in Safari
The demo worked reasonably well for the most part, but there were some significant pauses where we had to wait for VoiceOver to tell Chris what was going on. In a few cases, she tried to go faster, and then unexpected results occurred.
The full demo, as recorded, was just under 9 minutes long. Chris and I discussed editing options. On the one hand, it would be more transparent to show the demo exactly as recorded, but it would also be somewhat misleading since under normal circumstances, she wouldn’t have this annoying VoiceOver lag. We agreed that it would be ok if I did some editing to crisp it up.
As it turned out, editing out the pauses was not the hard part of editing. I can only assume that ScreenFlow caused this, but whenever VoiceOver was talking, if Chris also talked, Chris’s voice level dropped by 90% in the recording. This is not how it sounded on the call at all.
Picture this. Chris is talking along, and VoiceOver says something like, “Safari, open Safari”. Her continuous audio track suddenly ducks down and then back up again. Normally, Chris either waits for VoiceOver to stop talking or she hits the Control key once to make it stop. But remember, she’s not hearing VoiceOver start talking until a second or so later.

Obviously, what Chris has to say is more important than what VoiceOver is yammering about. So I had to select Chris’s audio track, put my cursor at the point where she suddenly jumps from loud down to soft, hit the T key to split the track, then go down until VoiceOver stops talking, split again. Then select the section where Chris is quiet, and go up to the menus in the sidebar of ScreenFlow to change the audio level from 100% to 300%. No keystrokes to do that. Now, back to VoiceOver, and I have to decide how to bring its levels down to 30-40% of what they are. Over and over and over again.
I didn’t count all of the cuts on all of the audio tracks, but on Chris’s track alone, I made 54 cuts.
When I was done, the audio tracks from me and Chris were not as loud as I would have liked. I decided to export just our audio and run it through Auphonic to not only level it but bring it up to the loudness standards (-16LUFS). Figuring out how to export just the audio of Chris and me without the audio from VoiceOver was a bit tricky. Turns out you simply mute the audio track you don’t want to hear, choose export, and then instead of the default of a movie file, change the type tab from Automatic to Manual. In Manual, one of the options is “Lossless – Audio Only”.

I took the exported AIFF audio file and ran it through an Auphonic production with the Adaptive leveler strength set to 100%, the compressor to Auto, left on Adaptive high-pass filtering, and the Loudness Normaliization set to a target of -16 LUFS, max peak level of auto, and a normalization method of Program Loudness. I could have spent time tweaking those settings, but it did a pretty good job of accomplishing my goal of leveling mostly Chris’s audio and bringing both of our voices up to the loudness standard.!

As a final step, I took the audio file created by Auphonic and dropped it into a new track in ScreenFlow, muted our two original tracks, and exported the project as an MP4 for Chris to show at the conference. The final file is exactly 6 minutes long.
Pneuma Solutions
It’s also been interesting working with Pneuma Solutions. They’ve got an interesting product and some unique challenges, and they’re conquering them. I’ve alerted them to one interesting problem that only a sighted person would notice. When I launch Remote Incident Manager, I get the weirdest thing in my menu bar. On my big display, there’s what I’ll have to call a menu bar icon that is 7.25 inches wide. I’m not exaggerating, I measured it with a ruler. It’s a series of black blobby things. The first one has some curves but the following four are just squat black rectangles. It finally dawned on me what this is. It’s a slice through the RIM logo, so the blobs are part of the R where it’s curvy, a slice through the I, and then slices through the three humps of the M.
When I was chatting with Shawn, I brought this up, and we noodled on it, and he’s pretty sure they just need to replace the asset for the icon. I suggested taking a peek at the API from Apple, which I can only assume exists somewhere. It’s the kind of thing, though, that only a sighted person would notice. I needed it because it’s the only way you can quit the app after a session, but Chris uses all keystrokes to access the menu bar options.
It’s not a smooth process yet to provide support to a sighted person, but my interactions with Shawn Beaver in tech support, Matt Campbell (CTO), and Mike Calvo (CEO) have been positive, and I believe they’ll keep improving Remote Incident Manager so blind people can help provide tech support to us all.
Now here’s a funny thing. I was searching podfeet.com for Pneuma Solutions to check something from my original post about Remote Incident Manager, and I found a second article. Guess what? Matt Campbell, the CTO I just mentioned, was on Chit Chat Across the Pond back in 2021! He came on and talked about accessible overlays that were becoming all the rage, and how they were actually a terrible thing for accessibility. I remember when Leo LaPorte was advertising for one of the companies that make an accessible overlay, which promises to fix all your accessibility problems. I wrote to Leo to let him know that they are terrible and make things worse, quoting Matt and pointing him to the interview. Don’t know if he listened to me, but he did stop advertising for them fairly soon after that, so I’m giving me and Matt credit for it.
Bottom Line
The bottom line is that I think Chris and I achieved our goal in the end. I learned a lot, which is always a good thing, and I enjoyed using my skills to help Chris produce a product that will demonstrate to the audience what she does every day to help other people. Getting to know Chris even better through this experience was great. She was willing to try anything, do endless experiments, buy an Ethernet cable, and laugh at my jokes along the way.
If you’d like to see our masterpiece video, I’ve embedded it in the shownotes for your enjoyment.
.