At Macstock this year, we had a brand-new attendee who was also a first-time speaker at the conference. His name is Mike Burke, and as I explained in my Macstock coverage, he took a very big swing in his workshop. He had us download 4 apps and a plugin, and taught us just enough to whet our appetites for what he was doing. I know I went through this already, but in case you fell asleep and missed it, I’ll repeat a little bit before I explain what I did with what he taught us.
The grand finale of his talk was when he had us download a Keyboard Maestro macro and run it on our computers. He explained that the macro was there basically to give him an easy way to trigger a shell script he’d written. The shell script he wrote was designed to create a folder structure for an upcoming conference, including folders for registration paperwork and for session notes. He even had it create boilerplate text documents for the session notes, so that he had a structure for taking his notes.
Before suggesting we download a script from a guy we just met, he showed the text of the shell script and explained what it did. He’s fully documented this on his website themikeburke.com so you can look at his shell script too.
He described this method of creating his folders and digital assets before starting on something as being akin to the French cooking method, mise en place, where you get all of your ingredients ready ahead of time.
During Mike’s presentation, when given the green light, I ran the macro and was delighted to see it did what he said it would do. This concept of pre-creating folders has been festering in the back of my mind ever since, waiting for a problem to present itself.
I was inspired by Mike’s method and how well he explained everything, so I decided to give it a go myself. I don’t expect you to use exactly what I did, any more than I used exactly what Mike did. Rather, I hope to inspire you to solve a problem you have with some of what I learned from studying Mike’s process.
The Problem to be Solved
This week I’m supposed to be starting to learn a new app to teach for my next ScreenCastsONLINE video, and I realized that I was just about to create the folder structure for the new project. This will be the same folder structure I created last time, and the time before that, and the time before that. Each time I set up these folders, they’re nearly identical, but since I’m human, I’m often slightly inconsistent from project to project.
You’d think the folder structure would be pretty simple, but it does have a smidge of nuance. In order to deliver my ScreenCastsONLINE project to the boss, I have to have it in Dropbox. However, Telestream, the developers of ScreenFlow, the app we use to create and edit the tutorials, will pop up a scary warning if you try to create a video on a cloud service. They say the behavior could be unpredictable and result in loss or corruption of data. That’s pretty close to the last thing I’d want to have happen, perhaps only just short of it making my computer explode.
My solution to this conundrum is to create folders both on a dedicated ScreenCastsONLINE Volume on my Mac and another set in Dropbox. I record video into ScreenFlow on the ScreenCastsONLINE volume. Every time I record and edit a segment (which could be as short as 2-3 minutes worth of recording), I save locally, and then I drag the ScreenFlow document from the dedicated volume over to a Dropbox folder. In March of this year, I asked Hazel to watch that folder over on Dropbox, and whenever I drag in a new version of the file, to rename it by appending the date and time it was saved. You may remember the post I did on it entitled “Automation Gives Me All the Feels”.
When I deliver my project using Dropbox, I have to also include a folder called “assets”, in which I am to include a 1024×1024 show icon and any artwork I may have created for the tutorial.
The two folders, one on the local volume and one on Dropbox, are buried deep in a folder structure only a psychopath would have created. In order to easily access these two project folders, I like to have them in my left sidebar of my Finder windows for quick access during the video creation. The two folder names must be different, so I can tell them apart in the sidebar, so they’re called “APP_NAME LOCAL” and “APP_NAME DROPBOX”.
It’s taken me far longer to describe the creation of these two folders than it does to create them and put them in the Finder sidebar, but still, doesn’t this just cry out for the implementation of Mike Burke’s mise en place automation?
Copy and Modify
I started by copying and then modifying a lot of what Mike wrote for his script because he spent the time to include nicely formatted front matter that described the project, said who wrote it (himself and Claude from Anthropic), and his MIT license. He gave a high-level explanation of what the shell script does and step-by-step functionality. I appreciated his approach because it forced me to really think out what I wanted this script to do before I wrote any code.
#!/bin/bash
# =============================================================================
# Macstock Conference Project Structure Creator
# Version: 2.1
# Created by: Mike Burke (https://www.themikeburke.com) and Claude (Anthropic)
# Last Updated: 2025-07-08
#
# License: MIT
# Copyright (c) 2025 Mike Burke
# Permission is hereby granted to use, copy, modify, and share this script freely,
# provided the above copyright and attribution notices are preserved.
# Full license text: https://opensource.org/licenses/MIT
#
# Description:
# Automates the creation of a standardized folder structure for Macstock conference attendance.
# This script creates a comprehensive organizational system that supports conference planning,
# session note-taking, and travel logistics management.
#
# Functionality:
# 1. Creates a main project folder named "Macstock"
# 2. Generates a complete subfolder structure:
#    a. Registration Paperwork folder with Travel Info markdown template
#    b. Session Notes organized by day (Friday, Saturday, Sunday)
#    c. Two numbered session folders per day with markdown templates
# 3. Creates pre-configured Markdown template files:
#    - Travel Info template with comprehensive travel planning sections
#    - Individual session note templates for structured learning capture
Like Mike, I launched Claude AI to help me get my syntax right and to ask it whether certain things were possible. Between my own knowledge of shell scripting from Programming By Stealth, copying off of Mike’s paper, and my able assistant, I figured out how to embed AppleScript to pop up dialog windows. These would be helpful to let the script ask me for the app name, and to provide some confirmation and ways to cancel.
I assigned variable names for the psychopathic folder structure in which I’d need these new folders constructed, so I wouldn’t have to type them out repeatedly and undoubtedly make errors. My favorite variable was DROPBOX_DIR:
DROPBOX_DIR="$HOME/Library/CloudStorage/Dropbox/SCO Video/SCO Video DROPBOX/SCO Working Show DROPBOX"`
See what I mean?
I tested each bit of the script in Terminal as I went along, which gave me the opportunity to add comments to my code for future me if the code didn’t work. For example, while creating folders is a very simple command (mkdir), adding folders to the Finder sidebar was a bit trickier. Claude suggested I access System Events with my AppleScript. System Events is a system daemon and requires special permission in System Settings/Privacy & Security/Accessibility. Don’t ask me what this has to do with Accessibility, though!
Anywho, with the correct permissions, you can have an AppleScript generate keystrokes on your behalf. With a folder selected, ⌘⌃T adds a file to the Finder sidebar, so Claude wrote the AppleScript to tell System Events to add my newly-created folders to the sidebar.
# Keystroke cmd-control-T to add to Finder sidebar
osascript -e 'tell application "Finder" to activate' -e 'tell application "System Events" to keystroke "t" using {command down, control down}'
In order for that command to work, though, the folder has to be selected or opened. The man (manual) pages for the command open say that if you slap a -R after open, it will reveal the file or folder in the Finder instead of opening it, but it does still open a Finder window to reveal it to you. I was hoping to have no Finder windows open when the script runs, but it seems unavoidable.
Claude and I settled on closing the window after the folder gets added to the Finder sidebar, but I’m not sure I like it. When the script runs you see a flash of two windows opening and then closing immediately. There is some value in having the folders open and ready to go when the script is complete, so I’ll probably remove the close window command.
# Close the window
    osascript -e 'tell application "Finder" to close window 1'
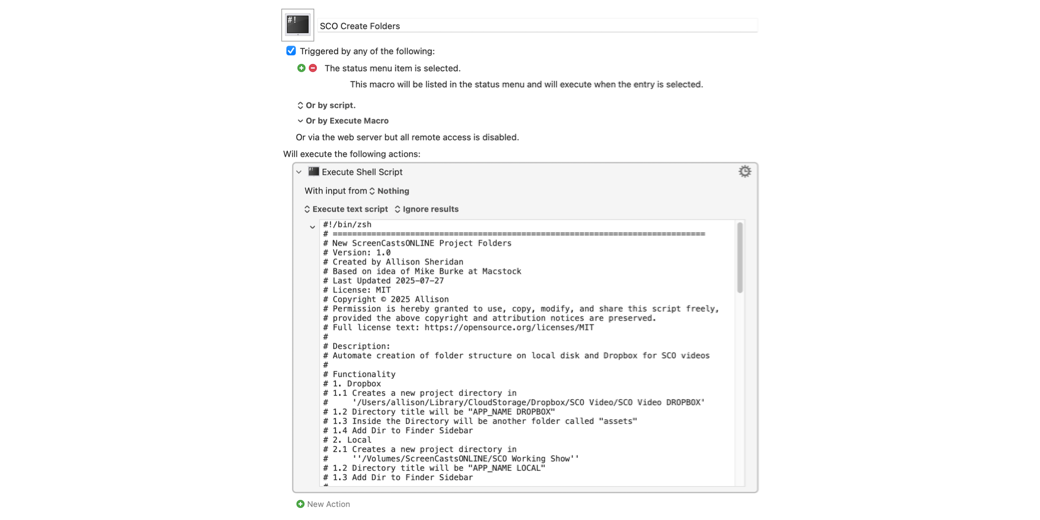
When I was done writing and testing my little shell script, I created a new macro in Keyboard Maestro and simply added an “Execute Shell Script” block and slapped in the text of my shell script. Nothing fancy here. Since I’ll only be using the macro every six weeks to save myself approximately 38 seconds, I decided to set it to be visible under the Keyboard Maestro icon in the menu bar rather than assigning it a keystroke.

Once that was working, I used git to put the shell script under version control on GitHub. I knew I’d be tempted to mess with it later, and I wanted a paper trail so I could back out my breaking changes.
Bottom Line
The bottom line is that I managed to spend at least 3 hours writing my 94-line (including comments) shell script to save myself those 38 seconds, and then spent well over an hour writing up the story to tell you about it. I believe I have been quite successful in avoiding learning the new app that I’ll be recording for ScreenCastsONLINE.
But maybe I could figure out a way to have my script create and save a new empty ScreenFlow file, and a new MindNode mind map, and copy an alias of it over to the newly created ScreenCastsONLINE project. I bet I could save an additional 12 seconds off the process!