Katie Floyd sits in for Allison this week and discusses digitizing family memories, Mark writes in with a review of Can I Stream It. , Katie talks about her new keyboard the K760 and in Chit Chat Across the Pond Bart explains the differences in email encryption protocols and how they work.
Hi this is Katie Floyd sitting in for the yet again vacationing Allison Sheridan of the NosillaCast Mac Podcast, hosted at Podfeet.com, a technology geek podcast with an EVER so slight Macintosh bias. Today is Sunday August 18, 2013 and this is show number 432.
Have you noticed how often Allison seems to be vacationing and slacking on her podcast host duties now that she’s retired? I thought she retired so she’d have more time for the show. But instead, she’s off in wine country with Steve and the kids so you’re stuck with me this week. Sorry Nosillacastaways for the lack of the live show, but that’s really, really, hard!
A few quick reminders before we get started, Allison and Steve have taken on the monumental task of sorting through and listing and now selling more than 22 boxes of lovingly used tech gear from the late Tim Verpoorten. Tim’s widow, Allis spent more than $2,800 shipping boxes of Tim’s gear and so far we’ve just broken even to pay the expenses. Most of the items are listed for sale on the Amazon Marketplace with a few specialty items listed on eBay. There’s a page on the MacRoundtable site with more information as well as a link accepting donations. All proceeds of the sales will go to Alice. I’m sure you’ll find some treasures you can’t live without, so check it out.
Digitizing Family Memories

I wanted to start this week by talking about a subject that is very near to my heart and that’s digitizing family memories. I wrote about this topic recently for Don’ McAllister’s ScreencastsOnline Monthly Magazine and received a lot of great feedback, but because I thought this was such an important topic I wanted to share it with as wide an audience as possible.
I recently lost my grandfather after a long battle with an illness. When he first started getting sick, my mom and I started going through boxes of family documents and memorabilia. We came across a treasure trove of photos. My grandparents traveled extensively throughout the world for my grandfather’s work and in their guest bedroom closet we found boxes filled with thousands of slides from their journeys. Among my favorites are a photo of my grandparents sitting atop a camel in front of the great pyramids of Egypt. Another is of my grandfather dressed in a tuxedo at the Vatican. There were also slide carousels of family snapshots through the years and a number of photo albums.
We wanted a way to share these photos with the family but splitting up the slides photo albums between all the kids and grandkids didn’t seem fair. After all, how would you even go about playing slides today? We also noticed many of the photos already started to degrade with the years As the resident geek, I was charged with finding a way to preserve these memories and distribute them to the rest of our family. Digitizing was the only way to go.
I looked at a number of options for digitizing the slides and photos. It essentially boiled down to three options:
- Undertake the scanning work ourselves.
- Outsource the scanning to a local shop.
- Outsource the scanning to one of the many specialty scanning services advertised online.
Our first thought was to scan the slides ourselves. My uncle bought a fairly expensive automatic slide scanner for about $1,500 and set out to scan the slides. I took one of the wedding albums and set off with my flatbed USB scanner. Our thought was we could save money and time by scanning the photos ourselves since the turnaround for such a large batch of slides and photos was averaging two months at commercial shops. Our thought was we’d sell slide scanner for a little less than we paid for it and come out fairly cheap.
This was a mistake. First, we are not experts at this. Although my uncle is technically proficient, scanning even a few carousels of slides took lot of time and attention to manage and fiddle with the settings. The quality of the photos (likely due to the settings he choose) was not good. I scanned a wedding album using the flat bed USB scanner with no problem, but it was a miserable process and took me hours to scan at high resolution a few dozen photos. We quickly realized we would never finish this project if left to ourselves.
Moving on we started looking to outsource our scanning. Given the irreplaceable nature of the materials we were hesitant to ship the slides off to be scanned. While loss of a photo or slide can happen anywhere, we felt the risk of loss was lower at a smaller shop and the likelihood of finding and retrieving a lost image was higher when dealing with someone smaller and local. The downside of using a local photo store that performs scanning in-house rather than someone who outsources and scans in bulk is the price is going to be higher, though not necessarily prohibitively so.
Prices will vary by area, but for comparison, at the local shop individual slides cost $0.89 each to scan, but for anything more than 350 slides and the price came down to $0.59 each. For photos, a 600 dpi scan cost $1.00 for a single photo, but the price got as low as $0.50 for 500 or more photos.
We ended up having most of our slides, 3000 in total, scanned at the local shop. Turnaround time was about 6 weeks and in the end the slides were returned to us in the exact same condition as we dropped them off and nicely organized into corresponding folders based on the label of the individual slide carousels. The quality of the scans of course depended on the quality of the image but we were pleased.
After our initial batch of slide scanning we still had a few random photos in boxes and books and I found a Groupon for ScanDigital. ScanDigital is a California based company that specializes in digitization of family memories and will digitize photos, slides and negatives and video.
ScanDigital’s normal pricing for scans is $0.48 for a 300 dpi photo scan or $0.68 for 600 dpi. Photos in albums and slides are a little more expensive. The goal here is to only scan once, so if you’re going to the time and expense to have your memories digitized I strongly recommend opting for higher resolution. A general rule of thumb is a 300 dpi scan will allow you to duplicate that photo at the same size with minimal loss of quality. With 600 dpi you have room for enlargements.
My Groupon deal bought the price down even further so I figured I would give one of these bulk scanning services a try. I boxed up what I counted to be 230 individual photos of various sizes and mailed them of to ScanDigital for scanning. Their website was fairly user friendly to navigate and walked through the process of packing and sending the photos. They also have a tracking page detailing exactly where your order is in the process.
I counted 230 photos sent to ScanDigital, although they inventoried 229 for scanning. (I counted twice, but I guess it’s possible my count was off.) The order took right at 30 days from the time ScanDigital received my package until they sent the original photos and data DVD with the scans back to me. The DVD arrived with 229 images at 600 dpi as ordered. As best I can tell they scanned all the photos I sent and I received all the photos I sent back, although I am still nervous about our counts being off by one.
With my Groupon deal and shipping, my total cost for 229 photos and shipping came to $95 and change. (Regular price without the Groupon would have been $155 plus $10 shipping.) By comparison, having the photos scanned locally would have cost me about $240 with tax. (For only 229 photos, the local shop charges $0.99 per scan.)
The image quality of the ScanDigital photos was fine. It’s hard to compare one service quality to another since one shop scanned slides and another scanned photos of various quality. I was impressed that ScanDigital was able to scan photos of all sizes. While ScanDigital claims to offer “photo editing” including cropping, rotation, color correction and red-eye removal I found in practice their “photo editing” was limited to rotating the photo and applying a generic set of filters applied to the photos, similar to choosing the “enhance” button in iPhoto. Honestly, this was expected and is probably fine for the masses. But for me, perhaps it would have been better just left the photo alone since I ended up editing them all anyway.
Whether you do it yourself, choose a local shop or outsource the scanning to a big firm, digitizing the images is only half the job. I’ve found just about every image scanned had to be touched by me in some way. If the image was good quality usually a simple crop or straighten in iPhoto would be fine. It’s amazing how much you can improve photos just with a little cropping and straightening. Due to age and normal deterioration many photos required additional work. Color correction and blemish removal was common. Some photos required a little extra care to repair damage. For this I did most of my work with the fabulous Pixelmator. For $15 I’ve more than gotten my money’s worth out of this program.
At my grandfather’s funeral I was able to put together a slideshow featuring about 200 of the newly digitized and enhanced photos for the family using FotoMagico, another wonderful application for displaying memories. I also was able to burn DVDs of all the images to share with the entire family, no more fighting over slide carousels or photo books, everyone had a copy of their own.
I have a couple pieces of advice for someone looking to tackle this type of project based on what I’ve learned:
- Start sooner rather than later. Starting 18 months ago meant I had the project basically completed and was able to finish it and prepare a video tribute that included these photos at my grandfather’s funeral. Still, I wish we did this years ago. If so, I could have asked him why he was standing in front of the Vatican wearing a tuxedo.
- Spend the money to have the digitization done professionally, you’ll be spending plenty of time editing the photos later. Perhaps you can get the family to chip in once they realize you’ll all be able to reap the rewards from the venture.
- Inventory everything you have and research your options. You generally get much better pricing when you digitize in bulk.
- All things considered, I would spend a few extra bucks to keep things local peace of mind. Just check with the local shop to make they’ve got the proper equipment and specifications to do this appropriately and they’re digitizing locally and not just shipping your items off and up-charging you.
- The higher resolution the better. You hope to only do this once, make it count.
- iPhoto is great for simple crops and rotation, but not for more complex edits. Invest in some better photo editing software. Pixelmator for $15 is my choice and they have extensive online tutorials. There are other options like Acorn, Photoshop Elements and Aperture are worth considering
- Backup, Backup, Backup! At every stage of this process. Backup or archive the original scans you receive, as well when you make edits and the finished photos. These are some of the most precious memories you have on your computer. I recommend a combination of local and off-site backup for redundancy.
In the end, it’s been about a hundred hours and a couple thousand dollars in total but we’re nearly complete with the process of digitizing all our family memories. It was a labor of love, but well wroth it.
Can I Stream It
 Next up we have Nosillacastawy SwitcherMark with a possible solution to a common problem – finding out how and where you can watch all that digital content you pay for.
This is Mark Pouley to review an iOS app and web service for cord-cutters like Katie and those of us watching more movies and TV shows on-line. As the number of places to find content on the web increases, it’s becoming harder to know where to find things to watch. Can I stream it from Netflix or Hulu Plus? Can I rent it in iTunes or Amazon? Until Apple unveils the next big thing in television, we’re left to our own devices to figure out what movies and TV shows are available and where we can watch them. Unfortunately, that often means logging into a provider like Netflix, searching, logging out, checking another provider and so on. This is even more complicated if, like me, you use your AppleTV for Netflix and iTunes, but another device to stream Amazon Prime.
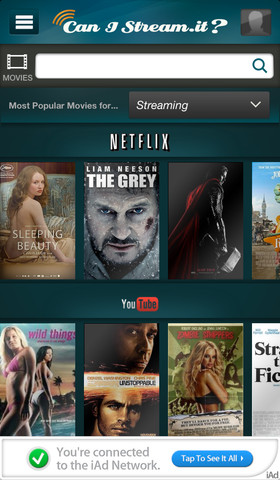
A few services are showing up on the web, and subsequently in iOS apps, that try to offer a solution to this problem. These services essentially search the most popular individual media sources and aggregate information about the availability of movies and TV shows, and list the results in a single user interface. Apple just acquired one of these sites, Matcha.tv, and it’s no longer operating. Today I take a look at another service and iOS app called Can I Stream It.
The basic concept of Can I Stream It is simple. You type the name of a movie or TV show into the search box and the app tells you if and how you can watch it on line. Can I Stream It breaks down the services into five categories: Instant Streaming, Streaming Rental, Digital Purchase, DVD/Bluray, and Xfinity Cable Services. Can I Stream It gathers information from major sources; Netflix, Amazon, Hulu Plus, iTunes and YouTube and other several sources. The Xfinity source appears to apply only to Xfinity on-line subscribers, but I think it may still be useful to see if a show is available on HBOGo and Showtime Anytime.
If a show you search for isn’t currently available in a particular category you can set up a “reminder” for Can I Stream It to send you an email when the show becomes available. For instance, Can I Stream It tells me The Hobbit is available for digital rental, but not yet available for instant streaming. I can set a reminder in the app and Can I Stream It will send an email when The Hobbit moves to Netflix or Amazon Prime streaming. You have to register with Can I Stream It to use this function of the service, but it seems convenient to me, so I registered.
The app appears to let you click on a listed source, like Netflix, to move from the app to the media app to watch the show. I say “appears to” because it didn’t always work when I tried it. It worked great for a show streaming on Netflix on my iPad, but for other apps such as Amazon Prime Streaming it wouldn’t play. Instead the app kept telling me I needed to install the Amazon player, even though it’s installed on my iPad. This seems like a bug that reduces the convenience of Can I Stream It, but it’s not a complete deal breaker.
The user interface is nice looking, but not necessarily intuitive. I’ve also seen some bugs where the app loads no cover art, or the wrong cover art for titles and a few other odd UI behaviors. Worse, Can I Stream It has a tendency to be really slow to load the availability information. There are a few iTunes reviews complaining that the app is buggy and slow. While I haven’t experienced any “crashes”, I have been left sitting on a page for too long watching the spinning indicator as it waits to tell me where I can find a particular movie or TV show. I don’t know if this delay is caused because the app is searching so many sources, if it’s servers are overburdened, or if the code is just poorly written. Whatever the reason, it reduces the usefulness of the app. Hopefully this will be fixed. Honestly, if isn’t improved, it could turn me off from using the app on a regular basis.
In my brief testing I also found the app’s data retrieval is not flawless. For instance, when I looked at movies that were identified as popular digital purchases I saw a listing for Joss Whedon’s recent “Much Ado About Nothing.” Since this is such a new film I was surprised the app reported I could rent and purchase it from Amazon. I followed the link to Amazon instant streaming and sure enough, right there was “Much Ado About Nothing”, a student film directed by Brandon Arnold. Well the cause of this error is obvious, but it highlights the fallibility of the Can I Stream It service.
One area I’d like to see more development is in discoverability of media. If you know what you’re looking for Can I Stream It is a very useful as it is, but that’s not how I decide what to watch most of the time. More often then not I don’t start a search knowing that I want to watch a particular movie or TV show. Instead I scan my cable channel guide, or the iTunes movie list or Netflix recommendations to find something to watch. I’d like a service that lets me do this for on-line content. Can I Stream It is better then then logging in and out of separate services, but it has room for improvement for discoverability. For movies, I can tab through the various services to see what is “popular” on that service, but the lists aren’t integrated, which creates a lot of redundancy; and they aren’t personalized for my viewing habits, which means they’re less helpful then the individual apps. There doesn’t appear to any such listing of “popular” or available TV shows which is a huge drawback. If you don’t know the name of the TV show you’re looking for, you won’t know if it exists for viewing. This is something that needs to change for a service like this to really be useful as a on-line media guide.
Can I Stream It is free and ad supported. You’ll see iAds at the bottom of the page, but I didn’t find them all that annoying.
You might think from my review that I wouldn’t recommend Can I Stream It, but I still think its worth giving a try. While it’s not perfect it is free and it does enough to make my media searches easier. Until Apple steps in and gives us the perfect TV watching experience this might just have to do.
One final note, I recorded this review with my Samson CO1U usb studio condenser mic that I just acquired from Allison. Thanks Allison, I hope to put it to good use. And – I hope your vacation leaves you rested and refreshed so you can get back to retirement.
Logitech K760 Wireless Solar Keyboard
Last week Ian Douglass brought us a review of the Logitech K750 full size wireless solar keyboard from Logitech. This week I’m going to look at a similar product with a different audience, the Logitech K760. (Retail $80/Amazon $57)
 First, we have a problem to be solved. In the case of the Logitech K760, there are a couple of problems to be solved. Problem one: I have an Apple Wireless Keyboard that I use with my Mac mini connected that i use as a home server connected to my television. I seldom use the keyboard, maybe a couple times a month but just about every time I do I get a low battery notice and I have to swap out the batteries. Problem two: I occasionally like to use a bluetooth keyboard with my iPad and I like it to be small and portable. But i use it so infrequently that often when I grab it I find it has lost its charge or I have to remember to carry around another cable and power adapter to keep it charged. Problem three: I really like my “clicky keyboard” (a Das Keyboard) that I use at my desk with my MacBook Air, but when I need to look up something while podcasting, it’ just too noisy. The solution to all these problems, the K760.
The K760 is a slimline, solar powered bluetooth keyboard for Mac that can be paired with up to three different devices that you can switch between with the switch of a button. The keyboard will recharge in ambient sunlight or artificial light which means I never have to worry about carrying around batteries or a charging cable or power adapter. Once charged, the keyboard claims to work for up to three months in total darkness.
Unique about this keyboard is that it can be paired simultaneously with up to three different devices via bluetooth. This means I can keep the keyboard paired with my MacBook Air, my Mac mini and my iPad at the same time. You toggle between the different devices using keys on the keyboard. One keyboard now potentially can do the work of three.
But how does the keyboard feel? It’s all a matter of personal preference, and the Apple Wireless keyboard isn’t my favorite, so I was a little skeptical about the K760. I was pleasantly surprised. The K760 is a solid keyboard with a good feel. The concave keys make for more precise typing and I personally prefer it to both the Apple Wireless keyboard and my MacBook AIr’s built-in keyboard. It’s quiet which makes it useable for podcasting or shared workspaces and I feel like I could comfortably type on the K760 for hours. I also appreciate that the K760 has customized keyboards for the Mac and iOS such as brightness adjustment, expose, home and more.
What’s not to like about the K760? Not much. The K760 does not have a numeric pad which makes it a non-starter as my primary desktop keyboard. You have to opt for the full size K750 for that, but keep in mind this was designed to be a portable keyboard for use with iOS devices. It also doesn’t have backlight keys so if you aren’t a touch-typist you may find typing in the dark problematic. The keyboard was also a little larger than I would have liked, when you add a case (which will set you back another $25) and throw it in your travel bag, it’s about the size of a full size iPad. But it’s a full-size keyboard which is also a plus, no cramped typing.
Logitech does offer an updated keyboard with the same bluetooth switch technology, the K811 that’s a bit more expensive at $100 ($73 on Amazon). With the K811 you get a smaller keyboard and backlit keyboard, but lose the solar charging so you have to pick what’s important to you.
For me, solar charging is a big deal as I’ve more than once found myself in a crunch with dead batteries and no charging cable. I’m very happy with the K760 and after this positive experience will be seriously looking at the larger K750 for my desk.
Security Light
Important Updates:
- Last Tuesday was Patch Tuesday – Microsoft plugged 23 security holes, including a particularly dangerous one in all versions of IE – if you run Windows, be sure to update, and don’t forget about your VMs or those Netbooks behind the couch you almost never use – http://krebsonsecurity.com/2013/08/microsoft-patches-plug-23-security-holes/
- FireFox 23 is out with security patches and security enhancements. The promised end of Third Party Cookies by default did not materialise, but FireFox have made a significant change in how mixed-security content is handled. In the past, FireFox (and other browsers) have popped up a warning message if anything on a HTTPS page is delivered over HTTP – these warnings made no sense to regular people, who just clicked OK, and probably also the checkbox never to be annoyed again. Mixed content is MOSTLY harmless, but can be very harmful. Static things like images being loaded over HTTP on a HTTPS page is quite safe, but dynamic content like JavaScript or iFrames is REALLY dangerous. FireFox have totally removed the warning for static content like images, and block dynamic content automatically without popping up a cryptic message – this will make browsing safer – so well done! – http://nakedsecurity.sophos.com/2013/08/07/firefox-23-0-is-out-fixes-features-and-just-a-tiny-bit-of-frustration/
Important News:
- Stories did the rounds this week about how easy it is to get plain text passwords out of Google Chrome (and FireFox if you don’t secure it (e.g. http://nakedsecurity.sophos.com/2013/08/08/chrome-firefox-display-plain-text-passwords-with-a-few-clicks/). This is not actually news, this has been true for as long as browsers have been saving passwords, but this serves as a good excuse to raise this important topic. Not all browsers are made equal – Safari stores saved passwords in the OS X Keychain – so they are stored in an encrypted form. FireFox saves your passwords in plain text by default, unless you set a master password, then, that password is used to encrypt your passwords. Chrome unfortunately does not have an option to set a master password, which is why I always disable the saving of passwords and form data on all my installs of Chrome. If you must use saved passwords in Chrome, my advice would be to use third party plugins like LastPass or 1Password to securely store those passwords for you. If you use FireFox, be sure to set a master password (Preferences -> Security -> Use a Master Password). If you use Safari on OS X – you don’t need to change a thing, Apple made it secure by default!
- The Android code verification hacks we’ve talked about in recent weeks continue to be exploited in the wild – if you have one of the many many Android phones that you can’t update because of middle-men between you and Google, you need to be VERY wary of installing software, and if I were you, I’d rood the device, get a new phone, or run AV – http://nakedsecurity.sophos.com/2013/08/09/android-master-key-vulnerability-more-malware-found-exploiting-code-verification-bypass/
Suggested Reading:
- A good article from Naked Security explaining why 8 character passwords are not enough to be safe –http://nakedsecurity.sophos.com/2013/08/16/anatomy-of-a-brute-force-attack-how-important-is-password-complexity/ (related news, Google survey finds that we’re still very bad at password security – http://nakedsecurity.sophos.com/2013/08/06/ok-who-uses-their-pets-name-as-their-password/)
- Android random number generation flaw compromises people’s Bitcoin wallets – this serves as a timely reminder that because Bitcoin is an anarchistic cryptographic currency, you HAVE to care about security – only cryptography protects your Bitcoins, and since there is no central authority, you can’t get fraudulently taken money back – a classic example of a trade off – by removing the positiblity of regulation by governments, you remove the ability to rectify fraud – protecting your Bitcoin is 100% your responsibility – think twice about how you secure your virtual money! – http://nakedsecurity.sophos.com/2013/08/12/android-random-number-flaw-implicated-in-bitcoin-thefts/
- A timely reminder to be ware of webcams – FBI investigating extortion attempt against Miss Teen USA 2013 allegedly from hackers who took over her webcam – http://nakedsecurity.sophos.com/2013/08/15/miss-teen-usa-2013-says-sextortionist-hacked-webcam-to-snap-bedroom-photos/
- A disturbing case in Houston illustrates the dangers of poorly secured baby monitors – http://nakedsecurity.sophos.com/2013/08/14/baby-monitor-hacker-spies-on-and-swears-at-sleeping-2-year-old/
- A good illustration of why there is no such thing as a safe site on the net – even the most trust-worthy sites often deliver ads, and those ads almost always come from third ad servers – a bug in the OpenX open source ad server software was inserting malicious JavaScript into legitimate ads – http://nakedsecurity.sophos.com/2013/08/07/openx-ad-servers-pre-compromised-official-distro-contained-remote-code-backdoor/
- The UK’s Information Commissioner’s Office quantify the obvious – most data breaches are caused by carelessness – this is why you should give as little of your personal information to as few people as possible (the graph in the story is worth a look) – http://nakedsecurity.sophos.com/2013/08/15/data-breaches-over-half-are-due-to-carelessness-says-ico/
- Google state the blindingly obvious in court documents – GMail users have no legitimate expectation of privacy –http://nakedsecurity.sophos.com/2013/08/14/google-says-gmail-users-cant-expect-privacy/
- PSA – if you run a Joomla-based website and didn’t apply the recent security patch – DO SO ASAP – http://krebsonsecurity.com/2013/08/simple-hack-threatens-oudated-joomla-sites/
- The researchers who brought you the Malicious iOS Charger are back with a way to sneak nasty code through the App Store Vetting Process – Apple have said they have made changes to the process in response – http://www.intego.com/mac-security-blog/researchers-prove-flaw-in-app-store-vetting-process/
- Cyberdarwinism in action – a set offering to hack any Facebook account in exchange for money actually defrauds the would-be hackers, and hacks their accounts instead – http://nakedsecurity.sophos.com/2013/08/09/hack-facebook-works-great-on-you-not-your-intended-victim/
Main Topic – Email Encryption – the Big Picture
A few months ago myself and Allison spend a few weeks in the weeds getting down and dirty implementing email signing and encrypting using S/MIME. This is only one of two common approaches to email encryption, so lets take a step back and look a the big picture, and particularly at the pros and cons of the different approaches.
The two most common email encryption schemes are S/MIME, and PGP/GPG.
Lets start with a quick re-cap of the S/MIME system.
1) S/MIME allows for any out-going email to be digitally signed, proving that it is from the person it claims to be from, and has not been tampered with in transit. (i.e. S/MIME digital signatures assert authenticity and integrity).
2) Assuming both parties have S/MIME configured, S/MIME can also encrypt emails – guaranteeing that the message really is from the sender, that the message has not been tampered with in-transit, and that the message has not been read in transit (i.e. S/MIME offers authenticity, integrity, and confidentiality)
3) S/MIME uses the same Certificate Authority system that websites use as their trust anchor. The security is based on Certificates, which are for all intents and purposes the same as those used by web servers to offer the same three guarantees in HTTPS – authenticity, integrity, and confidentiality
4) S/MIME is an email standard. MIME (Multipurpose Internet Mail Extensions) is the mechanism which allows non-plain-text content (like images) to be sent via email, which is a text-only protocol. MIME allows anything to be represented as text and transmitted in an email in such a way that the receiving client can re-construct the non-text data correctly. S/MIME is the standard for sending encrypted text as a MIME email attachment. S/MIME works by attaching either a digital signature (when signing email), or encrypted text (when encrypting email) as attachments to email, along with your S/MIME certificate.
5) Because S/MIME is an email standard, it is built into most clients, so there is no third party software or plugins needed.
6) The biggest down-side to S/MIME is that you need a certificate signed by one of the recognised Certificate Authorities (CAs). Start SSL gives you weak certificates for personal use only for free, but if you want strong encryption, or to use encrypted or signed email for commercial use you need to pay for a certificate. (Verisign will sell you a one-year S/MIME Cert for $22.95 – https://www.symantec.com/verisign/digital-id)
So how is GPG/PGP different?
PGP stands for Pretty Good Privacy, which is a commercial product. The free and open source alternative is GPG, which stands for GNU Privacy Guard.
PGP/GPG is a general-purpose encryption system, it can be used to encrypt anything – blocks of text, files, entire hard disks, and of course email content.
Unlike S/MIME, PGP/GPG does not use certificates signed by Certificate Authorities as trust anchors – instead it uses simple public-private key-pairs. Your certainty about the authenticity of a PGP/GPG-encrypted email is only as good as your certainty that the public key you have really belongs to the person who you think it belong to. With S/MIME your computer can automatically verify authenticity by verifying the provided certificate against the root certificates that are a part of every modern OS – with PGP/GPG it’s up to you to be sure about the keys you accept.
Some people publish their public keys on their websites – and for ‘celebrities’ like Leo Laporte that works well, but only if the person receiving an email pretending to be from Leo takes the time to figure out where Leo publishes his key, and to verify that the email received really is signed with that key.
There is also the concept of the “web of trust” – this is where people sign each other’s keys to ‘vouch’ for their authenticity – if you know and trust Allison and have her key, then you can trust all the keys that are signed by Allison’s key. You can even sort of trust all the keys signed by all the keys signed by Allison. If you know 10 GPG people who all sign 10 keys, that web can build out quite rapidly – but it’s very much a nerd-community thing, and just not going to fly in a corporate setting.
Finally there are also databases where you can register your public key so people can look it up.
Within a closed community like the Nosillacastaways PGP/GPG could work really well.
Apart from the less regulated trust anchor, another big difference between S/MIME and PGP/GPG is email client support. Unlike S/MIME, GPG/PGP encryption is not part of the email standard, and is not widely supported in clients (out of the box at least).
If you want PGP/GPG email you either need to pay for the PGP software, or get a free GPG plugin for your email client. If you use a mail client that has a plugin architecture like Thunderbird that’s a great solution, but, for Mail.app all these tools are hacks – there is no plugin system for Mail.app! On iOS you can’t hack the Mail app, so there you need to install a third-party mail client to get PGP/GPG support.
Personally, I detest hacks, they turn updates and upgrades into gambles! So, my advice is that if you do want to go the PGP/GPG route, that you switch to mail clients that either have native PGP/GPG support, or have an official plugin architecture like Thunderbird.
Final thoughts
Under the hood there is actually very little difference between PGP/GPG and S/MIME – both support digital signatures and encryption, and both use public key encryption to achieve that aim. The biggest difference is that with S/MIME the public keys are notarised by the Certificate Authorities, while validation of PGP/GPG is an unregulated organic affair. The very reasons that make S/MIME appealing to some people make it unappealing to others. GPG is more in line with an open source anarchist philosophy (I mean that in the true meaning of the word anarchist, not pejoratively) precisely because there is no one canonical trust anchor.
For geeks both are good options, but for regular peeps I would recommend S/MIME over GPG/PGP because of the automated certificate validation and the out-of-the-box client support. In the corporate world there is no competition really – S/MIME and Outlook are good friends 🙂
Reminder:
Next week’s Security Now will be on PGP encryption.
Links:
Hi Bart & Katie.
Excellent segment comparing S/MIME, and PGP/GPG.
I use both, well I do since listening to the show! Originally I have been a big supporter of GPG for some time & use GPG Tools for Mac https://gpgtools.org
After listening to the Podcast I decided to have a look at S/MIME.
Here is a Link to Comodo who provide free Certs for e-Mail at 2048 bits. http://www.instantssl.com/ssl-certificate-products/free-email-certificate.html
In your opinion is this free Cert. as trustworthy & effective as the paid versions?
Isn`t the problem with S/MIME the fact that it is notarised by Certificate Authorities that just could allow a “back-door” to a 3rd party such as NSA/GCHQ etc? I believe is much less likely to happen with the Open Source GPG/PGP?
Also thanks to Katie for standing in this week, I thought it was an excellent show.
I know the hassle of digitising old photos very well! My father died last October & he hoarded 1000’s & 1000’s of images that I am gradually working through myself.
Kind regards.
Nick
Thanks, Katie and Bart:)
This was a truly memorable and superb show! Stiched together absolutely perfectly and really got me into thinking about digital signatures. Well done both!
Just FYI, SwitcherMark and I are going back and forth on Twitter at the moment because I tried it on my iPhone and it… doesn’t work very well on the iPhone to be totally frank. Poor optimization is one of my biggest pet peeves.
It sounds like you were seeing some of the same issues I saw on the iPåd. Especially the delays in loading information.
[…] Nosillacast: Katie Discusses Email Encryption […]
[…] but often isn’t, it’s hard to find a better introduction than Bart Busschot’s on this episode of the Nosillacast. It starts at about 47 […]
Thank you for this article