 You know the old question, “why did you climb that mountain?” And the answer was, “Because it was there”? That’s the way I feel about some of the technology experiments I do sometimes. I love to play with tech and sometimes I will go to enormous work to get something to work when there’s a very simple solution to the same problem. But what’s the fun in that?
At CES, we interviewed a gentleman named Eric Jurgenson about an open source digital assistant named Mycroft AI. Imagine an Amazon Echo except not owned by anyone but you. You can buy a Mycroft Mark 1 today for $180, or preorder a Mycroft Mark 2 for $190. The Mark 1 requires a microphone and speaker be attached, but the Mark 2 will include both and has a pretty LCD display for things like the weather.
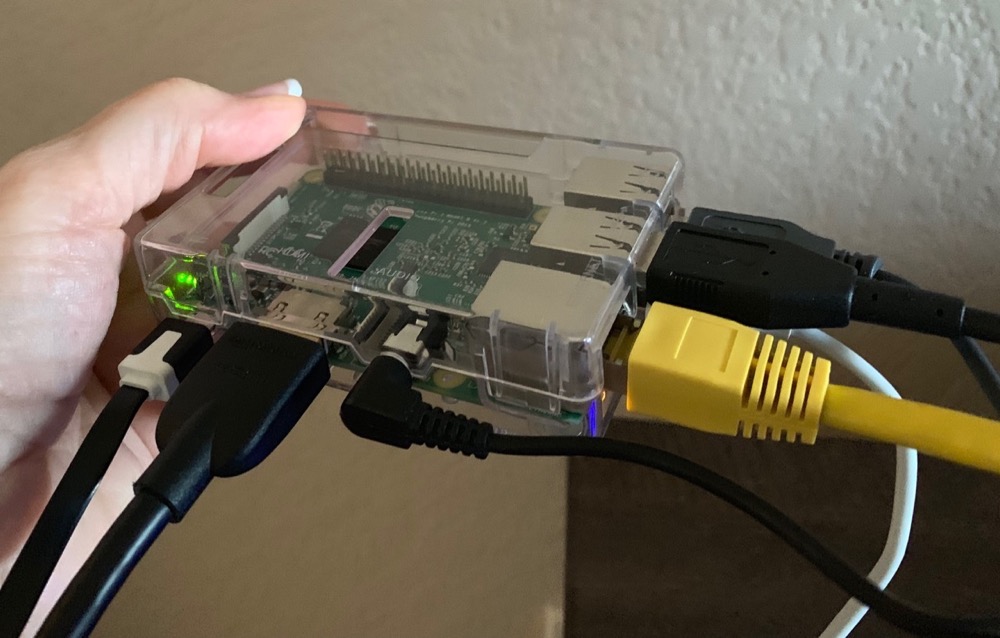 But what’s inside both devices is interesting, they’re built on a Raspberry Pi. For those who are unfamiliar, a Raspberry Pi is a single board computer that sells for an absolute pittance. The raw board will run you $35-40. This is a small circuit board, around 3×2″ with four USB ports, HDMI, headphone jack, Ethernet and a microSD card slot. To make it really elegant, you might want to put a plastic case around it. I gotta warn you though, a clear plastic enclosure is going to set you back another $5.57.
People have done really interesting things with Raspberry Pis, from building controllers for their home automation and teaching kids to code. I’ve been wanting to play with a Raspberry Pi for ages but couldn’t think of what to do with it so I never bought one. Over the holidays we had an open house to celebrate the completion of our bathroom remodels. Unexpectedly people brought us gifts! We got bottles of wine, gorgeous flowers, three people brought gin (wonder why), someone brought us giant mugs filled with chocolate. But of all these gifts, one was my favorite.
 You may remember Ed Tobias coming on the show to talk about how he built a web server for his family photos using a Raspberry Pi. I invited him to our open house and he felt it was appropriate to bring a gift as well. He thought it would be appropriate to bring pie! And I’m sure you’ve figured out by now, he meant a Raspberry Pi.
When I heard you could put Mycroft AI on your own Raspberry Pi I finally knew the project I needed to do.
I started at the Mycroft AI website, mycroft.ai/…. From there you can buy the Mycroft devices, you can support the open source project, and even invest in the project. There’s also a link to build your own Mycroft with a Raspberry Pi, which takes you over to github.com/…. Incidentally, the Mycroft software when running on a Raspberry Pi is called Picroft which is also awesome.
Remember that we’re going down a geeky and completely unnecessary path as I have an Amazon echo and a HomePod with Siri and all of our phones, tablets, Macs, and watches work with Siri. I think my favorite part of this adventure was when I saw the disk image for Picroft on Github with the title, “unstable image”. Usually, you get the choice of the latest and greatest vs. a stable image, but on Picroft they surface you the unstable image. That’s the BEST, right?
I downloaded the Picroft image with great glee. The Raspberry Pi operating system runs off of a microSD card as there is no internal storage. While I waited for the image to download, I followed the link the provided to the Raspberry Pi instructions on how to install an operating system image to an SD card at raspberry.org. The instructions of what to do next were surprisingly clear. They explained that it would be a zip file and made suggestions on apps for each operating system (Mac, Linux, and windows) on what tools you might need to use to unzip the file.
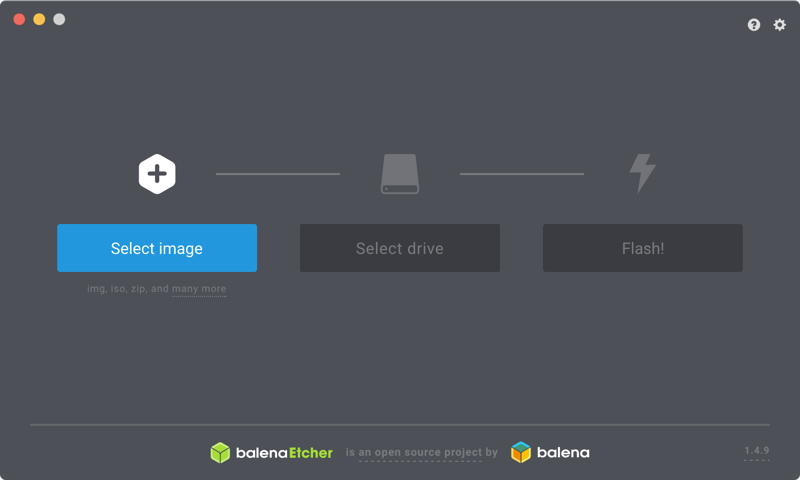 At the Raspberry Pi site, they suggested using Etcher, which is an open source, graphical SD card writing tool that works on all three OSs. I’ve never done anything like this before, but Etcher (which was actually called balenaEtcher from www.balena.io/…) made it super easy. You get three big fat buttons. The left says Select image and you point to the .img file that you unzipped. The next button says Select drive and you point at the microSD card that you’ve hopefully mounted before you got this far.
The last button says Flash! When you hit that button it installs the image onto the card. It took a while, maybe 10 minutes, but SD cards aren’t the fastest medium around. Once the SD card has been flashed with it’s fancy new operating system it’s time to stick it in the Raspberry Pi and see what happens.
I created the most beautiful Frankenstein to run this experiment. I plugged an old Dell monitor via HDMI into the Raspberry Pi for video. Then I used an old Apple extended keyboard with a brand-new wired Logitech mouse, both via USB. Interestingly it didn’t work to use the keyboard as a USB-hub for the mouse, they both had to be directly plugged in.
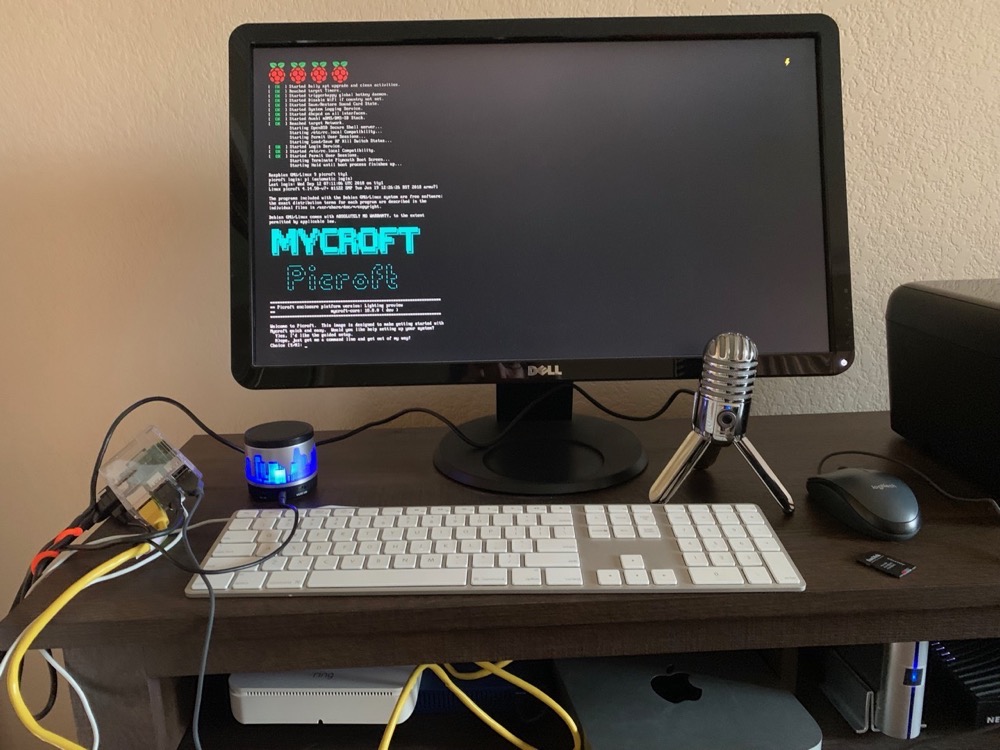 Steve and I recently test drove the Jaguar I-Pace electric SUV (not because we’re in the market, but because Pat Dengler got us invited to a special event so why not?) After the test drive they gave each of us a tiny little cylindrical Bluetooth speaker that actually as pretty good sound and a really pretty skyline of LA that lights up when it’s turned on. It also has a headphone jack so Steve suggested I try using it as the speaker for the Raspberry Pi.
Finally, I needed to connect a USB microphone so that Mycroft could hear my commands. They have only tested Mycroft with three specific USB mics, but I didn’t own any of them. I first tried my ATR2100 but that didn’t work, so I switched over to my $43 Samson Meteor Mic which I’d not used in ages. To be honest, I couldn’t figure out where I packed it away with all the moving from painting and remodeling! I finally found it, but my $36 Samson Go mic is still at large so if anyone knows where it is, I’d appreciate a tip on that.
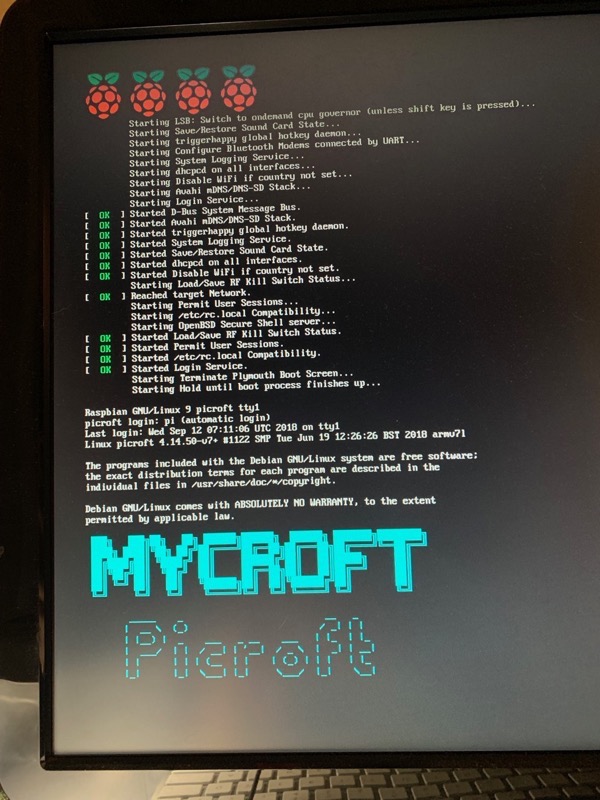 After plugging in an Ethernet cable (my Raspberry Pi doesn’t have a WiFi chip), my little Frankenstein was ready to roll. I plugged the micro-USB cable Ed included into an iPad power supply (they say to use a 2.5Watt or higher supply for best results). My screen was instantly filled with wonderfully unintelligible text glop scrolling by that would make a Linux admin’s heart sing.
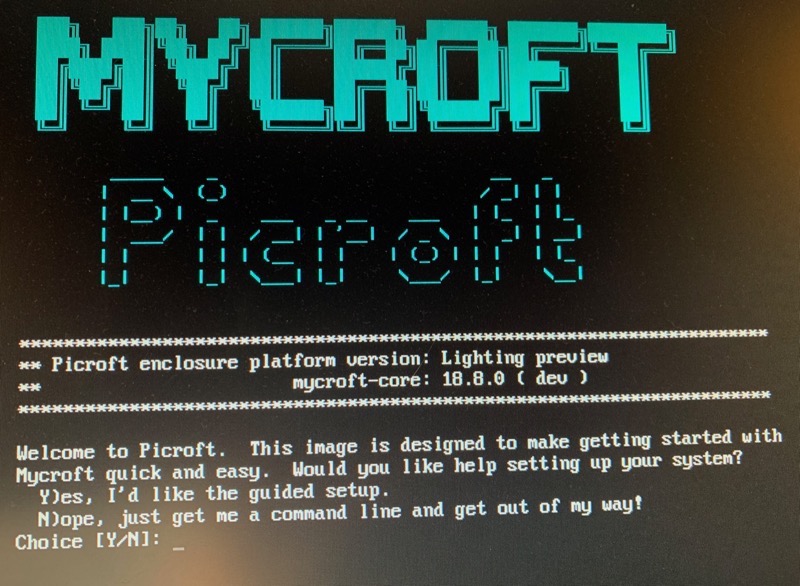
When it finished, it told me that it was running Debian Linux which was interesting. Then it drew in glorious 8-bit graphics the words MYCROFT Picroft. Fabulous. Right below that, it offered to walk me through their guided setup. The other option said, “Nope, just get me a command line and get out of my way!” I went for the guided setup. It asked me the following questions:
- Details of my WiFi connection, which then suggested I plug in Ethernet since I don’t have a WiFi card
- How my speakers are plugged in, with a headphone jack, HDMI audio or USB audio
- It queried me to test the output audio first, giving me a 1-9 option for volume and the hitting t to test. I was thrilled to hear Mycroft say “test” out of my little speaker!
- Next, it went through the audio input. This is where my first microphone choice failed. I had to reboot and start over with the second mic to get to this point and it worked. It asked me to make some noise and then after I stopped it played back the recording I’d made. Very exciting.
- Finally, after pressing the correct key to indicate my mic was working it asked me if I wanted to turn on auto-updates or if I was a core developer who wanted to manage the updates. Yeah, we’ll go with auto-updates.
- The next question messed me up the first time I ran this configuration tool. It said that by default Raspbian (the OS in a Raspberry Pi) does not require a password to perform actions as root, e.g. sudo. It asked me if I wanted to have a sudo password. Of course I said yes, gave it a password and immediately entered the password into my 1Password vault. After finishing all the configuration though, I tried my sudo password and it said I was entering it wrong! I wasn’t sure where this would mess me up along the line, so I actually reformatted the SD card, reflashed it with Picroft and went through all of this again and this time did not add a sudo password. I’ll work on that later.
- The next question was easier, did I want a different login password? Why yes, please!
- Finally, it told me if I needed to run this setup again I could simply type mycroft-setup-wizard and reboot
- But wait! One more thing. It read out a six-digit code and said I needed to go to Mycroft.ai to register the device. The first time I did this, it would never recognize the code, even though I triple checked it as Mycroft repeated the code once every minute. That was another reason I ended up starting over and reformatting the card! But the second time, I was able to make an account and enter my code and it worked!
Ok…it’s time to try it out…
Nope. Time to run auto-updates. Which is like watching paint dry only slightly less interesting. Hey, I’m the woman who has a coffee cup that needed a firmware update, what am I complaining about?
But finally, it was ready! I said, “Hey Mycroft” and I heard a delightful little bloop from my speaker. I then said, “What time is it?” And it gave me the time in Central Time. I’m in Pacific Time. Ok. I tried, “Sing me a song.” And Mycroft said, “I’m a little bit nervous about my voice, but here goes.” And went on to sing “My Favorite Things” from the Sound of Music in the most deadpan voice you’ve ever heard. It was awesome. He doesn’t always sing the same thing, and he doesn’t always apologize for his voice, but it’s always hilarious. Let’s listen:
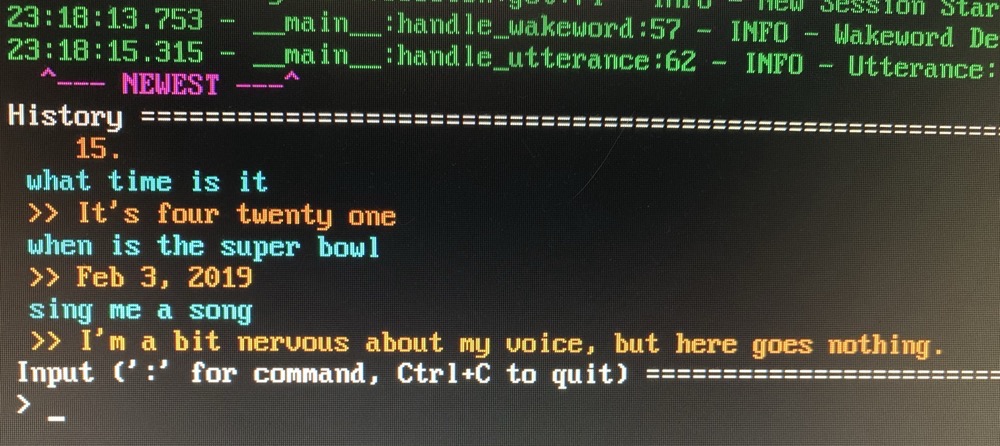 I bumped a key on the keyboard at one point and suddenly I was in a command line interface (or CLI as the cool kids call it). This made it really fun because when I make requests, I can see it interpret what I say first, then it types the answer on screen and then finally it speaks it out loud. I should mention that there is a pretty long lag between when it understands the question until it speaks the answer but in looking at the CLI I could tell that the speech synthesis itself accounted for most of that lag. I also found it interesting that you can interact with Mycroft from the CLI, typing in questions. That’s something that people have been asking for on Siri for a long time.
Now that I had Mycroft running beautifully on my Raspberry Pi, I was able to disconnect the keyboard, mouse, and monitor. They’re only necessary during the initial setup. It makes this far less of a Frankenstein – it’s just a little clear box with a circuit board inside, a speaker and a microphone. Still a hot mess to look at but I love it.
I have to say that this whole project was a great deal of fun, but sadly it only took me the better part of a day to get working. I was kind of hoping to have a lot of trouble getting this to work so that I could torture Ed with endless questions. Since Picroft is flashed onto its own memory card, I can easily swap back to running the regular Raspian OS and learn how to program with Scratch. Or guess what else? Mycroft can be installed on a desktop! It’s all through Github so I’m sure I can mess things up with that. Today during lunch I heard an ad from IBM for their AI service. It’s called Watson. I finally get why this AI is called Mycroft!


If you wanted to go farther down the rabbit hole, There is a ‘Google AIY Voice kit’ that google created a couple of years ago. This kit included a cardboard box, speaker, microphone board, and sound board to be attached to a raspberry pi.
You then download a sd card image that has the google ‘OK google’ software installed on it and go through similar steps as you did with mycroft above.
Someone creative also adapted the picroft image to be able to use the google AIY voice kit referenced above!
Here is a link on amazon to the Voice kit: https://www.amazon.com/Google-GOOGLEAIY-V1-AIY-Voice/dp/B075SFLWKX/ref=sr_1_1?keywords=google+aiy+voice+kit&qid=1548087321&s=Electronics&sr=1-1-catcorr
There’s nothing wrong with connecting your Pi via Ethernet, but I think it is likely your Raspberry Pi is capable of connecting to WiFi. The Raspberry Pi 3, released in February 2016, has onboard WiFi as do its subsequent updated verstions the 3 B+ and 3 A+, also the smaller, cheaper Raspberry Pi zero W has WiFi. I’d be surprised if your friend gave you one as old as a Raspberry Pi 2.
D’oh! I didn’t even think of that! I assumed because it was so inexpensive it wouldn’t have WiFi.