Last week you hopefully heard or saw our interview with Manu Menon from Axis about their Gear smart shade motorized controller. Steve was so intrigued by this device that he ordered one for us. Now we can give you a hands-on review.
Problem to be Solved

The problem to be solved is that every evening Steve goes to our vertical blinds on the front of the house and closes them for privacy, and in the morning reverses the process to allow the daylight in. It’s not hard, but it’s definitely tedious. They’re kind of hard to pull and you have to kneel on the couch to reach the string loop, and no matter which side you pull, you grab the wrong one first because they strung every other window in the opposite way. It takes a half dozen pulls to get them open too.
We’re used to devices from CES being vaporware, or at best coming out years after you first see them. When I tweeted that we had ordered the Axis Gear, Raj Deut tweeted back to me that he’d seen them at CES two years ago and was curious if they would actually deliver. Well, in just a little longer than it took him to produce the video, Steve received his Axis Gear on Tuesday.
Gear App

Inside the Axis Gear box was a Getting Started label that had a QR code begging to be scanned to get the Gear app. Sadly they printed it wee tiny, and the ink bled so that it was unrecognizable by our iPhone cameras. Not a huge deal because it was an easy trip to the app store to get the Gear app.
The app is pretty good. They walk you through step by step what to do, asking you questions along the way and tailoring the installation instructions depending on your answer. For example at one point it needs to know if you’re going to be adhering the controller to metal or wallboard and the instructions are different depending on the path you choose.
The only thing not to like about the app was that if you have to step away to do something and your phone goes to sleep, the app loses its place and you have to start over. It’s not a huge deal because you can flip through the screens quickly
Gear Installation

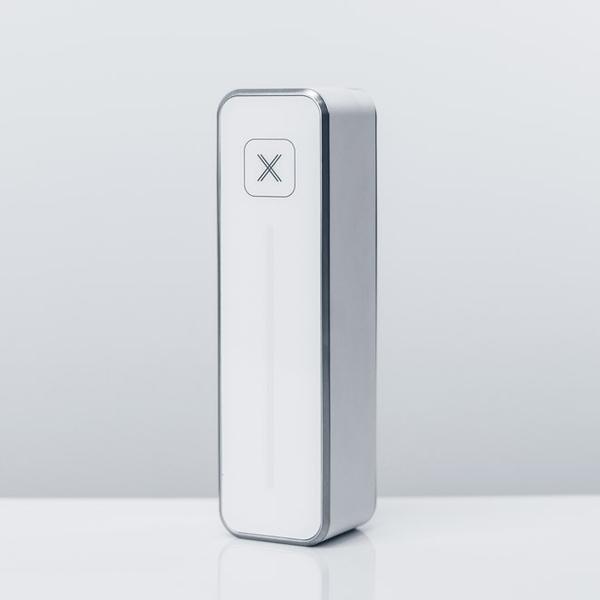
In the package there are a few parts. The main controller is a rectangular box about 6 inches long and maybe 2 inches square. It comes with a mounting bracket, a wall charger with what looks like a Magsafe connector and a solar panel with the same connector. Sadly our front window faces North and being in the Northern hemisphere, we don’t get any direct sun in that window at all. A pity really.
It’s important to note that Gear works with any shade that has a loop (either chain or cord) as the mechanism to open/close your blinds. The Gear controller has a plastic gear around which you feed the loop of your shade’s pull chain/cord, and then the controller slides into the mounting bracket.
But before you can do this, you have to remove the old equipment. This turned out to be more physically challenging than we’d thought. The old equipment in our case is simply a 4-inch piece of plastic with a spring at the bottom that’s screwed into the side wall, and at the top it has an embedded roller through which the cord is fed.

The hard part wasn’t removing the single screw, it was getting the cord out without simply breaking the plastic piece with the roller. We weren’t 100% certain that the new device would work and didn’t want to have to go hunt down a replacement part. Armed with a pair of pliers held by Steve to try to gently squeeze the plastic bracket open and a small screwdriver precisely placed by his trusty side kick, we were able to pop the wheel out without damage.
You have two options on how to attach the mounting bracket to the wall, with a couple of screws or with double-backed tape. The tricky bit is getting the placement correct. You have to leave at least three inches from any interference below so you’ll have room to mount the controller. But in the other direction you have to have it low enough that you get enough tension on the pull cord to allow it to grab and move the cord.
They give you a nice template to hold up to make sure you’ll be able to get it all in place correctly and the instructions in the app are really clear.
Gear Setup

After Steve got it installed, he excitedly followed the instructions to touch and hold the on button to turn on the Gear, but it didn’t turn on. He tried everything he could think of to get it to come on but there was no joy. We looked online at the troubleshooting section and it said that to be sure that the back panel was on the unit or it wouldn’t turn on. Well, the plastic gear looking thing had to be exposed or you wouldn’t be able to put the cord around it, so we figured the bottom half being covered was what they meant about a back panel. We were sad that it didn’t work.
Steve went online and found that they have a way to schedule a phone call for support through their online system. How cool is that? Even cooler is that the person called at the time of the appointment Steve requested. And they didn’t even mock him when they explained that the back cover that goes over the gear had to be on, and sure enough, it was still in the box! Oh well, it gave Steve a chance to exercise the support folks just for you.
The lovely support person Christophe stayed with Steve through the rest of the setup which was actually the fun part. When the Gear first comes up, an LED strip lights up in red at the top and bottom to indicate it still needs to learn where fully open and closed positions are.
On the end of the controller there’s a SET button. You hit that button when you’ve got the blinds fully opened and you’ll be rewarded with a green light on the top of the LED strip. Repeat the procedure to set the fully closed position and the entire LED strip will flash green to let you know the Gear’s configuration is complete and your motorized window shades are ready for use.
We have vertical louvered blinds, and when they’re drawn closed and louvered closed, they’re impossible to draw open even by hand. You can have them partially louvered closed and draw them so that’s how we have to have them set to ensure that we don’t burn out the motor on the Gear. Unfortunately, Gear does not support louvering the blinds, just opening and closing them.
And Now the App
 Once your Gear is set up and calibrated, controlling the blinds is quite nice. The Gear has an X at the top that means stop and you can tap along a vertical line to set how open or closed you want the shades. As I mentioned earlier, access to our blinds’ pull cord is a bit difficult as you have to kneel on the couch and reach behind it to get to the controller, so the app is an easier way for us.
The Gear app is snappy, fluid, and very functional. The screens are well laid out so that it’s obvious what should happen on each screen. You see a list of your shades on the main screen and a simple tap shows you the controller on screen allowing you to tap to one of the four open/closed set points or to any spot along the graphic slide controller.
You can set up schedules for when you want the shades to change and by how much. They offer some templates that are pretty useful, like a weekend schedule that’s different from your weekday schedule so you can sleep in. Alternatively you can create your own schedule from scratch. This scheduling feature is exactly what Steve wanted. Such a simple thing but so delightful to have it happen automatically every morning and evening.
 One of the requirements for a good automation tool is that more than one person be able to control the device through their phone. After Steve had all the fun setting up the Gear on his phone, I installed the Axis app on my phone. I tapped the plus button to add a device, it asked me to press the Pair button on the controller, and then it showed me a list of nearby Bluetooth devices (we have LOTS!) One of the devices was “Living Room Blinds”. I tapped it, and it said, “Someone else has already set up these shades, would you like to add it to your dashboard?” I said yes, and I was done. I do not believe I’ve ever seen an easier addition of a smart home device to a second user!
The one oddity is that I can’t see the schedules Steve set up, but I can add my own. I’m half tempted to write one that conflicts with his so the poor thing goes bananas.
Gear works over Bluetooth and supports Zigbee, so with a compatible hub you can add control Gear over the Internet. It’s not HomeKit-compatible, which is a disappointment, but it does solve the main problem we had. Gear does have a Group function in beta, so if you have several Axis Gears you can have them perform their magic in unison.
Bottom Line
The bottom line is that installation of the Gear Axis motorized shade controller is relatively easy and works with any type of shade that has a loop for a pull cord or chain. The setup in the app is delightful and easy, if you remember to put the backplate on the device. Human support from Axis is outstanding. Steve is really happy that he doesn’t have to open and close the darn blinds twice every single day. There is one fairly significant downside to the Axis Gear. It’s $250.