 Hello Allison and NosillaCastaways!
This is Joop from a windy home sheltering Netherlands. As a follow up to your item on your podcasts setup last week, I would like to give you a small review of a new microphone setup I bought recently.
So I wanted a condenser mic with XLR connection, and you need a pre-amp because the condenser mics use phantom power, and I need a boom arm. With a little bit googling and you-tubing I found the RØDE Complete Studio Kit with Audio Interface, Amazon price here was 280 euro that is including 21% vat, without vat it is 231 euro 40. (Out of stock at Amazon US, but in stock on B&H Photo for $349: www.bhphotovideo.com/…
RØDE gives a 10 year warranty so from all what I read and heard seems a decent price quality ratio.
And as a mic stand I ordered the RØDE PSA1 studio arm, price 78 euros incl vat, 62,81 excl vat. (PSA1 studio arm is discontinued.)
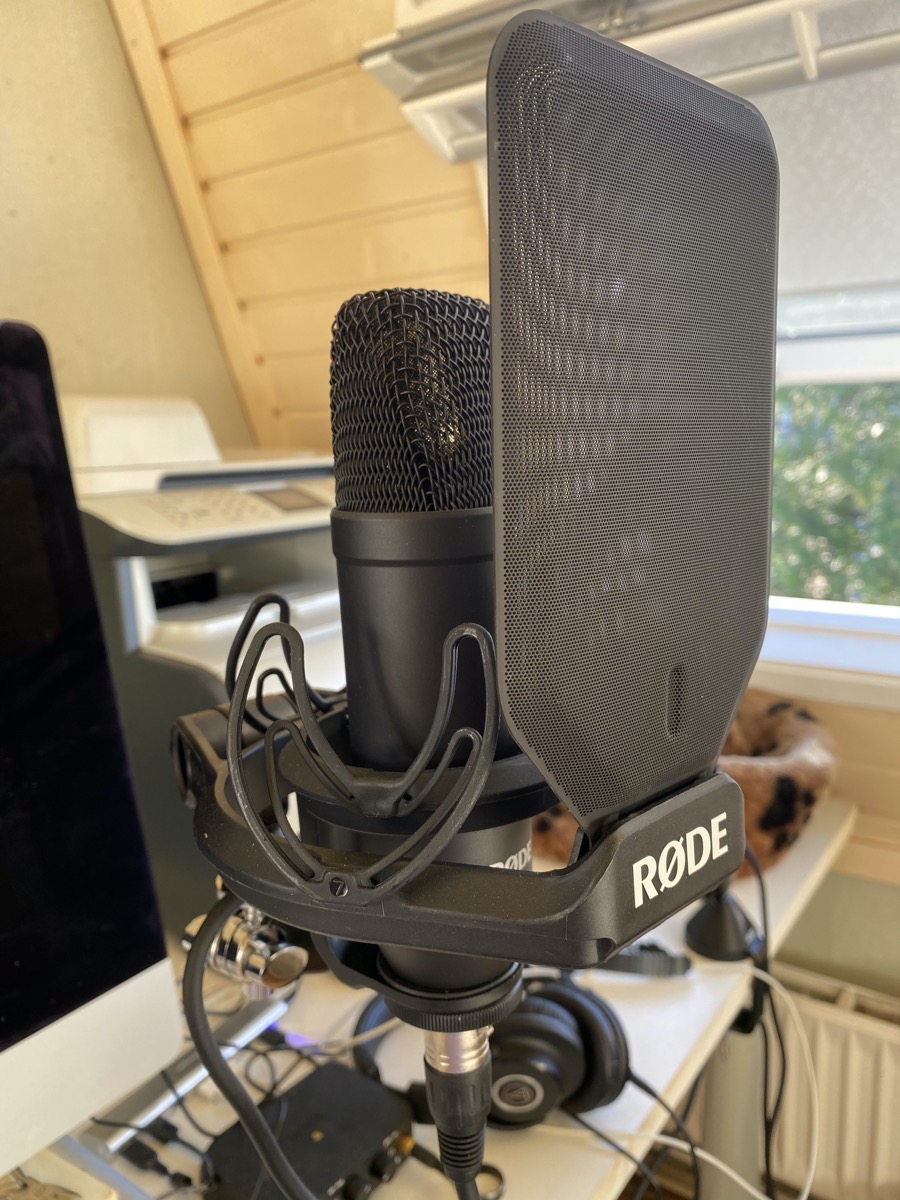
The studio box contains a NT1 condenser microphone, the AI-1 audio interface, a 6m long XLR cable, I guess thats about 18 feet, and a shock mount with pop filter, and a USB-C to USB-A cable.
All the parts feel solid and hefty, the mic is all metal, with a mesh top where you just can see the condenser part. I screwed it into the shock mount and of course the shock mount to the studio arm.
The mic has no switches toggles or buttons. It just has a gold-colored brand so you can tell which side is up.

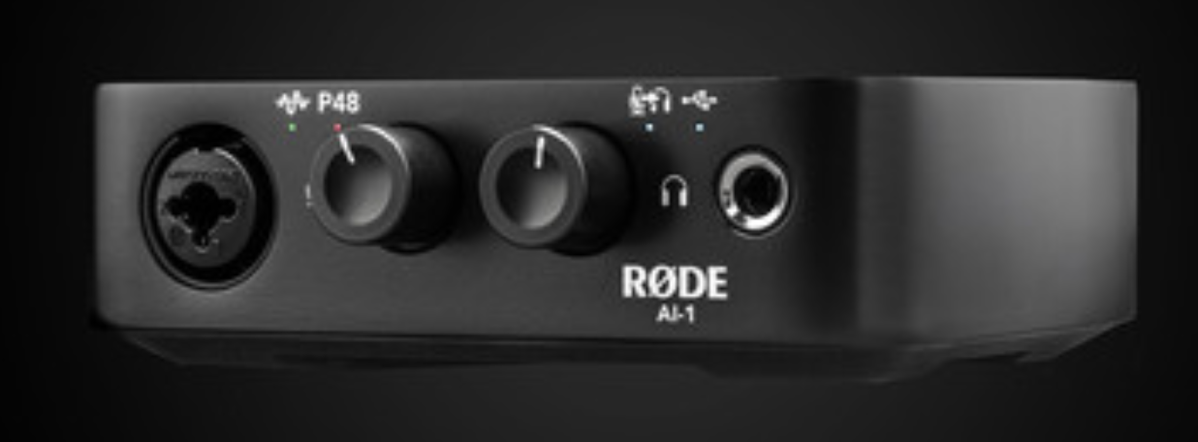
And the mic is connected to the AI-1 audio interfaces with the XLR cable. The AI-1 audio interface is a small all-aluminium box I would guess some 6 by 4 by 1 inch measurements. At the back are 2 balanced outputs where you can connect some speakers for monitoring, and a USB-C output.
With the USB-C you connect the AI to your Mac or PC.
In the front from left to right:
- A XLR plug for your mic cable of course. As a side note, the XLR connector in the AI-1 is a multipurpose connector, if you play electric guitar you can also use this interface to connect your guitar to your Mac/Pc.
- Next to the plug is the volume control for your mic, with a small LED indicating the level, green indicating a good level, orange you’re sending too much signal, and red you’ve overdone it.
- This knob is also a button you have to push to use the 48V phantom power for this kind of mic which is indicated with a small red LED
- Next to this a knob for the headphone volume control, and next to that a 6.5 mm jack for your headphone.
- The headphone volume is also a switch, normally there is a tiny delay between your own speech and when you hear yourself back on the headphones, which is very annoying. If you push the volume button you will hear the direct output of the mic without the delay.
So that’s it, for the few days I have been able to use this now, I’m very pleased with the product and the quality of the sound, and now I am struggling to learn anything about recording and mixing, playing with Audio Hijack and GarageBand at the moment.
I hope this made all some sense, and I wish everybody the best of health, wash your hands and stay inside.
Kind Regards,
Joop
On Twitter I am @oetgrunnen.

