You know how we all keep trying different task management tools in the hope that one of them will help make us the productivity champion we envision we can be? The same thing happens with note-taking apps. We keep looking for that Holy Grail that will help us organize all our thoughts. I’ve tried so many different apps that it’s embarrassing.
For a long time I mocked myself for this but over the years I think I’ve actually settled on, wait for it, 5 different apps that solve all of my note-taking challenges. I always envisioned that there should be one note-taking app to rule them all but it turns out I have many different requirements and each tool has its own benefits. The 5 apps I’ve settled on are:
- Ulysses
- Keep It
- Notability
- Google Docs
- Notes
I’d like to walk through each one and explain the problems it solves and why it’s my go-to for that problem.
Ulysses for Draft Blog Posts
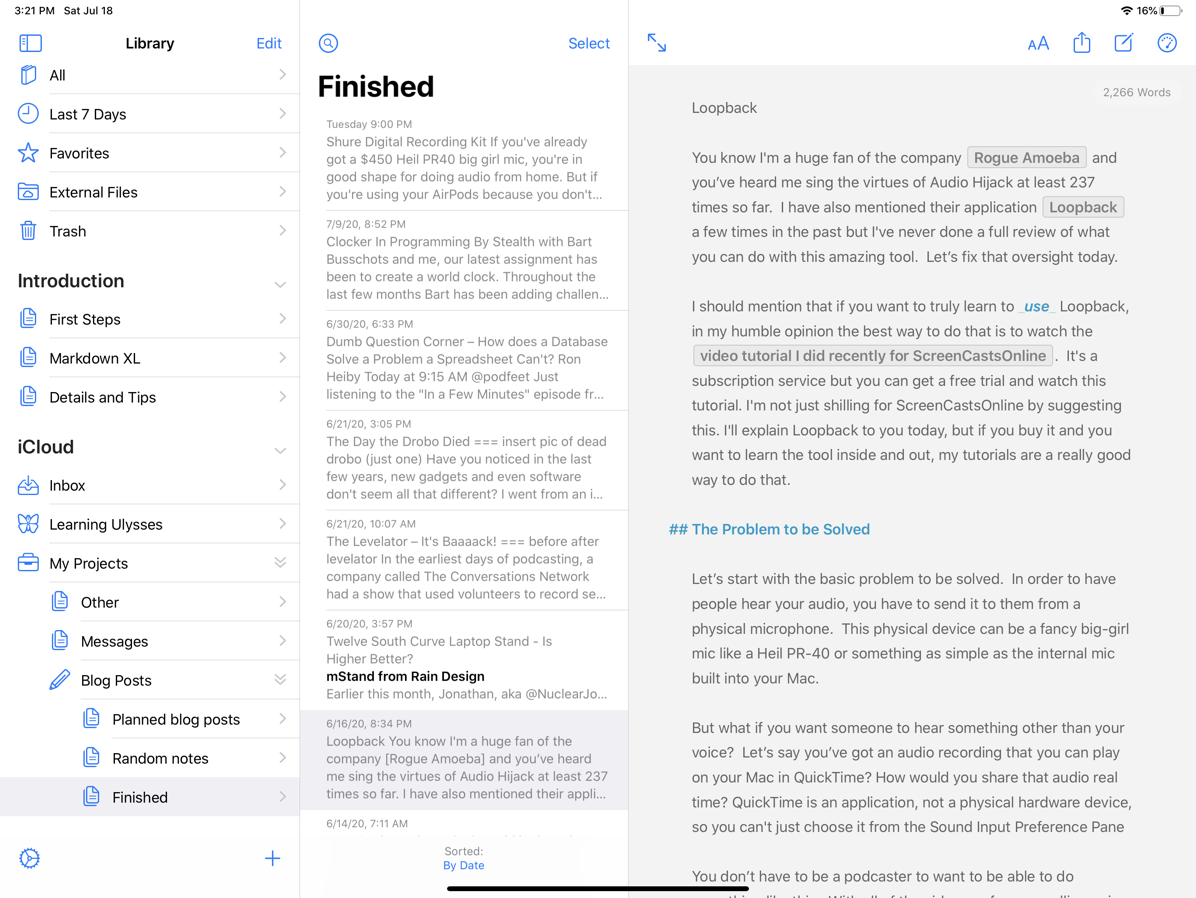
Most of my blog posts start now in Ulysses from ulysses.app. My preferred blogging tool is actually Mars Edit from red-sweater.com, but it’s only available on the Mac and I’m finding it quite pleasurable to write on my iPad Pro with the new Magic Keyboard. MarsEdit will still be in my workflow because it makes it so easy to drop in images and have the correct styling to add captions for clarity, and it provides a preview with my own theme so I can see how things look before posting to podfeet.com. I probably wouldn’t be using Ulysses if MarsEdit was cross platform.
Ulysses supports Markdown language, which has become more and more appealing over time for me. Markdown is more human-readable than writing in HTML, and since MarsEdit supports Markdown I can export the files to MarsEdit and keep working on the posts.
Probably one of the main reasons I like Ulysses on iPad for writing blog posts is that I’m less distracted. I know it’s possible to be distracted by notifications when using an iPad, but in general, having just the one app up at a time and making it fill the screen with no sidebar in Ulysses keeps my brain in one place.
Another reason Ulysses is perfect for my blog post writing is that it supports the beloved TextExpander. I use a zillion TextExpander snippets when I’m writing for podfeet.com which makes Ulysses far more productive than any other writing app on my iPad.
All of this makes a compelling argument to use Ulysses for the first draft of my blog posts using my iPad, but the icing on the cake is that Ulysses syncs very quickly (most of the time) back to my Mac. I can finish a draft on the iPad, and move it to MarsEdit on my Mac to do the heavy lifting. I make one mistake virtually every time I do this. I select all in Ulysses, copy, switch to MarsEdit, and then paste. That method borks all of the Markdown links I created so carefully in Ulysses.
The right way to export from Ulysses is to use the little share icon, and change the dropdown to show Markdown as the format and then copy the text and plop it into MarsEdit. Ulysses also supports exporting directly to WordPress which is pretty awesome, but since I definitely want to complete the work in MarsEdit I don’t actually use that feature.
One reason people like to write in a plain-text editor like Ulysses is that you simply can’t do things that distract you from the actual writing, like embedding images. Personally I find that embedding images as I go along helps me write a more cohesive story, so I still prefer working in MarsEdit when I’m on my Mac.
Ulysses app for iPadOS, iOS, and macOS is $6/month US, but if you’ve been looking for a way to justify getting a Setapp subscription, look no further. The thing that got me to start using Ulysses was that I was already paying $9/month for Setapp, and it includes Ulysses. While Ulysses used to cost $25 on the iPad and $50 on the Mac, the Setapp subscription actually covers both platforms so I feel like I’m getting it for free with my Setapp subscription.
Keep It for a Plethora of Things
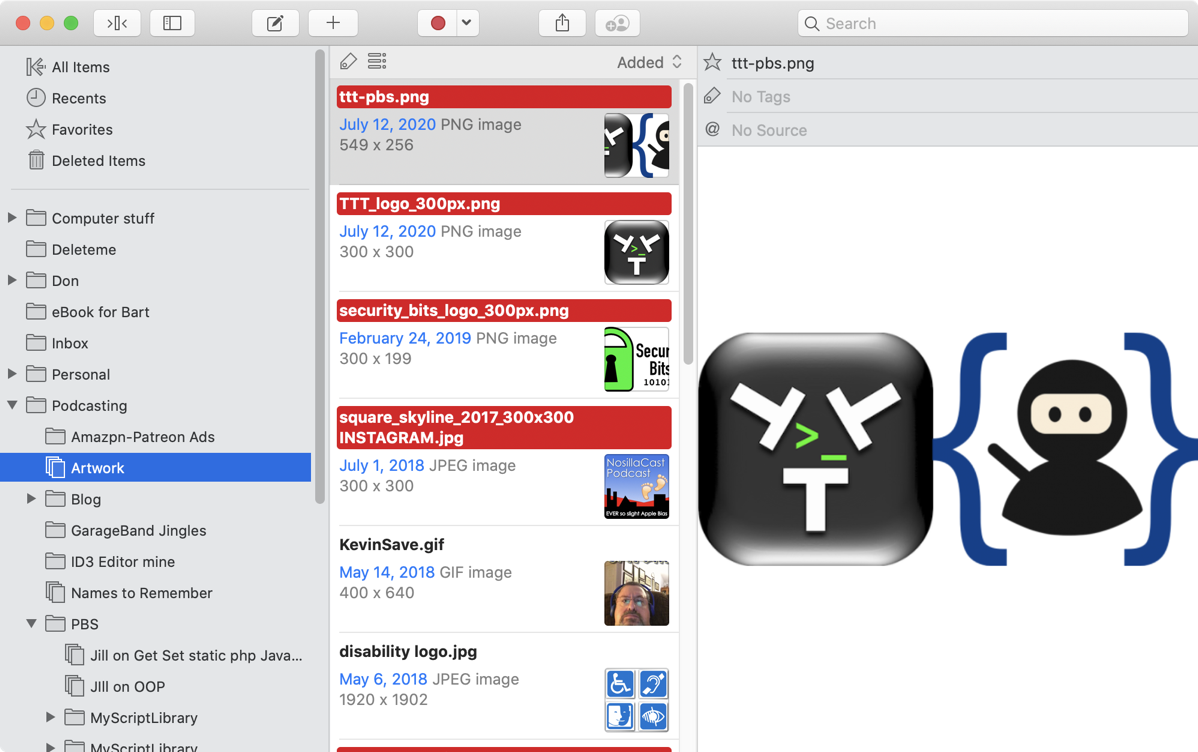
I use Keep It from reinventedsoftware.com/… to store many kinds of notes. Keep It’s main strength is that it stores every kind of data. Not just text files, but audio, video, images and more. It stores all of these things not in some arcane database, but rather right in the Finder. Keep It uses every kind of tagging, categorizing, folderizing, meta-data, smart album method you can think of. In a way, I feel like it’s a Super Finder.
This doesn’t fit in the note-taking app category, but I keep a copy of the logos for all of the shows I do and the audio intro and outro clips for them in Keep It because it’s easier and faster to find them in Keep It than the Finder.
The note-taking I do in Keep It seems to have evolved to being specifically notes about programming. If Jill sends me one of her fantastic explanations of some programming concept I’ve been struggling with on Programming By Stealth, the first thing I do is move a copy into Keep It in a folder called PBS.
If I am working on a project and I find some code or library that’s helpful to my programming, I copy the link for it to Keep It (in the field called “source”) and then put the explanation of how I used it to remind future me how I solved the problem. I tag the heck out of it to give future me a good chance I can find it later.
Helma recently helped me wrap my head around how to merge branches in Git (it’s a nerdy programming thing) and I immediately wrote up my understanding of the conversation in Keep It.
We use Mimo Live to broadcast the live show as you see it (podfeet.com/…), and I send my video and audio to Steve for the production using Chrome. We’ve been struggling lately with my computer not being able to keep up with the task, even though it’s a brand-new 8-core Intel i9 with 64GB of RAM and the fastest GPU Apple puts in their laptops. We just figured out last week, thanks to Mike Price in the live chat, that there’s a toggle in Chrome for whether to use hardware acceleration and for some reason toggling that off fixed the problem. You can bet I dropped his explanation and the link about it right into Keep It immediately so the next time it happens after a clean install or an update to Chrome I’ll be able to retrieve the solution. Again, tagged the daylights out of it so I can find it.
J.F. Brissette, the editor of my videos for ScreenCastsOnline, was helping me try to eliminate the plosives on my mic. Plosives are when “pop your p’s”. I have a pop filter but saying “Patreon of the Podfeet Podcasts” is just too much for it to filter out. J.F. explained that adding an Audio Unit High Pass Filter in Audio Hijack, set to the right frequency, can actually eliminate the plosives. One of the great things about Keep It is that it supports many text formats, including RTF, or Rich Text Format. That means I could copy and paste JF’s instructions into Keep It and paste in a screenshot of Audio Hijack so I can remember exactly what it should look like.
My programming notes, on the other hand, tend to be in plain text or Markdown because I have no need for graphics in them. Again, the flexibility of Keep It and the ability to tag the notes is what makes me put things I need to remember in Keep It. I can’t tell you how many times I’ve gone back to Keep It to find something I needed.
If I truly need to remember something and refer back to it later, my tool of choice is Keep It with apps for the Mac, iOS and iPadOS.
Notability When I Need to Think.
Notability from gingerlabs.com/… fills the need of a place to capture all of my handwritten notes. It has way more capability than that, typing, recording audio so you can combine your own notes, and what was being said when you wrote those notes, you can organize documents into notebooks and so much more. But I almost exclusively use Notability for writing by hand.
I did an article a little while ago entitled “Write by Hand When You Need to Think” podfeet.com/… and in it I explained that there’s something about writing by hand that helps me think. If I’m typing, I can’t help but edit typos and structure sentences properly. I find myself formatting text too. All of these things stop my brain from being creative.
The main place I need to be creative is in programming. If I try to type in code to outline an unformed idea, I have to get it exactly right. A command misspelled or a special character misplaced will bork the whole thing. But if I’m just trying to structure an idea, I can scribble it in what’s called pseudo-code in Notability and get the idea down quickly.
One of the reasons handwriting in Notability is so useful is that I can lasso a chunk of text and move it around. It’s really often that I get an idea down but realize I need to put something between two ideas. I can grab the one idea and move it around to make space.
I am also pretty fond of the eraser tool as I have a lot of trouble writing by hand so that even I can read it. With a pen and paper it’s really a mess, but with Notability if my hand spasms and writes gibberish I can quickly drag across it and delete it. Importantly the eraser is not a pixel eraser, it’s an object eraser so if you touch a bit of script text it selects it all. If I mess up a whole chunk of what I’ve written I can lasso it, tap and hold and then delete the whole thing.
I have found something awesome about writing in Notability. You can change the color and textured background of the virtual paper, and a dark blue background with lines on it is absolutely delightful to write on. One reason it’s so delightful is that almost any color shows up as though it’s a fluorescent gel pen. All but the very darkest colors look great.
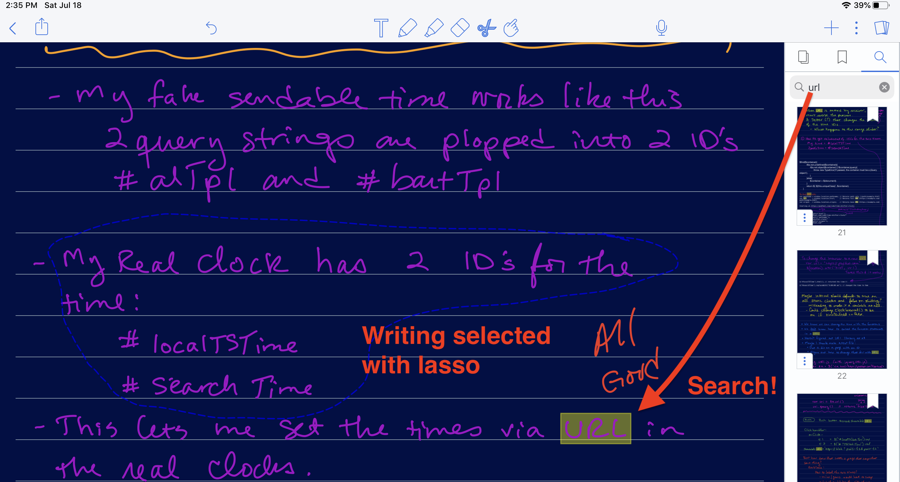
I use the different colors when I’m changing what I’m writing about. I may work on one part of the code for a while, jotting down ideas, scribbling red asterisks to remind myself that one idea might work, but then I jump to another part of the project and I can clearly see the difference because I switched from bright blue to bright pink.
I also use Notability to write letters to people. Because we do so much communication via email, a handwritten letter to someone can be a lovely gesture. A handwritten thank you note, a letter to see how someone is doing, or just to brighten someone’s day really stands out as being something special. Recently the grandmother of someone I know fell and broke her hip and was depressed she couldn’t do anything for a while. I didn’t know her very well, but I hand-wrote a letter to her chatting about her great-grandaughter and other things to cheer her up. I learned later that it made her very happy.
I could write a note on cute notepaper, but did I mention how my hands have a lot of trouble writing legibly lately? It is way too hard on real paper. So instead I pop open Notability, I write in maybe a dark blue on any light-colored background that makes me happy and I turn on the lines so my writing doesn’t slide down on the page to the right like some kind of psychopath. Then when I’m done crafting the letter and even editing it, I change the paper to white, and turn off the lines, and then print it on my regular printer. I then have a letter that looks to most people like I wrote with a blue pen on real paper but in fact, it was created electronically.
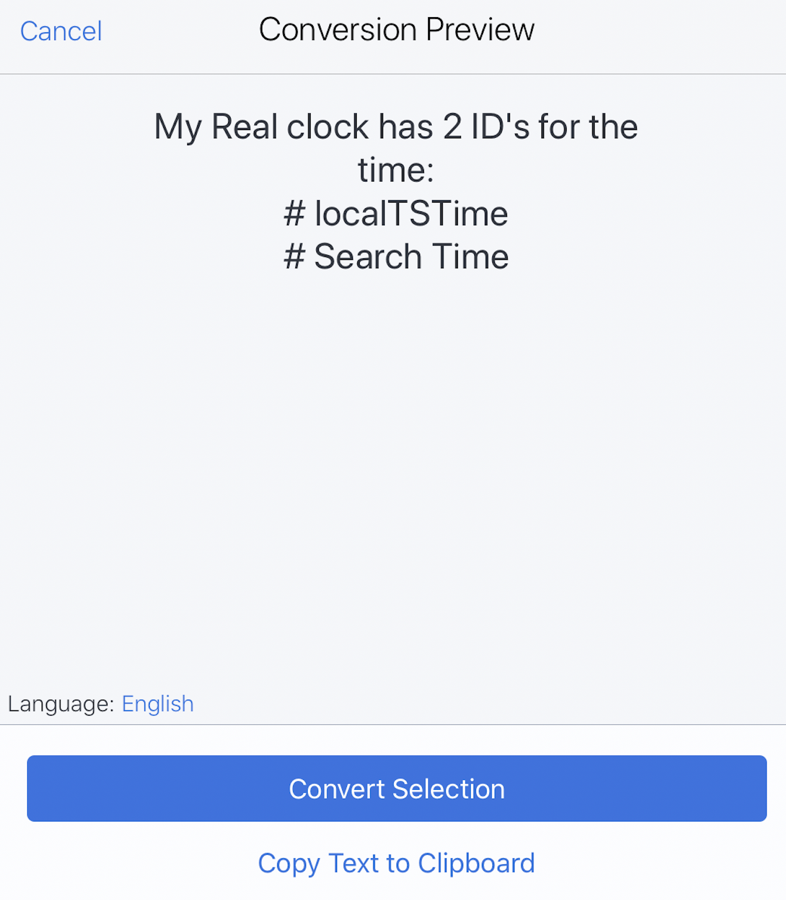
iPadOS 14 will have a feature called Scribble that lets you write by hand and then convert it to typewritten text. Well, guess what? Notability already has that and has had it for a long time! Both Scribble and Notability do this in pretty much the same way. With iPadOS14, you can select handwritten text just as though it was typewritten by tapping and dragging across the writing. Then you can copy as text and paste somewhere else. With Notability you use the lasso to select, then tap to convert to text. It pops up a window showing you what it thinks you wrote, which is cool because you get a chance to edit the text if it misinterpreted what you wrote. From there you can either paste it elsewhere or replace the handwritten note with text.
Even with this awesome capability, I have to confess that I don’t actually use it because my handwritten notes are more useful to me. Visually they mean more to me as I scribbled them than if they were text.
I have the best of both worlds leaving them as is because Notability does optical character recognition (OCR) on your handwritten notes, which means they’re actually searchable! Even with penwomanship that would make a second-grade teacher cringe, Notability seems to understand me.
I haven’t even begun to tell you everything Notability does, but go check it out at gingerlabs.com/…. There are even apps for iOS and macOS. And there’s a 25% off sale going on while I’m writing this up. I love Notability and find it indispensable for writing when I want to figure something out.
Google Docs and Apple Notes for Collaboration
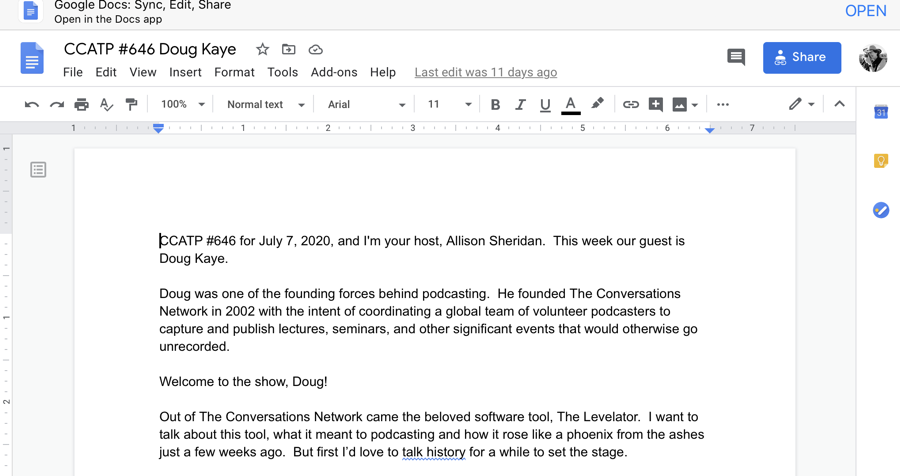
The last category of writing I do is the kind where I’m collaborating with someone else. Far and away my most reached-for tool in this category is Google Docs. Virtually every Chit Chat Across the Pond you hear was outlined in a Google Doc by me, shared with the person I’m interviewing and usually added to and edited by the other person as well.
To pull back the curtain a wee bit, it’s how I have honed my skill of interviewing to sound like I just naturally ask the question the interviewee was hoping to answer! I bet you thought I was just naturally insightful, didn’t you? Nope, it’s all staged.
Google Docs is perfect for this task because it’s cross-platform, is a format most people are immediately comfortable with even if they’ve been using Microsoft Office their entire online lives, and it’s getting harder and harder to find someone who doesn’t have a Google-connected account.
I also like that I can write up the notes before they see it, then simply hit the share button and create a link that gives them the edit privileges they’ll need. No finding it in shared folders or any faffing about like that. I pay for Microsoft 365 that comes with OneDrive but it falls over in a heap at ease of use on sharing documents every time I try it.
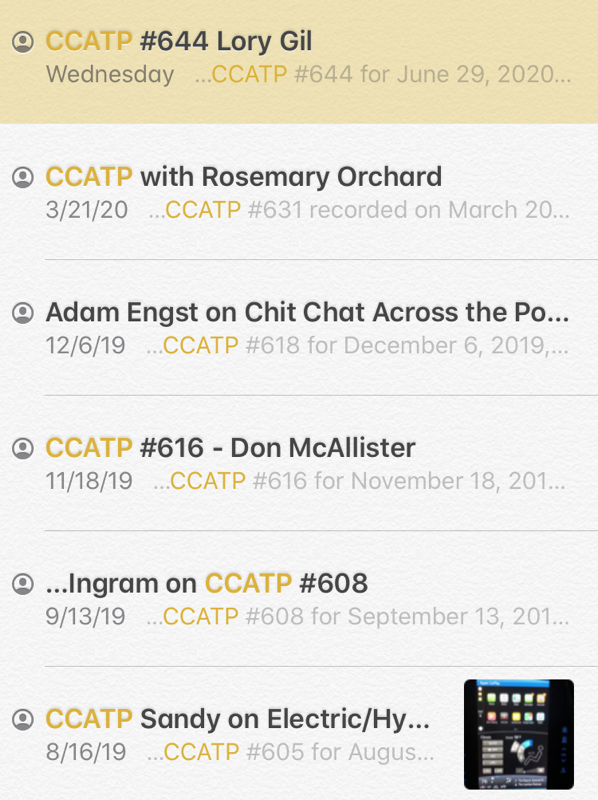
Since many of my conversations are with Apple-centric people, you might ask why I don’t use Apple Notes. I have done it in the past but only when I’m sure the person I’m interviewing is a hard-core Apple user, not just happens to have an iPhone or Mac.
For example, when people like Lory Gil of iMore, or Rosemary Orchard who’s crazy about Shortcuts, or Adam Engst who’s spent the last 30 years writing about Apple tools come on the show, there’s no reason not to use Apple Notes to collaborate with them. I say no reason but I would say that sharing a link with Google Docs is still way easier than with Apple Notes, but once we’ve cracked the code it works quite nicely with other Apple-minded people.
One thing I’ve noticed about Apple Notes is that I only put stuff in there that I don’t really care about referencing later. For example, I do take my notes from things like WWDC in Apple Notes, but after a week or so, that content really doesn’t matter to me. If I truly cared about capturing it to be able to reference later, I’d be putting it in Keep It. Ulysses is that way too. I write the first draft of my blog posts in a folder called Planned Blog Posts, and when I copy it to MarsEdit, the draft goes into Finished, where I’ll likely never look at it again. Google Docs for writing is pretty much the same way – I write things there and never look at them again.
Bottom Line
I really thought a solid plan of one note-taking app to rule them all would eventually congeal for me, but instead I’m using the best tool for the job at hand. And all writing isn’t the same, so that means 5 tools to rule them all!
