When it came time to replace our aged Drobo 5N, I chose to go with Synology because of the vibrant ecosystem of things you could install on their network attached storage devices (NAS). I didn’t have a specific problem to be solved other than needed a massive amount of disk that was raided together in some way to protect against a single disk failure. I figured over time I’d find cool things to do with it.
Well, this week I did something super awesome. I can’t put this in the “I have made fire!” category because the solution has been out there for ages, but it’s still pretty cool.
Problem to be Solved
Our problem to be solved is that a lot of IoT devices are not HomeKit-compatible. While we’ve steered towards HomeKit-compatibility gear whenever possible, we have a lot of devices from Ring and Wyze that are not.
The Ring and Wyze apps both work really well so it’s not a huge hardship to have to open those apps to control the gear but it would still be swell to have them visible and controllable in HomeKit.
Homebridge ? HOOBS
The Internet is a wonderful place, and clever people have figured out how to achieve this goal. Homebridge is an open source project that helps connect non HomeKit-compatible devices to HomeKit. That framework is supported by open source developers who build the plugins for specific devices.
The cool thing about Homebridge is that you can install it on wee tiny computers, like a Raspberry Pi or you can install it on grown-up computers. I helped my friend Pat Dengler set it up on her Raspberry Pi and it was super fun. Super GEEKY fun. Lots and lots and lots of Terminal fun. It’s definitely doable and it works great, but it’s definitely not accessible to normal people.

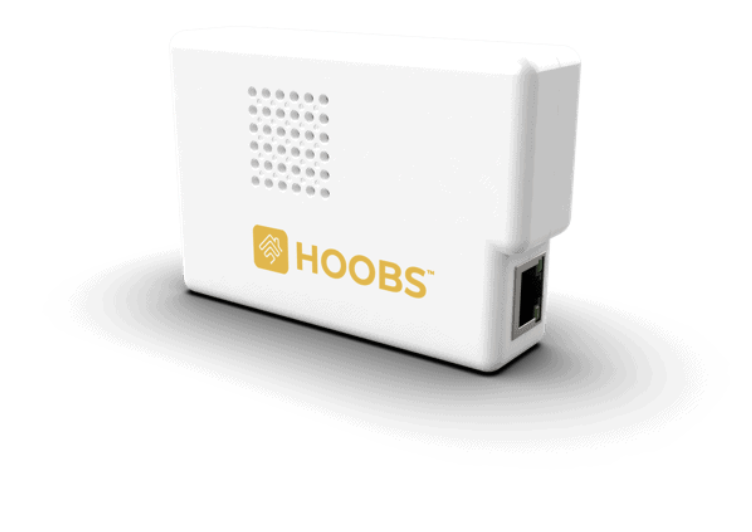
A company called HOOBS decided to try and make it more accessible. They sell a nicely packaged Raspberry Pi with HOOBS preinstalled onto a microSD card and then a very pretty web interface to add the plugins for the various devices you own. It’s $170. If you already have a Raspberry Pi which you can get for well under $50, you can buy an 8GB microSD card with HOOBS preinstalled for only $20.
But since this is open source world we’re talking about, they also have a free download of the HOOBS software, with a donation button suggestion of $7.
Docker Containers

So it seems that if I could get HOOBS onto a computer, I could maybe install plugins for my non-HomeKit devices and get them onto HomeKit. I do have a Raspberry Pi, but I also have this shiny new Synology Disk station. One of the ways you can install software on a Synology is to use a Docker container.
Simply put, Docker containers package up code and all of the dependencies to make the code run. That means not just the code but the runtime environment, system tools, system libraries, and settings. If you can get a Docker container for what you want to do, you don’t have to worry your pretty little head about all the rest. From the development side, a Docker container is extra cool because they isolate the software from the environment where you’re running it, so the application runs exactly the same regardless of the operating system on which you run it.
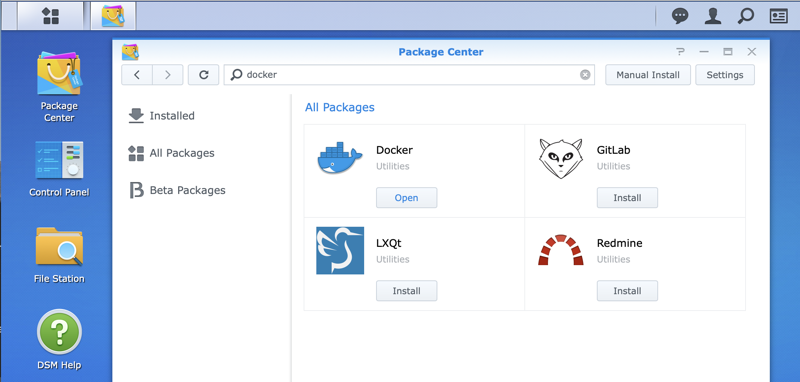
In the Synology web interface, there’s a thing called the Package Center with single click installers and one of the available options is Docker.
Installing HOOBS
Once you get Docker installed, the next step is to find the Docker container you want to run. As of right now, there are 6145 Docker containers in the Registry tab of the Docker app on my Synology. I think they call this the Tyranny of Choice. Luckily in this exercise, we know that we want to run HOOBS.
A quick search reveals 6 different Docker containers listed with a developer’s handle followed by /hoobs. I have to admit at this point that I didn’t figure out pretty much any of the rest of this on my own. Dave Hamilton put a link in a recent episode of the Mac Geek Gab to a really good video tutorial by Tech with Eddie that really helped me get it going. I should warn you that my definition of a really good tutorial is one that is thorough, doesn’t spend 20 minutes upfront yakking about what they’re going to tell you, has no music, and goes really really fast. Tech With Eddie goes through the menus really quickly but you can always go back and rewatch what he did. A slow, plodding tutorial is really hard for me to sit through so I like his style.
I’m not going to walk you through all of the steps to follow but rather I’m trying to give you the bigger picture of the pieces. We’ve got the hardware to run everything, in my case a Synology, then we’ve installed a Docker container into the operating system, then we install HOOBS into the Docker container.
Installation does require flipping some switches in the OS, like turning on SSH to be able to secure shell into the Synology (as you might do with your Macs to work on them from another room within your network). There are a few Terminal commands as well, but they’re not terribly daunting.
Plugins for Devices

Once HOOBS is installed you actually completely leave the Synology Disk Station web interface. In the browser, you go to the IP address of your hardware (Synology or the Raspberry Pi) but append it with the port you specified in the HOOBS and SSH setup. I have to confess that two days after setting up HOOBS I went to my Synology and for the life of me couldn’t figure out how to get back into HOOBS! Luckily I had stored my password to the HOOBS interface in 1Password so I found the URL in there. My memory sometimes…
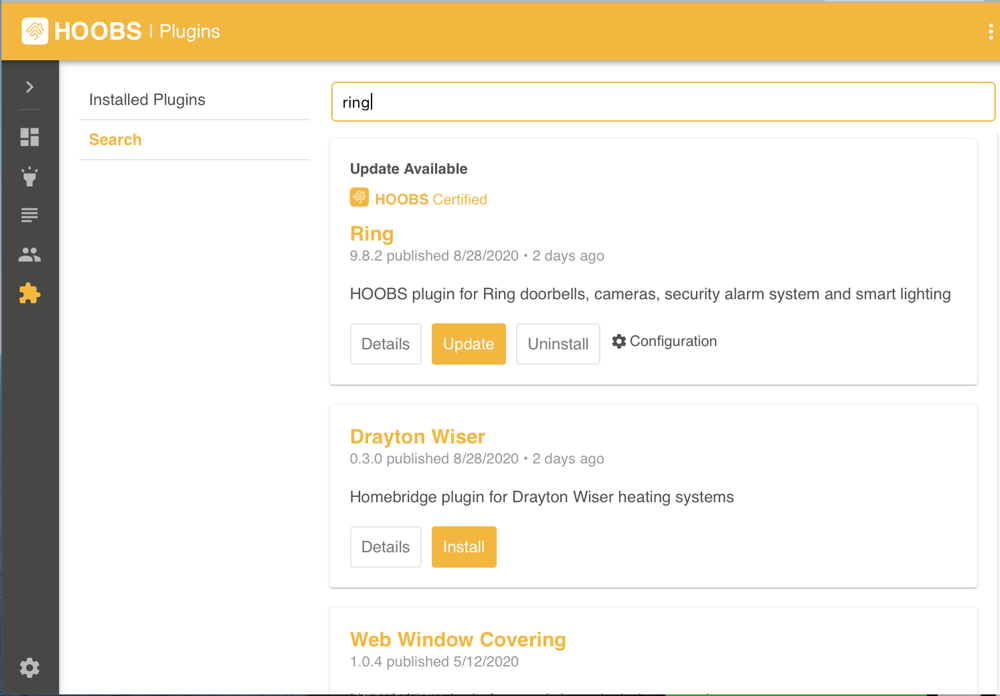
The HOOBS interface is very pretty and clean, and a simple click of a plugin icon in the sidebar allows you to search for the plugin to install for your IoT devices. With a blank screen in front of you, it’s not entirely obvious what is available. Luckily I knew that Ring was pretty much the top thing everyone wanted to add to HomeKit.
The plugins you’ll find when you do a search come from the open source community, so as with the installations of HOOBS, you might find several plugins for the same devices from different developers. Some of the open source packages have been certified by the folks at HOOBS, so it’s not a bad idea to try those first. Luckily HOOBS has certified the plugin for Ring so I didn’t have a hard decision.
Like I did with the HOOBS installation itself, I’m not going to walk through the installation and configuration of plugins because it will be different for every device you have.
Benefits of Ring in HomeKit
The fantastic news was that after I got the plugin for Ring installed, all of my Ring devices showed up in HomeKit. It was truly awesome. I could see our three Ring cameras, I could see all of the security sensors on all of the windows and doors, and I could even set the alarm system from Ring all within the Home app. I think one of the values that the Home app brings is that you can organize your devices by room.
Now with all the Ring devices joining that context, I can go to our Entrance room and see the carriage lights out front, the status of the August Lock and our Ring video doorbell. In the Yard “room”, I can see our Ring Floodlight and Ring Spotlight cams along with our HomeKit-enabled Rachio sprinkler system.
We used to use a 1990’s home security system that was built into our house, and the one advantage it had over the Ring was that it had little lights on the keypad that would show you which zone had a window or door left open. With the Ring system, you don’t really have an interface for that. When you try to alarm your house, the Ring will simply say, “A door or window is open but I’ll leave it up to you to run furiously around your house trying to figure out which one.”

But with Ring in HomeKit now, I can look at my entire house all on one page and brightly lit up are two boxes showing my kitchen window and family room sliding door are both open. Way better than any solution I’ve seen before.
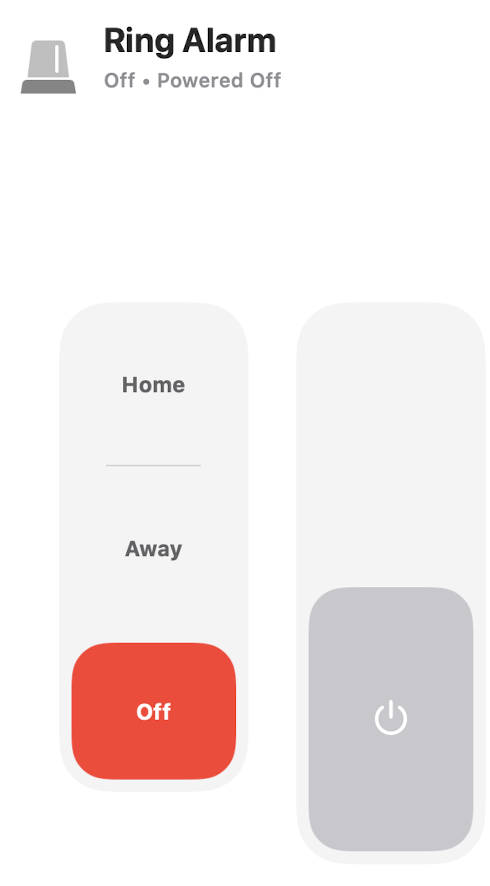
We did have a funny moment when we saw our Ring Alarm in HomeKit with two controls. One was a slider with off, away, and home (which are the three settings for the alarm). But the other was simply a toggle switch with a power icon on it. Curious, we tapped it. Guess what that power icon does? IT SETS OFF THE ALARM!!! That was a fun little treat for our neighbors at 7:30am on a Sunday morning.
I have to confess that this entire exercise was just to see if I could figure it out. I do a lot of tech stuff for that reason. But then Steve pointed out to me that ever since I put Ring into HomeKit, the Ring cameras are much more responsive. We have always been a bit disappointed at how long it takes to get live video from our doorbell, and even upgraded our Ring doorbell hoping to improve it. If anything, the response seemed even worse. But with it in HomeKit, it’s maybe 2 seconds from when we tap the camera until we are watching live video.
I call that a huge success.
Other IoT Devices
I was really hoping to install a HOOBS plugin to get my Wyze cameras, lights and switches into HomeKit. Wyze devices have multiplied like rabbits around here so having them in HomeKit where I could control them with Siri and scenes like “It’s Showtime!” would be awesome.
Unfortunately, it looks like it’s not meant to be, at least for me. The plugin that will add Wyze devices to Homebridge/HOOBS is called Camera FFmpeg. But in order for Camera FFmpeg to control the cameras, you have to flash the firmware on the Wyze Cams with their RTSP implementation. To quote Wyze on doing this,
RTSP is not a stock feature with the Wyze Cam and is a beta feature that requires the installation of different firmware. Using the RTSP firmware will prevent the camera from supporting any future functions or features in the Wyze app.”
In other words, they will no longer be Wyze Cams, just pieces of hardware you bought from Wyze. Sadly, that would be a “no” from me.
I was poking around the HOOBS website and they had the logos of some of the bigger companies HOOBS can connect to, and one of them was Tesla. You can remotely through HomeKit unlock doors, open the trunk, open the charge port, start charging, and even enable keyless driving! I asked Steve if he wanted me to set it up and I think his exact words were, “Do your car first, I’ll be right behind you.”
Another cool use for HOOBS/Homebridge is if you’ve got devices that you bought from a company before they added HomeKit capability. For example, we have a bunch of current Belkin switches, but our older Wemo switches from Belkin aren’t HomeKit-compatible. Maybe I’ll work on those before allowing self-driving via Siri to my car with HomeKit.
Bottom Line
To review the process one more time from the top-level: you install plugins for your devices into HOOBS (which is Homebridge under the hood) which in turn is installed in a Docker container that is installed on the Synology. Easy peasy, right? To be honest the whole process only took me around 90 minutes and that included watching the video to learn how.
I’m delighted that I found a valuable thing to do with my Synology other than using it as a giant pile of disks, and I’m even more delighted that Steve likes the performance of our Ring devices now that they’re in HomeKit.

Try Rapid Ring app for a faster response time when answering ring pop ups.
Another advantage of ring in HomeKit is the notification on Apple TV in IOS14.
John DF – That is SO cool! Why do they not just put this functionality into the real app? Why do we have to be told by someone it even exists??? I’m so glad you told us. It’s amazingly fast. HOOBS is still as fast but still, this rocks. Also saw you submitted it as Cool Stuff Found to Mac Geek Gab. Very cool.
I was using Homebridge for a while to control early generation Wemo switches. It worked really well. I eventually bought the Wemo bridge because my Homebridge setup was not stable. Really, it was the iMac I was running Homebridge on that wasn’t stable. Random reboots I eventually tracked back to the Bluetooth hardware on the iMac and a failing 4TB FireWire drive.
I’m currently using HomeBridge on a Pi 0W to bring a MyQ garage door controller and my Nest thermostat into HomeKit. Next step will be getting my Insteon dimmers working in HomeBridge again.
Sounds like you’re having fun, Tony!
Hello. I am trying to install Ring plug-in in Hoobs on Synology Docker. I am getting errors when I run this command in the terminal in Hoobs “npx -p ring-client-api ring-auth-cli” so I cannot get the RefreshToken. I ahem other plugins working with no issues. Any help would be great! THX!
I think you are overstating the penalty for installing the RTSP firmware on the Wyze camera(s). I have that installed on one of my cameras. It still works in the Wyze app just as always. It is just that the firmware is frozen on that RTSP version, and won’t get any *future* updates.
I too am trying to install Ring plug-in in Hoobs on Synology Docker. Getting errors in the terminal in Hoobs “npx -p ring-client-api ring-auth-cli”. Can’t get the RefreshToken.
Mike – When Ring forced two-factor authentication (which is a good thing), I was never able to get HOOBS working again in spite of attempts to get the RefreshToken. I ended up going directly with Homebridge and that worked for me. Let us know if it works for you?