As I mentioned a while ago, my aged Drobo 5N died after many years of good service. The 5N, for the last few years, had the role of backup NAS to the newer Drobo 5N2. When the 5N died, I did what I’ve been itching to do for quite some time – I bought a Synology DS1019+.
I explained back in June when I first got the Synology that I wished I could give you a full review of the device but it’s so feature rich and so new to me that I’ll be putting out smaller pieces on it over time rather than one giant article. Lucky for me, Steven Goetz bought a Synology at the same time so he will be helping to answer my questions.
Web Interface
The initial big change going from Drobo to Synology was going from a dedicated app for Drobo to a web interface for Synology. The Drobo app isn’t bad, but it is antiquated. In fact, Catalina keeps complaining about a legacy app that will stop working soon and the app is the Drobo Dashboard. I’ve written to Drobo and they promise it will be updated before the next OS but it still doesn’t give a warm and fuzzy feeling.
The Synology is accessed via the IP address of the device on your network with a simple login window. When you’re logged in, you’re in what they call Disk Station Manager, or DSM.
DSM looks like a nice, pretty Linux GUI desktop. It looks like that because that’s exactly what it is. From what I can gather in my searching, it isn’t any standard Linux distro but a modified distribution of Synology’s invention. It looks like a “real” computer windowing system encapsulated inside a browser window.
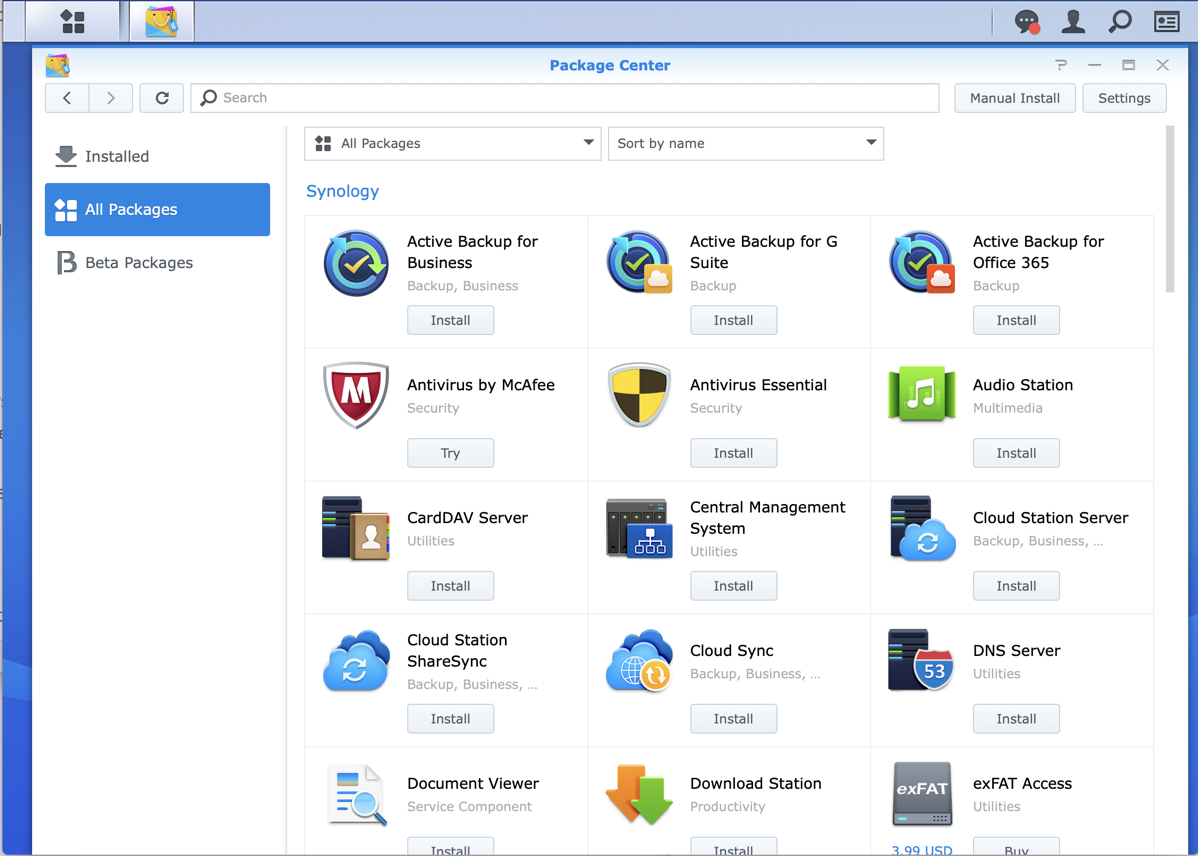
Package Center
On the desktop are a couple of important functions that we should walk through. Package Center is where you get all the fun applications you can run on the Synology. There are 57 apps written by Synology in Package Center and another 52 written by third parties!
But that’s not all. You can install third-party apps designed for Synology from outside of Package Center. I found a couple of resources for apps in a quick search, like synocommunity.com/… and a search engine for finding third-party packages at search.synopackage.com/…). I have no idea if these are legit or terrifying, so perhaps until Steven Goetz does the research for me and tells me they’re safe, I’ll keep myself entertained with the 109 apps available in Package Center.

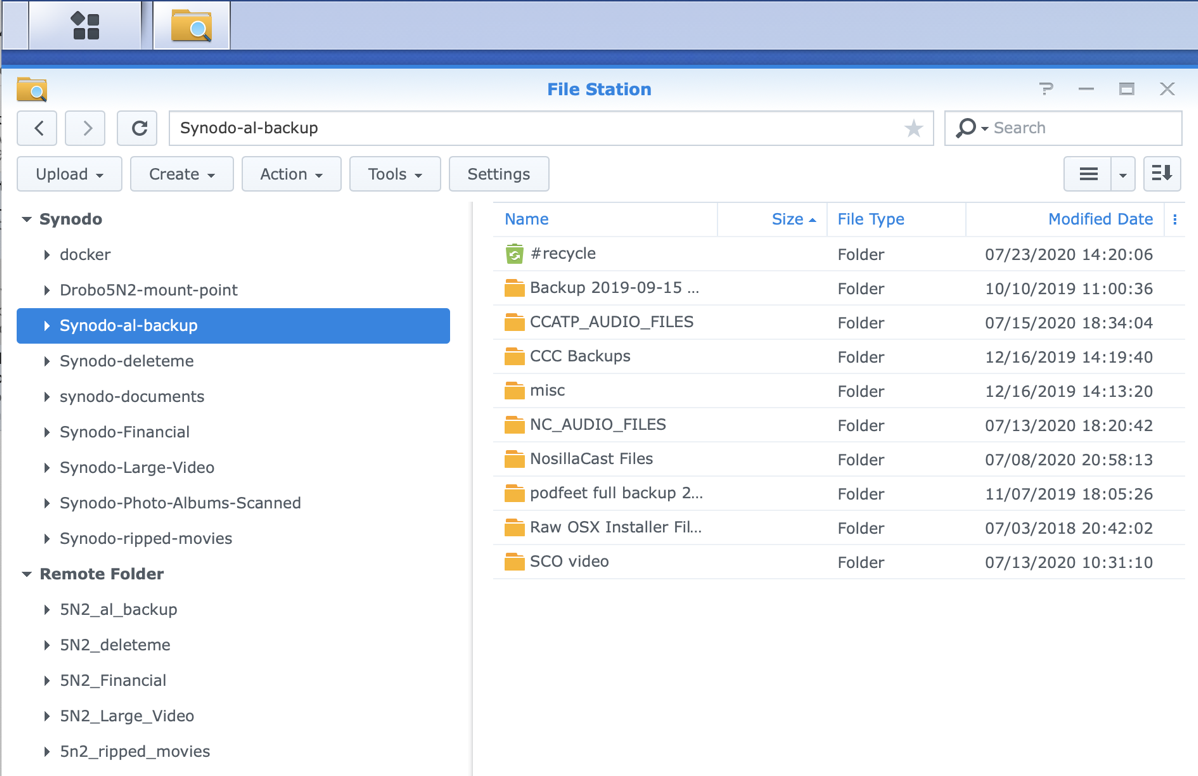
File Station
Another important service right on the desktop of the Synology is called File Station. As you might suspect, this is where you manage your files but it’s a bit odd to get used to. I’m not sure you have to do this, but you can create separate shared folders, each of which appears as a separate volume when you mount it to your Mac or PC. I say I’m not sure you have to do it, because you could just dump all of your data in one place. That might get real dumb if you start setting up things like Time Machine backups to your Synology.
Once you create shared folders, you can mount them via SMB to your Mac (using Go → Connect to Server in the Finder).
While my Synology will be backed up to the Drobo 5N2, I first needed to get all of the data from the 5N2 onto the Synology. I could have mounted the equivalent shared volume of both NAS devices to one of my Macs and dragged the files from the 5N2 to the Synology, but that would have meant the data would travel over our network twice: once from the Drobo to the Mac, and then from the Mac to the Synology.
Instead, inside File Station you can mount a remote folder. When you mount a remote folder, you have to choose a CIFS or NFS Shared Folder. I’ve done some poking around on my own and I still don’t understand why to pick one over the other, but Steven Goetz said to go with CIFS so I did.

Now in File Station I can see all of the shares on both NAS devices without mounting them every time so that’s cool. It took FOREVER to move 8.1TB of data from the Drobo to the Synology, mostly because I would do it in clumps and then check that it would actually work. But I finally did get all of our data migrated.
Control Panel

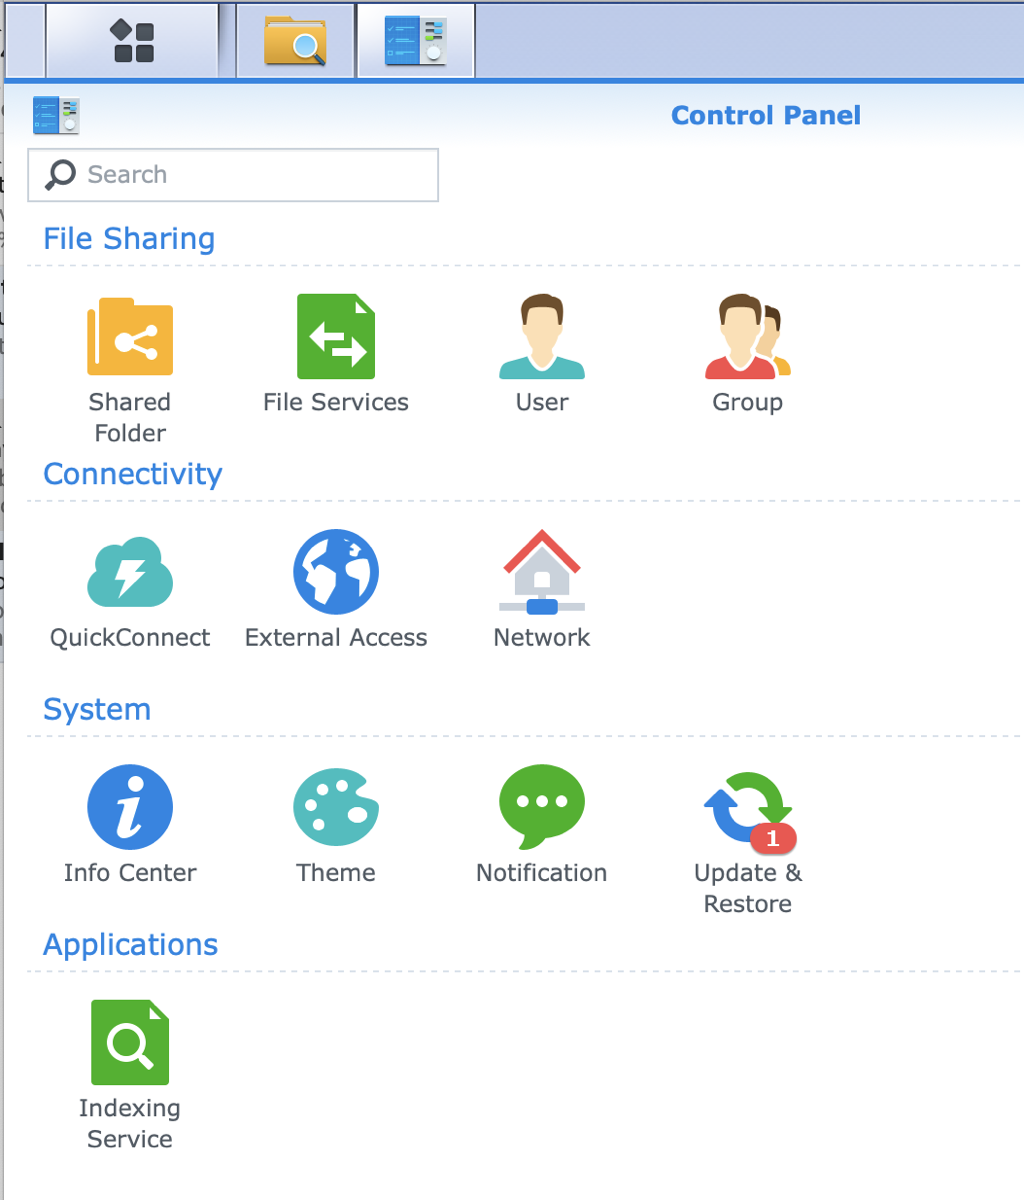
Synology comes with a Control Panel which looks at first blush like Control Panel on Windows or System Preferences on the Mac, but I’m definitely not comfortable in there yet. I’m confused by one thing in particular. It has a section on File Services that I really think belongs over in File Station.
For example, if you want to enable Apple File Protocol (AFP) vs. SMB, you don’t do that in File Station, you do it in File Services inside Control Panel. File Permissions are not in File Station, they’re in the Control Panel called User.
I’m sure I’ll get used to it but I find myself switching back and forth between File Services and File Manager trying to figure out where the control I need is located.
On the Drobo there’s only one user. On Synology, since it’s really a linux installation, you can create multiple users and give them different permissions. It’s not like that’s a big deal in my house, since I (mostly) trust Steve with admin privileges on things I manage, but it’s kinda nice to have our own logins. It also became very important when I installed the Plex server package on the Synology. It turns out for the Plex server to see the folders with your content to make them into Libraries, you have to create a user named plex and give it permissions to those folders. This is counterintuitive since the folders are ON the Synology where the Plex server is installed but there you go.
And that’s why I had to learn where to go to give a user privileges. It’s not in the User control panel. It’s not in File Services either. It’s in File Station under properties of the folder itself and Permissions where you can add a user to have access. It’s hard to get to because if you select the folder in File Station, and open the Action Menu where the Properties are an option, it’s greyed out. You have to right-click on the folder and choose Properties. Maybe that’s a bug?
At this point, even with that curious annoyance, I’m sure you’re hollering at me that this is exactly where you change permissions on the Mac, but there’s a slight difference that tripped me up. When you’re in File Station and you successfully discover Properties and go to the Permissions tab, this is where you can actually create the user, in this case named plex. I read all kinds of forum posts and had to keep opening menus to find one that looked like the screenshot they showed to find the answer.
The good news is that Synology is so popular that there are LOTS of posts on how to do things. Every time I ever searched for an answer on a Drobo question, I would get crickets as a response or at best an answer from 2014. Nice to be in the modern age.
Stuff I’ve Done
I feel like I haven’t done much with the Synology given the plethora of things it can do but I do like knowing I have hours of entertainment available to me.
Plex
I mentioned turning on Plex and pointing it our library of ripped movies and TV shows. We own all of these discs, by the way – 350 of them at last count!
Our main purpose with our Plex library is to have them backed up and to allow our children who no longer live at home, to watch our movies. When I got the Drobos I tried setting up Plex on them and it was a disaster. The processors in them were just too darn slow to manage the task.
Eventually I decided to use a 2016 Mac mini which had no purpose in our house and it’s been doing a passable job of serving the movies. I say passable where the definition of that term means “sometimes works.” To call it fiddly would be an understatement. If the Mac mini reboots for any reason (which it seems to spontaneously from time to time) someone has to know it happens and log back into my account. We’ve had all kinds of networking weirdness too and it’s not been a pleasant experience for anyone.

Once I got the Plex server on the Synology to have permissions to see its own drives, the Plex server quickly downloaded all of the “album artwork” and updated tiles and it was in business. I had Lindsay, the nerdiest of my kids to test it out and the movie came up immediately. She said, “it’s way better … because it actually worked.” We’re still fiddling with the quality of the stream though as it appears we’re sending a 720p signal instead of the full definition, but what fun would this be if it worked immediately?
Enabled External Access with QuickConnect
There are a lot of services you can enable on the Synology that only make sense if you can access it externally. For example, you can use a Synology package to replace Dropbox-like functionality and even host your own Office Automation cloud service not unlike Google Docs.
In order to access the Synology from outside the network, they have the “EZ-Internet Wizard” which offers to configure our Internet connection, router port forwarding and set up a firewall. I suspected I would not like its choice and I took a look at what it was going to do, and sure enough it wants to have UPnP enabled. UPnP stands for Unplug and Play which from what Bart has explained is not a great idea from a security standpoint so I backed away from this “EZ” method.
They do have a service called QuickConnect which allows you to connect via a web browser to your Synology. You create a QuickConnect ID (or accept the one they offer you) which is sort of like a password but not really. It can only contain letters, numbers and dashes.
Once you’ve chosen an ID, you connect to your Synology externally by going to http://QuickConnect.to followed by your QuickConnect ID. note that it is NOT https. Don’t be alarmed though, as soon as the URL resolves, it takes you to your login screen to connect to your Synology and THAT screen is secure.
Once you log in with QuickConnect, it’s the management web interface that you have at home. So it’s not a way to run the cloud services for example, it’s how to manage the server.
I found an article on How to Geek regarding some problems with QuickConnect (mostly with bad passwords and mine is a wicked good xkpasswd.net password) but it suggests instead of using QuickConnect to enable Open VPN on the Synology and log in via the VPN. See? Hours and hours more entertainment available to me!
Sort of got backups running on Mac mini
You may buy a network attached storage device (NAS) to back up data locally. Maybe you back up your music, photos and financial data. If your NAS dies, then it’s not a catastrophe because it’s a backup. In our case though, the data on our NAS is mostly data we have nowhere else. The volume is too big (at 8.1TB) to be financially feasible to back up to the cloud. One volume has personal data that could easily be backed up to the cloud but it’s of a nature we don’t want it outside of our house.
A single NAS device has the data replicated through RAID so we should be protected from failure, right? Well, no not completely. We’re protected if a disk drive dies, which is the most likely scenario. But when my Drobo 5N died, the failure was that it could no longer see the hard drives. So the only way I could get my data back would be to buy another Drobo and hope it could read the disks. I can’t just plug each disk into my Mac and see anything on them.
This is why I have two NAS devices. In my new scenario all original data goes onto the Synology and then the plan was to back it up to the Drobo 5N2 that I still maintain. I explained the challenges of backing up from the Synology to the Drobo in my initial story, but in a nutshell Steven and I have been unable to find any way to back up directly between the two devices without utilizing another computer. As I explained in talking about moving the initial data from the Synology to the 5N2, It’s inefficient to have all the data crawl up the Ethernet cable from one NAS to the Mac and back down to the second NAS, but that’s my only choice.
The work I’ve done in the past two weeks has been to use Carbon Copy Cloner to attempt to back up from one to the other via the Mac mini. I say attempt because I’ve had mixed success.
I have 7 shared volumes to back up, one of which is named deleteme so I can simply use it to test things like backups. So 6 real volumes. Well not really, one is called Documents and I don’t know what that’s even for, so let’s call it 5 real volumes. From least annoying to most annoying to deal with:
- Financial and medical documents we don’t want in enemy hands. 100% text so the files are plentiful but small
- Cold storage of all the data that goes into making the podcasts each week. Some fairly large audio files but a lot of littler files too
- Steve’s been scanning in our photo albums and putting them on the NAS. Until I catch up with him and pull them into Photos on my Mac, these are the only copies. Lots and lots of medium-sized image files.
- As I’ve mentioned, we’ve got hundreds of DVDs and Blu-Rays ripped to our movie drive for Plex acces
- And finally the most annoying share, which is all of the original source materials for Steve’s videos. The files are plentiful and most of them are gargantuan
Now remember that the first thing I did when I got the Synology was copy all of the data from the Drobo 5N2 to the Synology. So I set up Carbon Copy Cloner on the Mac mini to start cloning back the other way. I figured it would work really easily and quickly because the data should have been identical. I started with the deleteme share, since that’s it’s whole job, and it worked perfectly.
Over the next week or so I started doing the more important shares. All of those text documents cloned immediately. The podcast audio and image files worked great too. No troubles at all with all of the ripped movies and TV shows. But then I hit Steve’s monstrous Large Video share and that’s when things got “interesting”. Of our 8.1TB of data, 5.4TB of it are on this one share.
The clone of the Large Video drive will run for hours or sometimes just minutes, but it keeps having failures on different files.
Carbon Copy Cloner is written by Mike Bombich and he’s possibly the most responsive, smart, and helpful developers I’ve ever worked with. But after weeks of work he’s out of ideas. Here’s his synopsis of the problem
I think we’ve exhausted every option on the CCC/macOS side of the equation to make this more robust. Again, I’m seeing dropouts from both the source and the destination. I don’t see any network connectivity problems, just periodic disconnects from the NAS devices and random “file vanished” messages (i.e. a file was indicated as contained by a folder, but then the NAS claims the file isn’t actually there).
I put an example of a typical error message into the notes in case anyone reading or listening has an epiphany about it.
07/21 22:27:27 '/Volumes/Synodo-Large-Video/Completed Videos & Photos/NosillaCast Videos/Macworld 2011/Macworld 2013/Macworld : iWorld 2013 Montage 1080.mov' disappeared from the source
And
The source NAS volume indicated that this file was in its parent folder, but when CCC attempted to open the file, the NAS device reported that the file did not exist. The file may have been legitimately removed from the source, or this could be a NAS service failure. Restart the source NAS device and run the task again. If the error persists, then the parent folder on the source is corrupted and should be replaced.
Mike believes that if I keep running the task regularly it will eventually all get into sync but until the NAS-side issues get addressed we’ll continue to see a low level of errors.
Bottom Line
The bottom line is that I’m having a lot of fun with the Synology in spite of this one share giving us fits. Over all it is way way way faster than the Drobo 5N2 which is only a couple of years old. Opening the shared folders via the Finder is really quick, and running Plex off of the Synology is quite a bit faster than running it off of the Mac mini. We’re really pleased with it and I’m super happy the Drobo 5N finally died on me so I had to buy a Synology. I look forward to all the other cool fun stuff I’ll be able to do with it – and I haven’t even started to look at the iOS apps for Synology!

