Today I thought I would give you a review of the OWC Mercury Elite Pro Dual with 3-Port Hub.
Let’s start with the problem to be solved.
Problem 1: I just received my new M1 Mac mini and in looking it over I noticed the lack of ports.
Problem 2: I like to have a time machine drive for my Macs, I don’t depend on Time Machine as my sole backup but it is a nice tool to have when I accidentally delete or overwrite the wrong file.
Problem 3: I wanted a “job drive” or “work drive” for items that I am currently working on. My Mac mini only has 1TB of storage so for those larger home video projects, including the kids’ school programs, family get-togethers, not sure that I even remember those are anymore but I hope to be able to refresh my memory soon and attends some of those again, I like to use a non-operating system drive to store these projects.
As one does I opened up the Amazon’s and started looking.
I wanted to buy a USB hub, a time machine drive, and a “job/work drive”.
Let’s add this all up.
I found a 4TB “spinning rust” drive, keeping in mind that the MAC Mini only has USB type “C” ports for a little over $120.
Then looking for a USB-C Hub I found them all the way from something I wouldn’t buy for $16 to something I seriously looked at from Anker at $46.
Moving on to the “Job/Work drive” the SanDisk 2TB Extreme Pro SSD caught my eye at only $330, REALLY, let’s look for something a little cheaper, how about a Seagate Barracuda SSD 2TB for $250?
This was getting expensive fast and by the way, are you thinking what I am thinking?
All of these devices need a port to plug into and I really don’t have that many ports to begin with.
Time to get a little creative.
I decided that I really wasn’t finding what I wanted or needed from Amazon, maybe I would have found it if I looked long enough but for external storage, I have had issues with Amazon no-name or strangely named devices I have purchased in the past.
At this point, I decided to look over at our friends macsales.com to see what they had to offer.
I opened the MacSales web page, went to drives, External Drive Enclosures and what did I see? Dual-Bay drive enclosures, it was at this point that the little light bulb above my head went on.
What if I purchased a Dual-Bay drive enclosure instead of two single external drives? That would reduce the need for a port on the back of my already limited ports M1 Mac mini.
But would I be able to find one fast enough to support an SSD drive?
Then I saw it, what I thought would be a perfect fit for what I was looking for, the Mercury Elite Pro Dual with 3-Port Hub for $149:
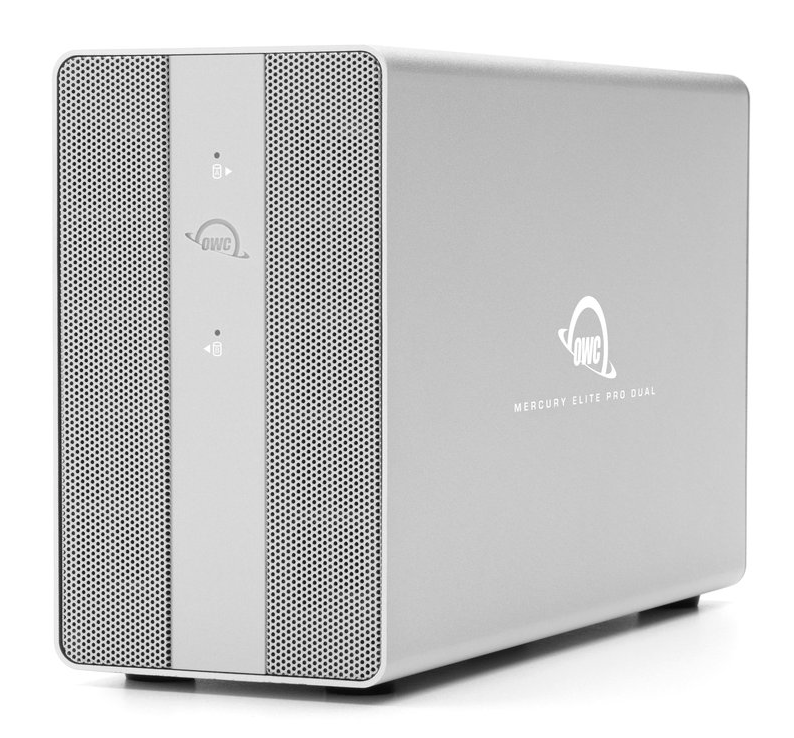
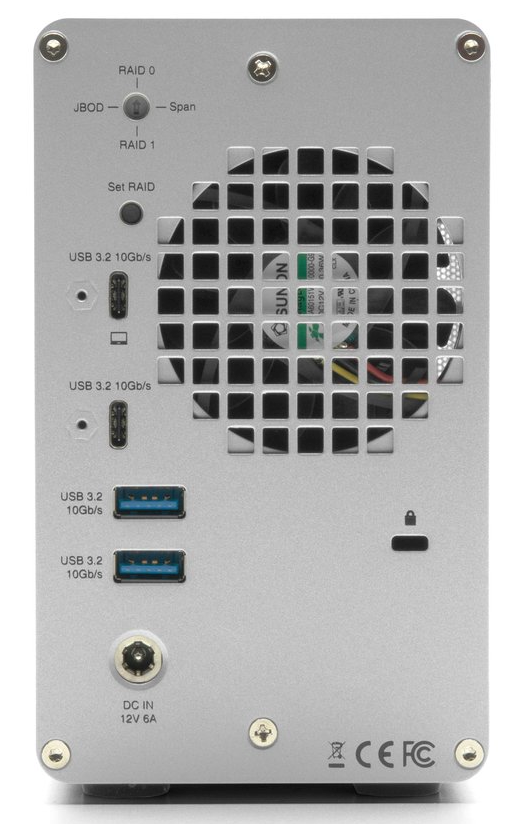
Yes, I had found it, granted it was physically a little larger than I actually needed or expected, The Mercury Elite Pro Dual with 3-port Hub is built to support two 3.5” hard drives but its performance of up to 1250MB/s was just the ticket and it even had support for RAID 0, RAID 1, SPAN and JBOD which is actually the configuration that I wanted and it also has a USB 3.2 type C 10Gb/s port & 2 USB 3.2 type A 10Gb/s ports, yes no need to purchase a separate USB hub I can get all that I want with only connecting 1 USB-C cable to the external port deprived M1 Mac mini.
For those who cannot recite the differences between the different RAID levels, some families talk about the weather or politics at the dinner table but at my dinner table, we often talk about the latest security breach or company that has most recently been hacked or in this case, put on our nerd hats and talk about the differences between RAID levels, what don’t all of you have nerd hats? To be honest, I rarely take mine off, well what were we talking about again, Oh, yeah the RAID levels that the OWC Mercury Elite Pro Dual with 3-port Hub supports:
- JBOD – Our first setting stands for “Just a bunch of disc’s”, Alison recently talked about this one. This is where you plug in the enclosure and each drive shows up independently as if you plugged each drive in as a single drive (this is the setting I am looking for).
-
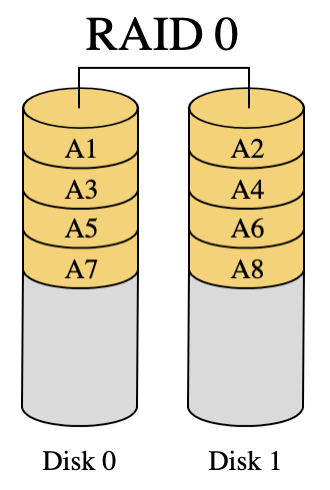
RAID 0 – This is sometimes referred to as “A Striped Volume”, this is where the data is written to each drive contiguously. For example, If you were to split a piece of data into four slices, slice one would be written to drive 1, slice two would be written to drive 2, slice three would be written to drive 1 and slice four would be written to drive 2.
RAID 0 is also the FASTEST RAID setting because the data is being read from two drives at one time and the overall usable space is additive so if I have two 10TB drives in a RAID 0 volume I would have a 20TB usable single volume. The downside to RAID 0 is, while it is fast if you have one drive fail you lose ALL of your data because, using our four-slice example, we would only have slices one & three of our data if disc 2 failed.
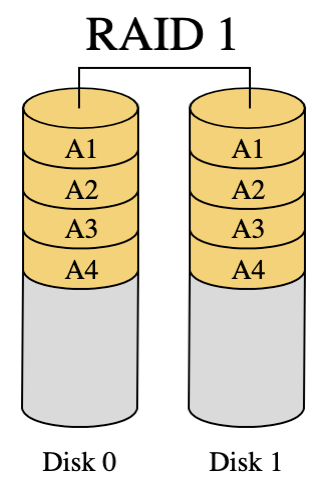
RAID 1 – This RAID setting is sometime called “Disc Mirroring” or “Safe RAID” or “Expensive RAID” do to the cost if you want to use it for a large number of drives. RAID 1 is when you have an identical copy, a mirror, of your data on two drives. The downside to RAID 1 is that you lose the space of a total drive. For example, if you were to purchase two 10 TB drives you will only have 10 TB of usable storage space. The upside to RAID 1 is that if you have a drive failure you have another identical drive copy so your data is safe.
- Span – This is really not a RAID level but the ability to address both drives as if they were just one big volume. For example, if I need to have a 20 TB working volume but I only have two 10 TB hard drives I can Span the two drives so that the drives appear to the system as a single 20TB drive volume instead of two 10 TB drives. The downside to spanning drives is that the drives work independently so you do not get the speed of a RAID 0 however you don’t always lose all of your data if you have a single drive failure.
Now back to my problem to be solved:
At this point, I remembered that I already have an old internal 2.5” 4TB 16mm thick Samsung/Seagate hard drive that I really have had a hard time finding a home for because the drive is SO blinking thick at 16mm where most 2.5” drives are under 12mm or even 9 or 8mm thick it really won’t fit in anything, it is just too blinking thick but in this case, it won’t matter because the enclosure is made to fit much thicker 3.5” drives.
So now that I found my time machine drive what about the SSD “job/work drive” that I wanted?
Well for this one I decided to buy an internal Crucial MX500 2TB SSD. Would you believe me if I told you I found one on sale for under $190 at my local Best Buy? I couldn’t believe it, I normally don’t buy much of anything at Best Buy but I couldn’t pass this sale price up.
The other advantage of the Crucial SSD is that I get a 5-year warranty, unlike the Seagate Barracuda SSD from Amazon I was looking at that only had a 3-year warranty, and Crucial’s main offices are based just up the road a few hours from me.
Over the years Crucial has been very good to work with on items that have gone bad that I have needed or wanted to get warrantied and at this point, I have lost count of the number of MX500 drives that I currently own, they are a decent performer for a decent price.
Now time to put it all together, or as the box says, “Some assembly required”.
What, only Phillips screw driver will be needed but that’s it, where is the fun in that? No power tools? No spudger? No utility knife?
I drew the line and had to at least use the utility knife to open the box, I mean you have to have some fun when putting these things together. Some of these tool-less projects are just nonsense to me, anything not needing the purchase of some kind of new specialty tool to add to my toolbox so that I can, as the wife puts it “have the right tool for the job” are just not fun but we will talk about the need for a second storage shed in my back yard to keep all of my specialty tools to another review, do you think Alison would like a Shed review? Maybe next time.
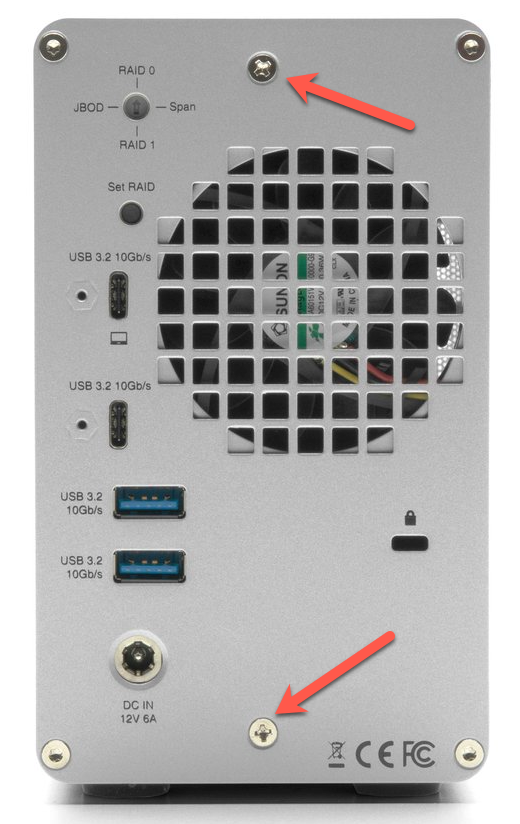
Time to open the enclosure, the OWC Mercury Elite Pro Dual with 3-Port Hub has two Phillips screws on the back that need to come out for the top shell or cover to be slid off.
Once these two screws are out and you can slide the cover off, you will then see the unit is designed to hold the drives connected on opposite sides of a middle spine. Each side of the spine has a drive tray that will hold either a 2.5” drive (the unit calls these SSD’s) or a 3.5” drive.
A nice feature of this enclosure is that it also includes a fan to cool the drives.
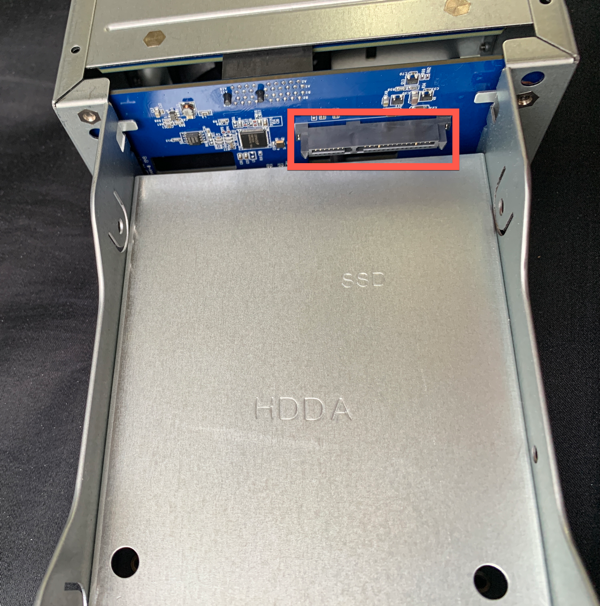
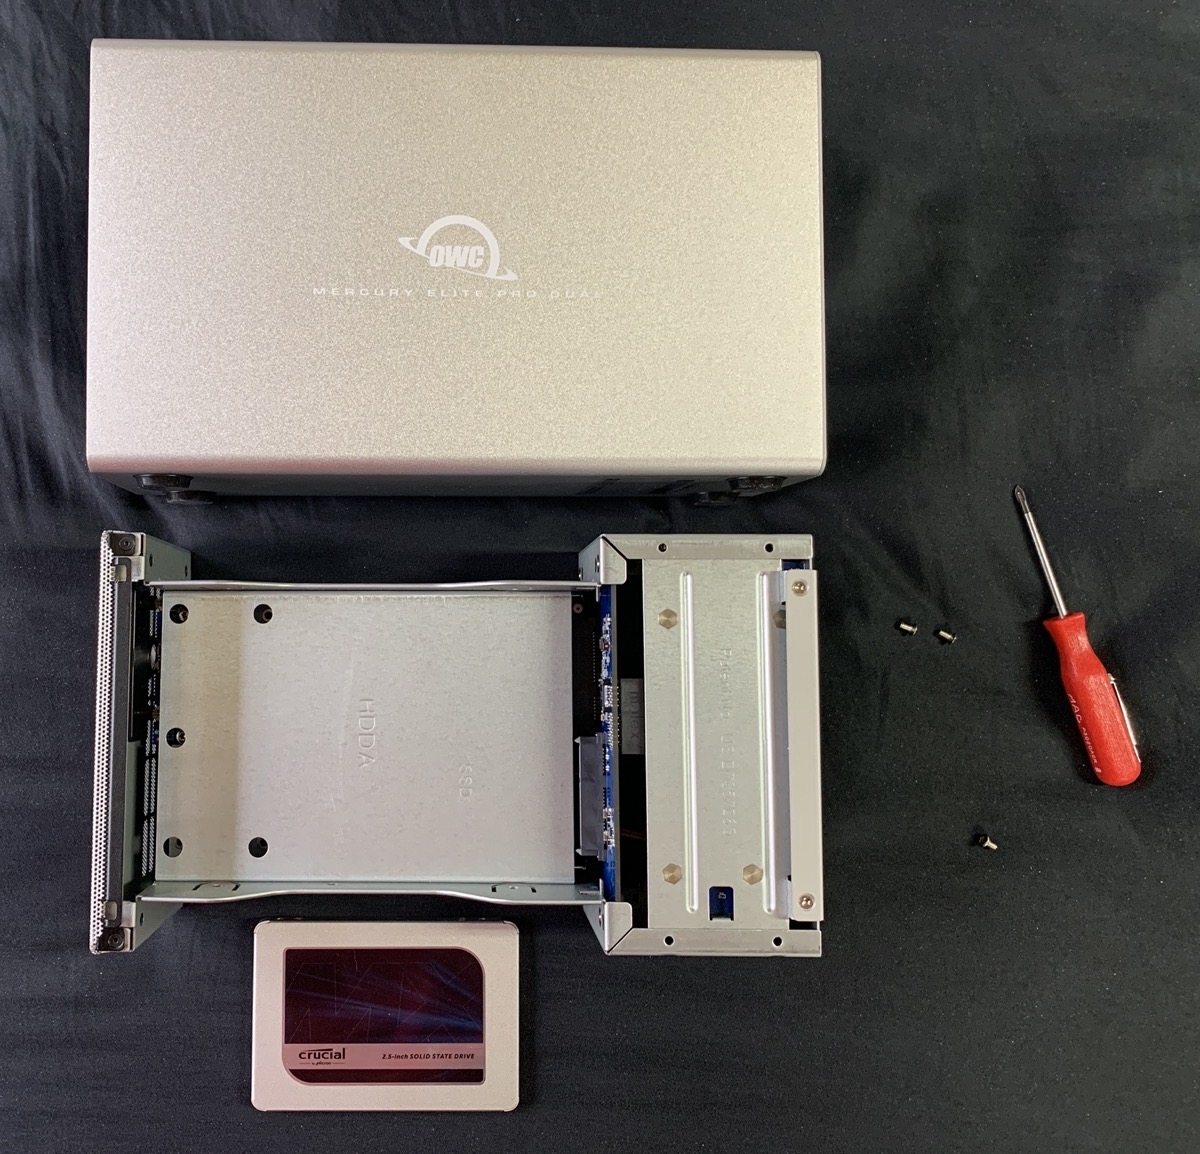
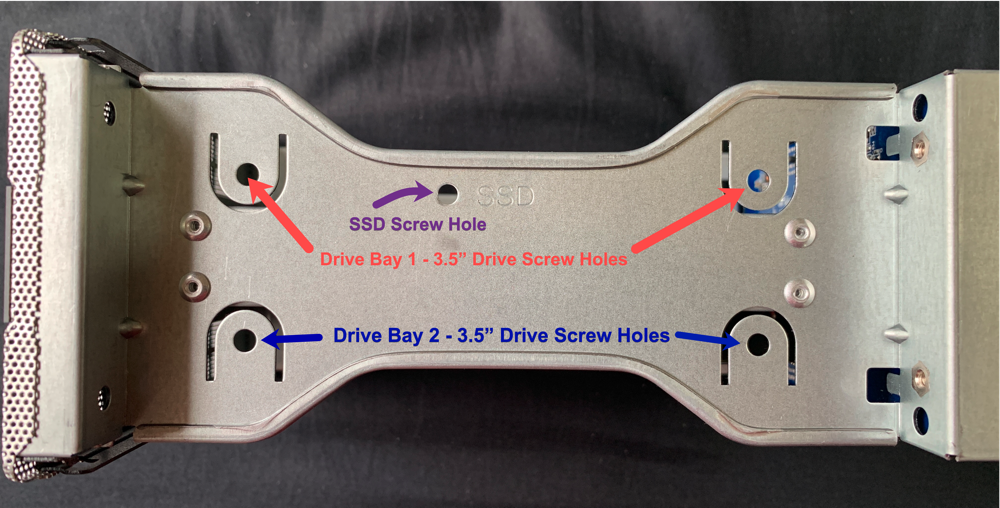
Rather than cables, this enclosure has the fixed combo SATA Power ports that the drives plug into. Once the drives are plugged into the combo SATA Power connectors, the drives will then line up with screw holes to hold the drives in place. For the 2.5” drives (again the enclosure calls these SSD) there is a single screw that holds the drive in place, for the 3.5” drives four holes, one on each of the drive’s corners are provided.
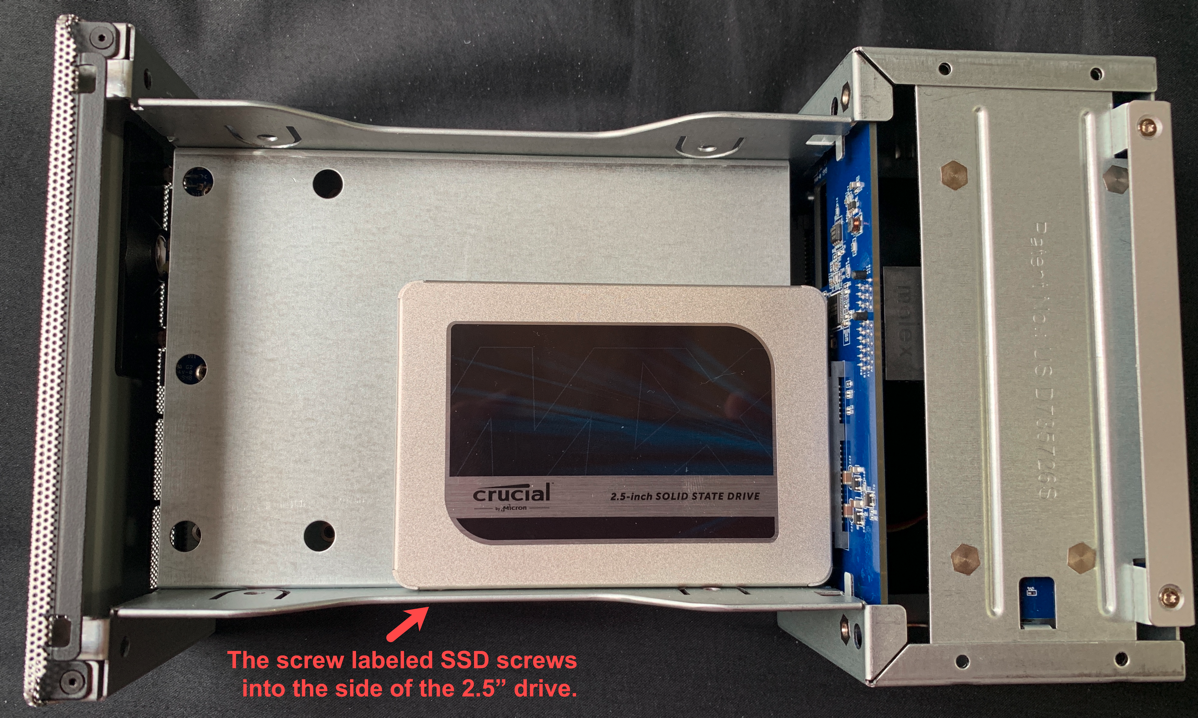
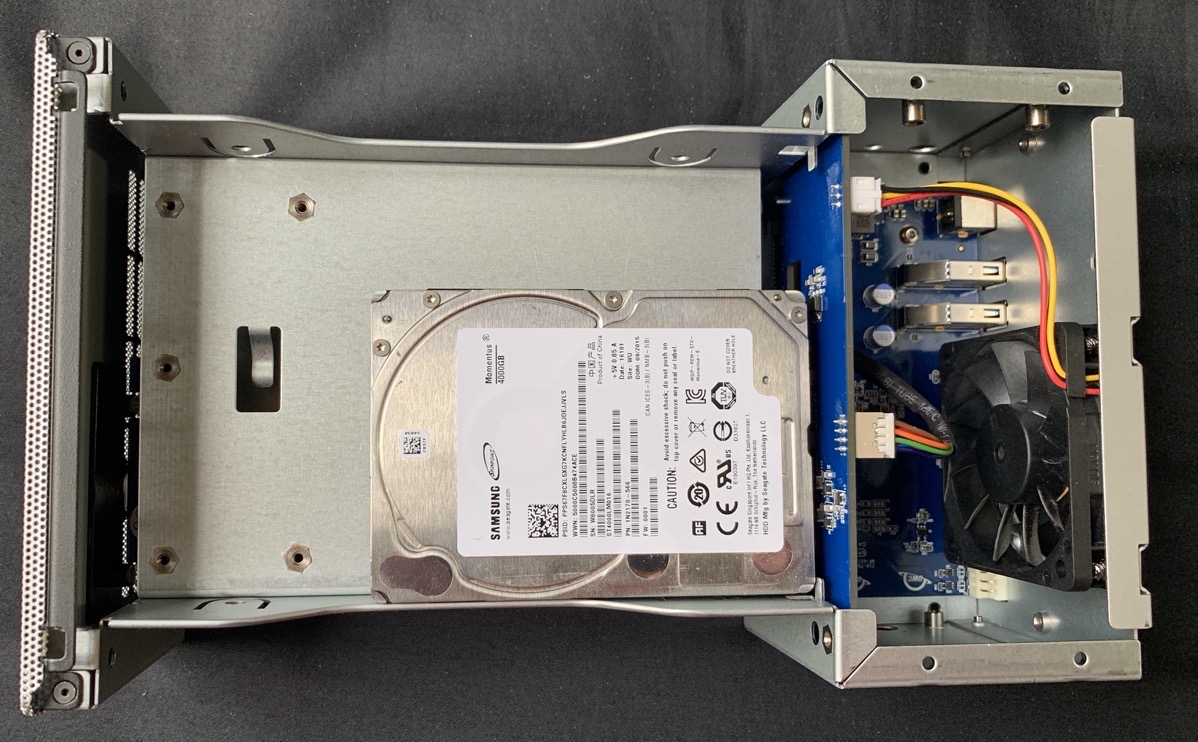
Once the drives were installed, the cover slid back into place and the two screws holding the cover on were replaced I was ready to plug in the single USB-C cable into the M1 Mac mini.
The enclosure comes with a modest power brick, as the cool kids call them, which when plugged in immediately powers the drive enclosure on as there is no power button on the enclosure. The cable length of the barrel end, that’s the end that plugs into the enclosure, is approximately three feet or just under, I could be more specific but that would require me to go out to the specialty tool shed and I just can be bothered to do that right now (actually I think I misplaced the key to the lock if I’m honest). The other side of the power brick is a standard C13 to three-prong power cable. The power brick does have its own little green LED light so that you know that you plugged in the cable to a powered plug, which I like.
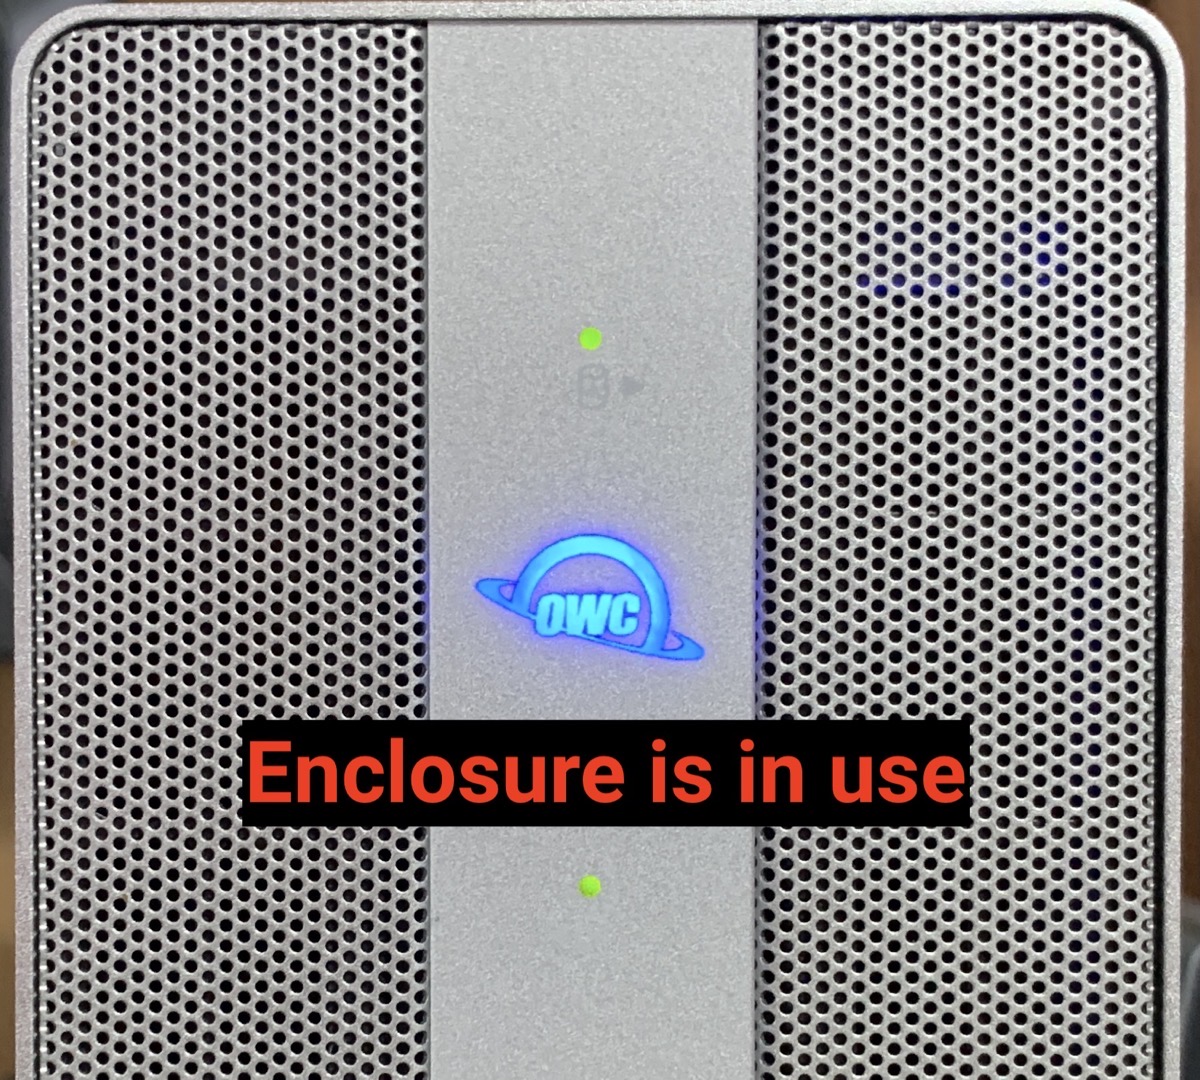
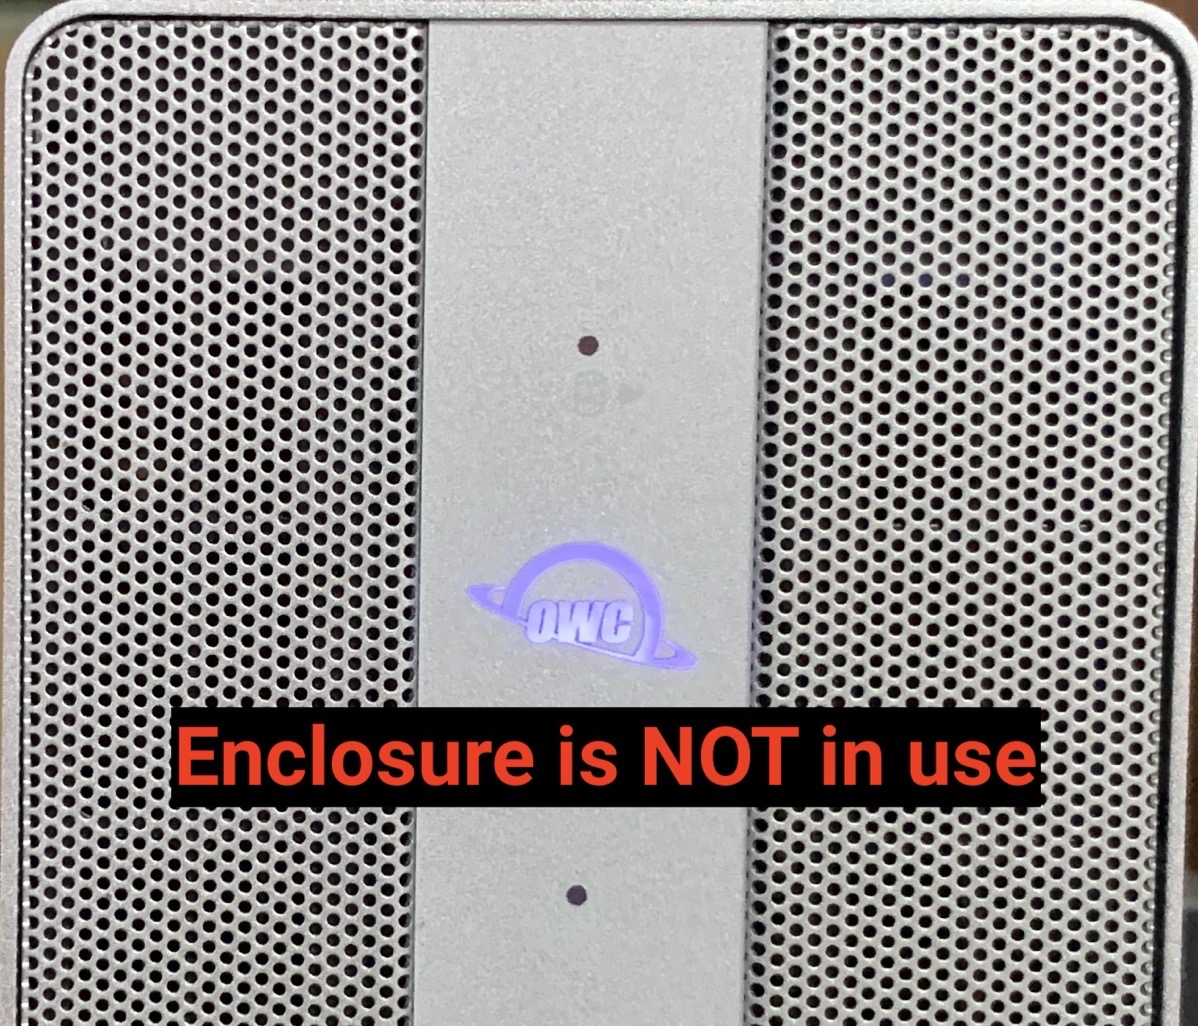
The enclosure has a few lights on the front, a little green “activity” light for each of the drives, they flicker when the drives are in use and then there is also a larger OWC light on the front that changes from a soft white to a blue when the enclosure is in use:
As far as software that is required, there isn’t any, you just plug in the unit and the operating system, at least my M1 Mac mini just recognized each of the drives. One thing to keep in mind however is that just like the unit that Alison reviewed, if you do use one of the RAID settings this unit does have the “Set RAID” button that has to be pressed, again in my case it wasn’t required because I am using the JBOD or Just a Bunch of Disk’s setting so each drive shows up independently.
In my case, I open up disc utility and formatted the Spinning rust drive as MAC OS Extended Journaled but once I selected the drive for use in Time Machine it reformatted the drive as APFS after warning me I was going to lose everything.
The 2TB Crucial MX500 drive using disc utility I formatted it as APFS.
For me, this enclosure works out very well. It provides all that I need which includes both a “spinning rust” Time Machine drive and an SSD “Job/Work Drive” as well as the 2 USB 3.2 type A 10Gb/s ports and a single USB 3.2 type C 10Gb/s port while only taking up one of the limited ports on the back of my M1 Mac mini.
So in the end, would I buy it again, yes I think I would.
Thank you for listening and “Stay subscribed”.

