

I’ve been a user of Reinvented Software’s Keep It for over 7 years. According to the product page, Keep It is used to create and edit notes, rich text, plain text and Markdown files, scan documents, edit PDFs, archive emails, save web links in a variety of formats, preview and search just about any kind of file, and organize these in a variety of ways.

I don’t use it much for notes, but I do use it to keep track of receipts, contracts, policy documents, authorisation forms, and more. I love that I can quickly scan a paper document directly into Keep It using my iPhone, and I can then access it on the phone or a Mac or iPad, as it stores files in iCloud. Likewise, I can also add electronically delivered documents directly, using its share sheet service. It has been handy when calling up a receipt in a shop or itinerary in an airport, or an accident form in a medical centre.
More recently, I’ve been using it to capture many photos, scans, and some web pages that I’ve been gathering in my personal history research. In this use case, it has never felt quite right, but I never put my finger on why.
Sometime in April, I launched the app on my Mac and, presumably as a result of a software update, I was presented with a pop-up window introducing me to a new sibling app called Scrappy. I decided I should learn more.
At first, they seem quite similar, but they really have different personalities. Keep It is more like a serious filing cabinet for documents and notes, while Scrappy is built for quickly grabbing snippets, links, images, and ideas from around the web.
Keep It is file-based. Its contents are all files that live in normal folders and it integrates tightly with Finder and iCloud, so it acts like part of the operating system. It also has powerful editing and organisation tools, including Markdown support, OCR scanning, mail archiving, and automation features. Scrappy keeps things simpler and more visual, abstracting away folders and filenames, and has a stronger focus on browsing and collecting.
The difference shows with web links and notes. Scrappy acts a bit like a smart scrapbook, automatically pulling in previews, images, and article text. Keep It takes a more traditional approach, saving whole pages as PDFs, archives, or editable documents. Keep It’s notes are also much more feature-rich, almost like a lightweight word processor.
To choose between them mostly comes down to workflow. If you want a structured long-term archive for documents, Keep It is the heavyweight option. If you want a fast, flexible place to throw interesting things and find them later, Scrappy is probably the more approachable app.
You can read more detail about the differences on the Reinvented Software site.
I decided to try out the trial of Scrappy and see if it better suited my personal research tasks. I used a migration tool to take content from Keep It into Scrappy. This was less than ideal because I had to take all the content. So I ended up keeping my personal history section and deleting a lot of other things. This was easy to do, but the iCloud syncing took a long time to catch up with it all on every device. As everything in Keep It is just a file, and that file is right there in Finder, I could have just dragged them all in, but I wanted to allow the two apps to share any metadata.
Once I got the basic content across, I started figuring out how the organisation works. The first thing to note is that instead of folders, Scrappy has lists. Or… not! Because Scrappy is based on the concept of a “library” and does not expose files, your items just… exist… in the library. The primary means of organisation is lists. These are like folders, except items can be in more than one list or in no lists at all. In this sense, they are like labels or tags.
Except… Scrappy also has tags. These are also optional, so items can have zero or more of them. The difference is in how these two are represented in the interface. Lists appear in the sidebar, can have a hierarchy, and there are also smart lists. Tags are just tags. Each exists on its own. Of course, smart lists can query tags, along with numerous other attributes, including list membership.
My Keep It files had been imported from folders into lists with the same names. As I started trying to improve on my organisation, I went through a few iterations. With the help of a few email conversations with Steve at Reinvented Software, I finally settled on a structure that is now working pretty well for me.
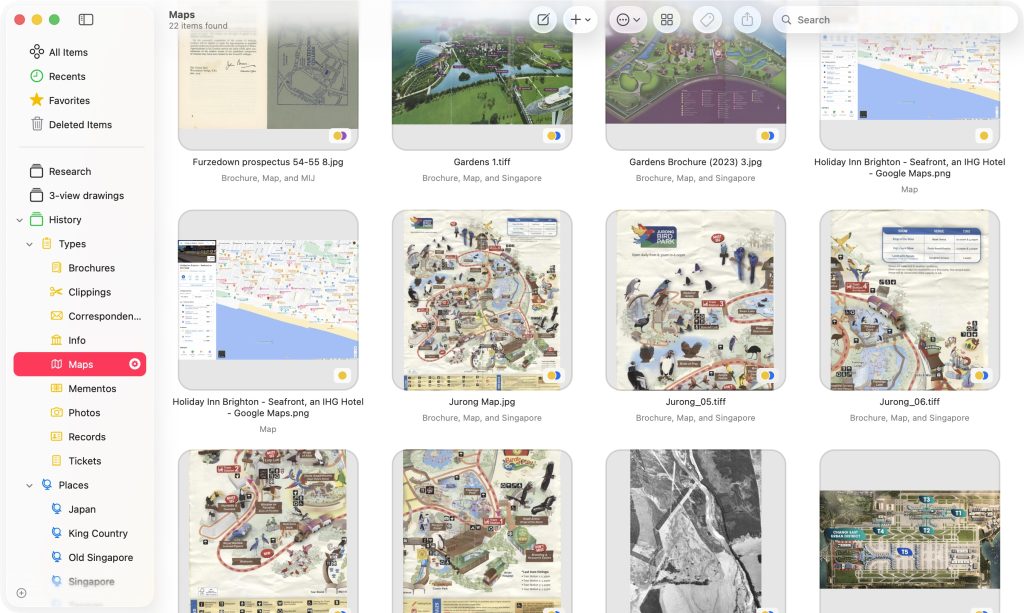
It is worth noting here that every item has a name but, because they are not files, you can have multiple items with the same name. Even in the same list. It’s probably more useful to think of them as titles.
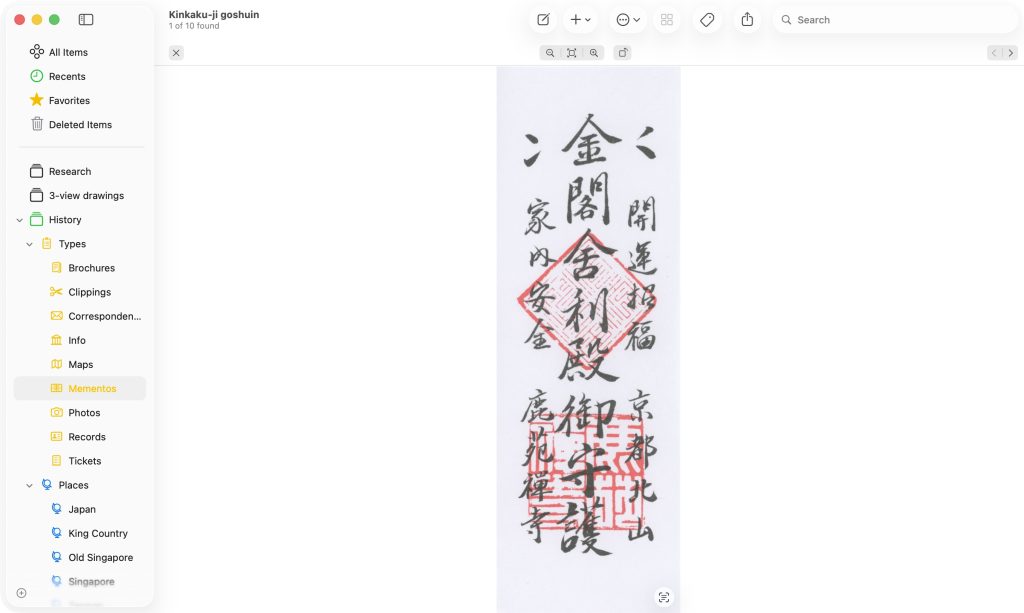
I have almost no standard lists. Instead, I have leaned heavily on tags. I have a group of tags each for people, places, and item types. These “groupings” are only related by colour. Each tag can optionally have one of the standard 7 colours, like Finder tags. I then apply all the relevant tags to each item. For instance, I have a scan of a paper blessing we were given at a temple on our tour of Japan. It has labels for Japan, Memento, and for me, and my wife.
I have a series of smart lists. One for each person, place, and item type. These lists mean I can quickly go to, say, everything from Japan or every memento. Initially, I was trying to do this with standard lists, but the real power of tags comes from the search box.
If I start from one of my smart lists, then that initially limits my search, but I can also start from the All Items view. A quick aside… the All Items view is critical, considering items can exist with no list membership and no tags! Whether I have an initial filter from a smart list or not, I can click in the search box and start typing.
Typing a letter J gives me quite a few possibilities: JPEG images, Japan, and every person on my tags list — because I’m using initials, and we all have a surname starting with J! A click on Japan, or using the arrow keys to navigate to it and press Enter, will add it to the search box, and the main view is filtered to only matching items. Now I get to just keep typing. The letter M gets me quite a few item types, but by the time I get to “Mem” the only option is Memento. A down arrow and Enter locks that in. Now I’m looking at all mementos from Japan. I could keep going if I wanted to select on a person as well.
This is equally easy on the Mac version or on an iPhone or iPad.
Once you find your items, they’re easy to consume. Everything in Scrappy is displayed as a large, square thumbnail. A double click or tap opens it to take up the full size of the main view. The Escape key will close it again.
In the case of saved web pages, there are two views available. The Link view shows a simplified view, much like Safari’s Reader view. This is also the view that the thumbnail is built from. The Page view loads the full web page. In this view, there is also a button to save the page into Scrappy’s library so you can access it offline. If you already have it saved, you can click the button then confirm and Scrappy will remove the saved page.
With any item open, or even just selected in the main view, you can use the standard sharrow button to share the item. Web pages share a URL, and images and PDFs will share as their original file type.
There are many other small features I won’t cover, but they all allow you to navigate and organise in yet more ways.
Scrappy has a 14-day free trial from the App Stores (macOS, iOS/iPadOS), after which it is a subscription. For Mac only: US$19.99/year, iPhone and iPad only: US$14.99/year, or combined Mac + iPhone + iPad: US$29.99/year.
It has survived a recent review of my subscription outgoings, along with Keep It, and is finding an increasing use case for me. My latest use is capturing web pages for some product research for a large upcoming purchase. I still have more work to do, adding more tags to my personal history items, too.
As I was reading your adventure with Scrappy, it reminded me of a similar app named Yoink.
I have not used it for 3 years. I best go check on its alive-ness.