Drogon Drop revisited, iClipLite from inventive.us/iCliplite, more on the cool number 142857, QA Director Steve finally finds another mistake, Flashblock from flashblock.mozdev.org, QT Movie Notetaker from dvcreators.net, Margaret’s eBay tutorial, the GIMP for photo editing from gimp.org/downloads/, running Vista RC1 on Parallels on the Mac!
Subscribe to the Podcast –> 
Listen to the Podcast once – 42 min 46 sec
Dragon Drop revisted
Last week I reviewed Dragon Drop, the freeware application that allows you to store folders in little tabs along the bottom of the screen in OSX, which pop up delightfully when you click on them. I wrote to the developer, David Adamson and asked him if it would be possible to have applications live down there as tabs, and he wrote back with this response:
“Applications as tabs? Like an application’s windows could minimize to tabs? The way to do that involved hacking the core frameworks, a la Ape Enhancer (and thus haxie predecessors like Unsanity’s WindowShadeX). That’s the road I started on with DragonDrop long ago, and deemed it too unstable and intrusive for my purposes. Perhaps I’ll look into it again…”
I wrote back to David and told him not to bother, the more I think about it I should really be using the hide feature in OSX to get my apps out of the way and have the slip into the dock, not sure why i don’t use that more often! as always I love the accessibility to the shareware and freeware developers, it’s great to get such a quick response!
iClipLite
Two weeks ago I reviewed a shareware app for the Mac called iClip, and this week listener Tim comes up with an interesting and related option.
Tim writes, “Catching up on your 9/10 Nosillacast. I wanted to let you (in case you didn’t) know that a free iClipLite widget exists, that is very convenient. Though surely not as functional as the full iClip application you reviewed. I have found it VERY convenient, plus it has better eye-candy than the image you included on your program notes.” He even included a nice screen snapshot so I threw that in the shownotes.

I checked out iClip Lite and it looks like it has some of the good functionality of iClip but moved to a widget. the good news is that it’s free from inventive.us/iCliplite, and if you like widgets you’ll probably find this one useful. Just like iClip, it allows you to toss a snippet phrase, or a url or even a file name into a bucket to be retrieved at will later. You have to play with this a bit to see why it’s useful, the eye candy to which tim refers are a series of black circles that wink open when you click on the “in” arrow to put something in it (no need to paste from the clipboard). to copy something out of it and into the clipboard, you simply click on the out arrow. to delete what’s in the bucket, just click the international symbol for do not enter. Tim points out that the black tab on the right permits you to stretch or shrink the widget to your space constraints, showing as many buckets as you have width on the screen.
I’ve come to depend on iClip for one special use, and that’s the url of the current week’s podcast. I have to enter that over and over again to make the images come up in the shownotes, but each week the end of it is different for the folder I make for the current week. For this reason iClip beats iClip, because I can edit what’s in the bucket and just change the end of it, while in iClip Lite it’s pretty much put it in there, or delete it. I guess that’s why one would be free, right?
iclip lite beats iClip though in being a widget, I think they behave more consistently than things that pull out from the side of the window. As I mentioned a few weeks back, switching to an external monitor makes those apps behave kind of hinky – sometimes I have to force iClip open, it won’t come up when I drag my mouse to the side, but other times it comes up just fine. widgets work everywhere and all the time!
The iClip Lite website says “t can even be a handy file launchersimply copy a file in the Finder and paste into a bin. Then double-click to launch.” I tested it, and it worked as advertised, but the icon on the bucket did nothing to tell me what file was in it. If you had a bunch of Word files stored there for easy launching you could never tell which one was which. Maybe I missed it but I couldn’t find a place to tell them apart!
this is a useful little widget that could make your life easier, check it out at inventive.us/iCliplite
More on the Cool Number
Last week I talked about a delightful number that has some fascinating characteristics – the number 142857. Listener Maurice from the Netherlands sent in a new fact about 142857 that I hadn’t learned about yet. He says:
Hi Allison, Another funny property of 1/7th, 1/7th is the sum of:
0.14
0.0028
0.000056
0.00000112
0.0000000224
0.000000000448
etc.
You see the pattern? Each term is 1/50th of the previous term.
Maurice – Not everyone gets that math and numbers can be beautiful, I’m glad you enjoy the elegance too! Thanks for the extra info on this one.
QA Director Steve
So poor QA director Steve has been bereft as he hasn’t been able to find any mistakes in the podcast lately, but it looks like he found one last week. when I was talking about that cool number, I explained that when you multiplied it by 14, the number changed so that it was all 9’s except the first and last digit which added to 9. the problem is that evidently I didn’t read the number correctly – I think I said 9999998 instead of 1999998. I’m sure many of you were lying awake at night worried about how this actually worked, and I’m so glad Steve is there to correct these critical errors.
FlashBlock
I was telling listener Art about how hard Flash animations crank up my processors on the Intel-based Macs, and he told me about a great extension for Firefox that gives you the choice of whether to play Flash inside websites. Go to a site like MySpace and check out how much your processor gets hosed, wouldn’t it be nice if you could only play the Flash files you WANT to play? If you go to YouTube, you probably want to play Flash videos, but if you got to MySpace do you really care if the dancing emoticons in the ad banner are actually dancing for you? Check out the extension FlashBlock from flashblock.mozdev.org.
In FireFox, go to the menu bar and select Tools and pull down to Extensions. In the list that comes up (yours may be empty) click on “get more extensions” on the bottom right. This will take you to the FireFox extensions website, and from there you can search on FlashBlock. If you select the download, all you have to do is restart FireFox and you’ll have the extension all ready to go. Go to a website like YouTube after you do the installation and instead of the Flash videos you’ll see a script “f”. the best part is that if you click on the f the video will start to play. This is the best of both worlds – you can play Flash when you want to, but it’s YOUR choice! thanks Art for a great enhancement to my surfing experience.
QT Movie Notetaker
Have you ever been watching a video maybe of a podcast and you wish you could jog down a note to remind yourself of something they said, and maybe even to bookmark that note to a specific time in the video so you could come back and rewatch it? If so, you might want to check out QT Movie Notetaker from dvcreators.net which works on both OSX and Windows XP.
I downloaded QT Movie and gave it a whirl. I found it worked with .m4v files and .mov files, but not .avi’s. The first thing you do is click on load new movie, which works with .mov and .m4v files, but not .avi files. the movie launches on the right hand side and on the left is a field where your notes will go. One button says to start the movie and after the movie starts it changes to stop movie and take a note. As soon as you tell it to stop, a time stamp is placed in the note field and your cursor is ready to type in a note. Click the button again and the movie plays. Once you’ve created these notes with their time stamps, you can click on any of the time stamps and the movie jumps right to that position.
You can even create a recurring note, which I can see would be very useful. You can save your notes as a simple text file, or email the notes to someone where the notes with their timestamps are in the body of the email. One thing to keep an eye on, is that at rest QT Movie Maker sucks up system resources – at idle it was taking up 40% of my available processor power. This is a simple tool that provides a really specific capability, and that’s the great thing about freeware and shareware! It does what it does perfectly, and isn’t a big pile of bloatware doing all kinds of fancy tricks that just slow it down!
Margaret’s guide to eBay
A few shows back I talked about sometimes we’re afraid to do something that everyone else seems to know how to do, so I did a tutorial on how to put a video up on YouTube. I also mentioned that I’m afraid to sell anything on eBay because everyone else seems to know how but me! Listener Margaret decided it was time she help me out and she wrote a tutorial just for us! she included 18 screen shots to help walk you through the menus, so when you’re done listening and you want to take a shot at eBay yourself, check out the shownotes for the full tutorial. I’ll also be adding it to the list of permanent tutorials in the right sidebar on podfeet.com. Margaret wanted me to point out that there are now two ways of doing listings on eBay, and her tutorial is on the original mentod. Listen in as I we all learn how to sell on eBay using Margaret’s great tutorial!
In order to buy and sell on Ebay, you will need to have a user name. To create a user name, click on ‘register’ at the top of any screen on ebay.com. Registering is easy. You fill in personal information such as name and address, etc. You will also need to create a password and provide a valid e-mail address. Once completed, you will receive an e-mail from Ebay to which you must respond in order to continue. It’s that easy to get started.
You do not need a Paypal account in order to sell or buy on Ebay, but it is strongly recommended. Most buyers prefer Paypal as it does not cost them money (although as a seller you must pay a small user fee based on transaction amount) or time to pay. One click and they have paid! I know a lot of Ebayers who do not bid on an item if Paypal is not an option. To create a Paypal account, go to paypal.com and click on ‘Sign Up’. Again you will fill in personal information, create a password and provide a valid e-mail address and bank account number. Paypal will deduct 1 or 2 small amounts from your account to confirm that the bank link is working. Once that is confirmed, you now have a Paypal account.
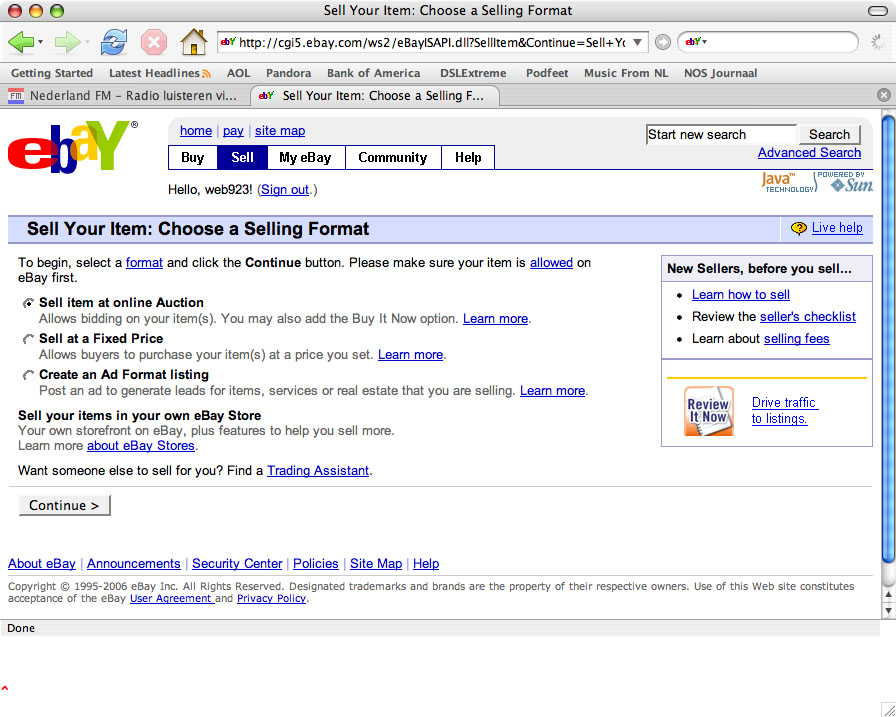
From the top of any Ebay screen, click ‘SELL’. Click ‘SELL YOUR ITEM’. If you are not already logged into Ebay, you will be asked for your user ID and password.You now have three auction choices. The most common choice is, ‘Sell item at online auction’ Check this box and continue. We will now go through 5 steps to list your item. Picture_1
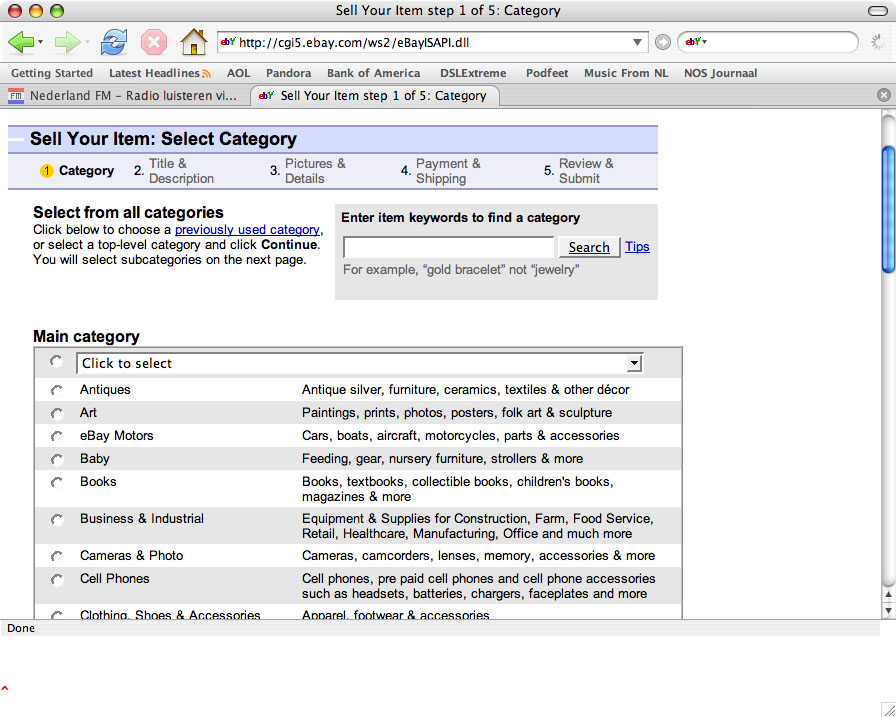
You are now at step 1 CHOOSING A MAIN CATEGORY FOR YOUR ITEM. For our example, we are selling the DVD ‘Breaking Away’, so I chose category DVD & MOVIES and ‘continue’. If you have trouble figuring out a category for your item, enter item keywords to see if Ebay can direct you. There is a chance to add a 2nd Main category. This option costs extra and in most cases is not necessary. Picture_2
Now I have narrowed my category down, so I can continue OR add more features to my listing. Every screen has the chance to add features (and costs) to your listing. Ebay warns you so you aren’t surprised by the additional costs. Also at every step, you can click a ‘learn more’, ‘fees’ or ‘tip’ button for additional information. I always choose the path that doesn’t cost extra. Picture_3
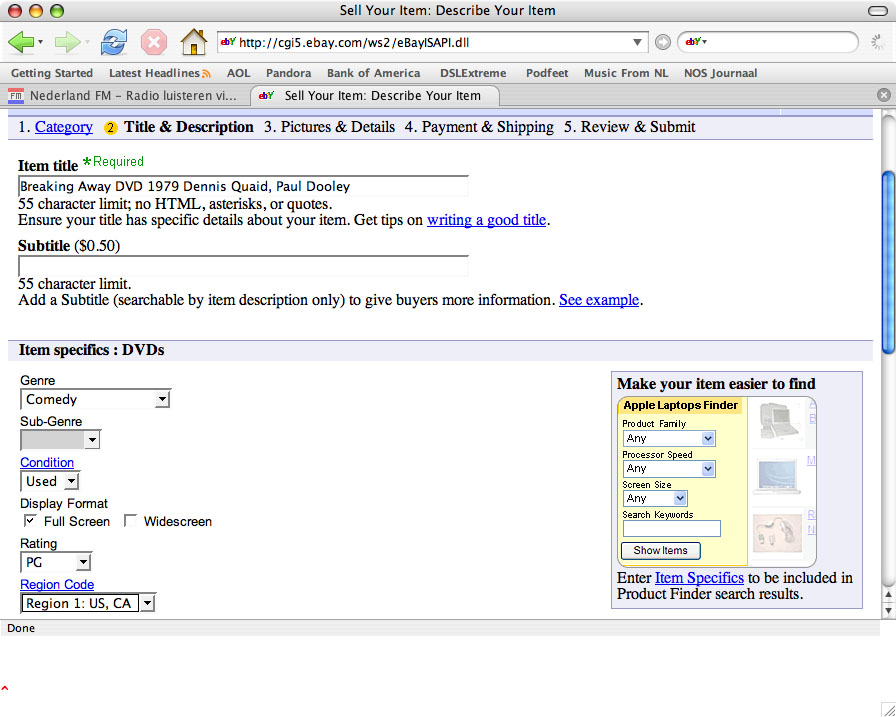
We are now at step 2 TITLE and DESCRIPTION. Since I am selling a DVD, Ebay will let me enter a UPC code that will enter all sorts of preloaded info about this DVD. This is a great new feature. I, however will go the old fashioned way and create my own description and LIST THE STANDARD WAY. Picture_4
I now must title my listing in 55 characters or less. Try and be as descriptive as possible so that your item will show up in searches. Better descriptions = better exposure. Picture_5
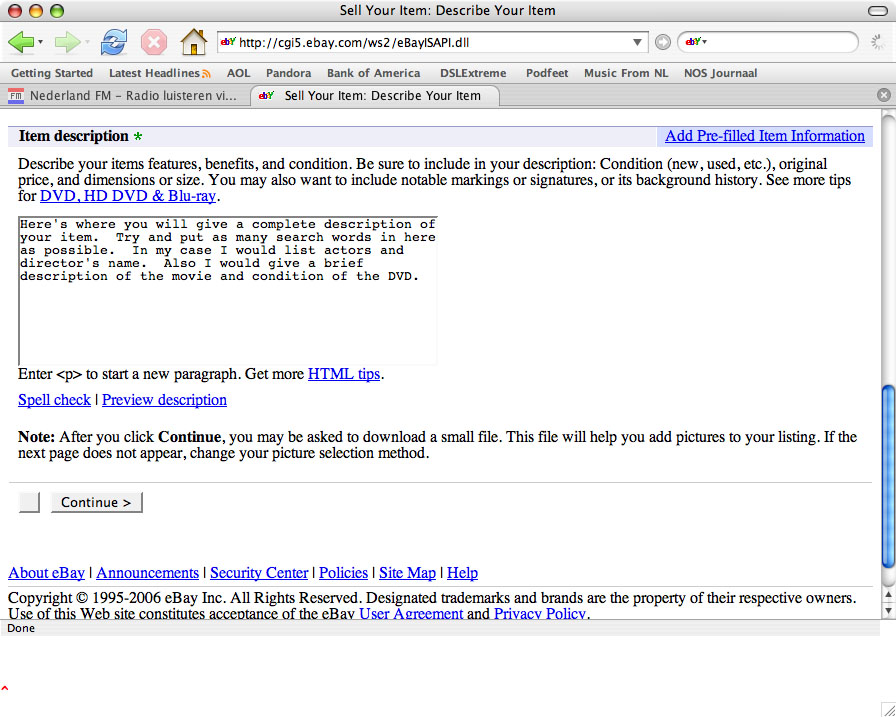
Time to describe your item. Again you will notice there are tips you can click on for help. Picture_6
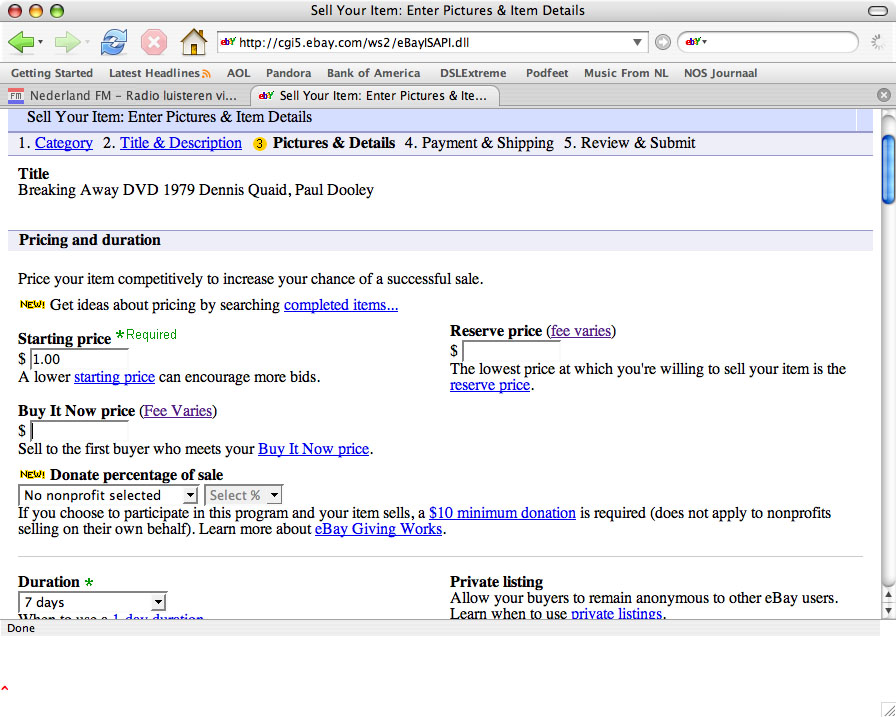
STEP 3 PICTURES AND DETAILS. Time to add pictures to showcase your item and to come up with a starting bid. Note the prompt to help you decide on a starting price. The higher the starting price, the more Ebay charges for insertion fees (for a list of fees, go to the Fee screen). I always start at $9.99 or less. Picture_7
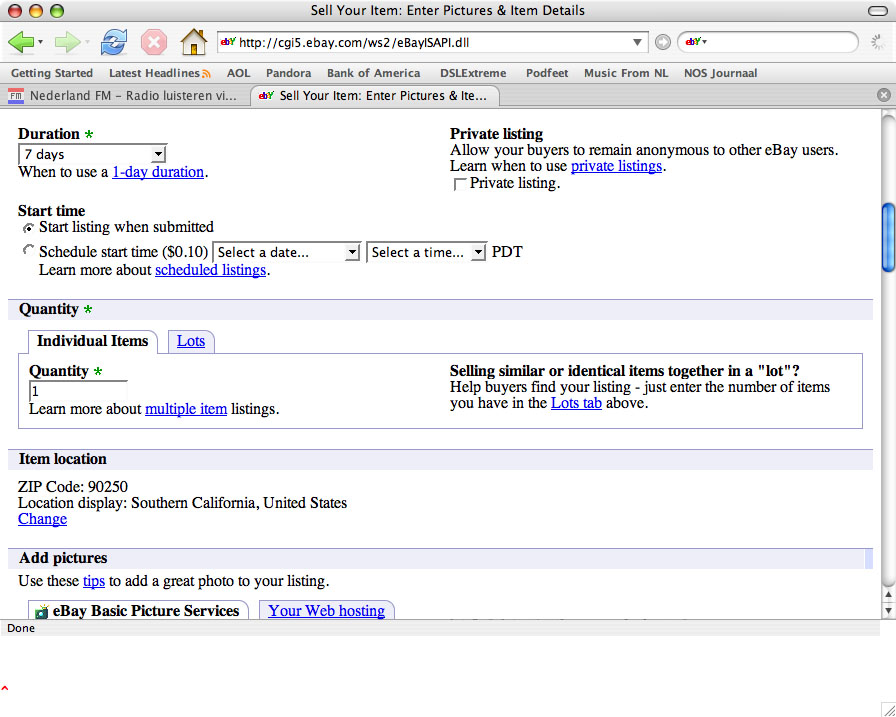
Determine your auction length and start time. Note selecting a start time costs extra, but might be worth it. Often you have time to list items but then realize you won’t be around when the auction ends. Selecting a start time for later in the week might be helpful. Picture_8
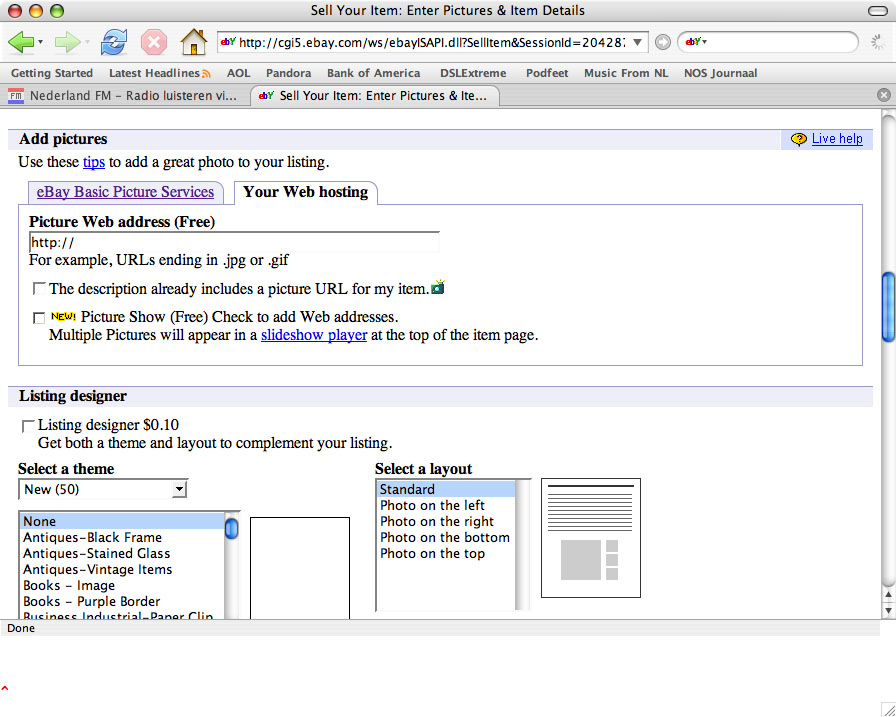
Time to add photos. The first photo is free. Each additional costs more UNLESS you load from your own FTP space. Loading from your FTP space is freeee. Just click on ‘YOUR WEB HOSTING’ tab to fill in URL. Note: keep photos less than 500 pixels wide with about a 50k file size. If you don’t want to deal with FTP, then just click ‘EBAY BASIC PICTURE SERVICE’ and load photos there. Picture_9
Note for an additional charge you can gussie up your listing with all sorts of borders, backgrounds and other features. Frankly, I find all that annoying. It is a good idea to have a gallery photo if your selling an item that might benefit from a thumbnail view with the title description. I’ve decided that ‘Breaking Away’ does not need this. Picture_10
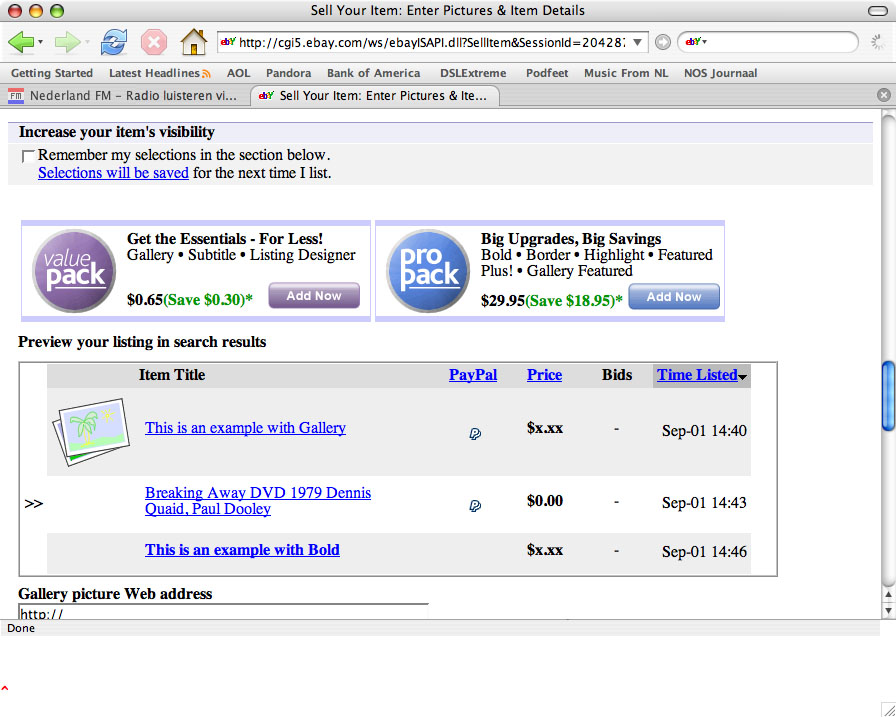
Even more ways to promote your product. Again I decline, although I like the free counter. Picture_11
STEP 4 PAYMENT AND SHIPPING Choose your payment options here. Picture_12
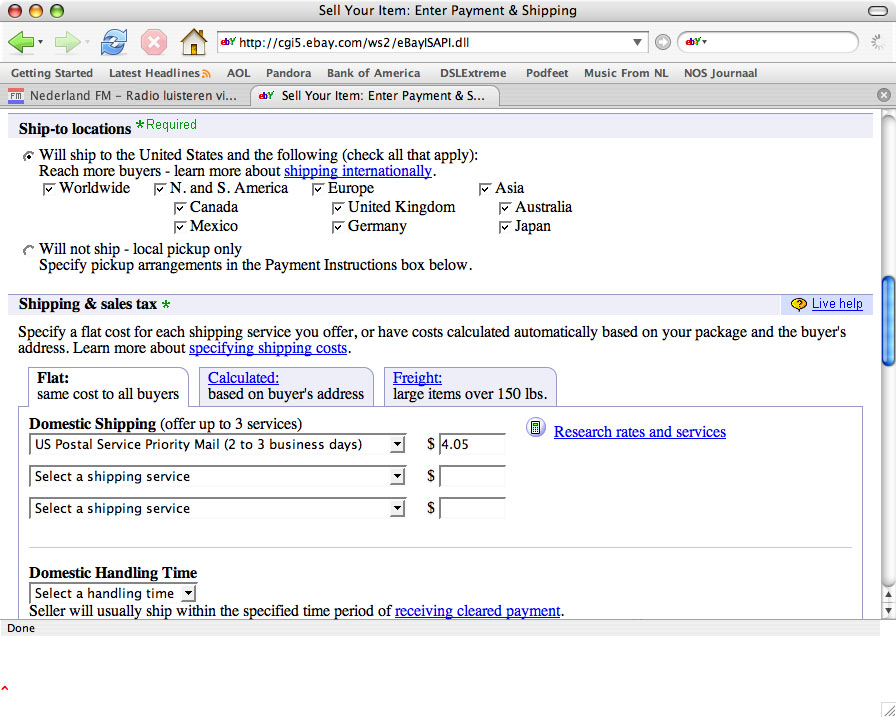
Choose your shipping methods. I ship anywhere. I chose the ‘FLAT RATE’ tab as I like to give a flat rate shipping price. For the U.S. I like Priority shipping because the post office provides you with free boxes and tape. To find other shipping boxes, dumpster dive at Cost Plus or other non food stores. Wealthy neighborhoods at Christmas time are a great place to get shipping supplies. Ebay has partnered with the USPS, so you should be able to review rates right at this screen. You can also go to USPS.gov and download the latest rate schedule. Of course you can choose to ship FedEx or UPS as well. Picture_13
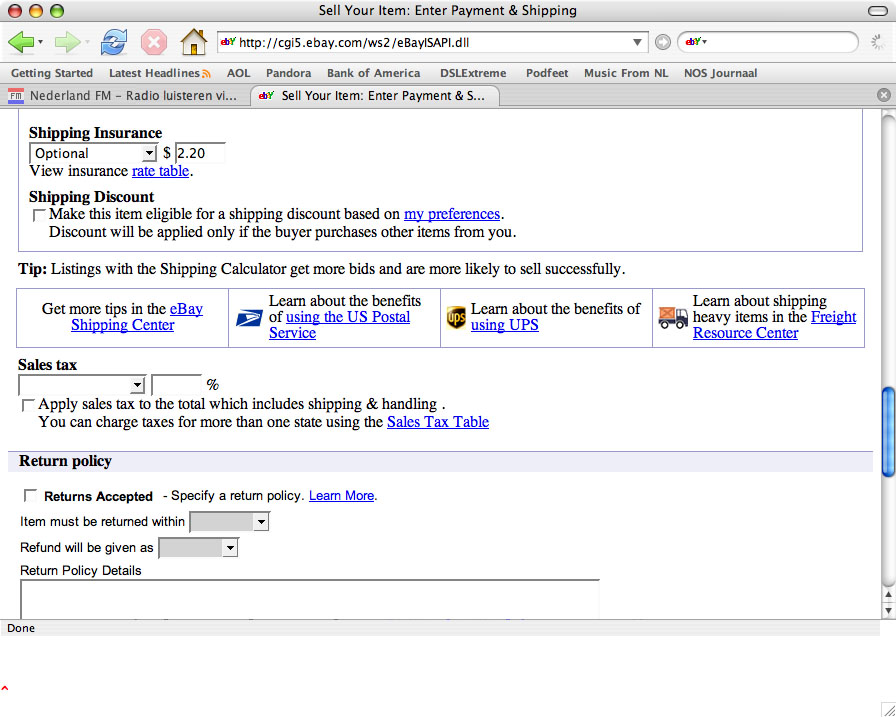
Look! More helpful shipping prompts. I like to give insurance as an OPTION, so I checked that box. Note: A lot of fields you can just leave blank if they do not pertain to you. Picture_14
You can add a RETURN POLICY note or additional shipping note. I chose to let my international friends know that their shipping will cost more. Picture_15
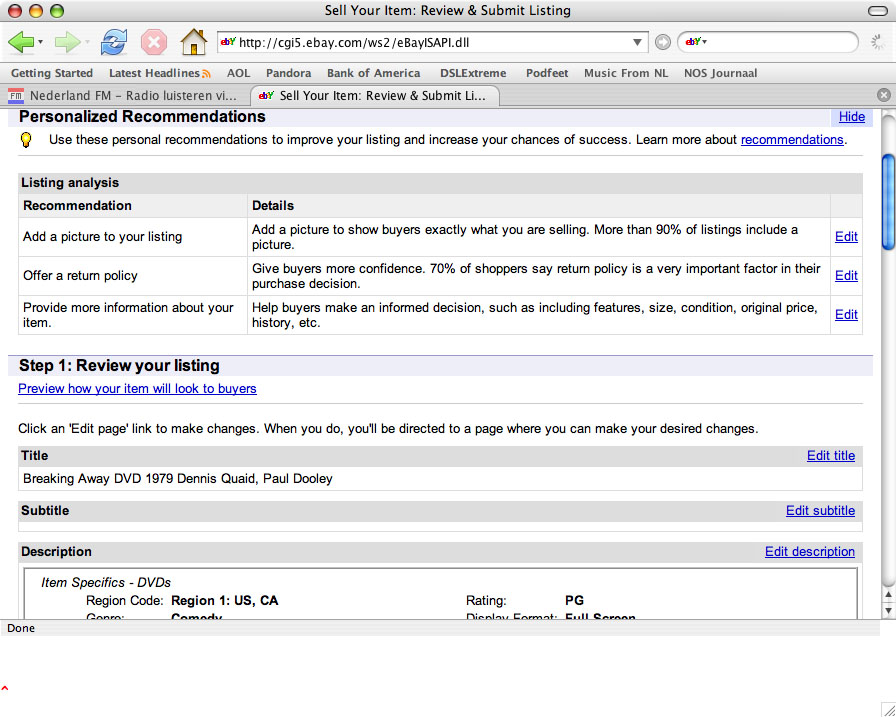
STEP 5 Time to REVIEW AND SUBMIT How nice of Ebay to review my listing and make suggestions. I’ll pass. Picture_16
Here’s a chance to make any corrections to your listing. Picture_17
Here’s where you review the fees that have accumulated before the auction starts. If all is OK, then click ‘continue’ and let the auction begin! Picture_18
At this point Margaret was going to start writing up what to do after the auction ends, but she went to eBay and found that they had a very succinct description on which she didn’t think she could improve. The first part of the link she she provided is how to set up the auction, but I’m glad we have her tutorial because it gives the real-world view of what you should care about and what you should ignore. I appreciate her personal touch to that! In any case, let me read to you what eBay says about what to do after the auction ends, starting at section 4 on eBay’s site.
When your listing ends…Communicate with your buyer. If you use eBay’s Checkout service, when your buyer completes checkout, eBay will notify you by email. If you didn’t specify shipping and payment details, the buyer can use checkout to request this information. You can also use checkout to send the buyer an invoice. If you selected not to use checkout, you should contact the buyer directly using email or phone.
Important: You should contact the buyer directly if you have not heard from the buyer or the buyer has not completed Checkout within 3 days of your listing’s end. Receive payment. If the buyer paid with PayPal, you will receive an email confirming payment. If you have not yet registered for the PayPal service, you will be prompted to register to accept the payment.
Ship the item to the buyer. Pack it up well! Use bubble wrap or crumpled up newspaper to protect the item from damage during shipping. Make sure any parts of the item that are fragile are well padded and are located toward the center of the box if possible. You don’t want damage from shipping to create problems for you and your buyer.
Leave the buyer feedback. eBay’s feedback system helps create a trustworthy community for everyone. Your feedback about your buyer is important information for other sellers.
Well, that’s it for this week’s tutorial, and I really have to thank Margaret for doing all this work for us, she really did take a lot of time with all the screen snapshots and personal directions. We’ll see if I get my nerve up to sell something now, I’ll be sure to use her tutorial if I do!
Bart’s suggestions
Listener Bart wrote in with some answers for me – I was talking about Open Office and how long it takes to load, and I blamed X11 for it, and said I didn’t understand what X11 was anyway. Here’s what he said:
You mentioned X11 and not knowing what it was and it being slow to load. X11 is the Linux (and Unix) “window manager”. It’s basically the software that Linux applications which have GUIs use to render their GUIs. Linux without X11 command-line only. If you have X11 you can get Linux GUI support. Apple X11 allows Linux GUI apps run on the Mac. Had Apple not added X11 to OS X I’d probably still be running Linux on all my machines. X11 has brought Linux apps to the Mac.
X11 itself is exceptionally small and very fast to load. It’s Open Office that is PAINFULLY slow to load, not X11. As a quick (and not so scientific test) X11 starts up in about 3 seconds on my old G4 MacMini. If you’re interested, I regularly use X11 for the following Apps (in order of use):
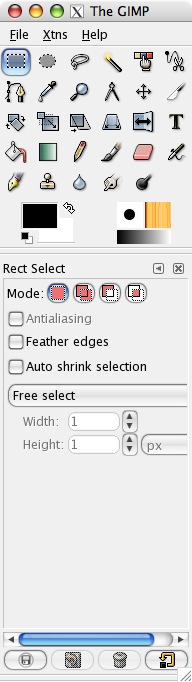
– 1 – The GIMP: a great cross-platform (Linux, Unix, Mac & Windows) open-source graphics package. We’re talking PhotoShop level power but with a slightly less intuitive interface unfortunately 🙁
– 2 – KStars: A great open-source Astronomy package that I’d be totally lost without
– 3 – GNUCash: an open-source accounts package that I use for the account for me small web services company
Well, Bart inspired me to check some of this out. I ran GIMP a long time ago (YEARS ago) so I decided it was time to give it another try. If you’ve wanted to get Photoshop but couldn’t swing the $600 or even the $80 for Photoshop elements, or maybe you need a good image tool for one of your kid’s machines and like the sound of the word “free”, you’ll really like the GIMP. Plus it’s got a cool name.
Before you can load any of these applications, you must install X11 which is not part of the standard install. this part threw me for a loop, so I’ll tell you what not to do. I have the install disks that came with my MacBook Pro, and I also have the official Tiger disks. I installed X11 first from the Tiger disks, and it wouldn’t run. I checked the console logs (those are logs you can look at that show you everything that’s going on under the hood while you’re running applications) and the errors seemed to be talking about my font server not running. I remember 10 years ago when i first heard of X and they always yapped about fonts! After about an hour of trying to find out how to fix this, I searched in Apple’s message boards, and found the solution – at least for MacBook Pro’s you have to use the original disk, not the Tiger disk, must have a bug in it of some sort.
Now let’s get going! To find the installer for X11 is a little bit tricky, it’s hidden on the disk in System/Installation/Packages. In there you’ll find X11User.pkg, double click that and it will install X11 for you. turns out Bart was right, X11 launches very quickly, I’ve been disparaging it’s name all these years, and for that I’m deeply sorry.
Time to get GIMP from gimp.org/downloads/. Because open source software is geek heaven, it’s a little trickly to figure out which link to click for the download. If you’re not an ubergeek, scroll down to “Binaries for various platforms” and click on the GIMP for UNIX (including Linux), Windows, or MacOSX.
 To install GIMP on Windows, you’ll need GTK+ 2 Runtime Environment, which is a multi-platform toolkit for creating graphical user interfaces. I think that means it’s the same functionality that X11 brings to Linux and OSX. there’s a link on the download page for an automated installer for both the GIMP and GTK+.
I installed GIMP on OSX, and it asked a few odd questions like how much RAM to allocate to the application, which is important in an image editor because if you open something huge, you could end up running out of RAM and the application will use the hard disk for space instead which is really slow. This concern was eliminated in OSX when dynamic memory allocation was instituted, so it’s kind of interesting to see that come up again. I let it stick with the default of 128MB, and I also left all the other defaults alone as it did the installer.
GIMP installed just fine, and I’ve got to say it’s come a really long way since last I looked at it! I put a few screen shots in the shownotes so you can see how pretty it is. As I describe the GIMP, remember that my frame of reference is Photoshop Elements, not Photoshop. the tool palette has a whole bunch of tools (way more than Elements). One thing I’ve always been jealous about real PS is that it has the functionality of channels. Channels are a way of separating the three primary colors, red/green/blue and operating on a photo in those three independent colors. I’m not sure I’ll actually ever use this functionality, but I frequently hear or read tutorials on PS where I can’t play along because PSE doesn’t have channels. this could be fun!
I can find a few of the familiar functions, but some of the more standard stuff is still eluding me. It took me a while to figure out how to crop a photo to a fixed aspect ration like 4×6, but it was right there in front of me – when i clicked the rectangular marquee, down on the bottom half of the tool palette a bunch of options had shown up about whether to feather the selection, whether I wanted to add to a current selection or subtract, and then also the option to crop to a specific size or a fixed aspect ratio.
One of the downsides to photoshop elements is that it takes FOREVER to launch. a big frustration for me is if I double click on a jpeg file expecting Preview to launch and instead PSE launches, and I just have to go do something else while it comes up! If PSE hasn’t been opened recently so it’s cached, it takes 55 seconds to launch and open a jpeg on my MacBook Pro! It’s not a Universal application yet, that is it’s not compiled for the Intel processor, so it has to use the Rosetta emulation, but there is no other application that I run that takes anywhere near that long to launch under Rosetta. I reopened it after it was cached, and it was 23 seconds, which is still way too long. In contrast, the GIMP, even having to open the much-maligned X11 layer only too 8 seconds to open! I’m starting to think I may switch to the GIMP and stop buying PSE (I’ve bought every upgrade so far) at least until it’s Universal, which isn’t expected till some time in 2007! The GIMP is Universal today, no waiting.
One thing I should tell you about the Mac version is that you have to use the control key instead of the command key we’re used to. For example, instead of command-s to save, it’s control-s. This shouldn’t be too much of a hassle, most of us who use Macs also use PCs, so we can switch back and forth ok, just something to remember when you use the GIMP. Another oddity is that each of the menu/palettes are separate floating windows. this means they don’t all jump forward or back as you switch to the GIMP and back. this is a little disconcerting because while you can see your image, all your palettes could be buried behind browser windows, etc on the Mac. On the plus side, I know there have been numerous times when I want just the image from PSE to be in front but I need to see another applications’ window right next to it, but PSE keeps plopping all of it’s palettes on top. Could be useful once I get used to it. I haven’t figured out how to print – I took an image and cropped it to 4×6, went to Page Setup to select paper size and get rid of the boarders, and then I told it to print and it showed me the printer I wanted, and I hit print – but nothing ever happened. the print monitor application didn’t launch. I tried this a couple of times, then I switched to Preview to open the edited file and printed from there and there was nothing stuck in the queue. I’ll have to fiddle with this a bit to figure out what’s wrong – printing is a fairly important feature, but not as important as it once was!
I’ll be playing with the GIMP for sure, I think you should give it a whirl too! Hey, it’s free, right?
Vista RC1 on Parallels
Call me crazy, but the temptation was just too great! I got an invitation from Microsoft to download and install the first release candidate of Vista! Yes, the operating system that won’t be released into the wild until early next year (in theory ) to the general public. What could be more fun than an unreleased operating system installed in a virtual machine on top of OSX? Well, how about having to download and install an unreleased version of Parallels to do it? YAY! Nothin’ better than that for major geek fun, I tell you.
I marched on over to the link in the email and started the download from MS’s website, but the install was so slow (everyone was hitting that server at once I suspect) that it was going to take SIX HOURS to download, so I thought to myself, I should do it in BitTorrent, that will be WAY faster, right? Well, the cool thing about BitTorrent is that you trade bits around, and this works great as long as a lot of people are sharing and a lot of people have all the bits. Well, that was not the case the first day, that’s for sure. Hardly anyone had all the bits, so it actually took 26 hours to download on BitTorrent! I’m pretty clever, aren’t I? Once I had invested a couple of hours, I figured I might as well let it run, since at least I was helping other people.
Once I finally got it downloaded, I loaded up the latest pre-release of Parallels and tried to run the install and it didn’t work! Turns out that version of Parallels worked with the beta of Vista, but not with RC1. the great thing about Parallels is that if something doesn’t work, wait a few days and they’ll have a fix for it. Sure enough Friday morning I went to the site and there was a post for how to run Vista under Parallels with a new build that was supposed to work.
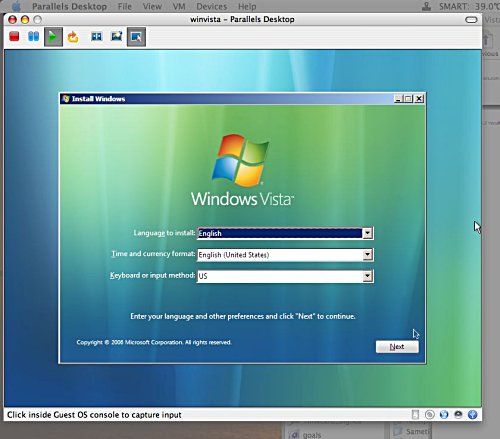
I launched Parallels, pointed to the ISO image I’d downloaded of Vista and hit play. The Vista installer asked for my license key, which had been provided to me in the invite email from MS. In Parallels you have to tell the installer up front how big the installation is allowed to grow into. It doesn’t necessarily take that up front, just an upper limit as you install software and Windows expands all on its own. I set it originally for 6GB, but the installer came back and said it needed something like 6.2GB. So I rebuilt my virtual machine and gave it 8GB. I got to the same spot in the installer, and now it said I needed 9.7GB! I figured clearly this warning can be skipped. The bad news is that once I got done doing the install, Vista keeps saying I’ve only got 151MB left! I ran the Parallels compacter program, which usually shrinks things up nicely, so I checked the size of the entire Vista installation and it was down to 5.39Gb out of the 8GB I gave it. The really bad news is that even after rebooting Vista, it’s still whining about it. the good news is that it’s running okay (when it’s not whining about disk space) so I can give some first impressions.
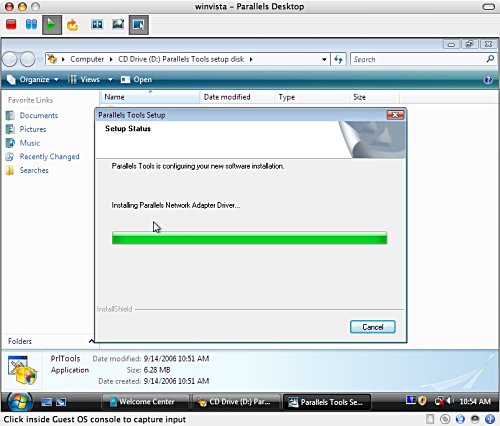
When you install an operating system in Parallels, you have to install what’s called the Parallels Tools, which are really drivers to fake out the OS into using the hardware on the Mac. these usually work well, and overall it’s pretty good under Vista. The graphics look good, things move quickly with no traces or anything, the mouse moves properly and can float between Windows and OSX nicely, but the audio is pretty hinky. this happened in an early release of Parallels, so I suspect they’ll get it fixed before too long. It’s a shame too, because I stumbled across the accessibility section and I wanted to test out the screen reading capability for our visually impaired listeners, but it was just too herky jerky to listen to I’m afraid. I posted in the Parallels forum about it, so I’m sure someone will fix it shortly or tell me what I boogered up.
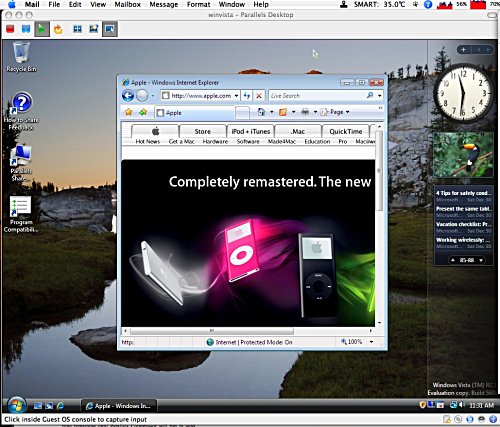
I launched IE first thing, and I had network connectivity. I’m really pretty shocked at how similar things are to XP, I didn’t have much trouble navigating around – IE was in the quick launch bar already, and it came up just fine. I put a screen snapshot of Vista with IE up…of course I had navigated to the Apple home page for the photo op!
The first thing I did with IE was download and install Firefox, and the install went flawlessly, except for the whining about disk space. In IE when i told it to download Firefox, a screen popped up saying “have you seen the nice bar on top yet protecting you?” and the bar said, “not downloading FF”. Gee, I TOLD it to download, that sure helped me a lot! I clicked on that bar and I had a popup choice to actually download. When I told it to install, a chime sounded, the entire screen went dim except for a window warning me that I was about to install software. It was kind of disconcerting, but I guess it gets the job done of not letting software install without us knowing about it. At least until someone hacks it I suppose.
I installed Picasa next, the excellent free photo management tool from Google, and it loaded but man the whining about disk space really kicked in then! I don’t know how to tell whether the disk is really full or not. Picasa ran great as always.
 One thing that’s keeping me from running it a lot is that it HAMMERS my cpu’s. It was regularly hitting up around 80% on BOTH processors! Vista has widgets, so I launched the one that measures system resources, and it was hanging around 60% on the processor (only showed one). that was if I was doing NOTHING in vista, no applications even launched! so then I wiggled my mouse and it PEGGED the meter widget at 100%. I’ve mentioned before how nice and toasty my MacBook Pro gets when the processors get cranked – I haven’t been able to run Vista for more than a half hour before I have to let the poor baby cool down.
I’m sure I’ll be working more with Vista over the coming months, hopefully getting this disk space issue resolved. I’m sure I’ll install Vista quite a few more times, so stay tuned. if there’s something you desperately want me to check out on Vista, let me know and I’ll try to get it loaded as long as it’s either free or there’s a free trial!
Akeelah and the Bee
Friday night we watched the movie Akeelah and the Bee. It was a great feel-good movie, and in it they had a wonderful reading from the book “A Return to Love” by Marianne Williamson. I want to read it to you as it inspired me to push towards the greatness I know I can achieve, and I hope you’ll see that in yourself too.
“Our deepest fear is not that we are inadequate. Our deepest fear is that we are powerful, beyond measure. It is our light, not our darkness, that most frightens us. We ask ourselves “Who am I to be brilliant, gorgeous, talented and fabulous”? Actually, who are you not to be? You are a child of God; your playing small doesn’t serve the world. There is nothing enlightened about shrinking, so that other people won’t feel insecure around you. We were born to make manifest the glory of God that is within us. It is not just some of us, it’s in everyone. As we let our own light shine, then we unconsciously give other people permission to do the same. As we are liberated from our own fear, our presence automatically liberates others.”
With that, go out and be great, do the things you know you can do, don’t be afraid. On that inspirational note, that’ll wind up this week’s installment of the NosillaCast. You can email me at [email protected] or send me voicemail at [email protected]. thanks for listening, and stay subscribed.
Sorry to say I’m getting a 404 on this issue both from the direct link and in iTunes 🙁
Just FYI … this just started working now so no need to worry 🙂
whew! I’m so glad!
[…] If you’re on a budget but really want a powerful image editor like Photoshop, you should consider using The Gimp. I did a full review of The Gimp on Show # 62 on 9/24/06, and I really liked it. I use Photoshop Elements myself, and i found features in The Gimp that are only in “real” Photoshop, like the ability to work in different channels (red/green/blue). The Gimp is Open Source and works on Mac OSX, Linux and Windows. So why am I talking about it again after all this time? […]