Vicious circle on Podcasting, thanks for the donations, awesome NosillaCast Widget makes the big time at apple.com/downloads/dashboard/radio_podcasts/nosillacastwidget.html, HDA Bob on the Electrical System, a new email client for OSX called GyazMail from gyazsquare.com, freeware audio converter called Max from sbooth.org/Max/. Google Part 9 with Google Code at code.google.com/ and Google Co-op at google.com/coop. Podfeet.com translated into 9 languages using the Google Translate WordPress widget from trevorcreech.com. Parallels takes it up a notch with release candidate 3120 with improvements in coherence and added USB 2.0 support.
Subscribe to the Podcast –> 
Listen to the Podcast once – 37 min 10 sec
Great thing about doing the Podcast
There’s a vicious circle going on here. I love playing with software, experimenting, learning how things work, and knowing what’s out there in the freeware and shareware world. So I do a Podcast about it, right? Well that puts the pressure on to download every darn thing that sparks my eye, and learn about it, even if it doesn’t solve a problem for me, maybe someone will need it today. The best thing happened today, my friend Namdar (remember the guy that spent 4 hours replacing the hard drive in my daughter’s iBook?) told me that he had scanned in a book his father had written of his memoirs, and had this huge pile of jpegs, and wanted to join them into one big pdf file so they have essentially a pdf book of his memoirs. Well, just last week I mentioned a tool called PDFlab which I had reviewed a long time ago, that will allow you to imbed jpegs into a pdf file! I showed it to Nam and he was delighted, it perfectly solves his problem. then he made the mistake of talking me again, and was telling me how one of his friends wrote this scary crazy IEEE paper on Fractals…so, you’ve got it, I told him about Apophysis, the free Windows fractal maker! Which of course means I’m even MORE motivated to do research into new products and do more podcasting and tell more people about tools and the vicious circle goes on and on!!!
Donations
I wanted to thank all of you who have been so GENEROUSLY donating to the NosillaCast! You know I’d do it for the love of it, as evidenced by the vicious circle comments I just made, but it’s really nice to have some help paying the bandwidth bills! I really really appreciate it, and it also shows to me that I’m providing real value. thanks again!
Awesome NosillaCast Widget
I’m sure by now you ALL have downloaded the totally awesome NosillaCast widget, but for those who are not fortunate to yet subscribe to the NosillaCast, I submitted it to Apple for their Dashboard Widget site. In just a few days, it was up on the “what’s new” page, and now it has an official spot on the dashboard pages – i put a link in the shownotes so you can see it! it’s at apple.com/downloads/dashboard/radio_podcasts/nosillacastwidget.html Ok, so it would be EASIER if you just popped up your NosillaCast widget and clicked the link from in there! In all seriousness, I’ve actually been using it that way – the fastest way to get to the links i like. I also posted a poll in the forums asking what you think about the widget, so go cast your vote! Speaking of polls, Leo has posted a poll on who wants an iPhone, check that one out too!
HDA Bob
I’ve been showing you the fun parts of HDA Bob’s website at hdabob.com, but let’s start looking at the high value parts of what he’s done. He has SO much instruction in here, it’s hard to know where to start, so I’ll just start with his “recent changes” section. He has recently updated the pages that explain how the electrical system works. First he explains what the different components are of the electrical system, the battery, alternator, lights, wiring, ignition switch, starter, fuses, gauges, and the electronic control unit.
He then goes into a detailed explanation of how all those bits work together. note that his lessons are generic to all engines with a bit of Honda/Acura specific information thrown in. At the end of this lesson, he includes a humorous article explaining how electrical systems REALLY work (hint, they’re driven by smoke!)
check out the lessons Bob so generously writes for us at hdabob.com.
Gyazmail
Tim Verpoorten of the MacReviewCast asked me to do another review for him (maybe he liked the last one!) I thought you might like to hear it too.
–
——–insert audio review of gyazmail—————
thanks Tim. I’m glad to try out new software whenever I can, and GyazMail from gyazsquare.com sure sounded interesting. (spell gyaz). GyazMail is an all-new email client for Mac OS X, newly developed from the ground up to offer you a full-featured but easy-to-use package based on the Cocoa framework. Or so they say on the website. GyazMail is shareware at $18, but you can download and try the software for 40 days for free. I used to use Entourage from Microsoft and liked it, but when i switched to Apple Mail, I never looked back. It’s integration with Address book is great, the way it can shrink photos for me for emailing, it’s all good – so it will be hard to sell me on a new Mail client. then again, it’s always good to keep your eyes and ears open for new tools that solve problems for you.
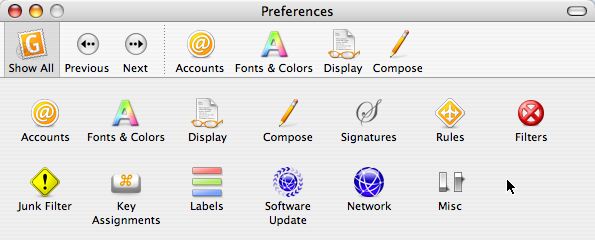
doing a review of an email client is harder than most tools, because you have to figure out how to configure it, all that IMAP/POP/incoming and outgoing mail server stuff before you can even start to play. in GyazMail I assumed I’d set all that up in preferences and I was greeted by a really pretty display of icons for accounts, fonts, display, compose, signatrues, rules, filters, junk filter, key assignments, labels, software update, network and just in case something didn’t fit in those first 12 categories, there’s one for miscellaneous.
In Accounts, I chose New, and decided to go with IMAP for now. IMAP allows you to keep your emails on the server even after they’ve been downloaded to your client, which I hope it will let me do so i can still receive them in Apple Mail while I’m testing GyazMail. Well, it’s probably something I’m doing wrong, or maybe my own podfeet domain doesn’t allow IMAP, because it didn’t work. I changed to POP3 and I was able to send an email to myself in my .mac account. The great news is that GyazMail is fully integrated with Address Book, so it definitely made it through the first hoop! it does an autofill as you’re typing which is excellent.
I then composed an email to my daughter in her .mac account, and hit command-shift-D instinctively, which is the shortcut that sends mail in Apple Mail, and it worked in GyazMail too. that is, it tried to email it, but it came back with SMTP protocol error 553: “sorry, that domain isn’t in my list of allowed rcpthosts.” That doesn’t make any sense, both emails were to the .mac domain, and what’s an rcpthost anyway? I did some searches on this error and found it had to do with server relaying, and making sure your users were authenticating properly, which didn’t help me at all. I went back to GyazMail and opened the email I wanted to send, and under the GyazMail menu, right under Preferences, I found Outgoing Server, and a pull down to 2 servers both with the same name (the right name) of my outgoing mail server. humph.
Well, I switched to the 2nd one and it worked! what the heck is that about? I went back to the preferences and changed the description of the outgoing mail server to something memorable, and now when I look at the outgoing servers, there’s still 2, but the good one is the memorable name, so as long as I keep it on that one, mail will send properly. how very odd. I don’t see where to get rid of the wrong one, the only thing I can figure is that it’s a leftover from my attempts at an IMAP installation. Oh well, annoying, but at least it’s fixed now.
When you write compose an email in GyazMail, the default is to only show the To: field, which makes it look very clean, but you can easily add a cc: or bcc: header when you have a message open ready to send by pulling down in the View menu. I checked in the Preferences menu, and under Compose there’s a place to show the cc and bcc headers as default if you prefer it that way. Nice to have it as an option!
I dragged a photo into the body of an email, and it attached it just fine, and also put the name of the picture and the size right below the picture. I also tried attaching from the menu bar, clicking on Message/Add Attachments, which defaults to “add to the bottom of the message”. that’s not necessarily what I want to do, but it’s not a bad idea in a lot of cases. A simple click on that check box makes it go at the top where I want it to go. It’s a little odd that there isn’t a paperclip on the window of the email message itself like just about every email program around, isn’t it? I hunted around the preferences and could find no menu that would give me a little paper clip. I hoped I would find it eventually. As I mentioned, I like the way Apple Mail handles attaching of photos, so I was curious to see what GyazMail would do with them, but I couldn’t find any place where GyazMail would allow me to change the size of the photo. that’s really a bummer.
In my wandering of the preferences I found a couple of neat features – html mail is off by default, which is considered safe computing – html mail has been found to be able to harvest nasty bits of code that can compromise your system, at least in the windows world. I’ve chosen personally to live on the edge though and let it come through. I might want to rethink that, with the exception of my good buddy Skippy, all of the html mail I get seems to come from spammers. Of course many would suggest that Skippy’s email is spam too, but I don’t think so! Anyway, back to the review.
I found a cool feature I’ve never seen in an email client before – GyazMail allows the user to edit the little text that always gets sent along when you reply or forward an email. For example, the default when you forward is a bunch of dashes with the words “begin forwarded message” followed by more dashes. you could replace that with “some moron sent this to me” followed by more dashes! Ok, probably you wouldn’t do that, but you get my drift? the reply template defaults to “On #d, #n wrote:” which you can change, and which teaches you how they create the date and name. I decided to experiment, and added #t to the default template, and sure enough when i replied to an email it included the time along with the date and name. not a huge feature, but interesting and possibly useful to some.
GyazMail allows you to assign menu keys to just about everything. since I didn’t find the little paper clip to attach things, I checked to see if I could assign a menu key and sure enough it was easy and quick to do just that. they give you every single menu choice in a hierarchical chain so you can choose any menu item and assign a key stroke. this is terrific because it could really ease the transition from any other mail app – just add the key commands you instinctively do from your own command and you never have to learn new ones!
There were two things I liked about the preferences. One was that you can leave the prefs open while you work on emails so you can test your changes. In Apple Mail you have to close all the windows of the preferences before you can open a new message, so this is a welcome change. the other nice feature is that if you do close the preferences, when you come back to them they default to the part of prefs you were looking at when you left.
I didn’t have a lot of mail to play with, but I tested one of my pet peeves in Apple Mail. You know how when you want to do a search, say on all emails from Surfbits, if you switch to another folder, the search field is empty? I HATE that. good news is that GyazMail keeps the search field with your search term, much better done. It also seems to know that you’re searching for something. I had been looking for that darn error message, when I started a search in GyazMail it defaulted to looking for the same search term. that’s kind of cool.
Overall i found GyazMail to work cleanly and simply with an interface that’s probably a bit better than Apple Mail’s at least as far as the preferences go. I wish it had better support of photographs, and that outgoing mail server thing was a bit annoying. the Address Book integration works very well, and the search is better than Apple’s in some ways. I’m not sure i found anything that was so compelling that I’d dump Apple Mail just yet, but overall it’s at least as good if for some reason you can’t stand Apple Mail.
If you enjoyed this review, you can hear more like it on the NosillaCast over at podfeet.com. Of course that would be AFTER you finish listening to the MacReviewCast!
thanks for letting me check this out, Tim, I’ll probably keep playing with it to see what else I can uncover.
—————-end insertion————————————–
So this is really embarrassing – Tim played that review on his podcast earlier this week, and he got a comment on his blog from his listener Hans, giving the obvious answer to one of my questions about GyazMail. He said, “For your paper clippy: open a new message, go to the View menu and
choose Customize Toolbar. HTH.” Now, exactly how stupid do I feel? duh, it would be under View/customize toolbar! why did I think it would be under preferences? it’s ALWAYS under view toolbars! Oh well, it’s a good thing there’s listeners out there to help us podcasters!
Max
Listener Margaret sent in an interesting request:
Is this freeware (Max) something that might be reviewed on your show? Previously you have touched on the subject of audio. This app looks cool, but being clueless I wouldn’t know how to use it. It seems at every Mac Club meeting, someone is asking about creating audio files in various formats (In fact January’s topic will be about various media conversion). I thought it might be of some interest to your audience since it is a free application for a subject that seems to generate a lot of interest.
and she signed her email,
Would Rather Hear The Podcast Than Read The Manual
I headed on over to sbooth.org/Max/ to check it out. I resisted the temptation to download the Unstable version, but decided to act responsibly and go for the stable version. According to the website, Max s an application for creating high-quality audio files in various formats, from compact discs or files. When extracting audio from compact discs, Max offers the maximum in flexibility to ensure the true sound of your CD is faithfully extracted. For pristine discs, Max offers a high-speed ripper with no error correction. Once the audio is extracted, Max can generate audio in over 20 compressed and uncompressed formats including MP3, Ogg (Vorbis), FLAC, AAC, Apple Lossless, Monkey’s Audio, WavPack, Speex, AIFF, and WAVE.
wow, this looks like a real find! I downloaded and installed Max. The application has a very simple interface – the top half is where you drag files to be converted, and the bottom half is where you add desired output formats. I took the plunge, and dragged a file into the top half. There weren’t any output formats in the bottom half, so I clicked the only button I could, which was Setup output formats. There was a whole slew of formats from which to choose, so I picked mp3 and Ogg (Vorbis). I’ve always wanted to do something in Ogg Vorbis, all I really know about it is that audiophiles are pretty rabid about it, so it must be good! One odd thing as I chose the output formats was that while there were a lot of options, they were mostly greyed out, other than setting the quality.
oh well, not sure I would have understood them anyway. After i added the two output formats, I hit convert, and in 25 seconds it converted a 6 minute AAC file into both mp3 and ogg vorbus. That seems really really fast, doesn’t it? It saved them in my Music folder (which i figured out by using Spotlight to search my disk), but later in my usual dinking around i found a setting in the Preferences where you can tell it where to put the files when it’s done. I have a tin ear, I guess, I listened to the AAC file, then the MP3 at 168kbps variable bit rate, and then the Ogg Vorbis, and they all sounded exactly the same to me! AAC was 2.9MB, mp3 became 4.5MB, and Ogg Vorbis became 3.7MB. Odd that they got bigger than the original, isn’t it? did they somehow ADD information to the file when they compressed it?
Speaking of preferences, there’s a ton of them! they had fun making the icons in the prefs, they’re very colorful and fun.

There’s a general tab that controls Max’s behavior when you insert a disk, like acquiring the artist and track names for you automatically. the Formats tab is the same as the setup of output formats, while the Output tab manages not only where your file goes, but some more advanced actions like the ability to join input files. I did need to join two files once, and it looks like Max could have solved the problem for me.
Next in the preferences is Ripper, which is where you can choose which ripper you want to use – basic ripper, comparison ripper, or cdparanoia. I have no experience with these, so I just left it at Basic ripper. there are settings for the different rippers too, like error correction and some complicated sounding SHA-256 sector comparison. the next tab is called MusicBrainz (with a z), which sounded intriguing enough to look up on Wikipedia. In there it says that “MusicBrainz is a project that aims to create an open content music encyclopedia. It is an online database of information about recorded music, not a database of music.” Sounds pretty interesting, but I was afraid my ADD would kick in if I went off to learn about it!
I’ve never completely understood tagging, but Max even has that – you can do tagging by FLAC, Ogg Vorbis, Monkey’s Audio, and WavPack. again, I’m flying blind here on this guys, no idea why I’d want to tag differently by format! Next is the Album Art, which I actually understand – you can have it pulled from amazon – 6 different country opportunities but all Amazon. Finally there’s an iTunes button, which is awesome because it allows you to automatically add output files to your iTunes library, and you can even add them to a playlist if you like!
Ok, enough about the prefs, let’s do some ripping! I only felt qualified to test the mp3 ripping, so I set up just mp3 as the output format, and stuck in a CD – in this case, Nightmare before Christmas because i never quite got around to ripping the Oogie Boogie Man song off that CD! when I stuck in the CD, iTunes offered to help do the ripping for me, but I told it to go away. when i launched Max, it came up with a new window I hadn’t seen before, it was titled tim Burton’s the Nightmare Before Christmas, and it had the title, artist, and all of the tracks listed by name and length! It didn’t pull the album art, and the MusicBrainz query but that’s probably because I didn’t put login information in for MusicBrainz.
I selected the Oogie Boogie song, which is 3 min 17 seconds, and it took just under 30 seconds to encode it for me! i popped open iTunes, and there was my wonderful oogie boogie song! I’m not sure why it didn’t pull album artwork for me, but I’m pretty sure iTunes will do that at some point when I’m not paying attention, it seems to enjoy doing that!
Overall Max appears to be highly capable, runs really fast, has a very playful interface, and it’s free! It’s clearly more advanced than I need, so if you’re looking for a tool to handle multiple (20!) formats and you actually understand why Ogg Vorbis is better than mp3, then check out Max from
sbooth.org/Max. thanks Margaret, this is really an excellent tip!
Google Part 9
Google Code
It’s time for part 9 in our Google study. Our next tool is called Google Code, and it’s available at code.google.com/. This part of Google is not so much for the mainstream, but it’s part of what makes Google so amazing. You know how there are a bunch of sites cropping up on the web that have Google Maps as a basis for a more interesting tool? Like remember that site that had the little red airplane you could fly over Google satellite maps? the reason those sites are possible is because Google makes Application Programming Interface, or API, available to everyone so you’re free to embed it in new things you make! this is such brilliant sharing – it just makes Google more imbedded in our daily life.
On the Google Code site, there are four fun ways to enhance your web site – there’s the Google Maps API I was just talking about – you can embed Google maps into your own web pages. Next there’s the Google WEbmaster Tools that in theory will optimize your site’s coverage in Google’s search index (I’ll have to check THAT one out!). After that is the Google Web Toolkit which allows you to write AJAX apps in the Java language (probably not for me) and finally there’s Google AJAX Search API – which allows you to put a Google Search module on your web pages.
If you thought that was it, it goes on! You can write simple min-apps for the Google Home page and Google desktop, write plug-ins to search more file types with google desktops, create and share content with Google Earth/Maps and Maps for Mobile, and even how to create custom buttons for the Google Toolbar. See how brilliant they are? They’re getting US to write the code to make them more valuable, and we’re thrilled to do it!
At Google code you can also learn how to manage your AdWords, read and write google Data APIs, add Google Checkout, or “federate with Google Talk using the XMPP protocol”, whatever the heck that is! They also have a google code blog so you can read what’s new in this whole world of all things Google!
Google Co-op
If you thought I was out of my league on Google Code, wait till you hear the next product – it’s called Google Co-op at google.com/coop, and it says it’s a platform that enables you to customize the web search experience for users of both Google and your own website. In here you can create your own search engine. Why would Google want you to do that? Evidently you can create a custom search engine that reflects your knowledge and interests, and you can make money from the resulting traffic! This sounded like fun, so I looked a bit further into it. The custom search engine puts a search box and search results on your website, you specify or prioritize the sites you want included in your searches, you can customize the look and feel of the search engine, and somehow you can invite your community to contribute to the search engine.
I played around with creating my own search engine for a while, but I’m not sure I actually got the intent so much. You make up a name for your search engine, you give it the sites you want to have searched, you can give it a custom icon, which I did but I could never get to show up. at the end it gives you a button that allows you to add your custom search engine to your Google IG homepage (which I didn’t really want). I thought it would allow you to add this snazzy search to your site, which it does, but when i added the code to podfeet.com, instead of putting in the pretty icon, and showing the clever name I had created, instead it just put a REALLY long search bar in the sidebar (it hung off the edge of the white part onto the black, and didn’t show the clever name or anything! Oh well, it was kinda fun, and if anyone stumbles across it they’ll get linked to podfeet.com anyway so maybe I’ll get a few extra clicks!
Google Translate
 I did another enhancement to the website – since the NosillaCast audience is international, I added a translate capability in the sidebar. What you’ll see now is a set of flags that represent French, German, Spanish, Italian, Portugese, Japanese, Korean, Chinese, Arabic and English. I am an ugly American – I only speak one language, so i can’t test this to see if it’s any good at all! The WordPress translate widget is using Google Translate, which we haven’t even reviewed yet. One of the things I love about this WordPress widget is that it was written by Trevor Creech who is just 18 years old! If you’re interested in trying this out on your own blog, check it out at trevorcreech.com.
Parallels build 3120 RC
It’s time for a Parallels update, a few weeks back I reviewed the new Fusion Beta from VMware that is an established Virtual Machine company in the windows world and this is their first foray into Mac land. I tested it out because I heard that it supported USB 2.0 devices like the iSight and other web cams. It was pretty unstable and REALLY slow, so I panned it. Listener Jay wrote in to tell me that there’s a new version of Parallels out as a release candidate that also supports these devices! Hurrah! I have to be careful now because I’ve become very dependent on Parallels in my daily work flow so I was hesitant to go from a stable release to an unreleased version, but in the end my instinct kicked back in and I loaded Release Candidate 3120 anyway. I’m livin’ on the edge! in nerd world, at least.
When i first loaded it up, it was a little hinky. I had been delighted in the previous release that I can now dynamically change the size and shape of my Parallels window and Windows itself adapts to those changes. no longer did I have to right click on the desktop to go to the properties and change the resolution to change the size of my screen. Imagine my dismay when i installed this release candidate and found that when i resized my window, I got scroll bars or empty spots because windows hadn’t adapted! I was bummed it stepped backwards like that. for some reason Windows also lost my desktop background, and even going in and changing it in Windows didnt’ bring it back. the third mess I got myself into was that somehow the cursor location was off from the visual representation of it – when I’d click somewhere, the clicking would actually occur about a quarter of an inch below my cursor! This happened AFTER I loaded the Parallels tools which are supposed to make the cursor work properly. Oh no, this is a disaster!
I restarted windows after loading some drivers, and everything came back fixed! i can indeed resize the window and Windows, and my desktop background is back and my cursor is fine now. Yay! I should mention that when you load a new version of Parallels it allows you to point to your OS installations from the previous version, you don’t have to reload them so that’s handy.
Now let’s talk about the fun stuff. The amazing thing about the Parallels team is that each new rev is so much cooler than the one before! I was able to hook up a Windows only Logitech quickcam and run the video conferencing software I needed with the new version of Parallels, proving that indeed it does now support USB 2.0 devices. this is most excellent for me. i haven’t loaded the Boot Camp drivers yet, but I’ll be doing that soon so I can see if I can get the iSight to work next. That will be awesome if it works.
The really big excitement came in way coherence works now. Back on show number 73 I made a little video (which is also in the tutorials section on podfeet.com) which explains what coherence it. Basically in Parallels now you can release your applications from Windows – each application can be free to live in your Mac environment without showing the desktop of windows. it’s kind of hard to explain without seeing it, so I encourage you to watch the video. But in RC 3120, they took it up a notch. They’ve gotten rid of the hinky graphics that showed it was more of a parlor trick – it used to be as you moved an Windows Excel file around you could see the Windows desktop background being repainted behind it. now they move seamlessly around on the screen exactly as though they were OSX apps.
to make them even more integrated, they now show up as applications in your list of running Mac apps. I can’t figure out how to make a screen shot to show it to you (must be time for another video!) but you know how you can hit command-tab to see all your open apps and switch between them? It’s the same on Windows, I think it’s control-tab or windows-tab or something like that. anyway, now in OSX when you do that, you see each of the Windows apps right there with your Mac apps! I opened Excel in Windows and Excel in OSX at the same time, and they were both in the list! The windows version is easily distinguishable because the icon has a little Parallels symbol on it so you can tell where it lives.
I knew this was truly integrated into my Mac environment when the menu bar application Spirited Away kicked in. i did a review of Spirited Away a while back, it whisks away any application you haven’t played with for a while so that you’re not distracted by all your open apps. So here I am working away and I hadn’t played with the Windows version of Excel for a while, and suddenly it disappears! I was freaked at first, assuming something had crashed, but then I looked over in my dock and there was windows Excel. How cool is this? I was looking for something else on my disk, and I discovered a new folder inside the Parallels folder called “Windows Applications”. In that folder I found all of the icons for the different applications I have loaded in windows! I could tell they’re icons and not real apps by their sizes – I’m pretty sure PowerPoint is bigger than 160K! interesting way they’re doing this.
To take things up one extra notch to make the experience of switching between windows and mac completely seamless, You can now use the command key in shortcuts on windows. By that I mean you can use command-c to copy in Windows apps instead of having to remember to use control-c!
this is truly a revolutionary update, and makes the Windows and Mac integration just delightful. I showed it off to one of my hotshot windows expert friends and she said, “well, that’s it now. why wouldn’t I buy a Mac?” Why indeed? I’m not even arguing which OS is better here, it’s that we simply no longer have to choose! I’ll have to test Linux again soon to see if these new features like coherence works there too!
Next week I’ll be doing an update on Crossover – they’ve made some real progress there too! Crossover is the product that allows you to run Windows APIs, that is the real executables under OSX. I can’t begin to explain HOW it does this, but they have a released product with a 60 day free demo version and I’ll be testing that out this week to see how far they’ve come.
to whet your whistle, I put a picture in the shownotes of IE 6 running on Crossover on the left, under Parallels on the right!
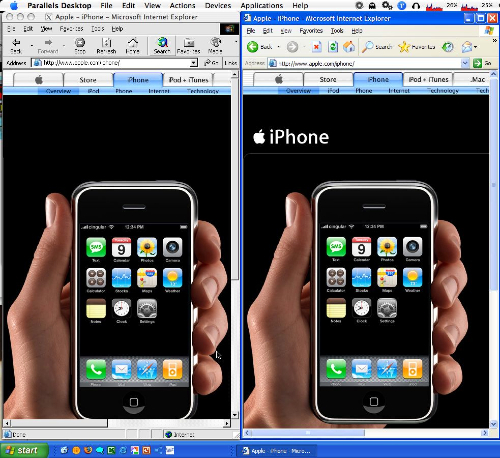
Notice that you can see my Macintosh menus on the top, and Windows across the bottom so you can tell I’m in both simultaneously!
Well, I’ve probably rambled on long enough by now, be sure to drop me a note at [email protected], or send me a voice recording at [email protected]. Check out the forums at podfeet.com/forums too. Thanks for listening, and stay subscribed.