Sign in for the Google Plus Hangout during the NosillaCastaways party by following the ScreenSteps tutorial on how to sign in around 6pm on Friday night. AT&T/Samsung rant, then Dorothy, aka @maclurker brings us a review of the Boostcase Battery Case for iPhone 4/4S. Next we’ll get geeky with a discussion of the Escrow Keybag. George from Tulsa telling us about his experience with one of Google’s Chromebooks. In Chit Chat Across the Pond Bart regales us with his tale of adventure building his own home Network Attached Storage device from scratch!
![]()
mp3 download
Hi this is Allison Sheridan of the NosillaCast Mac Podcast, hosted at Podfeet.com, a technology geek podcast with an EVER so slight Macintosh bias. Today is Sunday January 27, 2013 and this is show number 403. This week we’ll start with an AT&T/Samsung rant, then Dorothy, aka @maclurker brings us a review of the Boostcase Battery Case for iPhone 4/4S. We’ll get geeky with a discussion of the Escrow Keybag – you’re going to love it. If we have time, we’ll hear George from Tulsa telling us about his experience with one of Google’s Chromebooks. In Chit Chat Across the Pond Bart regales us with his tale of adventure building his own home Network Attached Storage device from scratch! Let’s dig in.
Oh wait! one quick PSA about the NosillaCastaways Google Hangout during the party at Macworld. This week Kevin, aka @big_in_va, Steve, Dorothy, Mike McPeek and I did a test run of how this is going to work. It’s a teeny bit tricky because we need people to queue up to get in over in the G+ community. Hangouts only allow 8 people in at a time, and while the video will be broadcast if you’re following Kevin Allder on G+ we need the rest of the guests to sort of wait in line so Kevin can boot people out and bring them in in the order they arrived. Of COURSE I made a ScreenSteps tutorial on how to sign in (Steve made me) so there’s a link in the shownotes to it, and it’s posted in the NosillaCastaways G+ Community! Ok, NOW we can get to the show.
Wait, I lied. There’s a new Mac Roundtable posted – if you’re sick of hearing about Macworld | iWorld, and it hasn’t even happened yet, you probably don’t want to listen! It’s Chuck and Katie to start out with talking about what they think of the show, and then there’s individual recordings from me, David, Dave, John F, Jonathan, and Don – all talking about Macworld. I thought it was a great show – hope you like it!
AT&T + Samsung Rant
I have a rant but I’m not exactly sure who’s to blame. I think it’s AT&T but it might be Samsung so I’m going to combine two stories into one so that both are shamed equally. Where I work we primarily use AT&T. Don’t mock us or shut off your iPod right away, ok? Sometime between December and now, our LTE service pretty much went in the pooper. It’s not like we have Verizon speeds (say 14Mbps down) before it went in the pooper, but it was in the 3Mbps range. After things went in the terlet, we were looking at numbers like .020 Mbps, otherwise known as 20kbps…yeah, worse than dialup.
Those of us on iPhones did a little test – we turned off LTE, and dropped them down to what AT&T likes to call 4G (which is really HSPA+) and suddenly we were happily back in the 3Mbps download range. Oh well, that’s cool, right? But here’s the problem. My buddy George has a spanking new Samsung Galaxy S3 (which I’ve confessed before is a wicked cool phone), but on AT&T he CANNOT turn off LTE! At first we just assumed George was missing something but we had a couple of hardcore Android geeks look at it and they couldn’t do it either. Finally George called AT&T and after about 45 minutes they confirmed that they don’t let you turn it off. So AT&T is giving him crappy LTE service AND won’t let him move down to 4G to get faster speeds. Isn’t that lovely?
I should note that not only can you turn off LTE on an AT&T iPhone, you can turn off LTE on a Verizon-based Samsung Galaxy S3.
The story gets better though. We had AT&T come out to help diagnose why our LTE service had gone into the pooper since Christmas. Two guys come out, they check it and confirm that it’s horrible. The fun part was when the guy came to try and explain to me why. So first he says, “well your problem is that the tower is about 3 miles away.” I looked at him and asked, “oh, did you move it right after Christmas?” um, no m’am.
Next he says, “well it’s highly congested in this area.” Ok, I can buy that but then I asked him why the level of congestion changed since Christmas. He says, “well you see, Apple sold a LOT of those LTE iPhones over the holidays, so that’s why.” I looked at him, barely able to conceal my contempt for his idiocy…ok, maybe I didn’t conceal it at all, when I said, “so, I think Verizon sold a bucketload of the LTE iPhones over the holidays too, and how come my Verizon Mifi is getting 15Mbps downloads right next to my AT&T iPhone that’s getting 20kbps???” I don’t even remember what he answered to that but he mumbled something idiotic and then left.
Maybe an antenna designer out there can explain this to me or someone has a hack for poor George and his AT&T Samsung Galaxy S3.
Boostcase Battery case review from MacLurker
Hello Nosillacastaways. This is MacLurker with a review of the Boostcase Battery. Otherwise known (pause) as the Hybrid Two-Piece Standalone Snap Case And Detachable Battery Sleeve for iPhone 4 and 4S.
In time-honored fashion, the problem to be solved: How to extend the battery life of an iPhone 4S while still chatting, surfing, and tweeting, and not dragging around a caseful of extra cables and devices.
My family solved this for me by giving me the Boostcase. It combines a protective phone case with a rechargeable battery sleeve, resulting in a sleek device I can hold in one hand. It’s a bit thicker and heavier with the battery sleeve on, but it’s very usable like that. This allows me to easily access my iPhone while it’s connected to the battery, with no extenders flapping around at the end. The phone case slips nicely into the battery sleeve and latches snugly in place.
The Boostcase comes with three items: an iPhone case, just like most phone cases. It wraps around my phone and allows access to all of the input/output jacks as well as the front panel. The second piece is the battery sleeve. This contains the battery, an on/off button, four blue LEDs that indicate battery charge state, and a micro-USB connection jack. The case slides into the battery sleeve, connecting to the iPhone on the bottom. The two really meld together. Finally the BC includes a USB to micro-USB cable for re-charging the battery. The entire package retails for about $80. Last thing: the case and battery sleeve come in a variety of tasteful colors and designs.
Sadly, at this time, there is no Boostcase Hybrid for the iPhone 5, only for the iPhone 4 and 4S. Although the company web-site does say it will be available any day now.
Now for operation: I can leave the battery sleeve attached and then either turn on the battery for continuous charging. Or I can turn the battery off, which switches my iPhone back to its internal battery. I can connect the battery sleeve to my Mac or a power source to re-charge it either with the iPhone in or not. If the iPhone is connected, it will charge the iPhone first for 3 hours, and then the battery. When the iPhone is at 100%, the Boostcase will supply power to the iPhone as it is used. I keep the battery sleeve separate from the iPhone most of the time. It’s just easier to handle that way. Then I slip the sleeve back on for a charge as needed.
I did some quick testing to verify the Boostcase operation. The Boostcase box claims that the Boostcase will double the battery life. And this turns out to be pretty much true. The Boostcase will re-charge a completely drained iPhone 4S, but then its little battery is done and will need re-charging itself. Using my iPhone while it is charging will run the Boostcase battery down faster and result in a less than 100% charge to the iPhone. The battery is rated at 1900 milli-amp-hours, enough, so they say, for 7 hours of phone & web on 3G, 10 hours of Wifi, 46 hours of audio playback and 11 hours of video.
So this might not work for the super-user that needs multiple charges in a day. But it works fine for me as an emergency boost to get through a long day of phone calls and audio podcasts. I like the slim compact form, which makes it very portable. And it’s certainly easy to use.
Check it out: the Boostcase Hybrid Snap-Case and Detachable Battery Sleeve for iPhone 4 and 4S.
I also think they are probably waiting for approval on the licensing for the Lightning connector. Belkin just got their approval so I’m hopeful we’ll see some options for the iPhone 5 at Macworld. I’ll have my credit card ready!
Escrow Keybag
A while ago I was working with my buddy Niraj to try and figure out if the iPhone was really and truly encrypted. I wasn’t convinced that it was. The reason I thought it might not be encrypted was I showed Niraj how you could plug a password-protected iPhone into a Mac and yet you could still drill into the iPhone using a tool like iPhone View and see files that were on the iPhone. We kept noodling this and then remembered that the first time you plug a password-protected iPhone into a Mac, iTunes will try to sync and it will say I can’t think this device enter your password. That means there’s some sort of trust relationship built between the iPhone and the Mac after the first time.
That started us on a quest. We needed to know where that file was stored. Was it stored on the iPhone itself or was it stored on the Mac? Googling this was extremely difficult, because words like lock and iPhone and sync and things like that – it’s so many hits that it’s impossible to find the thing you’re looking for. I shouldn’t say impossible, because a friend of ours actually did find it.
This next part it’s pretty geeky and maybe it’s not something you actually need to know, but it’s pretty cool. The secret file is actually on the Mac, and it’s called Escrow Keybag. Isn’t that an awesome name?
Escrow Keybag is super cool too. You actually move the Escrow Keybag to another computer, that 2nd computer will now be able to see inside the iPhone even though it’s still locked. Even cooler – you can move these files between Macs and PCs! We tried it, and it works.
The location of the Escrow Keybag on both OS’s is posted in the shownotes:
Windows:
%AllUsers%\Apple\Lockdown\Updated 2018: %AllUsersProfile%\Apple\LockdownMac: /private/var/db/lockdown/
To test this, navigate to the location I just gave you, delete all of the keys there (you’ll have one from everything you’ve owned). Now plug in your locked iPhone, enter the password or passcode, and you’ll see a new Escrow Keybag (still love saying that). Now move that file to another Mac or PC into the location shown, preferably one that hasn’t been allowed to see into your iPhone before, and voilà – your iPhone can sync without being unlocked on the new computer. Is that cool or what?
Google Chromebook review by George from Tulsa
I reviewed Samsung’s original Chromebook in July 2011’s Show 319. As much as I liked the concept of a malware-proof computer, its Atom processor was just terrible. There’s a reason netbooks flopped, and the Atom is it. Google has continuously enhanced Chrome OS, but it still needs decent hardware.
I’m using one of the special i5 Chromebox desktops from last June’s Google I/O as the Internet hub of my home theater. The i5 does a superb job streaming video and music, as well as offering lean-back browsing. Samsung ‘s new $249 Chromebook has been the top selling laptop on Amazon for weeks running. It’s hard to find any in stock, and often sold out. At 11.6” of silver plastic, Sammie’s Chromebook looks a lot like the 11” MacBook Air. Under the hood it’s running a mobile Samsung Exynos Dual Core GPU enabled ARM-15 processor. Low power, long battery life. Acer’s also in the game, offering an Intel Celeron powered C7 for $199.
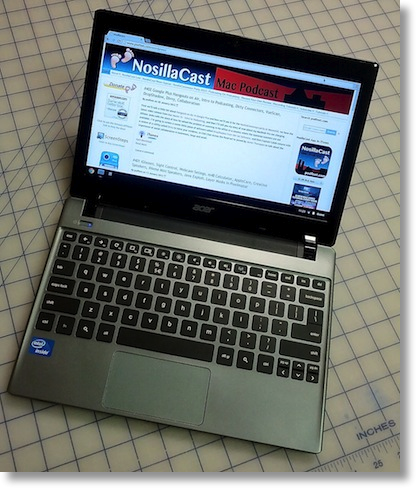 After visiting Best Buy and comparing the two, I left with the Acer. It’s noticeably faster, with a crisper screen, better keyboard, and, new to Chrome OS, a 320 GB hard drive. Google is working to “nativize” Chrome OS for ARM, which may speed up the Samsung and enable Netflix. If the current ARM-based Samsung Chromebook is any indication, let’s hope ARM matures a lot before the rumors of Apple moving OS X to ARM prove true.
My i5 MacBook Air runs rings around the Chromebooks, doing everything they can, and a lot more. As it should, given the $1,400 price difference. With my Air, I don’t need a Chromebook. But I’m continually rebuilding our one Windows computer at work, and I suspect my co-worker who uses it may be inadvertently infecting it because she shares files with her Windows computer at home. Since, in theory, there’s no way for a Chromebook to get infested with malware, much less pass the infestation on to Windows, I gave her a Chromebook to use for her personal and work-related browsing and emailing when away from the office.
Most of the published Chromebook reviews I’ve read go negative because the Chromebook isn’t a full-featured computer. That was more on point when the $500 I paid in 2011 would buy a decent Windows laptop. At $199, things have changed. Chromebooks still aren’t full featured computers, but neither are iPads or Android Tablets that cost more and do less.
For $199 the Acer C7 comes out of the box with a great keyboard, track pad, Ethernet, 3 USB 2.0 ports, HDMI and VGA output, a 320 GB hard drive, and an SD card slot. It links to all Google’s services, includes free phone calls, and includes 100 GB of Google Drive storage free for two years.
Now that Google’s core applications, Gmail, Docs, Spreadsheets, and Presentations are or will very soon work offline, and with hundreds of gigabytes available for media, the Acer is useful without live Internet, unlike earlier Chromebooks that might as well have been bricks when not online.
The screen is the weakest part of both Chromebooks. Samsung’s less reflective matte finish is dimmer and less crisp to my eye, but the Acer’s, which is fine inside, is barely visible in sunlight. Both models offer VGA and HDMI out, and if you’re tethered to a desk, you’ll want an external monitor.
The $199 Acer C7 Chromebook: a capable, hacker-proof, mobile computing device that won’t break the bank to buy, won’t break your heart if stolen, and can be remotely wiped by simply changing your Gmail password. Connect to a USB hard drive, external keyboard, or mouse. Stick in a camera card. Advantage: Chromebook.
Sure, the Acer outweighs the 11” MacBook Air, Galaxy Note 10, and Retina iPad 4, but not by a lot. If it’s enough to break your back, at least the thick stack of cash still in your wallet will cushion your fall.
ScreenSteps
I’m guessing that if you’re a listener to this show, you probably do tech support for your family. Some of them pick up on your advice quickly, and some…not so much. I’m pretty lucky that my family is pretty good about following my suggestions. Last week my father in law sent me an email that was pretty short and sweet. He simply wrote:
Last week there were news reports that part of Java should be disabled in Apple computers. My question is: Do our Apple computers currently have Java installed? If so, exactly how do we disable the part of Java that is bad?
Luckily a while back, after Bart had explained the dangers of Java, I wrote a tutorial on how to disable Java in Chrome, Firefox and Safari. Now the last two aren’t terribly complicated but Google makes it a bit of an adventure to find the setting, so that tutorial seems really valuable to people.
I knew though that my mother and father-in-law are Safari users, so I simply sent them the link on podfeet.com on how to disable Java. Of course I made this tutorial using ScreenSteps Pro and the built in utility that lets you post directly to your blog as a post or as a page. The reason I’m telling you this story about my in-laws is because I got emails back from BOTH of them thanking me for the help. I want to read their short letters to you
My mother-in-law wrote: I really think you could make a bundle by making your tutorials available for users like us. Three clicks and we were done! Thank you, thank you.
My father-in-law wrote: thanks again for your help. It really makes it easy when you send a tutorial. The first 2 or 3 steps in a path to correct something are critical. Many people would assume we should know where to click for each step.
It feels so good to be able to do something for them because they do so much for us. If you’d like to be able to help your family and not have to repeat instructions over and over again and look like a hero, check out ScreenSteps and Clarify over at BlueMangoLearning.com. If you’re going to Macworld, keep your eyes peeled – Greg and Ja from Bluemango Learning will be at the NosillaCastaways party so you can meet them in person!
Chit Chat Across the Pond
Security Light
The Java Saga Continues:
- Oracle got a patch out the day the last security light aired – http://nakedsecurity.sophos.com/2013/01/13/oracle-releases-cve-2013-0422-patch-for-java/
- Within hours – reports started to circulate of a new zero-day which the new update did not patch – http://krebsonsecurity.com/2013/01/new-java-exploit-fetches-5000-per-buyer/
- Bottom line – security experts, and US-CERT agree – don’t run Java in your browser unless you have absolutely positively no choice – http://www.intego.com/mac-security-blog/java-is-still-not-particularly-safe/ & http://nakedsecurity.sophos.com/2013/01/15/disable-java-browsers-homeland-security/
- If you want another reason to banish Java for ever more, Ed Bott at ZDNet shows how Oracle uses Java SECURITY UPDATES to distribute crapware – it’s bad enough that Oracle try to trick users into installing rubbish like the Ask Toolbar along with Java in the initial installer, but to repeat the trick in each security update, and to keep defaulting that checkbox to on, is utterly unacceptable IMO – http://www.zdnet.com/a-close-look-at-how-oracle-installs-deceptive-software-with-java-updates-7000010038/
Important Updates:
- Microsoft Release Patch for IE Zero-day – http://technet.microsoft.com/en-us/security/advisory/2794220
- Foxit has updated Foxit Reader to address the zero-day we warned about a few weeks ago – http://nakedsecurity.sophos.com/2013/01/21/update-foxit-pdf-reader/
Interesting Security News:
- A problem with Verizon’s Cellphone triangulation software in Las Vegas shows why it is vital to always display the error on a reading as well as the reading – http://nakedsecurity.sophos.com/2013/01/18/the-man-who-steals-all-the-phones-in-las-vegas-pinpointed-precisely/
- New Twitter site design makes it easy to spoof a verified account (just put the icon in your background image!) – so be careful who you trust – http://nakedsecurity.sophos.com/2013/01/17/twitter-fake-verified-account/
- It looks like there is a vulnerability in at least some Cisco/Linksys Linux-based routers, including the popular WRT54GL – http://nakedsecurity.sophos.com/2013/01/18/cisco-linksys-router-exploit/
- Backdoor found in Barracuda appliances – http://www.intego.com/mac-security-blog/barracuda-appliances-found-to-have-a-secret-backdoor/
Main Topic – Building a Home File Server
Preface:
My existing way of dealing with storage in the house was to buy cheap USB caddies for my primary disks, and to use bare drives for backups, which I would connect to the computer via a dock. This system has served me well for a long time, but, I was building up more and more disks on my desk, and more and more bare drives, and, things went badly wrong when I bought my first 3TB drive. Every year or so I was buying some new disks that were twice the size of my old disks. I was taking one former backup disk and making it a new primary disk (so buying yet another caddy), and then using the new double-sized disk to back up two primary disks. So, one primary 250GB drive and one backup 250GB drive became two primary 250GB drives and a 500GB backup, then the a 1TB drive was bought, the 500 was added to the main pool, and the two 250GBs and the 500GB were backed up onto the 1TB. Eventually the smaller disks were retired, and replaced with just one new disk etc.. This was all fine until I bought my first 3TB disk. It turns out that neither my caddies, nor my toaster could address such a large drive. The disk did not work at all in the caddies, and the toaster showed it as being a 700GB disk! The reasons for these problems is that these new very large disks use 4k sectors instead of the old 512b sectors we’ve used in drives for decades.
In the end the only way I got my new 3TB drive to work was to install it in the world’s largest caddy – a Dell Optiplex 620 rescued from a skip! I stuck the disk into the Dell along with an old small 250GB drive, and booted off the Ubuntu install CD – Ubuntu could see the disk without issue, so I went ahead with the install and have been using the Dell as a SAMBA file server for a few months now without issue. In fact, with rsync over SSH it makes a great backup solution, but, the motherboard only has two IDE and two SATA ports, and there is only room in the case for 2 HDDs and 2 CD/DVD drives. I bought a bay adaptor and converted one of the CD/DVD bays into a HDD bay, and stuck an old (and hence small) IDE drive in there which I used for the OS, which left room for only two modern SATA drives.
While the PC-as-NAS idea worked, it was big and cumbersome, so I thought that thinking long-term a NAS appliance was probably a better bet. Having heard so many podcasters I trust advertise and plug them for so many years, I of course thought of a Drobo first. So, I started to look for a good price on a Drobo from an Irish reseller (import duty makes importing one myself unfeasible). Irish pricing on the Drobo is shockingly poor. This is the best I could find on my short-list of Irish tech sites I trust – http://www.dabs.ie/products/drobo-mini-4-bay-storage-array-with-thunderbolt—usb-3-0-8786.html (€642.28 for 4 bay Drobo mini). This isn’t even the drobo I wanted, the full-size 5-bay one cost a staggering €840.06 (http://www.dabs.ie/products/drobo-5d-5-bay-storage-array-with-thunderbolt—usb-3-0-8785.html)!
I gave up on Drobo and started to search for a generic 4 to 8 bay NAS. Prices were cheaper, but still starting from a little under €300 for a basic 4-bay device, and going up sharply from there. I considered spending €321.90 on this – http://www.dabs.ie/products/qnap-4-bay-nas-enclosure-7C0L.html, but before I hit buy I decided to see what I could build myself for the same price or less.
What I Built:
A PC that can hold up to 10 HDDs, with a motherboard that has 6 SATA ports on-board (more cab be added with an expansion card later) as well as a USB 3 bus, an Intel i3 CPU, and 8GB of RAM. Total Price – €301!
- Case – €32.87 (http://www.dabs.ie/products/xigmatek-asgard-ii-black-chassis-87YM.html)
- Motherboard – €83.60 (http://www.dabs.ie/products/asus-p8b75-v-s1155-intel-b75-ddr3-atx-81WZ.html)
- CPU – €115.30 (https://www.dabs.ie/products/intel-core-i3-3220-3-10ghz-s1155-3mb-86KM.html)
- RAM – €37.88 (2x Corsair XMS3 4GB DDR3 1600MHz DIMM 240-Pin) (link dead on dabs.ie site)
- Power Supply – €32.15 (https://www.dabs.ie/products/best-value-storm-800w-psu-120mm-fan-pfc-850D.html)
- Total = €301.80
How I Chose My Parts:
- I searched for a big tower case with as many drive bays as I could find at a reasonable price
- I searched for a motherboard with lots of SATA ports, USB3, GigE (they all have the latter these days), and on-board graphics at a cheap price – making sure the size was compatible with the case (almost certainly not a problem with a case as big as the one I chose, but always remember to check these things!)
- I searched for a good CPU at a reasonable price that was compatible with the motherboard (remember to verify that the socket type of the CPU is supported by your previously chosen MoBo)
- I searched for cheap RAM with the fastest speed supported by my chosen CPU
- I searched for a cheap but beefy power supply – an average PC has about a 400-500W PSU, but since I plan to fill this thing with a lot of drives I went for an 800W one to be sure to have enough power.
Don’t Panic If Things Go Wrong!
In an ideal world nothing ever goes wrong, and when you build your own computer, you put it all together and the instant you hit the power button you hear that satisfying single beep that tells you the motherboard is happy and will not proceed to boot. Things don’t always work out like that!
NEVER throw out the manual that comes with your motherboard. Normally, when something is badly wrong, it will shout for attention with a beep code – each mobo has it’s own beep codes, so you need the manual to translate the electronic cry for help into English (or some other human language)!
The zeroth step in trouble-shooting is to turn off all the power, stop, take three deep breadths, and, with the help of the motherboard manual, verify that you have connected everything correctly. If you have, move on to the first step of trouble shooting, if not, fix what ever is wrong, and try again.
After you’ve calmed down and checked everything, power the machine up, if you hear beep codes, well, then you know the problem, but if not, still don’t panic.
Start by disconnecting everything from the board except for power, CPU (INCLUDING THE CPU FAN), the power switch, the PC Speaker, RAM, and display. If the machine posts with that minimal setup, start connecting the rest one by one until you find the culprit.
If the machine does not power up with even that bare setup, strip things down even further. Take the motherboard out of the case, resting it on the static bag it came in, and connect only power, the CPU (INCLUDING THE CPU FAN), RAM and display. If this is enough to get the machine to post, then the changes are high that something in your case is shoring out the board. Note – to start a machine when it doesn’t have a power switch CAREFULLY touch a screwdriver across the two pins for the power button for a second – DO NOT CONNECT ANY OTHER PINS WHAT SO EVER!!!!!!!!!!!!
If even this barest of bare setups will not post, then you know something is seriously wrong. Realistically, it is almost certainly the power supply or the motherboard. If it were RAM or CPU you would expect beep codes.
I found myself in the last of these situations. The fans spun when I powered the machine via the screwdriver trick, but the machine never posted, and after about 30 seconds the machine re-started itself. Out of about 15 attempts to start the machine, the BIOS randomly showed for about 2 seconds twice before the board re-started.
I happened to have a spare power supply to hand, one that I knew worked, so I could rule out a problem with my PSU straight away. That meant I almost certainly had a bad mobo. Against my usual pattern I had gone off-brand for the motherboard, and I now regret not sticking with brands that I know and trust. I simply contacted the seller, arranged a return. I asked for a refund rather than a replacement copy of the off-brand mobo, and then ordered a similarly specced board from a brand I know and trust, Asus.
When the new board arrived I popped it into the case, connected only the bare essentials, and powered it up – instantly I got that one single satisfying beep. I powered it off again, fully assembled the machine, tried again, and huzza – it worked!
That’s going to wind this up for this week, many thanks to our sponsor for helping to pay the bills, Blue Mango Learning at bluemangolearning.com makers of ScreenSteps and Clarify. Don’t forget to send in your Dumb Questions, comments and suggestions by emailing me at [email protected], follow me on twitter at @podfeet. Check out the NosillaCast Google Plus Community too – lots of fun over there! If you want to join in the fun of the live show, head on over to podfeet.com/live on Sunday nights at 5pm Pacific Time and join the friendly and enthusiastic NosillaCastaways. Thanks for listening, and stay subscribed.
Turn off S3S3 LTE
try Google
http://forums.att.com/t5/Android-Discussion-and-Support/Finally-a-way-to-turn-off-LTE-for-the-Galaxy-S3-Saves-a-lot-of/td-p/3326169
that looks so cool and fun and geeky – but I’m not sure George will let me do anything that weird to his phone!
There were other suggestions in Google for turning off S3 LTE.
Maybe different levels of weird.
Want it to work? Fix it!