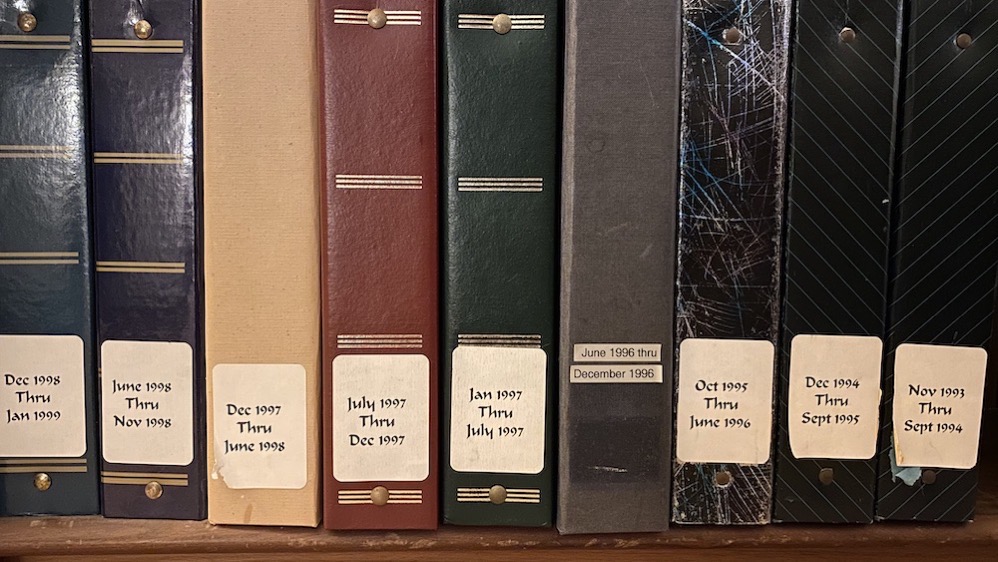
Back in the old days, I took a fair number of photos. Nothing like the number of photos we take today, of course, but more than most people,. I know you’ll be shocked to hear this but I very carefully organized my photos into photo albums labeled by date. I did not learn this from my mother, whose photo organization technique could be encapsulated in the phrase “put them in a basket”.
Eventually, I started taking digital photos of course, but I still printed them and put them into my photo albums. But there came a time when I realized this was no longer going to be practical. I began taking care of my photos on my Mac, first with the application aperture, and eventually Apple Photos. Of course, I kept my photos in order in those applications just like I did in my physical photo albums. I created a folder for the year, then folders for each quarter, and finally albums with the year month, and date of the event that had been captured.
Steve decided recently that it was time to start scanning in the photo albums. He started with a flatbed scanner and it was clear that this was going to take absolutely forever. For Christmas last year I bought him a high-speed photo scanner, the Epson FF-680W ($600 at Best Buy). I’m not a fan of Epson as a rule, but this scanner will do photos at 1 per second at 300dpi. The quality isn’t great, but with a project this daunting, the trick is to actually get it done, so the speed is going to win here.
The best way to photo scan has been a topic for the ages, but that’s not actually what I want to talk to you about today. I thought it might be interesting to you, and would definitely be cathartic to me to describe the process that we’re going through after Steve has done the hard labor of scanning in the images.
The problem to be solved is how to get all of the images into my iCloud Photo Library across my devices. I want the album sorting to mirror what I had in the physical albums, and I want separate Photos Albums for the events within the physical albums. I also want the dates of the images in my Photos library to be pretty close to the real dates when the events took place. Doesn’t sound too hard, does it?
Well…it is taking the diligence and fastidiousness of two super-organized people to pull this off. The prework for this task will be our first order of business.
Pre-organization of Photos in Google Sheet

Steve is scanning the images to our Synology so we both have access to all of the images. Each of the physical albums has a label on it showing the date range, such as “Aug 1983 to Feb 1984”. Steve creates a folder on the Synology that matches that date range on the original physical album, but he formats it so the folders will stay in order, such as: “Family Pics 1983-08 to 1984-02”. When he pulls the photos out of the physical album, he organizes them into little piles by event.
He sets up the scanner profile to put the physical album date range as the title of each image with an index number appended that increments with each image. Each of the events gets prepended with an index number as well.
He records all of this in a Google Sheet. For example, there is an event called “Cats, Cave and Afghan”, the Google Sheet says there are 12 photos in the album, and their sequence numbers are 197 to 208. Obviously such precious memories must be preserved in order!
You might think that this is a wasted effort because those sequence numbers don’t mean anything. But it turns out that if we are ever to keep these photos in order when they get into Apple Photos, the sequence numbers are critical to achieving that objective. Plus, we are engineers, so what else are we going to do?
Creating Album Names with Prepended Index
Now that Steve has a column for what will eventually become the album name (like Cats, Cave and Afghan) I need to add a leading sequence number so that the albums are easily sortable in Apple Photos. In the Google Sheet, I created a column entitled “2-digit prefix”. I put 01 for the first album, but Google Sheets changed it to the plain number 1. This is problematic because, without the leading 0, sorting doesn’t work properly.
I selected the cell that now has a “1” in it, and chose Format ? Number ? More Formats ? Custom number formats and typed in 00 to get the leading 0. That sounds messy but I only had to do that once. I selected that cell with the 01 in it and grabbed the bottom corner and dragged down, and that gave me 01, 02, 03, etc.
But all I have now is a column with two-digit indexes in it. What I need is that two-digit index to be prepended to the name of the album that Steve has so carefully hand-crafted.
That’s easy peasy in any spreadsheet program with the concatenate command. Concatenate basically means to smash a couple of things together. Let’s assume that the index 01 is in cell A1, and the album name “Cats, Cave and Afghan” is in cell A2. In cell A3 we can type:
concatenate(a1, " ", a2)
This will give us “01 Cats, Cave and Afghan” in our cell A3. This sounds tedious and difficult, but once I wrote the little concatenate command, I was able to paste it in every tab of the spreadsheet, do a fill down, and I was done. Took me maybe five minutes to replicate to all of the album titles he’s created.
Now we are ready to start fixing to make a plan to import images into photos.
More Work on the Synology
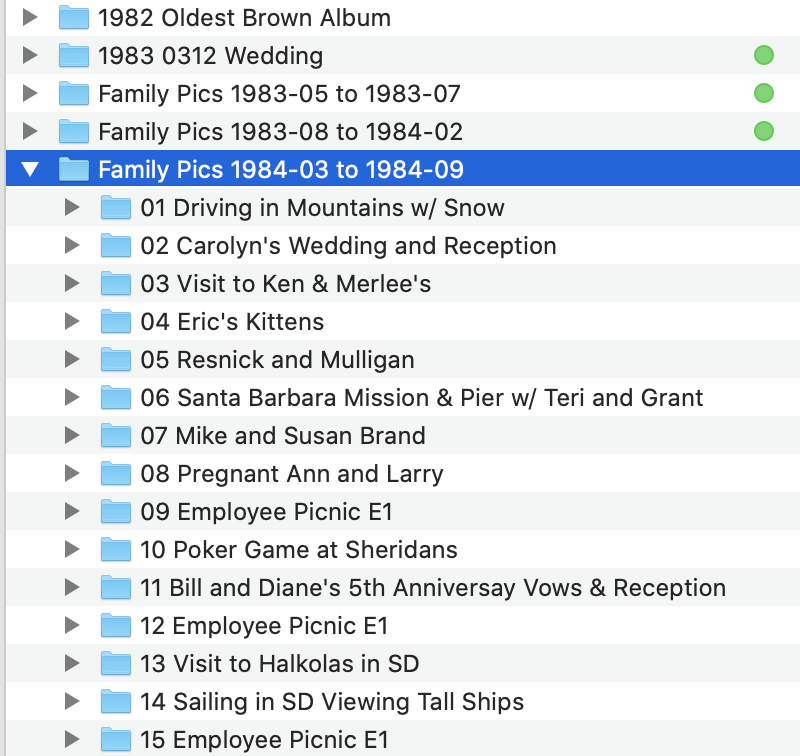
Let’s review what we have now. We’ve got a folder on the Synology with all of the images taken from a single photo album. All of the images have a 3-digit prefix. We’ve got a spreadsheet that tells us which images (by their index number) go in which albums, and we’ve got a nicely-formatted album name with a two-digit prefix.
The folder on the Synology doesn’t yet know about the events though, it’s just one giant folder with 250 photos in it. We need to create folders with the album names. Here’s where a clipboard manager, like Copy ‘Em comes in super handy. In the spreadsheet, I clicked on each album name with its fancy two-digit index and hit command-C to copy each name, one after another. Then in the Finder folder for the big album, I hit command-shift-N, and then used Copy ‘Em to drop in the name of an album, repeating the new folder dance 18 more times.
I’ve got 19 subfolders for each event, named so they stay in order. Referring back to Steve’s data in the spreadsheet, I can drag images 1-98 into the album “01 Sailing Trip to Santa Cruz Island”, and repeat for the next 18 albums.
When we go to the penultimate step, moving these albums into Apple Photos, you’ll see why adding that two-digit index to the front of every album name was so important.
Apple Photos
Finally we’re ready to drag the images into Apple Photos. I conducted several failed experiments to try to find the least annoying way to get the images in while preserving the structure of images inside event names sorted by their index and in a folder representing the original physical album.
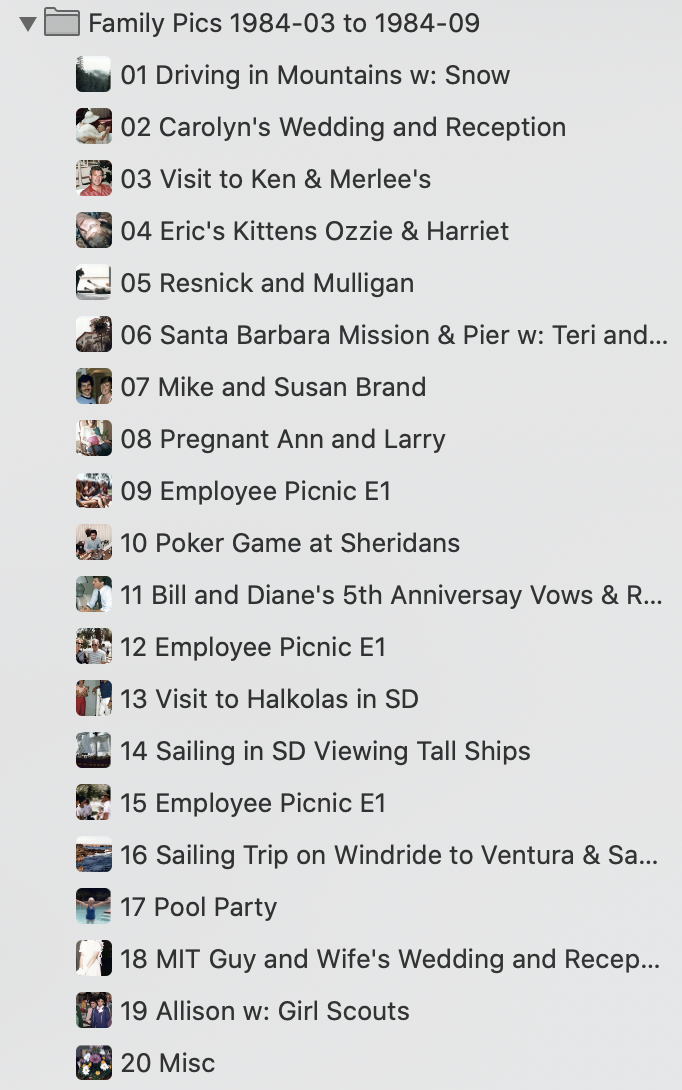
Turns out the least annoying (and yet still annoying) way to do this is to simply drag in the top-level folder for the date range we’ve been working on. This creates a top-level folder with the date range of the physical album. But inside that, it creates folders for each of the events, and inside the folders are albums with the same event names. We really want those albums, not folders, because one of the dumb things about Apple Photos is you cannot search by a folder name, only by an album name.
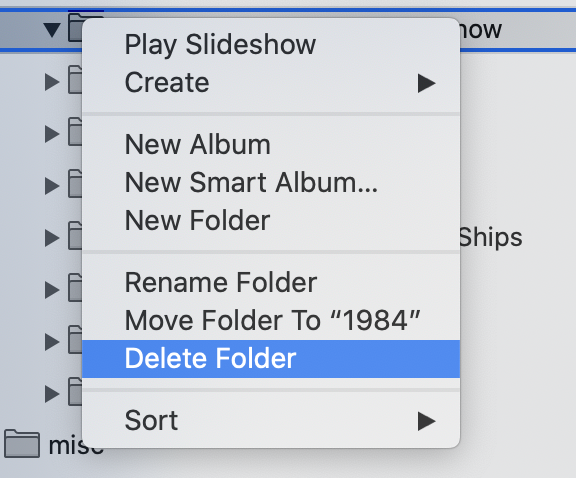
So here we have 19 subfolders with 19 albums inside them, and I have to painstakingly open each subfolder, and drag the identically-named album from within up a level, and then I have to delete each of the now-empty subfolders. To my chagrin, there is no keystroke for this action, and there’s not even a menu for it so you can’t add that action in a keyboard shortcut in System Preferences. Instead, to delete a folder in Apple Photos, you have to right-click, choose Delete Folder, AND answer the confirmation dialog.
The other thing that’s interesting to note is that when you drag the images into photos, the action happens asynchronously, so the subfolders were all out of order. And that’s why we so painstakingly added an index number at the beginning of each event name. Now we know how to get them back in order.
If you open an album, you’ll also notice that the images in the album are out of order, but luckily since the title of each image also has an index number, we can choose View, Sort, Keep Sorted by Title. 19 Times.
This to me is by far the most tedious part of the process, and it took me several tries to make it this easy!
Stop and Enjoy the Photos
We have one more step to go and it’s actually a fun one, but at this stage in my process I put in a very important step. I allow myself 10-15 minutes to stop working and enjoy the photos I’ve just imported. I haven’t seen many of these photos in a decade or more because they’ve been buried in these non-searchable albums. Not only is it a walk down memory lane for me, but I choose a few photos to send to friends and family that I think they might enjoy.
Ok, break time is over, let’s do the last fun step.
HashPhotos
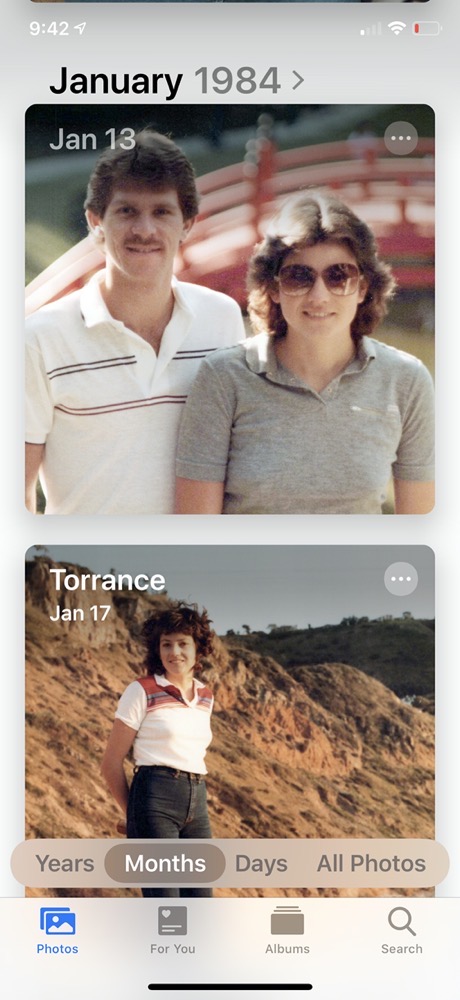
We’ve now got the photos in albums, organized by date range of the original physical album, which is great. But let’s say I want to search for a photo I know was around 1983. If I go to the Years tab in Apple Photos, all of these images have the date they were scanned, not the date they were taken. The photos also don’t know where they were taken, and Apple doesn’t provide any way to change the metadata with Apple Photos.
But a wonderful application called HashPhotos for iOS and iPadOS from beyondf.com/… can do this for us. I did a full review of HashPhotos a couple of years ago where I sang its many virtues. The key thing to understand is that HashPhotos after you give it permission, has full access to your Apple Photos Library. This means the changes we’ll be making in HashPhotos to the date and location of the images will be reflected back in Apple Photos.
In HashPhotos, we have the same left sidebar as in Apple Photos, so we can see My Albums and navigate to the folder structure I’ve been describing. I’m working on 1984 photos as I tell you about this process, and the physical album that was scanned goes from March to September 1984.
My goal is to make sure that the images in these little event albums will show up in the right year and have their month be within this range of March to September. If I can tell by the album when it actually occurred, like someone’s birthday, or a specific holiday, I can put the right date, but most of the time I won’t have a clue about the real date. For example, I’ve got an album that was taken the day my friend Eric got his kittens Ozzie and Harriett, and shockingly I don’t remember what month it was 36 years ago.
If I make every event the exact same date, they won’t stay in order the way they were in the physical album so I had to come up with a methodical, if somewhat arbitrary, method to give each event a unique date. Since this physical album starts in March of 1984, my solution is to have the first event album be dated March 1st, 1984, the second will be March 2nd, 1984, etc. That keeps them in the right order and has at least some logic to it.
Let’s see how HashPhotos can set the dates.
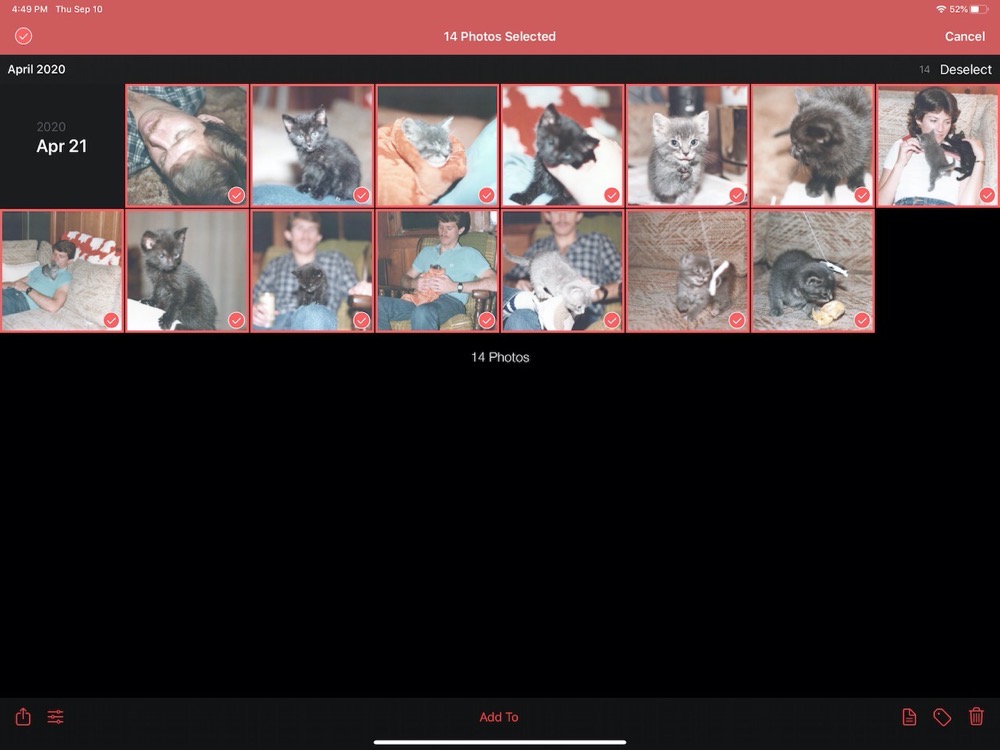
First, tap the event album name in the left sidebar. The sidebar will slide out of the way, revealing the images within and their dates. I can see that Steve scanned in Eric’s kitten photos on April 21, 2020. We want to select all of the images in this event album, and to start this process, in the upper right we’ll tap on the Select button.
At this point, I could individually tap on every image, or I could tap and drag to select, but there’s a new Select button in the upper right and tapping that selects all 14 of the photos. Now all of the photos have a red checkmark on them, and the Share icon (the box with an up arrow) in the bottom left has become available to me, indicated by changing from grey to red.
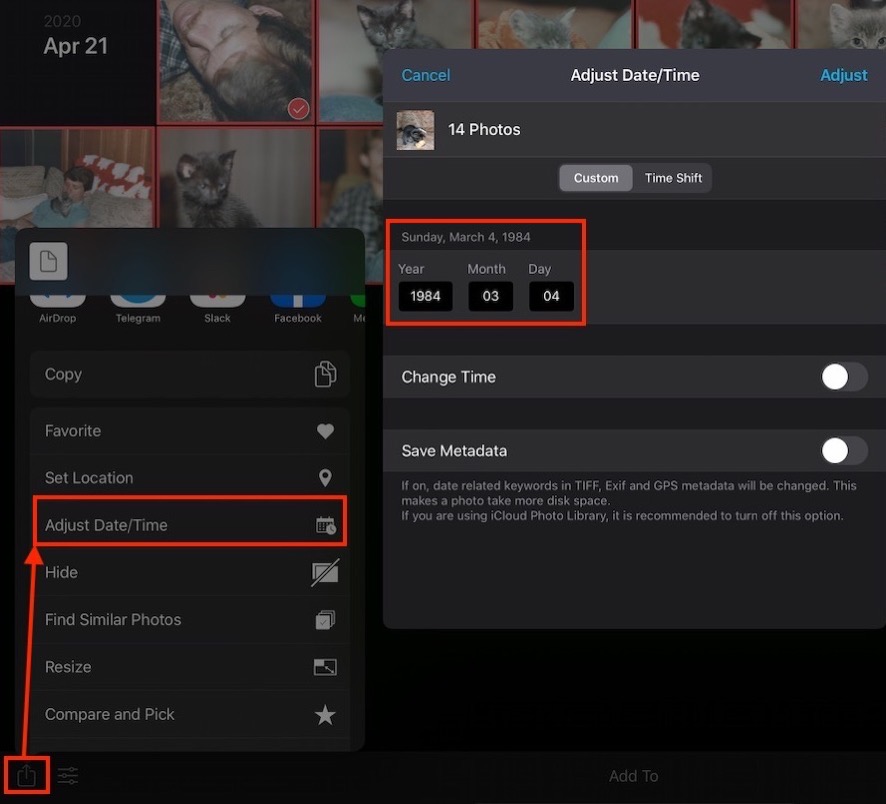
The share menu has the typical options to share via your messaging applications like Telegram and Slack and all of the social media applications you use. But below that, we’ve got a list of options that are specific to HashPhotos. This app is really capable, so you’ll see things like find similar photos (great for getting rid of duplicates), you can create a slideshow, create animated GIFs, and even make cute little film strips. But the item we really care about is called Adjust Date/Time.
When selected, Adjust Date/Time gives a popup that has fields to change the year, month, and date, and then we need to tap Adjust in the upper right of the popup. At first, the album will still show the 2020 date, but if you go back to the albums view and back in you’ll see the new date!
If by some chance you know the actual location at which the photos were taken, hit Select twice again to reselect the images, and then in the Share menu choose the Set Location option. You can move a map around or do a search for the city or the exact location. The nice thing is that it keeps a running list of the recent locations you’ve entered, which is pretty handy. Geotagging is so fun and easy with HashPhotos.
The process to change the date took me a lot of words to describe, but in reality, it goes like this: Tap album, Select, Select, Share, Adjust Date/Time, type in Date, Adjust. Takes me maybe 15 seconds total to change the date on each album, and it’s actually kind of fun. You can go over to Apple Photos on your iPad or iPhone and you’ll see that the dates have indeed been changed.
Finis
There’s one final step I like to do, just for my own sanity, and that’s to go back to the Synology and mark the album I just finished with a Green tag. I even created a keystroke for it using Automator. That is literally the only automated step in this entire process!
You may think after hearing all the work I did here that my mother was onto something with her “throw them in a basket” method of organization. Or perhaps Steve and I have inspired you to be as detailed as we are in our photo organization. In any case, Steve and I are having a blast as we go through these photos, seeing memories from way back that were buried in dusty old albums I never opened.
