A few weeks ago Ray Hedrick of ViewSonic came on the show to talk about their USB-C lineup of displays, which I feel haven’t gotten much press in the Mac community. ViewSonic loaned me the VP2785-2K. This is a 27″ display with 2K resolution and it has a plethora of connections to suit every need.
While this display supports USB-C with all its USB 3.1 connectivity goodness, it also has ports to allow it to be backward compatible with older technology. We’ll get into the connections in a bit, but let me explain why I chose this particular model from ViewSonic.
ViewSonic has a lot of models of displays. And by a lot, I mean 119 if I counted correctly. The first two digits of a ViewSonic monitor’s model number tells you who it’s designed for. The VP series I’ll be talking about here is their professional line of displays. They’ve also got VA for home and office, TD for Touch, VG for business, VX for entertainment, and XG for gaming. Within each of those categories they’ve got 22″, 24″, 27″ and 32″+.
The VP2785-2K is part of their professional line, and sports a resolution of 2560×1440, otherwise known as 2K, and is priced at $613. While 4K or even 5K displays are amazing, they’re out of reach in terms of price, so I chose the 2K display to see if maybe it hit a sweet spot with better resolution than 1080p but not at the expense of 4K. To give you a frame of reference, the equivalent professional display from ViewSonic at 4K (VP2785-4K) at $919 is over $300 more than the VP2785-2K.
Setup

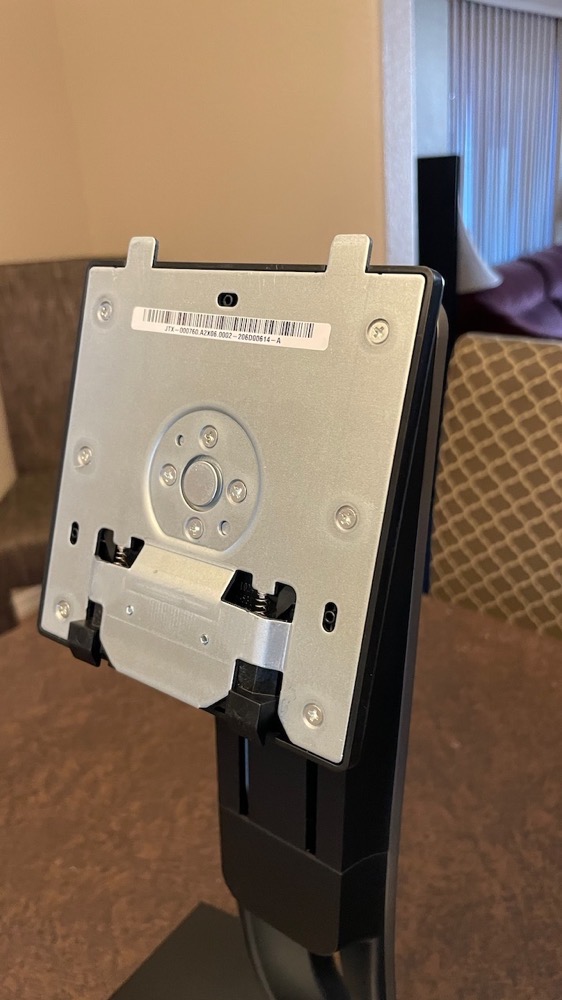
The VP2785-2K comes with a stand, or you can use it with a standard VESA mount. You tilt the display onto the bracket of the stand and it locks into place with a definitive snap. You probably remember my complaint about the height adjustment on the Pro Display XDR from Apple which is ergonomically bad for a woman of normal seat height. I have no such complaint with the ViewSonic.
I can bring the bottom of the display down to only 2″ above the tabletop, which is actually significantly lower than I need it and has an upward travel range of 5.1″ from there. I can’t use it standing like I can with the XDR but if you really want to use a display standing, wouldn’t you need the desk itself to go higher?
The VP2785-2K can also rotate 90° right or left into portrait mode, tilts forward 5° and back 21°. The VP2785-2K has an anti-glare coating but I had a particularly challenging window behind me and found the ability to tilt useful to help eliminate the little bit of glare I was experiencing. In case you’re worried about the display moving around too much, there’s a pin you can insert under a discrete, black rubber gasket on the support to hold it still.
Usage – USB-C to MacBook Pro
My first use of the VP2785-2K was to hook it up over USB-C to a 16″ MacBook Pro. I’m a tough judge of a monitor since I’ve been looking at 500nit brightness displays at 5 and 6K for the past 5 years. At first, looking at 2K at 300 nits vs 5K at 500 nits was a noticeable difference, but after working with it for a while I stopped noticing the lower resolution and brightness.
Having recently had the “pleasure” of working with a 1080p screen, the VP2785-2K looked great. I kept reminding myself that this good-looking screen was only around $600, not a thousand dollars.
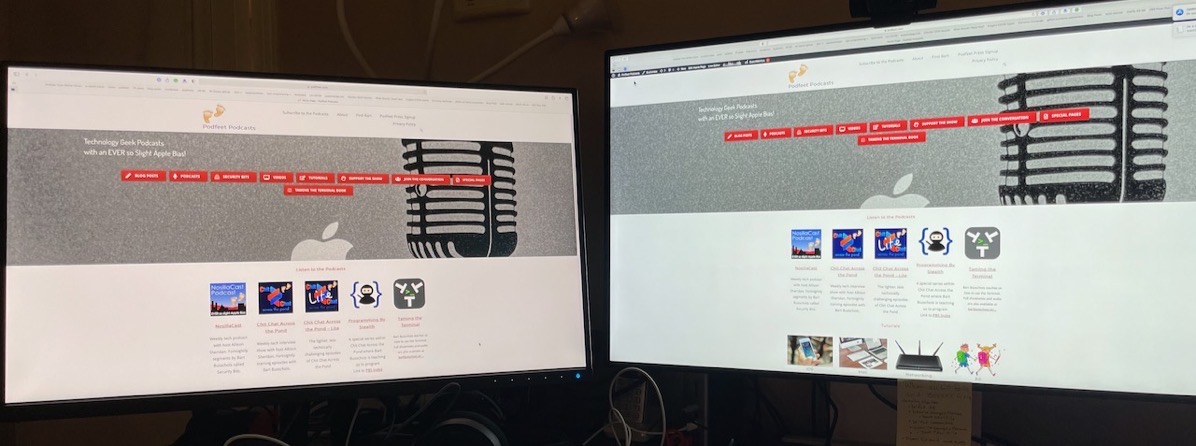
Most people seem to lower the brightness on their displays, so I think 300nits is probably great for the vast majority of people. I put a photo in the shownotes of the ViewSonic display next to the XDR. It’s a totally unfair comparison with the XDR at 10X the price, but I think it actually shows how good the ViewSonic display looks. It’s almost as bright and the color almost as true using the Adobe RGB setting on the ViewSonic.

One of the great joys of USB connectivity for displays is that this one cable can carry the video signal, audio, data, power, and USB. I plugged my Logitech c920 webcam and Samson Meteor Mic into the display’s two USB-A ports. I used the included USB-C cable to connect the display to the Mac, and as expected, the USB devices worked, the video looked great, and because the VP2785-2K supports Power Delivery, it also charged my MacBook Pro. I used it for a Zoom call and it worked perfectly and simply.
More Ports
I mentioned up front that the VP2785-2K has a lot of connectivity and supports older technologies. I took a picture of all the ports on the display so I could match them up to the spec sheet and be able to explain what they’re all for. I had to bring in my research assistant, Steven Goetz for this part because I couldn’t quite figure out why some of them were there.

The ports are broken up into two groups – those for display and those for USB. On the display side, there’s the USB-C port I already mentioned (that gives you Power Delivery and USB and video) but it’s also got HDMI and two DisplayPort connectors. I had to ask Steven why there would be two DisplayPorts, and he explained that this is so you could daisy chain two displays together. Makes sense – see why I keep him on staff?
On the USB side, I got really confused. There is a second USB-C port, and the spec sheet says 15W downstream. I knew the other USB-C port had 65W of Power Delivery, so what’s this one with 15W for? Steven explained that it allows you to charge a phone or tablet on that second USB-C port. Again, makes perfect sense!
Next are two USB-A ports. I explained earlier that when I had the display connected via USB-C, I plugged in a webcam and USB microphone to those USB-A ports. But next to the USB-A ports is a USB Type B port. USB-B is the connector you see on printers and other peripherals. I was simply baffled why the ViewSonic display would have this port. Back to Steven for the answer.
He pointed out that when you’re using USB-C for connectivity, the display becomes a USB hub automatically. But if you connect over HDMI or DisplayPort, then the USB signal hasn’t been delivered to the monitor. To get USB to the display, you need to connect a USB-B to USB-A cable to the computer.
I tested Steven’s hypothesis. I hooked up the M1 Mac mini via HDMI and tried using the USB-A ports for a keyboard and mouse and as expected, they didn’t work. Then I connected the included USB-B to USB-A cable and the keyboard and mouse worked. I didn’t get around to testing the included DisplayPort to DisplayPort cable because I was too lazy to dig out enough adapters to make that work! I really don’t take for granted that ViewSonic includes every single cable you need, how rare is that?
While the VP2785-2K really does have you covered with pretty much every connector you could need, I have one complaint.
I really, truly dislike the placement of the connectors on the VP2785-2K. All of the connectivity is on a backplane that faces down but from the middle of the display back. This means that if you tilt it forward the 5° it can go you can’t see the connectors from the back, and from the front even tilting it 21° back doesn’t give you any view at all. Even with the display on the edge of a desk, kneeling down on the floor and trying to look up, I couldn’t see the connectors.
My solution was to take a photo of the backplane with the display lying face down on a table for reference. That way later when I was swapping cables in and out, I could refer to the photo so I’d have a starting point of where a connector was, and then blindly try to connect the cable. Maybe the best method would be to plug in all the cables with the display face down and then leave them hanging off the back and only plug and unplug them from the computer side.
Changing Display Properties

One thing I’m not used to is having controls for the display available on the display itself. The VP2785-2K has a touch-sensitive power button in the bottom right. I’m a fan of touch-sensitivity but I have bumped it accidentally a few times while adjusting the display height or angle and I was confused when the display went dark. I’m sure you could get used to it though.
Next to the power button are five little white dots. These are also touch-sensitive buttons. With these controls, you can change the color profile, switch inputs, adjust contrast and brightness and adjust the volume.
I was surprised to see a volume control because the VP2785-2K doesn’t have built-in speakers, but Steven Goetz pointed out there is a headphone jack in the display section of the connectors. I fished around on that underneath connector panel until I got my headphones plugged in and sure enough I could hear Bart’s dulcet tones from a recent Programming By Stealth episode.
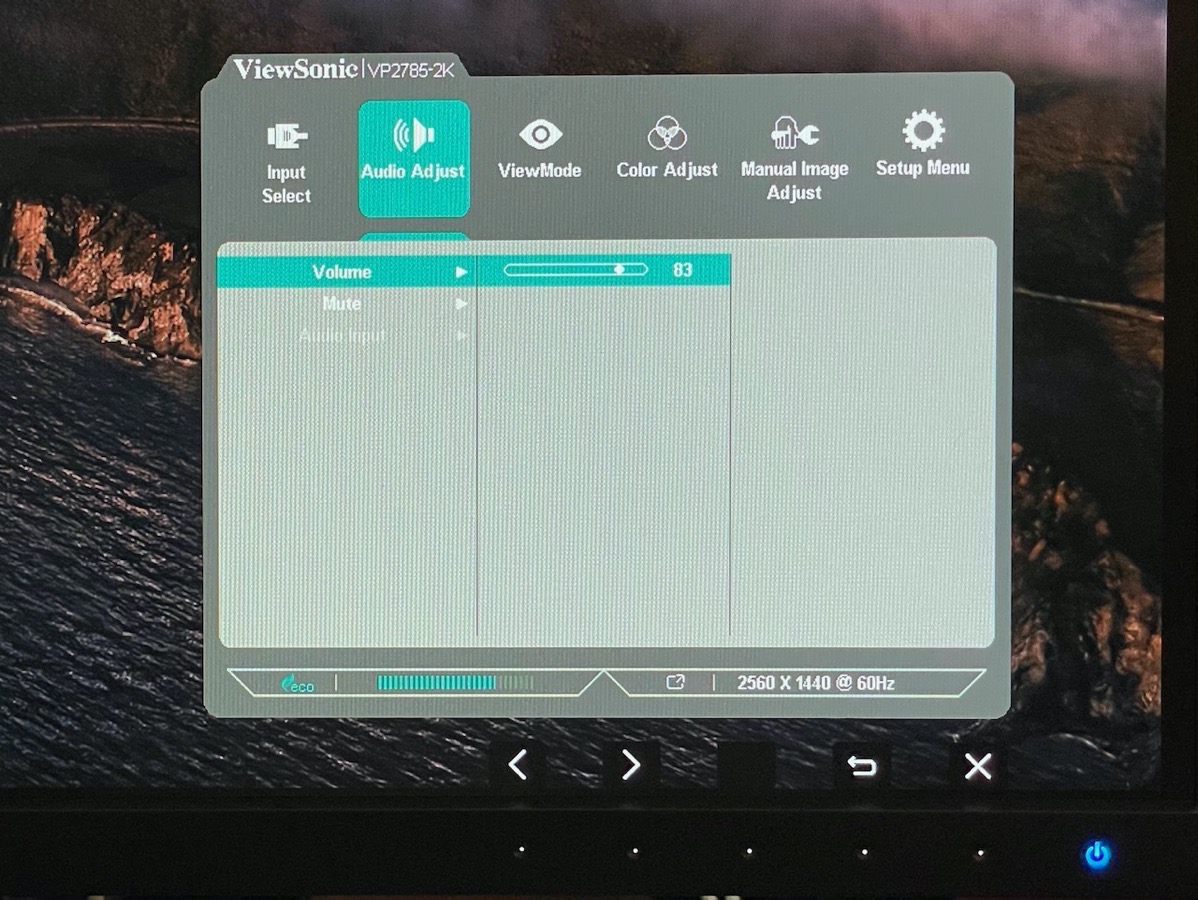
The odd thing is that you can’t control the volume to the headphones from the Mac, you can only control the volume and mute via the on-screen controls, and the process is laborious.
- Tap any of the 5 dots to bring up the controls window
- Tap the dot under a right chevron button to navigate to the next tab for volume
- Tap the dot under the checkmark which select the volume control
- Tap the dot under the checkmark again to get to the volume slider
- Finally tap the dots under the left/right chevrons to move the volume up or down.
In these same menus, you can get to mute and change the audio input.
I don’t know about you but I think I’d plug my headphones into my computer and have two cables to connect rather than go through all that faffing about just to adjust the volume. I’m not sure why other manufacturers like LG make monitors where you can adjust the volume with the keyboard controls or the Sound Preference pane, and you can’t with Viewsonic.
I checked in with ViewSonic on this and they have an application called vDisplay Manager that lets you adjust the volume through software and you can adjust the color profiles and other settings through it. Seems like a lot of overhead to have to launch an app when you just want to turn the sound down.
Testing with a Windows PC
You know I don’t keep any Windows machines in my house. At first, it was a matter of protest but these days I’m a bit less rabid on the topic. I happened to have the opportunity to test the VP2785-2K with a Windows laptop.
Over USB-C, the display worked a champ, exactly as it did on the Mac. Over HDMI something odd happened. The cursor was noticeably jumpy onscreen, which I didn’t observe when it was connected over USB-C. I contacted ViewSonic about it, and they suspect that the PC had chosen a 75Hz refresh rate rather than 60Hz. Unfortunately, I didn’t still have access to the PC to test the theory, and with a Mac connected it defaults to 60Hz and the Displays Preference pane will not let you change it from 60Hz. I’m sure they’re right about the refresh rate.
Bottom Line
The bottom line is that I find the VP2785-2K to be a very solid display with good resolution at 2K. It’s very versatile with three different options from the fairly modern USB-C 3.1 to HDMI and DisplayPort connectors. The price point in the mid-$600 range makes it much less expensive than 4K displays and yet much better resolution than the cheaper 1080p displays. I wish the connectors were easier to get to, but I love the display height allowing for good ergonomics regardless of seat height. And did I mention they come with every cable you could need?
If the VP2785-2K isn’t quite the display you’re looking for, remember ViewSonic has 118 more. If you narrow it down to just the professional line, there are 63 from which you can choose, 6 of which support USB 3.1 over USB-C. The 4K version is $919 as I mentioned, and that’s almost $400 less than the 27″ LG 5K. If you’re in the market for a new monitor, I’d definitely give ViewSonic a look. Check them out at ViewSonic.com.

