I talked on the show a while back about how the one downside to an M1 Mac is that you can’t run Windows, or at least not without a lot of faffing about. I was actually surprised that in Knightwise’s recording about how much value he’s getting from his M1 MacBook Air, he never mentioned that as a downside. Knightwise’s mantra is “making technology work for you” and the center of that is being a slider who can use the best tool for the job, rather than being fanatically attached to one company’s technology (like some people we know). He has touted the Mac as the best platform because he can run macOS, Linux, and Windows all on one piece of hardware.
When I asked him about this limitation of the M1 he said he didn’t see it as an issue (not sure why) but that he hadn’t yet looked into whether the open source virtual machine software VirtualBox would run on the M1, at least to run a Linux distribution (or distro as the cool kids say.)
I did a bit of poking around looking into what virtual machine software runs on the M1s and discovered that VirtualBox from Oracle and the commercial software VMware Fusion do not, but Parallels Desktop does. And then I discovered an open source virtual machine app I hadn’t heard of called UTM which runs on M1 and even on iOS. Sadly, it requires you to jailbreak your iOS device so I declined that opportunity but running this on macOS Big Sur sounded like good fun.
Under the hood of UTM is QEMU, a decades-old, free and open source emulation software that is widely used and actively maintained. The value that UTM brings to QEMU is that it’s a graphical user interface not requiring a plethora of command line options and flags, so the learning curve is much more gentle.
I found an article by Steve Sande on the OWC blog where he walks through the steps to configure UTM on an M1 Mac, and install Windows on ARM for free, legitimately. As I mentioned before, Windows on ARM isn’t really supported to do this, and even if I succeed, apps would have to be compiled for 64-bit ARM to run on it. This makes this a fun experiment, possibly a colossal waste of time, and when I’m done I’ll have something I don’t need. Of course, that’s all the motivation I needed to proceed.
Let’s Do This!
I’m not going to go through the installation in detail, because Steve Sande does a fabulous job of it. He tells you what to download, how to configure it, and which buttons to push to make it go, all with screenshots to make sure it’s clear what he’s telling you to do. I will, however, go through an overview of how this works though so you have context for my discovery in going through his steps.
Virtual machine software works by creating an image that is the virtual machine. You need two things to make an image work properly: an operating system and what are called Guest Tools tailored to your hardware. Without the Guest Tools, your mouse and keyboard may not work, your WiFi won’t be recognized, perhaps sounds won’t come out of your speakers, and more.
To run Windows 10 for ARM64, it turns out Microsoft allows you a free download if you sign up for a free membership in the Windows Insider Program. Those are the words I wanted to hear so I signed up. The file you download has an extension of VHDX, which stands for Hyper V virtual hard disk.
Windows Insider Program ARM64 Preview Download
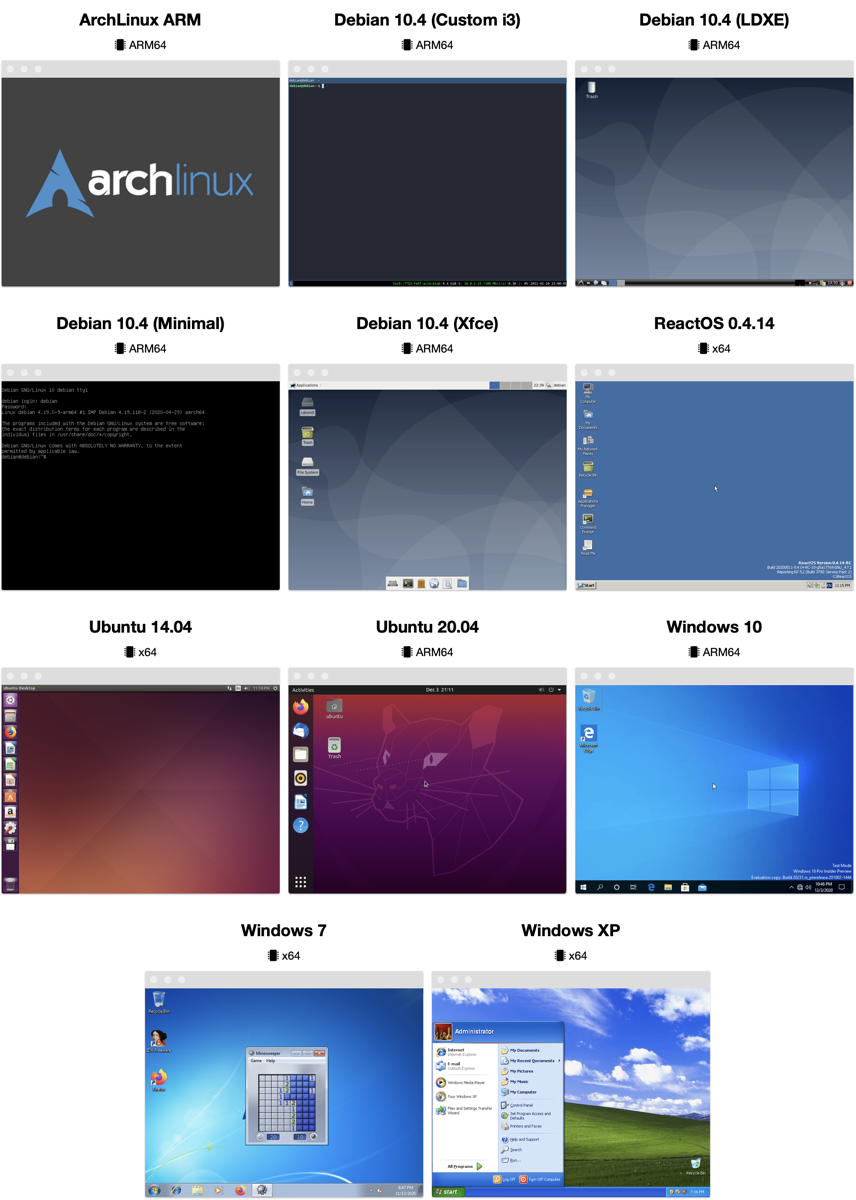
The UTM virtualization software points you to a gallery of operating system virtual machines you can download, which are mostly different distributions of Linux (which may be even more fun than running Windows). You will see the ARM64 version of Windows 10, but if you’re on an Intel-based Mac you can only run Windows 7 or Windows XP. Kinda weird that you can’t get Windows 10 on Intel but maybe Microsoft doesn’t let you have that one for free because it’s actually useful!
Steve’s instructions walk you through how to configure a virtual machine, including setting the architecture to ARM64, choosing how much RAM to allocate, how to create the virtual disks for the operating system, and the Guest Tools, which for UTM are called Spice Guest Tools to make it work with your hardware.
And it Went Horribly Wrong
When Steve explains how to add drives, he shows how to point to the Windows 10 OS that you’ve already downloaded from Microsoft. Then he explains how to create a virtual CD/DVD Drive and point it to the Spice Guest Tools. As soon as I pointed to the Spice Guest Tools, UTM crashed.
When I opened UTM back up, my image for Windows hadn’t been preserved. No worries, it’s just a few steps. As soon as I tried to point it at the Windows VHDX file, I got an error saying that it couldn’t be copied to images because an item with that name already exists. I was faced with some temporary file not having gotten flushed when it crashed, but where on earth would I find this temp file?
Luckily, UTM is an open source project on GitHub, and under the Issues tab, I found Morac2 describing the same issue. Even luckier, Morac2 figured out where this temporary file was so I could delete it and try again.
Github issue 2576 – Spoiler, the file is in $TMPDIR/com.utmapp.UTM/Images
On my second time through the image creation instructions from Steve, I was able to save without a crash. However, when I tried to point at the Spice Guest Tools on the virtual removable drive, I got another error saying it couldn’t restore removable drives.
Ok, back to the Googles and I found someone with the same problem and they were advised to clear the Spice Guest Tools from the CD/DVD and try booting to Windows without it. Presumably, that would get a clean boot into Windows and then we could back out and try the Spice Guest Tools again.
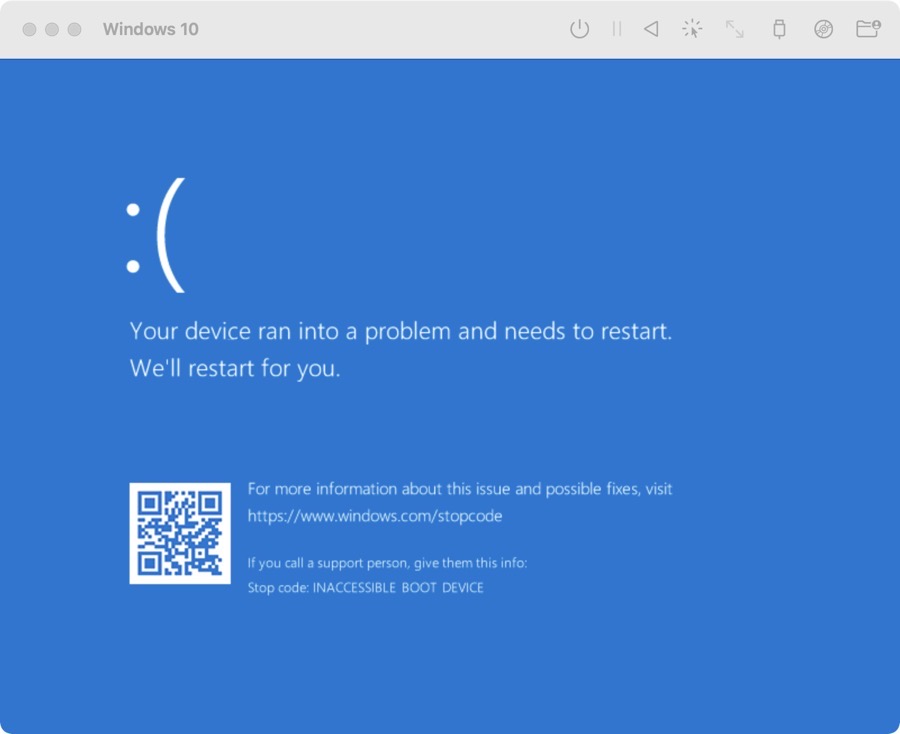
Sadly, after getting stuck at the boot loader for ages and ages, I got a Microsoft stop code of INACCESSIBLE BOOT DEVICE and that it was going to restart. Which just happened over and over again. I believe, based on the baby blue background, that I was experiencing a blue screen of death.
As much fun as this was, I decided it was time to abandon that whole path and see if I could get something normal like Ubuntu to install.
Ubuntu 20.04
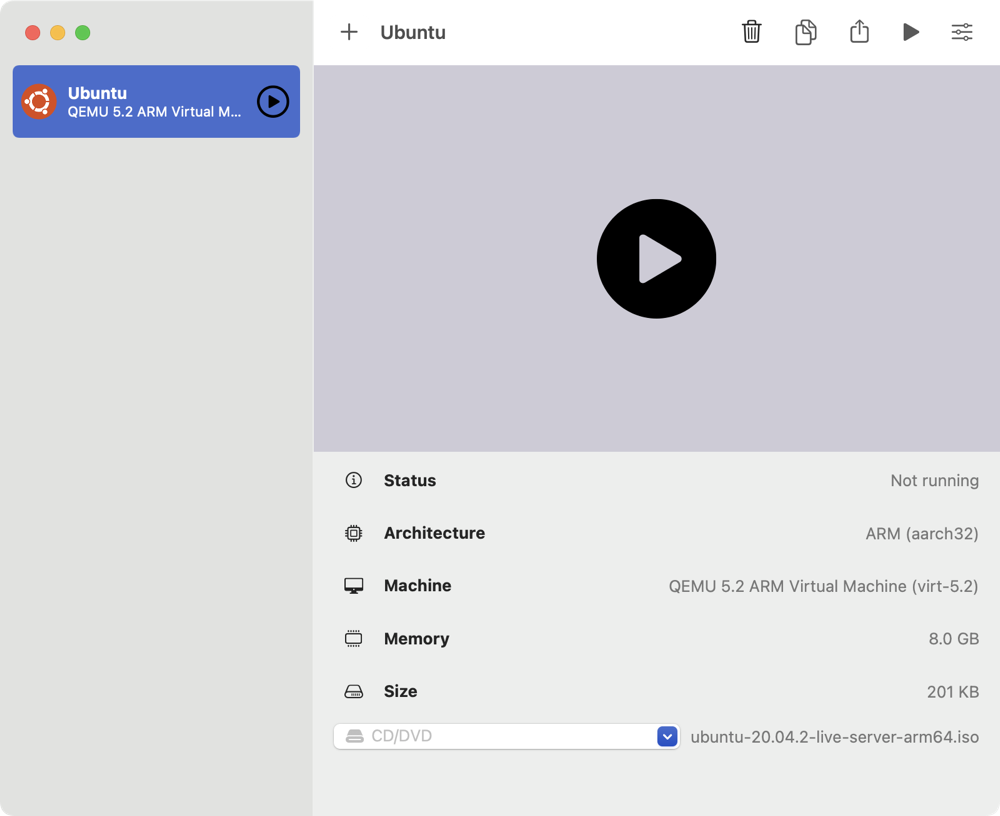
From the UTM gallery, I downloaded the Ubuntu 20.04 image, but it directed me to download Ubuntu server. I didn’t want Ubuntu server, so I hunted down the Ubuntu desktop operating system for ARM on my own. Not hard but it was another step. The step-by-step instructions on the UTM website were super easy to follow. And yet, I was unable to boot into Ubuntu.
I went back to the beginning of the instructions on the UTM website and realized that to use UTM with Ubuntu, you install the server first and then install the desktop version from there. Convoluted much?
I created the VM again, and as soon as I tried to point to the OS installer, it said I didn’t have permissions to “Images”. Well, that makes no sense, you let me access them a minute ago, how could permissions have changed like that? Let’s just turn it off and on again. I quit UTM and reopened and then it let me point at the Ubuntu Server ISO file. Yay.
Now I’ve got my Ubuntu VM configured exactly per the instructions, even including changing the icon to look like Ubuntu. And when I hit the big play button … it fails to load and gets stuck at the UEFI Interactive Shell. The only thing on this entire page I recognize is the acronym EFI, which is what firmware on a Mac is called.
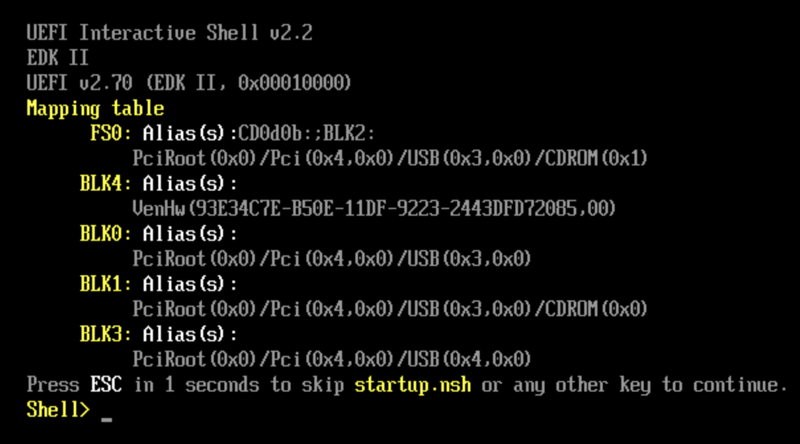
At this point, someone with less fortitude (or more common sense) would have given up, but not me. Off to the Googles yet again and I find this issue on the UTM app’s GitHub pages as well. The interesting thing is that one of the developers tests a fix, closes the issue and then shortly after that reopens the issue because the failure didn’t go away. Luckily, he posted a fix in the troubleshooting section of the Ubuntu installer page for UTM.
Workaround: mac.getutm.app/gallery/ubuntu-20-04#troubleshooting
You’re going to love the answer. All I had to do is verify that I saw FS0: Alias(s):CD0h0a0a::BLK1: at the top of the UEFI Interactive Shell window, then type in fs0:\efi\boot\bootaa64.efi and then I should see GRUB and be able to select Ubuntu Server. You know that’s what I was thinking of typing, just good to verify, right?
I typed in that bunch of glop I don’t understand and the shell came back with the response Command Error Status: Unsupported. I’m not joking.
My only move after that was to make a comment on the GitHub issue on the topic and move along.
How about ArchLinux for ARM?
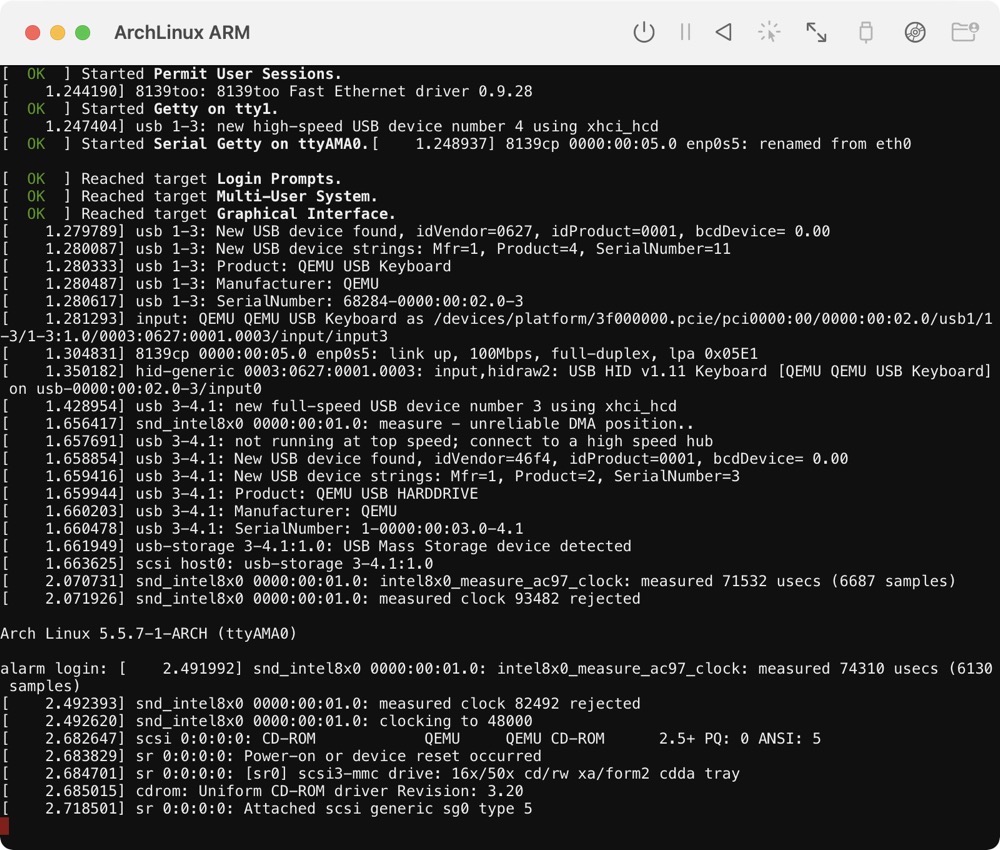
I just could not let this go without getting ONE operating system to work as a VM with UTM. I looked at all of the other options and chose ArchLinux ARM, mostly because I’d never heard of it. Unlike Ubuntu where it gave the an ISO image of the OS, ArchLinux gave me a .utm file which is a fully-configured virtual machine, so I double clicked it. It opened inside UTM and I didn’t have to do any setup at all.
UTM for ArchLinux for ARM: https://mac.getutm.app/gallery/archlinux-arm
I clicked the play button and it typed a lot of unixy-looking glop on screen for me, pausing for dramatic effect from time time time and then starting to change again. And then it stopped changing for a really long time. I hit the enter key just for grins and giggles.
It responded with alarm login:. Well, on the download page it says the username and login are root and root so what the heck, I’ll try that.
It spat a bunch more glop on screen including a whole bunch of process ids, none of which made any sense to me, and ended with a simple command line prompt that says [root@alarm ~]#. And again, I’m stuck. Remember how this UTM software was supposed to hide the command line work that I would have had to do in QEMU? Yeah, not so much.
Debian ARM (Xfce)
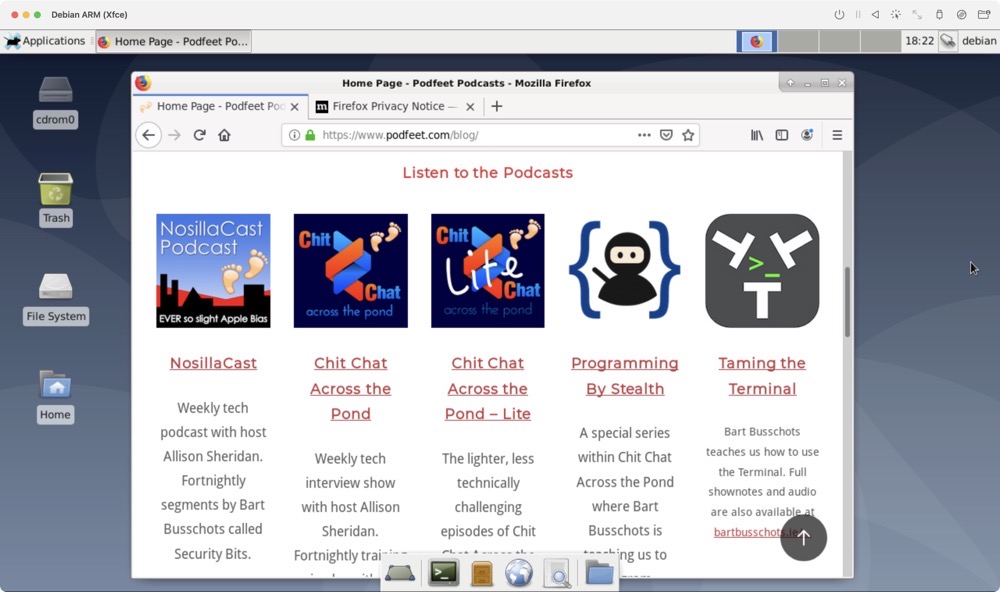
I was determined that I was not going to let this virtual machine software defeat me. I kept plowing ahead and moved on to try Debian ARM (Xfce). Evidently this Xfce version of Debian is intended to be a lightweight desktop environment, which sounded fun. Debian also downloaded as a fully-configured UTM file and with a double click I was off to the races.
You’re not going to believe this, but it worked. I was as shocked as you are. It simply booted up and I was in Linux! The screen resolution was super low so I found in settings how to change the display and it looked grand. I opened up Firefox and navigated to podfeet.com (as one does) and it looked dandy.
But then when I went to move the window around, the screen tearing was simply awful. I thought maybe it was because the default installation was set to only 2GB of RAM, so I changed it to 8GB but that had no effect. Then I realized there isn’t a guest tools installer for this distribution. I did a short hunt for them online, but I have to admit that after spending about 3 hours on this little project, it wasn’t my best effort. I never did find the guest tools but I declared victory and ended my little project.
And Yet…
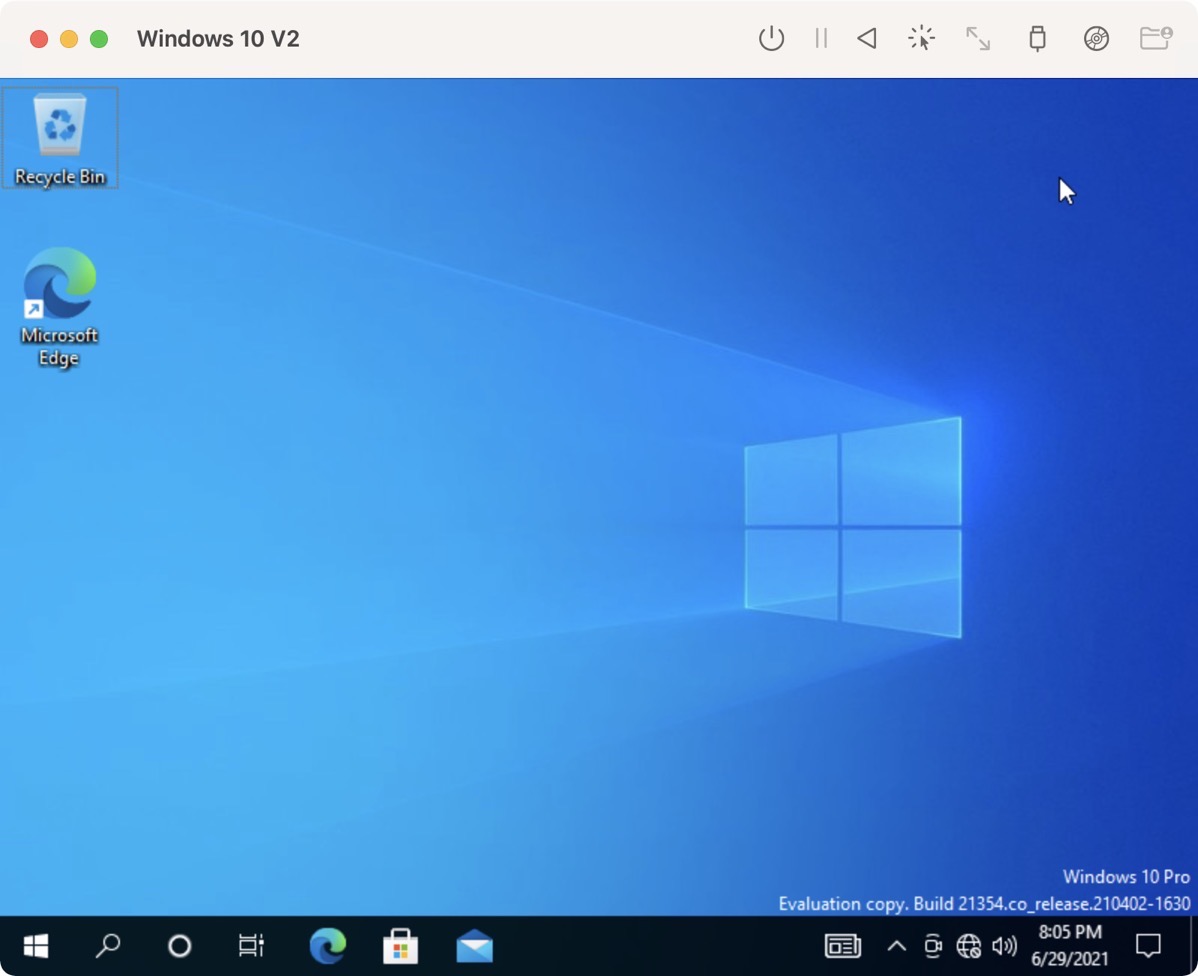
And yet there was still a little niggle in my brain that said the instructions from Steve Sande should have worked to install Windows on Arm. Earlier in some of my googling I’d run across a video about installing Windows on the M1 using UTM by someone who goes by the name Mr. Macintosh and I decided to watch his video to see if there was something I missed.
About 3.5 minutes in he hit the spot where I realized my mistake. In Steve Sande’s instructions, he clearly said that when adding the drive in the virtual machine for Windows that you had to choose NVMe as the interface. I’m 100% certain I did that the very first time, but I’m relatively certain I didn’t remember to set that in any of my subsequent attempts. I’m pretty sure I left it at the default of VirtlO, whatever the heck that is.
I had to try just one more time. And guess what? It WORKED! I had to answer a whole bunch of annoying Windows questions like three security questions that I bet 100% of you could answer with about a minute of googling, but then I was in. (And no, of course, I didn’t tell the truth on the security questions.) Once I had Windows 10 up in UTM, and I got a screenshot so I could prove it worked, it was time to get it working even better. The first improvement I wanted to make was to raise the screen resolution as it defaulted to 640×480. Mr. Macintosh gave instructions on how to interrupt the boot-up of the VM and get to the Device Manager to change the preferred resolution all the way up to a maximum of 1024×768.
I did that, rebooted…and Windows failed to launch. It gave me a blue screen of death with the beloved Stop code: 0xc00002e3 which evidently means “something has gone horribly wrong.” I tried booting into the Device Manager and undoing the crime of setting my screen resolution higher than a postage stamp but Windows was clearly mad at me and refused to boot. I started from scratch. Again.
After the new VM was created, it booted just fine, albeit at 640×480 but I left that well enough alone. The VM wasn’t recognizing my wired or wireless Ethernet cards, so I decided to try to get that sorted. A VM without networking isn’t much fun. I shut down Windows, closed the VM, and went into settings and found a Network tab in UTM where I could choose my real network card. Great! When I restarted Windows it blue screened again.
Through repeated experiments, I determined that Windows 10 is one-time use if running in UTM on an M1 Mac mini. I circled back with Steve Sande and he dusted off his Windows 10 installation in UTM from last March when he wrote the article, and he confirmed that he now gets a blue screen of death as well.
I opened an issue on GitHub and he added his configuration and information to my issue. It would have been nice if Steve had said, “You dummy, you forgot to…” But getting confirmation that something is broken is the second-best thing.
One More Thing
I was finishing up this article after finally calling it quits when Steve Sande mentioned that he did get Ubuntu working with UTM. You know what I had to do, right? I simply had to try again. I’ll not take you through all of it but after a few fits and starts that took maybe only another couple of hours, I actually got it working too. In fact, I did the write-up here about Ubuntu from inside the Ubuntu 20 virtual machine on UTM.
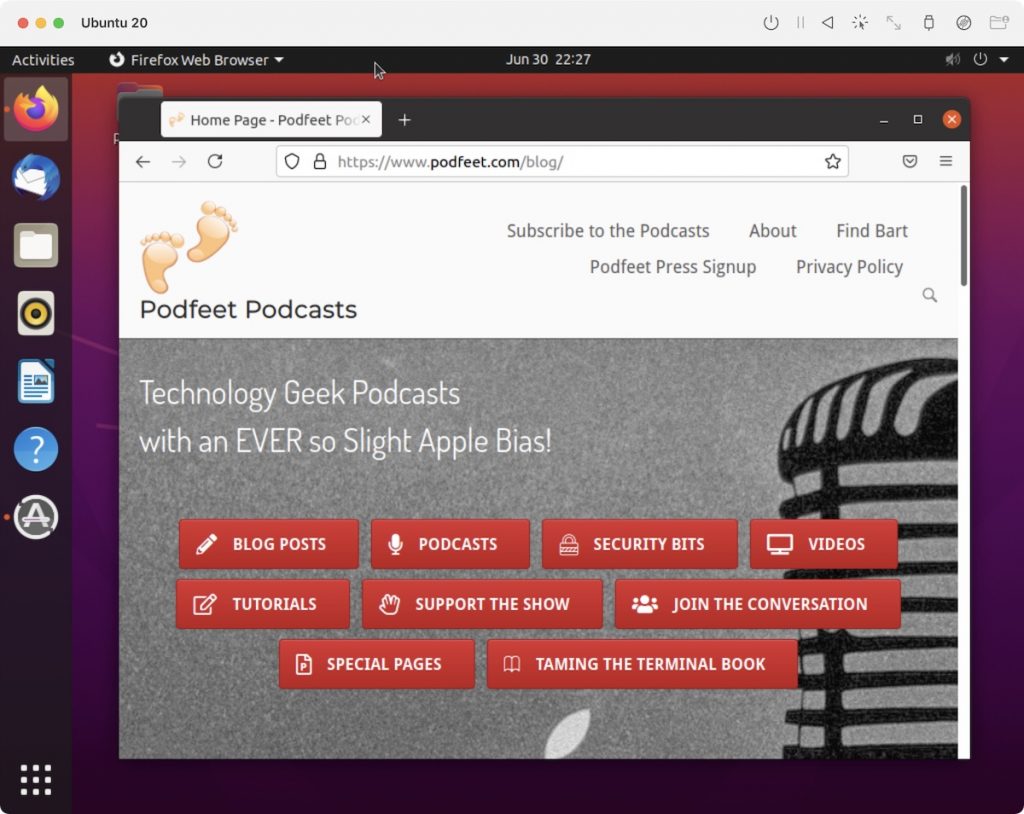
I’m pretty chuffed that I got it working, and it’s better than anything else I tried, but it does have the same screen tearing problem that I had with Debian. Networking is working, and I can play audio through it, and I can even copy and paste between macOS and Linux. I haven’t figured out how to install apps yet, but as soon as I do, I’ll be installing 1Password now that it’s available for Linux. I don’t need Linux but it sure is fun to be able to play with it.
Bottom Line
I couldn’t get Windows to run in a VM which was my original goal, but at least I finally got a workable Linux VM to run. I think I should put a pin in this by taking you back to one of the first things I said: “This makes this a fun experiment, possibly a colossal waste of time, and when I’m done I’ll have something I didn’t need.”


Hi Allison, I got Windows 10 working on my M1 Air, a couple of weeks ago. I followed the method of Gary Sims, see https://youtu.be/yWRzZYrSXDA He uses the method to convert the windows image, yiu have to install some programs with the help of Brew. You can change the screen resolution in the display settings of Windows 10 itself. I also managed to get the network adapter working.
I wanted to use Windows 10 to run the Windows version of some software program that I couldn’t run under macOS any more, because it was only 32 bits. It works, but Windows 10 doesn’t run very good. The mouse pointer keeps disappearing, in that case I have to switch to macOS to get it back. I installed the Spice helper tools.
I haven’t tried to install Linux, because I don’t have that much of room on my SSD left. I hope that a new version of UTM or Windows 10 will solve my problems, so that’s why I didn’t uninstall it yet.
Thanks, Frank. I did try the conversion of the .vhdx Windows 10 installer to .qcow2 using qemu, and now it gets stuck at the black boot screen. Progress bar goes across but then it stops. I can interrupt it with escape and get to the boot manager but haven’t found an incantation to get past it. I’ll take a look at the video and see if there’s more clues!
Hi Alison!
I wanted to get Windows 10 working on my M1 MacBook Air and was going to buy Parallels, but having to pay annually put me off.
After spending hours with UTM I got it working and even put a guide together which you can see here: https://medium.com/macoclock/how-to-install-a-windows-10-virtual-machine-on-an-m1-mac-for-free-9b18a3c628d0
It’s not super fast, but it is usable, let me know what you think!
Best,
K
Thanks Keith – nice writeup! I did later find the qcow change to the VHDX file which did eventually work for me too. Glad you liked to your writeup here.