In Kenneth Grahame’s 1908 children’s classic, “The Wind in the Willows,” the rich and easily distracted Toad is out with a few friends in his shiny new horse-drawn caravan, when suddenly they’re overtaken by a rude driver driving what was then the new technology of the day – a motorcar – causing the caravan to wreck, and leaving Toad to stare wistfully at the rapidly receding motorcar, murmuring “Toot toot” to himself as he dreams of acquiring the new technology.
I couldn’t help but think of that scene the first time I was overtaken by someone on an electrically assisted bicycle: there I was, pedaling along at a respectable 14 miles an hour, when a woman on an e-bike with bug antennae sticking out of her helmet overtook me at a furious clip, apparently without effort! Toot, toot, indeed. Unlike Toad I didn’t crash, and I did not immediately rush out to purchase the magical new conveyance, but I did start researching what might be the right e-bike for me.
When I first started thinking about getting an e-bike my primary goal was to reduce my 75 minute commute time on my 13-mile journey to work. I carry a lot of stuff, part of the route involves a long, steep uphill segment across a bridge, and there are often headwinds – both going to work and coming home! So the problem to be solved is how to choose an e-bike that would reduce my commute time and make the journey less onerous at a cost that didn’t break the bank.
Purchasing an e-bike mostly involves making choices along several different e-bike specific axes: class of bike, drive train technology, style of bicycle, and mail-order versus in-store purchase.
E-bikes come in two main classes, class 1 and class 3. In the U.S. class 1 bikes offer assistance up to 20 miles per hour, while class 3 bikes will assist you up to 28 miles per hour. As you might expect, class 3 bikes cost significantly more, adding about $1000 to the price of the more established bicycle lines. I chose a class 1 bike, partly to save money, but also because I felt that there was increased risk from car drivers who might be surprised at how quickly a class 3 bicycle would approach them.
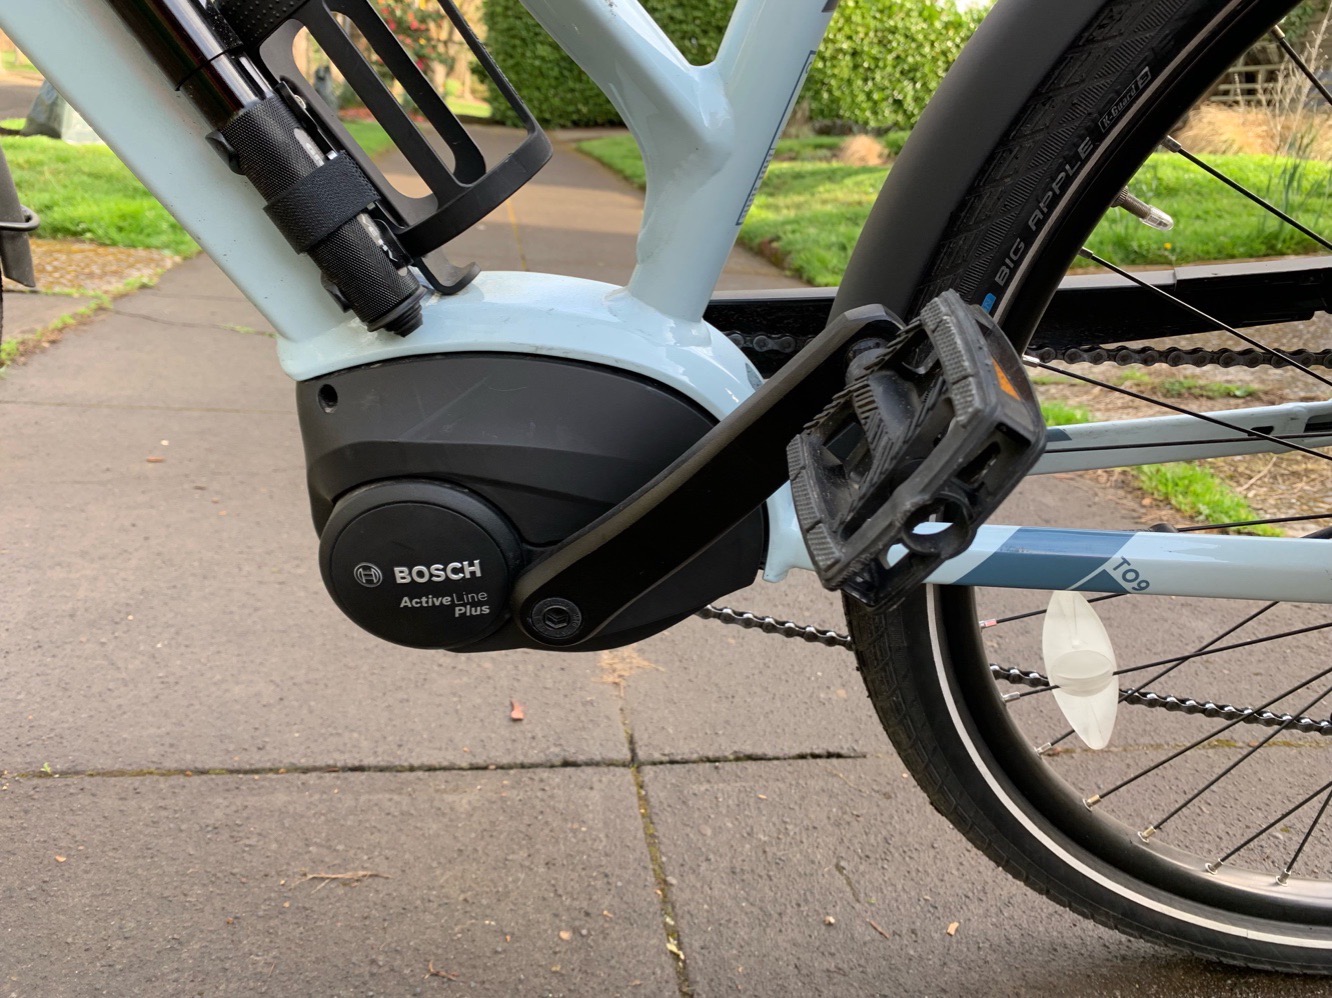
Most of the modern e-bikes use a bottom bracket motor built into the frame. The primary advantage of this is that it allows the system to directly sense the torque that you’re applying via the pedals, and add to that torque with the motor: when you’re pedaling lightly, the motor adds a small amount of torque, and when you’re pedaling strongly the motor adds more torque. A friend of mine, who was the first person I knew personally to buy an e-bike, refers to this as “God mode:” the system seamlessly multiplies your effort to make it seem like you have god-like strength.
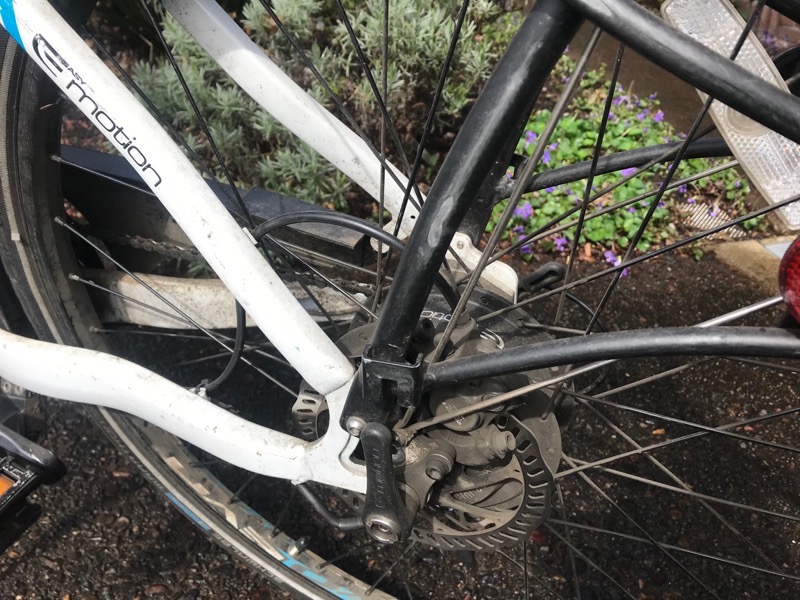
The competing drive technology is a hub motor built into the back wheel. This was used on early e-bikes, and is still used on cheaper e-bikes today. With most hub motor based systems it is more like you choose a set amount of power from the motor via a twist grip, and your legs add on to that at whatever effort level you choose.
A few hub motors estimate torque from other inputs like speed and crank position, but the effect is non-linear and not quite as natural as the bottom bracket motor technology. Hub motors also have the reputation of being less able to supply propulsion at high speeds, since the motor comes after the gearing; some newer hub motors have internal gearing to make up for that shortcoming. I chose a bottom bracket motor because I wanted the better riding experience.
An e-bike motor and battery add significant weight to a bicycle, around 12 to 15 pounds minimum. This makes it a little nonsensical to put them on frames that are minimalist, as most regular non-assisted bikes strive for the lightest and most graceful designs. Consequently, many e-bike manufacturers have gone to the other extreme and taken to styling their bikes like motorcycles, with chunky frames and wide, wide tires. After a lifetime of riding lightweight, graceful bikes I just couldn’t see myself astride one of the motorcycle wanna-be’s, so I chose a bicycle design based on the Dutch ethos: sturdy and practical, but undeniably a bicycle.
The mail-order versus in-store purchase decision is an interesting choice to make, especially in the e-bike market. You can definitely get more bang for your buck with the mail-order purchase, but you’re spending a considerable sum of money on something that you don’t get to see or try out first. You can find excellent reviews and a user forum at a site called Electric Bike Review, but an in-store purchase is still the lower risk path; in person you can try out a range of e-bikes to find the right one for you, and you’re guaranteed to be working with a shop that can service your e-bike properly for the long term. It also allows you to connect the paper specifications with some real-world riding experience. This turned out to the most important part of my bike selection process, so I’m going to go into more detail about that here.
Earlier I mentioned that I chose a class 1 bike, limited to 20 mile per hour assistance (you can actually go faster, on downhills and such, but it only assists you up to 20 miles per hour). I decided that I wanted an e-bike that would allow me to travel somewhere near that upper limit most of the time, without draining the battery too much or making me too tired.
Here I have to take a little detour to explain that most e-bikes offer different levels of torque assistance, selectable via push buttons on the handlebars. Higher levels of torque multiplication translate into greater propulsion and decreased range and vice versa. Most e-bikes offer at least three levels of assistance: an Eco mode, a Touring mode, and a Sport mode. The place where real-world experience on the e-bike comes into play is because you can’t assume that Eco mode experience is the same on two different e-bikes: the torque limits (and associated ranges) are usually different on different models. More confusing yet, you can have an e-bike where the Eco mode supplies more torque yet still has a longer range due to a larger battery or more efficient drive system.
In my decision process I started with the lowest model e-bike from Gazelle, a Dutch supplier of e-bikes sold in-store at specialty bicycle shops, and tested each of them to see what price would I have to pay to get an e-bike with enough “oomph” in Eco mode to allow me to sustain 18 miles per hour indefinitely (or at least with the effort I was used to expending). With a test ride, I found that their lowest spec bike, the Gazelle Medeo T9 City model, didn’t offer enough torque in Eco mode; I found that I had to increase assistance to Tour mode to maintain 18 miles per hour. Riding in Tour mode on this cheapest bicycle would have dropped the range from 65 miles in Eco mode down to 35 miles in Tour mode, an unacceptable trade-off.
Going to the next model up, the Gazelle T9 Medeo (standard) the torque limit in Eco mode was increased from 30 newton-meters to 35 newton-meters. That 17% increase in Eco mode torque was enough to allow me to meet my 18 mile per hour goal on flat ground. This was a case where the Tour mode torque of the City model was coincidentally equal to Eco mode torque of the standard model, with nearly double the range due to staying in Eco mode! So the T9 Medeo standard model met my requirements nicely, with a theoretical Eco-mode range of 60 miles that was a little more than double the round-trip distance of my commute.
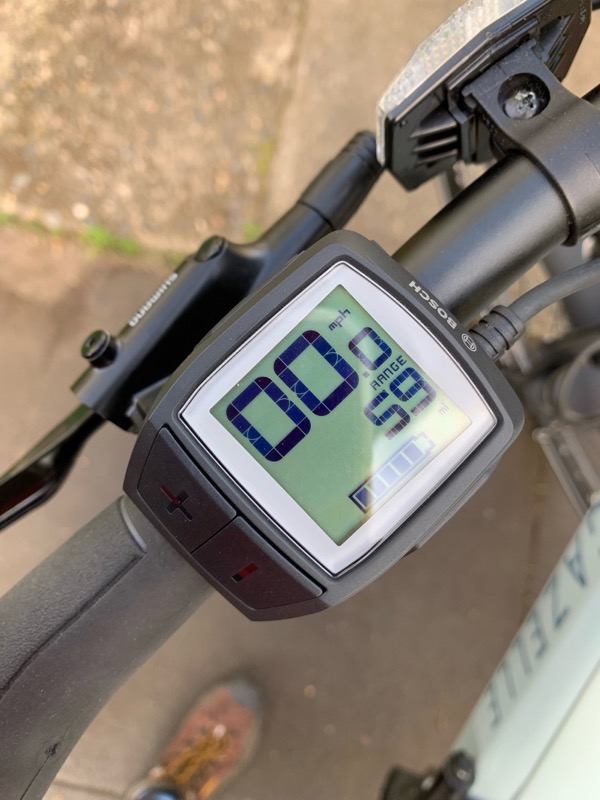
Having this margin of safety in range is important because the battery may not offer as much energy in cold weather, and sometimes I might need to use Tour mode for most of the ride due to headwinds. Incidentally, I have found the estimated battery range to be pretty accurate overall, though you can be fooled by the range number updated continuously on the handlebar display; this instantaneous forecast is a function of battery charge, assistance level, and the recent power output history. Sometimes after going up a hill you will see the forecasted range actually go UP as you pedal along at lower power output!
You might be wondering about the next model up in price, the Gazelle Medeo T10. The T10 has one more gear range on the derailleur (10 versus 9), a motor that offers greater torque multiplication in each mode, a battery mounted lower on the frame, and a price $500 greater. I had already found out from my test rides that I was only using the top five gears of the 9-speed cassette on the T9, so adding a tenth gear in the middle was of no benefit. The greater torque multiplication in Eco mode might have kept me out of Tour mode on small hills, but my route is mostly flat with one big hill that was going to require Tour mode regardless. The lower center of gravity with the battery might have been nice, but not $500 nicer.
From there the e-bike features (and costs) can go up ridiculously. The top-of-the-line Gazelle e-bike has continuously variable gearing in a sealed rear hub, a carbon fiber belt drive, and class 3 speed; it costs nearly $5000 dollars. While the carbon fiber belt drive and sealed hub gearing are said to be more weather-proof and lower maintenance, I didn’t think that they justified the much higher price for me. One wonderful feature that all of the Gazelle bikes have, even on the lower-priced models, is hydraulic disc brakes; once you use them in the rain you’ll never go back to rim brakes!
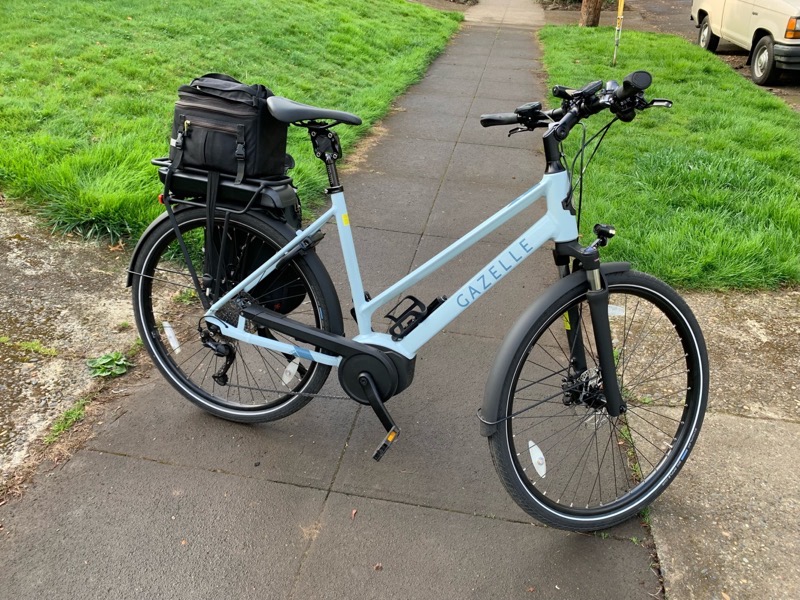
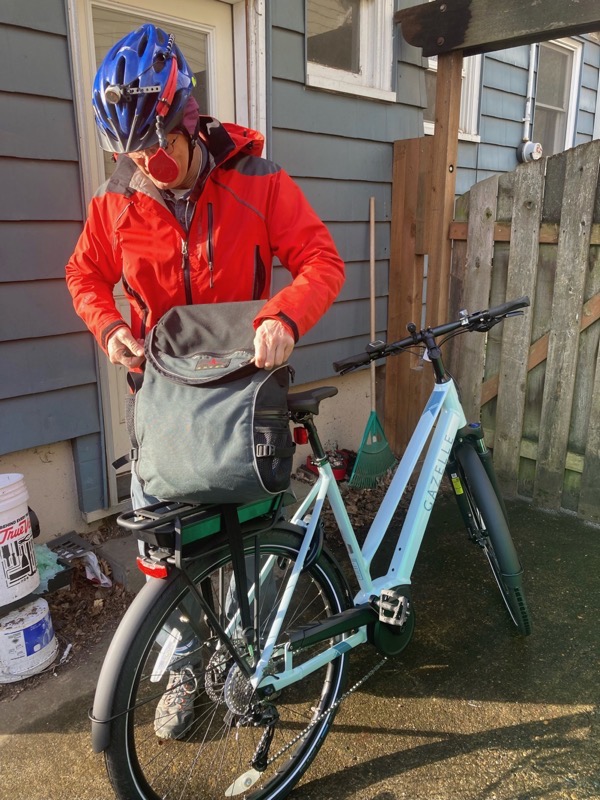
I ended up purchasing the Gazelle Medeo T9 standard model locally in-store, with 9-speed derailleur drivetrain, bottom bracket motor, 60 mile Eco range, hydraulic disk brakes, front suspension forks and sturdy Dutch bicycle styling for $2600.
At this point, you might be wondering how much I was able to reduce my commute time. Although I was able to raise my cruising speed from 14 miles per hour to over 18 (an increase of about 30%), the stoplights and other traffic controls mean that my overall commute time only went down about 20% (from 75 minutes to under 60).
The good news is that I think I hit the sweet spot of price and performance; I could have paid hundreds or even thousands more, and probably not made much of a difference in commute time or enjoyment. I realize that I haven’t said much about how it feels to ride my e-bike, but the best way that I can think to express it is like this: riding the fully loaded e-bike uphill and against the wind, I can feel just as swift and agile as when I’m on my minimalist racing bike on flat ground. Or even swifter and more agile if I feel like pushing a button.

Hi, Kurt here… sharp-eyed readers might notice that there are some non-stock upgrades on the bike as pictured, and I wanted to acknowledge those, as well as report a few niggles.
The biggest upgrades that I purchased were a Thudbuster suspension seat post (~$100) and a Specialized Body Geometry Sport saddle (~$60). Together these were a big improvement over the stock saddle and non-suspension seat post. The saddle supplied by Gazelle wasn’t overtly uncomfortable; it had decent gel padding, but it was made for leisure riding, and made the backs of my legs sore on the 13 mile commute distance because it was so wide.
You might also note some other accessories: I purchased a side-access water bottle cage, and a black Lezyne mini-pump, which I mounted together down near the motor. Unfortunately, even the side access model of water bottle cage is not easy to work with, and doesn’t accept the usual 20 ounce water bottle because of the way that it is tucked in between the two downtubes of the frame (a 20 oz bottle is too long). I’ll have to pick up a stubby size water bottle next time I’m at the bike shop. I also transferred my Lezyne Super GPS bicycle computer (~$140) over from my previous bicycle, as well as a Light and Motion front LED light ($60-$80). I still want to get an accessory red rear LED light that flashes for the rack in the back. I also purchased spoke lights from Nite Ize for better side visibility; I think that those were about $15 each.
I’ve put about 500 miles on the bike in a little under two months. I haven’t had any mechanical problems at all: it shifts reliably, and the brakes are still wonderfully powerful, yet modulated. Here are my niggles.
By far the most annoying thing about the bike is that the battery is positioned so close to the underside of the rear rack that I can’t pass the buckles of the trunk bag straps through the gap between the battery and the rack tubing to secure my existing trunk bag that sits on top of the rack. It’s probably meant to use a proprietary trunk bag system that doesn’t work the way my existing one does. The practical result of this is that I have to slide the battery out to secure or remove the trunk bag, which is kind of an ordeal because you can only take the key out of the bike lock once you have engaged the lock (the same key secures the battery). The net effect for me is that I just don’t take the trunk bag off the bike – I put my lunch in a plastic grocery bag, and drop that into the trunk bag as an ensemble. I suppose at some point I’ll give in and buy the trunk bag that probably works wonderfully with the rack, but I’m a little put out that I didn’t figure this out until I got the bike home.
The water bottle situation isn’t ideal: it is so low on the frame, and so tricky to get a bottle in or out, that you can’t really count on using it while pedaling. You just have to stop if you need a drink.
One quirk of the bike is that the speedometer of the bike isn’t accurate as shipped; it overstates your speed by about 5%, which means when it says you’re going 20 mph you’re actually only going about 19 mph (as seen on the independent GPS measurement). I asked the shop to look into this when I took it in for its 30 day tune-up, and they reduced the error. However, it is still reading about two or three percent high.
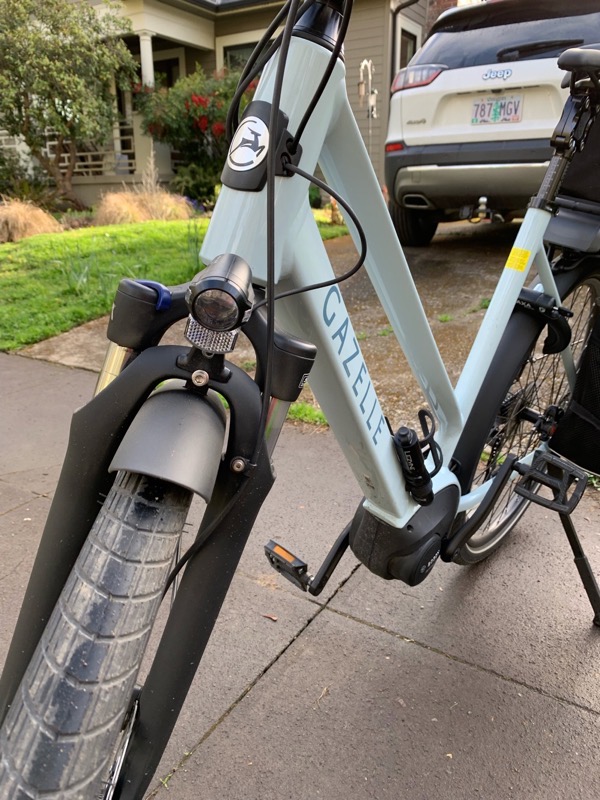
Finally, the built-in front LED light I would rate as barely adequate for night riding, honestly; on a non-electrically-assisted bike it would probably be fine, but at the speeds that I routinely travel on this bike the front light doesn’t throw enough light forward to give me much reaction time to spot a road hazard. Fortunately, I’m traveling in an urban environment going back and forth to work, so there are streetlights that are a help. I put the accessory front light on the handlebars as an aid to being seen, and then I was able to point the built-in light down at the road without worrying about choosing between being seen by oncoming traffic versus illuminating the road surface.