As is so often the case, I wish to blame Allison for what I’m about to tell you. I’ve had a project on the boil for a while now which had me seriously considering buying an Elgato Stream Deck. It is entirely Allison’s fault, however, that I actually bought one.
I bought the Stream Deck Mk. 2, which is the second version of the 15-key device. It is exactly the same size and, in its stand, sits at the same angle, as my Elgato Wave XLR microphone interface. That’s is also Allison’s fault, though she may like to pass the blame on to Marty Sobo for that first review.
I’ve titled this story, in fact series of stories, “Stream Deck — Down the Rabbit Hole” because that’s pretty much what happened once it landed on my desk. I’ve spent some time working on that project I mentioned, and it will do a great job for that, but I’ve also been experimenting with what else I can do, and learning a few tricks along the way. It’s this process I’d like to share.
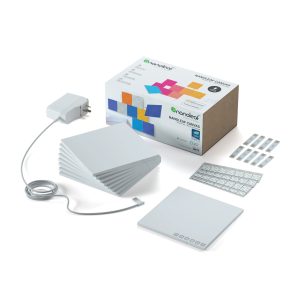
 The first task I thought I would tackle was home automation. I’ve not got very far into this area of technology yet, however my study is well appointed with four NanoLeaf Essentials colour smart bulbs in ceiling fittings, and a set of NanoLeaf Canvas light panels on the wall above my monitor, as well as a stereo pair of HomePod minis. I’d been using either the Home app on my phone, or talking to S-lady on the HomePods to control the lights, but S-lady requires a level of concentration to say the right thing without any awkward pauses, lest she stop listening. Not to mention the awkward pauses S-lady herself sometimes has, nor her sometimes inexplicable inability to perform simple actions she has done many times before.
So I got to wondering… could the Stream Deck offer me a more direct option for controlling my lights? The short answer was yes.
I looked for HomeKit integration in the long list of plugins available for the Stream Deck software. I was disappointed, however, as none exists.
My next idea was to see whether I could trigger Apple Shortcuts. This proved more fruitful, with a plugin available to do just that. I headed into the macOS Shortcuts app to see what I could set up but Shortcuts’ support for HomeKit isn’t what I’d hoped for. You cannot, for instance, toggle the state of a light. The Shortcut must either turn the light on, or turn it off. Neither can you raise or lower the brightness — you have to set an explicit level.
I managed to address toggling by fetching the current status and using an if-else block, but the number of bugs I encountered while working out even these simple automations put me right off using Shortcuts. Even if the shortcuts were simple and reliable, I’d need a whole bunch of them to do all the commands I want.
I decided to do an internet search to see if anyone else had managed to link up Stream Deck with HomeKit lights; the results weren’t encouraging without using a whole separate integration tool like HomeBridge — a route I did not fancy going down at all. On a whim, I searched “Stream Deck NanoLeaf” and was surprised to discover there was a NanoLeaf-specific plugin! On searching the Stream Deck plugin directory, I discovered there were, in fact, two.
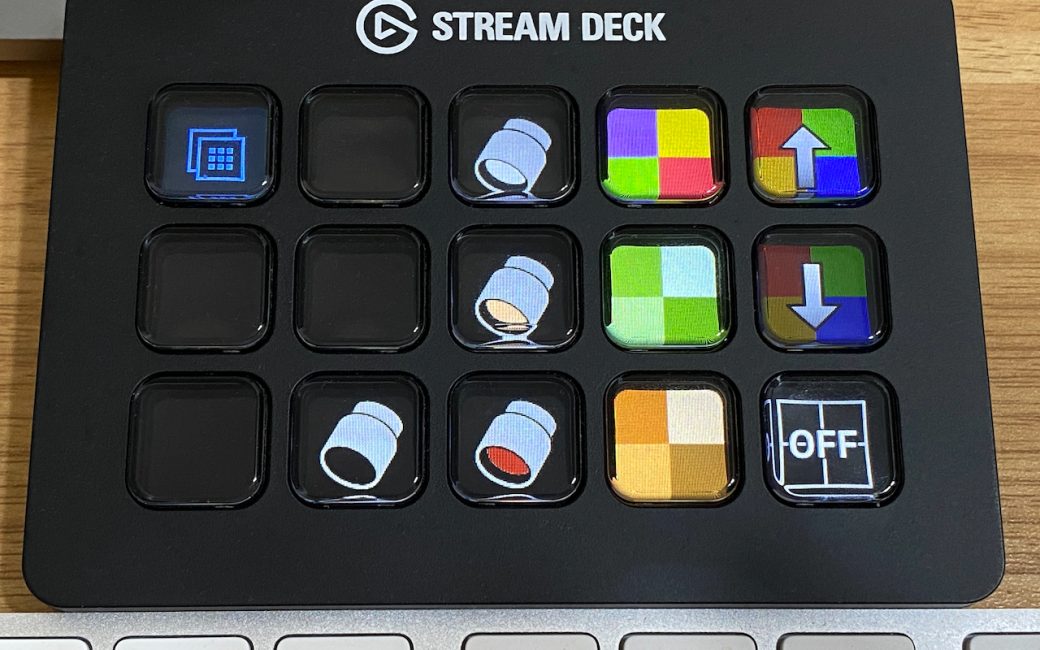
 The NanoLeaf Tiles plugin offered control of any of NanoLeaf’s light panel products and included actions for brightness up and down, as well as an absolute brightness, the basic setting of colour or scene, and an on/off toggle.
The NanoLeaf Controller plugin appeared to offer less, with only a single brightness action, however that action can take an absolute or incremental value. In the end, I preferred NanoLeaf Controller due to it’s easier setup process. Both of these plugins communicate directly with the light panel controller, skipping any need for HomeKit. I now had buttons set up to toggle the Canvas panels off and on, to raise and lower the brightness in 10% increments, and to select my three favourite patterns.
But… neither of these plugins would work for my NanoLeaf bulbs, and I have specific needs for those, which necessitates a brief diversion.
My study is an odd little space. It is made out of the remaining half of a small bedroom, when the other half was taken to provide an ensuite and walk-in wardrobe in the next bedroom. This not only makes the study quite small, it also makes the door invisible from the working space. Couple this with only a small window which looks out onto a bank, which is covered in trees, and backed by a fence, and it will become apparent that not much natural light makes it into this room. Since we moved into the house, I have had strong, daylight-white bulbs on the ceiling.
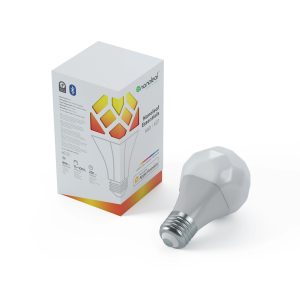
For a long time I had three CFL and later LED bulbs of 120 W equivalent brightness which bathed the room in bright light no matter how much natural light there was. I wavered for a long time on getting smart bulbs because I was used to 1400 lumens of light per bulb and all the smart bulbs I could find were well below this, most quoting only 800 lumens. The NanoLeaf Essentials bulbs quote 1000 lumens which is just enough.
The reason for smart bulbs in this tiny room may not be apparent, given I need as much light as I can get. I do like to warm the colour a little in the evenings, but the real reason for them is the weeks I am on call for my job. Being woken by a phone call at 2am is an exercise in waking up enough to understand and deal with the problem, but not so much as to risk not getting back to sleep.
Walking into a brightly lit room while still waking up is a recipe for never getting back to sleep no matter how quickly I solve the issue, and also for a headache. For this part of my life, I had a scene that set all four bulbs to a red colour at 10% brightness. This is enough to see my way into the room, considering my eyes are adjusted to full darkness when I am awoken. Each night I was on call, I’d log in a couple of necessary applications on my Mac, dim the screens, then ask S-lady to set my “on call” scene to dim the lights as I walked out of the room. Could I get the Stream Deck to do this?
 I needed to be able to control the Essentials bulbs from my Mac. Another internet search finally led me to an article by Jason Snell, where he explained a similar search had led him to a Mac app called HomeControl. This provides a menu bar icon with a drop-down menu of controls for all the devices and scenes known to HomeKit. This is pretty nifty in itself, but the functionality which makes it valuable for automation is every action it can perform can also be triggered via the app’s URL scheme. Stream Deck has a built in action to open a URL, so simply copying the HomeControl URL into Stream Deck’s action makes the magic happen!
With the buttons now successfully setting my ceiling lights according to my preset scenes, I was still left with the manual task of dimming my screens. I got to wondering if that could also be automated. Spoiler alert: it can.
I found a small app called Brightness which did just what I needed. It is available via Homebrew, which I was already using, so I went ahead and installed it. It didn’t work! I found the GitHub repo and read through the issues where I discovered the Homebrew version had not been updated for Apple Silicon and several users had hit the same errors as me. The solution, it was explained, was to install it by compiling from source.
This sounds a little daunting but it was very simple, following the instructions on GitHub. I could now simply run a command from Terminal to set the brightness of my MacBook Pro display, or my Studio Display, or both. All I needed to do was add the command as an action. Except… it wasn’t that simple!
The Stream Deck software doesn’t contain an action to “run a command”. It does contain an action to open an application. Some more internet searching told me I could simply put the name of my script … wait … script? It was easy enough to put my brightness command in a script, though it seemed like a needless extra step. But it solved another problem — the Stream Deck action to open will not let you supply any parameters.
So now I had three scripts in my home folder which set the brightness on both of my screens to a high, medium, and low setting — in fact 80%, 65%, and 10% respectively. I added these onto my Stream Deck buttons by using the Multi-action action. But wait! There’s more!
When testing my new buttons, I realised the Stream Deck itself was still at full brightness, which was now quite obvious in the dimly lit room. I checked the available actions, and there was one to set the Stream Deck’s own brightness. It’s a little limited with only 5 settings, one of which is completely off, but it did a good enough job. Now just one button would have my room lights, my monitors, and my Stream Deck all adjust accordingly.
Some time later, I realised there was one button I had not thought of. When I’m not on call, and I want to leave the room… I just want to turn all the lights off. This one was easy, with a scene to turn off all of the lights, but needed one extra feature. If all the lights go out the moment I press that button, I still have some light from the screens, but I’m risking my neck getting out of the room. So I added another standard Stream Deck action to the button — a delay for 10 seconds. Now I had 10 seconds to leave the room.
My journey down the rabbit hole does not end here, as you will note from my extensive use of the past tense. Things have since moved on, but that is for part 2. And… part 3!
[…] Stream Deck — Down the Rabbit Hole, Part 1 […]
[…] in January of 2023, I contributed a three part series to the podcast, called “Stream Deck — Down the Rabbit Hole”. In that, I mentioned […]