Last week, George from Tulsa gave us a great explanation of how he solved his problem of converting gigabytes of image-only PDFs to be searchable by using open source (free) Optical Character Recognition (OCR) software. He explained that he’s a Linux user with Linux Mint Cinnamon and so his explanation had an EVER so slight Linux bias. (OCR PDFs with Open Source Tools on Linux by George from Tulsa)
George’s goal was to be able to search his PDFs, but in applying OCR to his image files, he gained something else. A searchable PDF is an accessible PDF. If we can search a file, that means the text is there for screen readers like VoiceOver to be able to read. That’s a huge deal.
While George gave us the steps to install and use the open source tools to OCR files on Linux, he also said,
If you’re geeky and love playing with computers, you might be able to get Tesseract and OCRMYPDF to run on a Mac using MacPorts or HomeBrew.
One of the things I really enjoy about using a Mac is that we have a flavor of UNIX under the hood, which means we get to take advantage of many of the cool open source tools Linux people get to play with. Our Windows brothers and sisters get to play too because of the Windows Subsystem for Linux.
You know I had to see if I could get the same tools working on my Mac. I was hoping that it would be super complicated and I’d have to do a whole bunch of work and that would give me fodder for a long, drawn-out blog post. Sadly, it was very easy using the tips from George to convert unsearchable, inaccessible PDFs into glorious searchable accessible PDFs. But don’t worry, even though replicating what George did was super easy, I decided to take it up a notch so this will be a nice meaty story.
George’s instructions came at the right time for me. I recently downloaded a user manual for the automated pet feeder I told you about a while back, and I needed to be able to search it but the darn thing hadn’t been OCRd. I had a problem to be solved!
As you may recall, George described two different open source tools he downloaded to do the OCR dance: Tesseract and OCRmyPDF. If your document is an image, then all you need is Tesseract, but if you want to OCR a document in PDF format, you’ll need both.
Install Homebrew
To do this exercise yourself, you’ll need to do one thing that sounds super complicated, but is actually quite easy. You need to install something called Homebrew, and you have to do it from the command line in Terminal. We’ve walked through this before on the NosillaCast but it’s so easy I’ll explain it again.
I want you to think about Homebrew as being like the App Store, except it’s on the command line. We’re going to install Homebrew, and then a very simple command will let you install any app that is available in Homebrew.
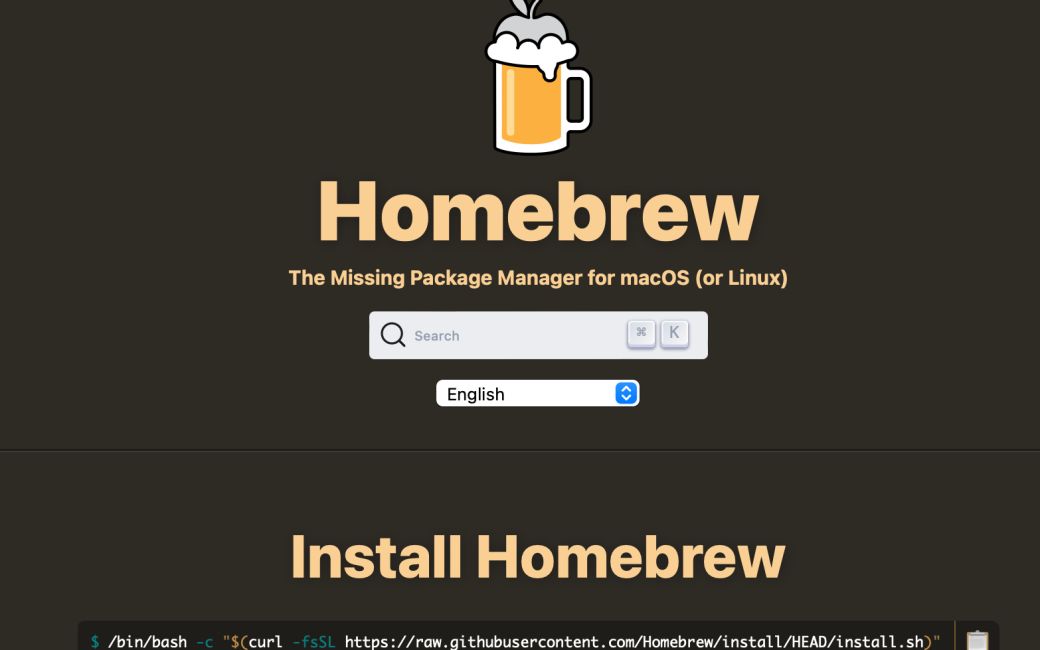
First, go to the Homebrew website at brew.sh.

On that page, you’ll see a long gloppy Terminal command, and to the right of it, you’ll see a copy command. Click to copy.
/bin/bash -c "$(curl -fsSL https://raw.githubusercontent.com/Homebrew/install/HEAD/install.sh)"
Now open the Terminal application which is buried in your Applications folder inside the Utilities folder.
Paste in the command you just copied and hit Enter. That’s literally all there is to installing Homebrew: copy, paste, enter. I should warn you that you’ll see lots and lots of unintelligible stuff fly by on your screen but don’t worry your pretty little head about it.
Installing Tesseract and OCRMYPDF
Installing Tesseract and OCRMYPDF is just as easy as installing Homebrew itself. To install an app with Homebrew, you simply type brew install and the name of the app into your Terminal:
brew install appname
So to install Tesseract, we’ll use all lowercase and type:
brew install tesseract
And then for OCRMYPDF, again in all lowercase:
brew install ocrmypdf
If you thought you saw a lot of glop fly by when you installed Homebrew, wait till you see how much goes by when you install OCRmyPDF! What you’re mostly seeing are what’s called dependencies. These are the other applications (called libraries in this context) on which OCRmyPDF relies. I think it’s possible that one of the dependencies installed with OCRmyPDF is Tesseract, but I installed Tesseract to test first so I’m not really sure..
To recap, we’ve typed in 3 Terminal commands, and we’re 100% ready to OCR our image and PDF files for free.
OCR an Image File with tesseract
George’s problem was that he had scanned documents that were saved as image files so they weren’t even PDFs yet. To convert his image files to searchable (and accessible) PDFs, he used tesseract, but he said the command can’t be invoked natively so he had to invoke it by using ocrmypdf. However, I found that on macOS I COULD use tesseract natively on an image file.
I took a screenshot and saved it with the name OG.png (for original). I then ran the very simple command:
tesseract OG.png NEW
This created a text file called NEW.txt with all of the text of the image file. Not exactly what we’re trying to do here, but interesting that by default tesseract could create text files for us.
To make the output a PDF, all we do is slap the text “PDF” (in all caps) on the end of our command. To summarize, we tell the command tesseract to take OG.png as the input file, NEW as the output file, and then PDF as the format. We don’t have to put the file extension on the file called New because it will be added automatically.
tesseract OG.png NEW PDF
That’s all there is to it. We now have a fully searchable and accessible PDF called NEW.pdf. That wasn’t too hard, right?
OCR a PDF with ocrmypdf
While OCR’ing an image file was fun, I more often run across unsearchable PDFs. I mentioned earlier that I have a user manual for the cat feeder from PetLIBRO that’s not searchable. I had an issue with the cat feeder and support told me to reset it, and I had to scan the entire manual with my eyeballs to find where they describe the reset process. Who has that kind of time? I really wanted this manual to be searchable.
It’s time to use George’s recommendation of OCRmyPDF to, well, OCR our PDFs. He gave us his simple command, which is only slightly more complex than the one we just used with tesseract. He invokes the ocrmypdf command, gives it the flag --output-type and then the file type we want which is pdf (this time in lowercase). Then he gives his input file 1.pdf and output file 2.pdf:
ocrmypdf --output-type pdf 1.pdf 2.pdf
I tested this command with my cat feeder manual, and it took 40 seconds to scan and OCR the 22-page PDF. It successfully OCR’d my PDF, but I was surprised to see scads of error messages in the Terminal as it ran. Every error was identical, complaining that some image object had no attribute. Example of just one of them:

As all of the errors seemed to be associated with images in the PDF, I wasn’t terribly concerned. I opened the PDF, and it looked exactly as it did before I ran the OCR process, except it was searchable and the text was selectable just as I’d wanted.
There were images in the original PDF and in some cases there were numbers with little dotted lines pointing to parts on the cat feeder, and perhaps OCRmyPDF was annoyed by those. In any case, if you get errors on embedded drawings or images inside your PDF don’t be surprised.
You Can Stop Here
I installed two app libraries using Homebrew and was able to replicate George’s success on Linux in converting both image and non-searchable PDFs into searchable and accessible PDFs. I was even able to turn them into plain text files if so desired. The whole process took me maybe 20 minutes if I round up.
But what fun would it be if I stopped right there?
Automating the OCR Process
In George’s article, he explained that he created a folder in which he drops the file he wants to OCR, names the file 1.pdf, and then runs his hard-coded command which saves the output as 2.pdf. In that folder, he also keeps a text file with his hard-coded command so he doesn’t have to remember it. While this works well enough and is certainly repeatable, I wanted to try to automate the process. I didn’t want to have to always use the same folder, or name the file 1.pdf. I wanted the freedom to have this work anywhere on my Mac with files of any name.
Often I spend lots of hours automating something that takes very little time but I do it often enough that getting it automated is worth the trouble. This is not one of those times. I hardly ever need to OCR files. And yet, for some reason, this idea just tickled me. It was a challenge and it sounded like fun. In Programming By Stealth Bart has been teaching us about automating things on the command line so this gave me a perfect opportunity to practice some new skills.
For those amongst us who are not programmers, but have managed to get this far by installing two app libraries on the command line, the next step isn’t too big of a leap. Whatever you can type in as a command in the Terminal, you can put into a shell script and run it all in one go. We already know how to run the commands to OCR our files, so why not slap them together into a shell script to make our lives easier? Since Bart taught us how to write Bash scripts in Programming By Stealth (installments 143-154), I decided to make my script in Bash.
My goals in the automation of George’s process were as follows:
- Allow the script to run on any PDF file in any folder
- Allow the PDF to have any name we like
- Have the script export the OCRd version of the PDF into the same folder as the original but with “-OCR” tacked onto the end. This way I’d be able to tell the two files apart, and I wouldn’t risk writing over the original file
- If I succeeded at these goals, I wanted it to run inside Keyboard Maestro but that was a stretch goal.
Building the Pieces of the File Name
Our script is going to run on any file name in any folder (directory). In order to build the name of the output file we’re going to:
- Extract the directory path from the input file and save it
- Strip off the .pdf at the end of the input file
- Build the output file name by adding together the directory path, the input file name, then adding “-OCR.pdf” to the end
Scripting languages like Bash (and AppleScript) take the first input to a command and give it the variable name $1. So if we run our script (which I’m calling ocrpdf.sh) by typing into the Terminal:
./ocrpdf.sh myFile.pdf
myFile.pdf is automatically assigned the variable name $1 in our script. But we don’t want to use that name because it can get reassigned, so let’s create our own variable name. I’ll call it inputName.
inputName=$1
$inputName will be the full path to the file name. For example, if the file is on my Desktop, $inputName would be:
/Users/allison/Desktop/myFile.pdf
Ok, cool. When we tell the script to write the output file, we’re going to need to tell the script where to write that file, which we’ve already decided will be right back into the same directory as the input file. We can extract the directory path from $inputName so we have it ready for the output file. There’s a built-in command in Bash called dirname that will grab it for us. I’ll create a variable imaginatively also called dirname:
dirName=$(dirname $inputName)
It’s swell that we have that full path name from our input file, and for our next trick, we need to extract just the file name for the input file without its extension. If we can do that, then we can use the directory, the original input file name plus “-OCR.pdf” to be the name of the output file. To get the input file name without the directory path and without the “.pdf” we can use another nifty little built-in command called basename.
inputBaseName=$(basename $inputName .pdf)
Ideally, since ocrmypdf can OCR image files too, I should write this generically so it could be a PNG, a JPG, or even a TIFF file. But I’ll leave that for another day.
The last thing we need to build the output file name is to slap “-OCR.pdf” on the end. I decided to create a variable called $add for the additional text.
add="-OCR.pdf"
We now have all of the building blocks to create the output file name:
$dirNameis the original directory path where we’re going to write the output file$inputBaseNameis just the name of the file without the path or file extension$addis the “-OCR.pdf” we’re going to pop on the end so we don’t overwrite the original file, and so we can tell which file has been OCR’d.
To build the output file name, we need to concatenate all of this together Concatenate is a fancy word for adding it all into one long string of text. In Bash, you put the variable names inside squirrely brackets with the $ on the outside, and any plain text just gets thrown in there without any brackets. We want the directory name followed by a slash, then the input base name (no path, no file extension) followed by our added text “-OCR.pdf”.
outputName=${dirName}/${inputBaseName}${add}
We are now ready to add the last and most important bit of our script – actually telling it to run the ocrmypdf command. We’ll run it essentially like George did originally, but we’ll use our fancy variables $inputName and $outputName instead:
ocrmypdf --output-type pdf $inputName $outputName
TADAAAA!
Putting it all together, we have our final script (with a lot of echo statements so you can see what it’s doing).
#!/bin/bash

# A small script designed to take an input file of a PDF, run it through the library ocrmypdf, and send the resulting OCRd file to the same name with the extension "-OCR.pdf" on the end

# assign a variable name to the input file including extension and path

inputName=$1
echo "nputName is $inputName"

# put the path into a variable
dirName=$(dirname $inputName)
echo "dirName is $dirName"

# Strip the path and file extension and assign to a variable
inputBaseName=$(basename $inputName .pdf)
echo "nputBaseName is $inputBaseName"

# Create a variable to add the text "-OCR" and the file extension .pdf
add="-OCR.pdf"
echo "add is $add"

# Create a variable for the output file name that concatenates the base name of the input and adds -0CR and the file extension .pdf
outputName=${dirName}/${inputBaseName}${add}
echo "outputName is $outputName"

# Run ocrmypdf on the original input file name, set the output to pdf and save to the new inputName with -OG and .pdf

ocrmypdf --output-type pdf $inputName $outputName
How to Use the ocrpdf.sh Script We Created
I sent this script off to George to run on Linux without any instructions and that succeeded as well as you would have expected. So let’s step through instructions on how to use this script.
- Install Homebrew as explained earlier
- Install
ocrmypdfas explained earlier - Create the script by copying the text in this article and paste it into a text file called
ocrpdf.sh - In the Terminal, go to the directory where you saved the script and change the permissions on the file so that it’s executable by entering:
chmod +x ocrpdf.sh - In the Terminal, we run scripts by typing
./before the script name. This script requires an input file so we need to run the script and tell it which file is the input file. - If your script is in the same directory as the PDF you want to OCR and if for example the original file is called myFile.pdf, type
./ocrpdf.sh myFile.pdfand it should create a file called myFile-OCR.pdf in the same directory that’s fully searchable and accessible. - If the file isn’t in the same directory as the script, enter the full path name for the file. If you’re on a Mac, you can just drag the file into Terminal after
./ocrpdf.shand it will automatically put the full path into the Terminal including the file name
If you want to be able to run the script from anywhere, there’s a bit more to it, but I’ll cover that in the part two of this tutorial.
This is my first time teaching other people how to write terminal commands and how to create a shell script so I think it’s highly likely I’ve left out some steps or I’ve made a booboo or two in the instructions. Go gently on me but do correct me or ask questions if this doesn’t work for you!
Confession is Good For the Soul
Now I’m going to tell you a little secret. I did not write this in one fell swoop. I made lots of mistakes and had to look a lot of stuff up. Perhaps that’s not a surprise to anyone. But how I looked things up might be a surprise. In the past, I’ve gone to the Googles, put in a search term, then scrolled through the results looking for answers from Stack Overflow. This is a site where programmers ask and answer questions on coding. Sometimes I’d get lucky and I’d find the answer on Stack Overflow, but often I’d have to search over and over to get the answer i needed.
But this time around, I asked ChatGPT the questions instead. I use Microsoft Edge as my Chromium browser rather than Google Chrome, and Edge has ChatGPT built right into the Bing search engine. The advantages of using ChatGPT are manyfold:
- You often get several summary-level answers. Each answer has a footnote that tells you the source. I can see on one question I got 7 answers, and the first couple were from superuser.com and stackoverflow.com. I can click on the link to the answer I’m interested in and read the question and answer in full context. Having it summarized and having quick access to the source is much better than a giant list of results from Google.
- ChatGPT remembers what you’re talking about. In a few instances, I’d ask it a question and then need to refine it by specifying that I was on a Mac. I didn’t have to repeat the question, I just had to write, “Now answer for macOS.”
- While the answers are wrong as often as people are wrong when they answer on the native websites, I found it very fast to work my way through the answers that weren’t exactly what I was looking for.
- I was able to command-tab away to work on something else during the 15-30 seconds it took ChatGPT to craft the answers to my questions.
I didn’t rely wholly on ChatGPT inside Bing to do my work, but rather had it help me build up each piece. I enjoyed having what Microsoft likes to call CoPilot by my side.

Bottom Line
I really enjoyed figuring out how to write a shell script on my Mac to automate the process of OCR’ing PDFs. Perhaps it’s a bit too nerdy for you but it really makes me feel powerful to be able to do this. I remember a day when I used to want to automate things because all of the cool kids were doing it, but I couldn’t figure out what to automate and even if I did think of something I didn’t have the technical chops to pull it off.
I think that’s what programming is all about for me. I have an itch I want to scratch and I know if I try to use the tools Bart and other NosillaCastaways have taught me, I’ll be smarter when I’m done.
One more thing. As I was writing this up, I kept thinking, “I’m not worthy to teach this stuff” and “I bet there’s a better, more elegant way to solve this problem”. I wrote it up anyway because Bart constantly says in Programming By Stealth that there are often many right ways to do something. Even if his solution might be more elegant than mine, it doesn’t make mine less. It’s probably my favorite thing about learning from Bart.
Believe it or not, there’s a part two to this article. After I got my little shell script running, I decided to figure out how to put it into Keyboard Maestro so I don’t even need to launch the Terminal to run it. It’s super cool and it was really fun, so stay tuned.
Hi Allison,
I forgot to mention that there is another opensource program I use to process PDF files. This is QPDF, you can also install it through Brew.
https://qpdf.readthedocs.io/en/stable/
I use it for optimizing PDF files. I sometimes scan manuals and some end up as huge files, with help of this program the file sizes will be smaller.
Many thanks Allison,
I used this article to create a Hazel rule to create OCRed PDF files from .jpg files. If anyone else is trying something similar, the details are:
The Hazel rule is simple: if extension is jpg then Run shell script.
The ‘run shell script’ embedded script is:
PATH=$PATH:/opt/homebrew/bin
LONG_FILENAME=”$1″
FILENAME=$(basename “$LONG_FILENAME” .jpg)
tesseract $1 “$FILENAME” PDF
Ok. Claire, this ROCKS. I love that you took it up an even nerdier level.
One question – I had a file called test.jpg, and the shell script embedded in Hazel correctly made an OCRd PDF. However, the names is now
“test.jpg″””.pdfAnd yes, if you’re wondering, it is a combo of smart and normal quotes like that.
Is that by design?
Hi Allison. No – the name change including quotes was not intentional. The expected behaviour is that the script creates an OCRed PDF with the same name as the original jpg.
When I pasted the script into my comment above, the quotes must have got converted to smart quotes. I tried copying the embedded script from my previous comment back into Hazel and came across the same issue as you!
I’ll try to paste the script again below inside code delineators. But, if anyone has a similar problem, replace all six double-quotes with normal non-smart double-quotes and the script should work as expected.
The Hazel rule is simple: if extension is jpg then Run shell script.
The ‘run shell script’ embedded script is:
PATH=$PATH:/opt/homebrew/bin

LONG_FILENAME="$1"

FILENAME=$(basename "$LONG_FILENAME" .jpg)

tesseract $1 "$FILENAME" PDF
Hot dogs, that worked, Claire! Luckily I kept my fake action in Hazel all this time so I was able to run it right away and it worked!