Today I tell you my tale of adventure moving podfeet.com from GoDaddy’s (awful) service to Bluehost. I’ll tell you how to move the database, how to move the files, how to get the domain name to point in the right place, and of course I’ll tell you all the things I did wrong along the way and all the places Bart helped me along the way. I’ll give you a quick review of Pear Linux from pearlinux.fr that makes Linux look like OSX. In Chit Chat Across the Pond we’re joined by Guy Serle from the MyMac.com podcast back again, this time to tell us how he actually created audio podcast episodes on the road at Macworld, using only an iPad and an iPhone.
Hi this is Allison Sheridan of the NosillaCast Mac Podcast, hosted at Podfeet.com, a technology geek podcast with an EVER so slight Macintosh bias. Today is Sunday May 19, 2013 and this is show number 419. This week I’m going to walk you through what it takes to move a WordPress website like podfeet.com, then I’ll tell you about a really cool version of Linux I’ve been playing with. In Chit Chat Across the Pond we have Guy Serle from the MyMac.com podcast back again, this time to tell us how he actually created audio podcast episodes on the road at Macworld, using only an iPad and an iPhone (and a few auxiliary devices) but no Mac at all. You’ll really enjoy how creative he got as he figured out what worked and what didn’t in a challenging setup like this.
But before we get started, last week when I did a review of the Roku 3 vs. the AppleTV, I mentioned how lovely the simple home button on the Roku is and complained bitterly about how many times I had to click the back button on the AppleTV remote. Great news – a whole bunch of NosillaCastaways wrote to me and told me that if I just hold down the Menu button on AppleTV for a few extra seconds and it actually takes you back to the home screen. What a great hidden tip! a NON-hidden home button would be better, but I’m so happy to at least have a way to do this. Thanks for everyone who wrote in, tell your friends!
Podfeet Moved to BlueHost
Over the past six years I’ve had reasonably good performance out of my hosting company, GoDaddy. I know, everyone else hates them but they were good to me. I should explain for those of you who don’t host your own website, you buy two things to accomplish that: hosting services and domain name registration. The hosting services is where you actually are given space on a server, domain name services are allowing you to rent the name of your site, in my case podfeet.com. GoDaddy has one of the most notoriously bad reputations of any tech company I know of. Their ads are pretty much large breasted women in tight leather suits, and their website is just awful in the upsell. Try to buy one little thing and you have to go through a lot of screens before you can pay. They also change their site around all the time so if it’s been a few months since you needed to do some administrative work, you have to climb over a bunch of newly added upsell stuff.
You might wonder why I stayed with them for six years when just about everyone else I know in podcasting has abandoned them. One big reason. My site stayed up pretty darn close to 100% of the time. To me that’s the number one most important thing. Secondly when tiny problems happened from time to time, they had great tech support on the phone, they answered very quickly, and they were able to quickly figure out if it was something I’d boogered up or if they had a problem. When it was my fault, they patiently helped show me how to fix it.
That all changed this week. I was about to go on the air with Bart and he was going to be answering a dumb question about securing your WordPress site, and I knew he was going to emphasize for the 85th time that you should be using Secure FTP instead of just plain old FTP. I had to confess to him that I was still using FTP (which by the way stands for File Transfer Protocol and it’s how you shove stuff up to your website). I went to the GoDaddy control panel and they had a button that said click here to request SFTP. I clicked it, they said to enter your phone number and they’d call back with a code. That happened right off, and when I pushed the button with that code it said that they were going to move my database to a new server.
The database on a WordPress site is where all the real content is. The blog posts, the dates they were posted, who posted them, pretty much everything on my site that isn’t formatting is in the database. I thought this was weird but I went in and changed my site so it would point to this new database server.
And that’s when everything went wrong. From Monday through Friday, my site was either non-responsive entirely or maybe it would come up if you had a whole minute to wait. More often than not though it was completely dead. I called GoDaddy right first thing Monday but the message on their phone said basically, “if your site is down, we know, we’re working on it”. I was pretty patient at this point, remember I had 6 years of uptime to compare to, and I figured if they had an outage that big they probably didn’t need me talking to them about it to convince them it was urgent. Luckily my podcast files actually live on another site altogether, so this didn’t impair you getting the show itself.
So Tuesday I call them, and open a ticket and they send it up to 2nd tier support but won’t let me talk to anyone technical. Wednesday I’m going out of my mind. I insist on a supervisor, and I get Chris. Like everyone else at GoDaddy he was VERY sympathetic and really felt my pain. But no, I couldn’t talk to anyone technical. No I couldn’t find out why they weren’t fixing it after 3 days. No, I couldn’t escalate any higher. No, I couldn’t get any kind of financial compensation. No, he couldn’t tell me how long it would be. No, he couldn’t even talk to this 2nd tier support level. You can just imagine how well this worked out for him. By this day, I told him I was leaving GoDaddy.
Fast forward through 2 more days of pain, and on Friday morning I got an email saying that something had gone wrong in the migration, I had some old apps running on my server and if I’d just clean those unnamed apps up they could try again some day. Right.
Now it was time to start finding a new host. I went out and searched for top web hosting companies, and three companies consistently made the top slots: Hostgator, Dreamhost, and Bluehost. With high praise from Hostgator from Timothy Gregoire and Allister Jenks, I headed that way but their site was so darn ugly it looked like GoDaddy. They probably have great service but I was running away from uglyville on purpose! Next I took at look at Dreamhost and even signed up, but found out two things to turn me off. Dreamhost does NOT allow you to call them on the phone! They claim to have a live chat – their twitter account even sent me a screenshot of where it was, but on my webbrowser there was no live chat icon to click. One of my requirements was to also allow me to enter the WordPress control panel using https, which requires a dedicated IP, but Dreamhost did not offer that as an option.
Ok, Bluehost it is! I have to say, their website is easy to navigate and their control panels very easy to interpret. Now lest I tell you think for a moment that I was embarking on this adventure single handedly, I can assure you I only took this step with Bart on standby for assistance. When I moved to GoDaddy 6 years ago, it took us about 5 days and Bart had to hold my hand every single step of the way! Evidently I have learned quite a bit in those ensuing years and I was able to do about 85% of it all by myself. I’m pretty amazed at that and proud of my little self.
I want to give you an idea of what goes into moving a WordPress site. It was a lot of fun for me, even though a few things went wrong along the way.
First thing is the prep. I had to download (using FTP on my client Transmit) all of the files associated with WordPress. WordPress takes that database I told you about and creates the way the website looks. It says where the banner image is, it defines that there’s a left and right sidebar, whether I have a list of pages across the top, the color of the links, and also has the plugins I use to modify the site like Akismet that stops 99% of the spam that comes into the comments. All those are simple files on the site.
For what was originally an unknown reason, it took FOREVER for these files to download. Normally it takes an hour, but after running all night long it was only 30% done when I woke up. Later I figured out what happened.
I also had to download the database itself which again is all of the posts and pages and comments and such. I have a WordPress plugin called wp-backup that’s supposed to send me regular backups of the database, but even though it works great on my other websites I manage, it wasn’t actually sending me backups for podfeet. That’s cool I told it to download one right then. It ran and ran and ran…but never showed up. Hmmm. The one thing that terrifies me about hosting my own website is going into a tool called phpMyAdmin. This is a really powerful tool that if I made one wrong move it could completely bork my website. I normally don’t go into it unless I have Niraj or Bart watching me every step of the way. Terrified, I went into phpMyAdmin and clicked only one button: Export. Yay, down came a file that looked just about right. It wasn’t of course, but I felt confident that I’d cracked that nut on my own.
Remember I said the download of the WordPress files took forever? it turns out all those times I’d asked for a backup to be emailed to me, my plugin was actually saving them on my website, INSIDE the WordPress directory! So when I did that download, there was an EXTRA 5GB of junk coming down – backups from years back. The good news is I figure this out when it was taking forever to push these files back up to the new location so things got a LOT snappier after that.
So now I have my new hosting account at Bluehost, with a static IP and I can SFTP my WordPress files up there. You may have noticed that podfeet.com actually switches to podfeet.com/wordpress in your browser; that’s because that’s where all the files actually live. In talking to Bart he felt that was a honeypot for hackers, why not make them do a LITTLE bit of work and call it /blog.
Now in the Bluehost control panel, I had to create a database. The screens were so easy I actually did that myself, and created a database user and password. Then I went into the normally terrifying phpMyAdmin to import the file I’d exported. This wasn’t so terrifying because I knew if I borked it on this end I could just blow it away and start over. I uploaded the database, but when I went to look at it, it didn’t have any tables at all. Oh well, too good to be true, I had Bart help me the second time and he showed me what I had to select before exporting the database and then things got sorted correctly.
Inside WordPress there’s a little file called config.php and that’s how you tell WordPress to look at the shiny new database. I jumped in there, edited away…and got stuck when it asked for the server, but a quick call to Bart and he told me it would be localhost, which it never was before but he said it was something that Bluehost did correctly so that made me happy. Ooh – Bart taught me a cool thing I didn’t know I could do. There’s a lovely text editor called TextWrangler from barebones.com that I’ve used for a long time but it had a feature I’d never used before. Turns out you can open a document on the server, edit it right there and save it directly back up there without having to download first!
Now there’s a tricky part to how to check and see whether the new site is working or not. Right now it’s not the REAL podfeet.com yet, because we haven’t yet told the domain name registrar to point podfeet.com at the new server. We don’t want to do that until it’s 100% working. Bart told me that I’d have to edit my hosts file. He didn’t say anything more than that and I actually knew what to do and figured out how to do it!
The hosts file is a file on your Mac in the location /etc/hosts. In here you can trick your Mac into looking at the right place. I only had to insert a line that gave the IP address followed by podfeet.com. He gave me a pat on my little geek head for figuring that out on my own. ok, we should be good to go, right? nope. didn’t work. By this time it was dinner on Friday night for me, I’d had a gin and tonic, Bart had wine, so we called it a night.
When I woke up (at 5:30 am on a Saturday I was so excited) I got to work again. I decided to see if all my WordPress files were where they should be. I’m not sure how it happened but one folder was duplicated and slapped inside another folder. I fixed that, and BAM! the new podfeet was up! Well, sort of. The main page worked, but if I clicked on any post, they didn’t work. Hmmm…by this time I was able to ping Bart and all he said was “we’ll have to fix your permalinks.” This turned on a lightbulb in my head – remember when KD Murray and Bart helped me set up the redirects so you can type in podfeet.com/googleplus and it goes to Google plus? Well back then I remember KD telling me that to fix my permalinks, all I had to do was go into WordPress itself, change the permalinks to some other format and switch them back and they’d work, easy peasy.
I should explain that permalinks are how the urls work for my blog posts. A lot of people like super simple short ones, like Bart, where his are formatted like bartbusschots.ie/blog/?p=2456. Other people like the url to tell something about the post, so I’ve chosen the permalink format that shows you the year, month, date, and the words I use in my title, so mine are super long but super informative. Anyway, that’s the thing I had to switch and then switch back.
That change causes a rewrite of a secret hidden file called .htaccess. That file is the same file where all my lovely KD redirects live. I was actually smart enough to know to go edit that, but not smart enough to know I was editing the wrong one. Turns out there’s 2 .htaccess files (maybe more?) one at the root directory and one inside the /blog directory that WordPress gets to muck about it. After I was corrected by Bart, I slapped in my redirects and they worked right off the bat.
Now that everything was working, we had one last bit to do. The name podfeet.com is actually still registered over at GoDaddy (for now) so I had to go into their Domain Name Server control panel and tell it to point to my shiny new IP over at Bluehost. Then all we had to do was sit and wait for all the servers across the globe to find the new site. It was fun hearing from Spain, Canada, Australia, New Zealand, England and Ireland as it sped across the globe. it was easy to tell who had the new site because it would say /blog instead of /wordpress.
Now there was another problem to be solved. All over the place I link to stuff on my own site – so let’s say I had a link to a tutorial embedded in a blog post, it would have /wordpress in the url instead of /blog, right? Or heck, what if YOU had a link to a tutorial I’d written or a particularly clever blog post? those links would all break! I feared that Bart would make me go into phpMyAdmin and do something frightening in there, but luckily he knew a much better way. Remember all those fancy redirects that he and KD put together for me? Bart knew of a way to do a rewrite condition that actually tells anyone’s browser when they try to go to podfeet.com/wordpress/anything to send them straight over to /blog instead. I dropped the code into the shownotes but I haven’t got a clue what it means!
RewriteCond %{HTTP_HOST} ^(www.)?podfeet.com$
RewriteRule ^(/)?$ blog [L]
Now if you aren’t in a coma yet and are still alert, you might have realized one last thing that might need to be fixed. I create the feed for the podcast itself every week, using Feeder from ReinventedSoftware.com and in every single one of the 400+ episodes, there’s a hard link to the article over on podfeet.com with that pesky /wordpress thing in the middle of the link. Turns out there’s a super easy way to fix that too – thanks to the brilliance of the snarky Feeder developer Steve Harris. I downloaded the rss.xml file (that’s the feed that tells your podcatcher where to go find the audio file and the shownotes and all that). I opened the xml file, and did a search/change all from /wordpress/ to /blog/ and saved the file out. Then all I had to do was import that new version into Feeder and I was back in business. Really makes life easy the way he wrote that app and the reason I still continue to recommend it to anyone doing a podcast.
So EVERYTHING was working. But then I broke everything on Sunday! It really wasn’t my fault I don’t think. I purposely bought the Pro account at Bluehost so that I could have https access to my WordPress login, and SFTP. On Sunday morning I decided to push the button to get my SSL cert from Bluehost. When I did it gave me a shopping cart showing $50 to buy it, but a $50 coupon off since it’s included in the Pro account. I didn’t pay too much attention to the fact that it also said in the cart that I had a dedicated IP for $0 (since I had the pro account).
I got a little confused on doing the cert so I tested out the live chat on Bluehost and they got me sorted out right away, so a successful first test of their service. A few minutes later I went to where I was working on the blog, and suddenly it’s asking me to log in again and it won’t take my credentials. ARGH! After quite a few failed attempts, I went back to Bluehost and looked at my support options. Again since I have the Pro option I can text chat, email or use the phone. The text chat will always be my preferred option but it was showing 9 minute wait times, but the voice option said 0 min wait. Winner!
I got connected to tech support right away and my new little friend Landon figured out straight away what was wrong. When I clicked that “buy” button for zero dollars, THAT’S when I got my real dedicated IP, which meant that now GoDaddy’s domain name service was pointing to the wrong IP address. So again I changed the IP over on GoDaddy’s site and within a few minutes the new address started to work.
When this is all settled out, I will eventually move the Domain Name registration from GoDaddy over to Hover to get completely away from them and to separate my DNS from my hosting service. I have to say I’m REALLY glad that I have my audio files themselves hosted on a third service, because that meant I didn’t have to change any of the links!
Bart and I had a great time doing all of this, and as he said he enjoyed helping me learn and he and I both really enjoyed how much less I needed him than I did the last time we did this. Nice to see I’ve made progress! I told him I feel like I’m off the training wheels but Bart still needs to reach out and steady my bike on the tricky turns. I don’t take for granted at all how much help he is to me. Great geek fun weekend all around, even when things went kablooie from time to time!
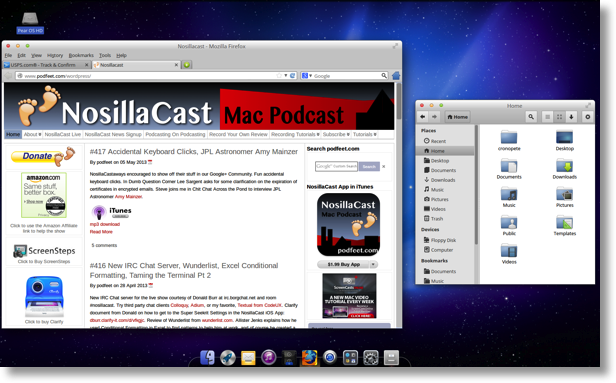
Pear Linux
It’s been noted that I often start my reviews with what problem there is to be solved but sometimes you just explore things because you can. This week someone mentioned a thing called Pear Linux, and all I had to do was look at one screenshot and know I had to install it. Pear Linux is a play on words – the logo is a Pear…with a bite out of it. This version of Linux is designed to look and feel as much like the Mac operating system as you can get.
Let’s back up for a moment in case someone out there is saying, “what do you mean you installed another operating system on your Mac? how do you do that?’ The trick is called a Virtual Machine. It turns out you can run all kinds of operating systems inside Virtual Machine software. First you need to buy either VMWare Fusion or Parallels or you can even get a free application from Oracle called VirtualBox that will run virtual machines. It’s a terrific way to test out operating systems without getting dirty. I’ve run lots of Linux variants and even Windows 8 on virtual machines.
Ok, with that out of the way it’s time to play with Pear Linux. You can download Pear Linux from pearlinux.fr. Make sure you choose the desktop version, I wasted some time with the server version. I also recommend that you use the bit torrent version rather than a direct download. I timed the bit torrent version against the regular version and after the bit torrent was done, I still had an hour 52 minutes left to download the regular version. I haven’t got a favorite Bittorrent client these days but I gave µtorrent a try from utorrent.com and it worked a champ.
Once Pear Linux downloads, what you have is an ISO image. It’s essentially like a mounted CD as an image. You launch your VM software and when it asks for the CD to install the OS you tell it to proceed without that and you point it at your ISO image. After basically clicking yes a bunch of times and letting it install you’re done. The defaults are to only give your VM 1GB of RAM and I think 2 processors, I bumped that up to 2GB and 4 processors (of my 8) so that I’d get some better performance out of it.
When Pear Linux launches you’ll be amazed at how mac-like it is. They went to a lot of effort to create visuals that hide the geeky linuxy stuff and help you figure out how to use linux. For example, I’ve always had a bit of trouble figuring out what applications are installed in a Linux distribution, but in Pear Linux they’ve replicated the Launchpad with essentially the same icon and put it right in a little dock at the bottom of the screen. There’s a System Settings icon in the dock that looks just like the System Preferences icon in OSX. Music? there’s an icon that looks enough like iTunes to help you find it. there’s even a “time back” icon that gives you Time Machine-like capability.
One of the tricky bits with using a virtual machine is getting it to talk to your various connected devices, like printers, wireless, and webcams. You may have fiddled with this in the past and found it to be a trial but today’s modern virtual machine applications have been getting a lot better. I did have trouble adding a printer to Pear OS, but I successfully got the application Cheese to take a picture of me using the iSight in my Apple Cinema Display. Wireless connectivity came instantly with no fiddling at all.
It works flawlessly with my apple trackpad and my bluetooth keyboard, which I think is a miracle in itself!
I played around quite a bit with Pear Linux and I have to say I really enjoyed it. Probably the only thing that made me cringe a little bit was you have to use the Control key instead of Command, but if you’ve used Windows at all you know you can get used to that. I think Pear OS is a great alternative for an old piece of hardware to give someone a really inexpensive Mac-like experience. Too bad it’s such a nightmare to install on a Mac natively as we’ve heard from Knightwise – that would make a good use of an old Mac too. anyway, download one of the virtual machine applications I mentioned, VMware Fusion, Parallels or Virtualbox and then check out Pear Linux from pearlinux.fr. Give it a whirl, it’s fun!
ScreenSteps
In the middle of all the fun I had moving podfeet.com around, one thing I had to do was make sure my new settings worked properly in Feeder as I mentioned earlier. Steve Harris complains that I always find the weird problems and I swear I don’t try to but sometimes I think I make my requirements too hard. Here’s one of them. When I’m typing in Feeder, I don’t like it when the text gets too close to the bottom of my laptop screen. I always feel like my head is craning down too low. I know I could drag the bottom of the window up higher, but that bugs me too, to have the text at the VERY bottom of the screen. So I like to throw in a half dozen line feeds just to keep some space at the bottom. Well it turns out Feeder has a default mode where it just strips all that away for you every time you save. About 12 times over the years I’ve written to Steve and said, “now WHERE is that setting again to turn off that annoying behavior?” Lucky for Steve I’ve gotten a lot better about creating ScreenSteps tutorials for myself. This time when I was fussing away about it, instead of bothering him at his nephew’s birthday party which I’m SURE he was enjoying, I whipped open ScreenSteps and sure enough I had two screenshots – one said BAD on it in the annotations and one said GOOD. Just that simple use of ScreenSteps was enough to make me happy today. I know it’s got all this great power and everything but sometimes it’s the simplest things that make you happy. I had easily created a document just for me that told me in two shots with two words what I needed to change, and more importantly the rapid search found it for me instantly.
If you’d like to see the REAL power of ScreenSteps, go over to BlueMangoLearning.com and download their free 30 day trial and when you inevitably buy it (or maybe Clarify) be sure to tell them Allison sent you!
Chit Chat Across the Pond
Recording podcasts with iOS at Macworld 2013
NOT the easiest thing to do in the world. Some built-in limitations Apple has in iOS made it harder than it probably should be. Brought gear to do video too with the iPhone but was too busy to get around to it.
First the hardware:
Apple iPad 3 64GB model WiFi/Cellular $Varies
Apple iPhone 4S 64GB model $Varies
Apple iOS Connection kit USB adapter
Audio Technica ATR2100-USB Microphone $34.00 (Paid $43.60 earlier through Amazon).
Blue Microphone Blue Mickey (http://bluemic.com/mikey_digital/) I was lent a Blue Microphone Mickey microphone by well…Blue Microphone at the show because while the Audio Technical USB microphone worked great with my iPad, I NEVER tested it with the iPhone using the Apple Connection Kit USB to 30 pin adapter. I just ASSumed that if it worked with the iPad it would work with the iPhone. However the iPhone’s power output through the 30-pin connector THEN routed through the Apple Connection Kit USB obviously was insufficient to power the Audio Technica Microphone DOH! This led to an amusing first day at the show which I’ll describe in a bit.
Shure SRH240A Headphones $38.50
I was also going to take video, edit it on the iPad, upload to YouTube for embedding on the site, which is really easy to do on an iPad/iPhone combination, but time restraints left me with no video. For MyMac this year it was Elisa Pacelli, Vicky Stokes, Julie Kuehl, and myself which was kinda bare bones as compared to the some of the groups we’ve had in the past. Also Tim Robertson, Fearless Leader for MyMac didn’t go this year so a lot of the organizing was left up to me. This is never a good thing. So no video this year.
Software:
I love how so many programs are turning to Cloud solutions that Apple just won’t give them in iOS. Whether it’s Dropbox or Box, or even custom made solutions geared specifically for a particular app, it shows that talented developers will find a way around what I consider some of the ways Apple unreasonable restrictions in iOS. Seriously? No file structure? That’s just self-limiting and eventually must be dealt with as iOS becomes more complex or eventually developers will stop trying. Fortunately having something Audio Copy works well with Cloud storage (on WiFi anyway), but other solutions are needed. How about a simple gesture to open files related to the program we’re working with? If you’re in a word editing app, just text files appear (or maybe images if you’ve dropped a box in a document that needs pictures). In a movie editing app? Allow files from Cloud to be imported easily instead of the work around we kinda have to do now.
But I digress…
For the iPhone:
TwistedWave by TwistedWave (https://itunes.apple.com/us/app/twistedwave-audio-editor/id401438496?mt=8). GREAT app for recording and easy to upload to DropBox. I recorded the first day on the floor with TwistedWave for the iPad when I found out my Audio Technica Microphone wouldn’t work with the iPhone. Here I am carrying this big slab with the microphone connected by a long cable. I looked ridiculous but had no other choice at the time. The PR lady from Blue Microphone took pity on me and gave me a Blue Mickey which had pretty much just came out. I don’t think she expected to ever see it again, but I made sure at the end of the show to return it before I left. After that, I used the Blue Mickey with the iPhone and uploaded from TwistedWave for the iPhone to DropBox and then downloaded that as audio carts in BossJock.
DropBox with a shared folder to all the other MyMaccers at the show. They could record their interviews, save them to the shared DropBox folder and I could pull them out, do some tweaking in TwistedWave and have it Audio Copy to…
BossJock by thebossjocks (https://itunes.apple.com/us/app/bossjock-studio/id531205021?mt=8). A very nice app but if I had to do it again I wouldn’t have used it for recording the podcast. It let’s you set up pre-recorded carts which you can use for intros, outros, theme music, bumpers, really anything that’s pre-recorded and drop it in live. Plus you can have presets for audio fade in and out. Thought it would work well for the podcast, but never thought about how long that can be for others not involved with putting all that stuff in. So Elisa, Vicky, and Julie had to cool their heels while I listened live and did the breaks AND threw in some of their pre-recorded interviews. Not smart on my part and I won’t do it that way next year. GarageBand for iOS could have worked, but some of the limitations for recording length just made it too difficult to deal with. Last year I used the TwistedWave for the iPad app, but that’s single track so fades are almost impossible.
So that was essentially the flow for doing podcasts at the Macworld Expo. This will change next year as I’m trying out two different iOS DAW (Digital Audio Workstation) programs. Both give me multiple tracks with the limit being up to available storage. However I’ll really only need 3-4 different tracks since we still can’t easily record Skype through iOS.
One is called MultiTrack DAW by Harmonicdog $9.99 (https://itunes.apple.com/us/app/multitrack-daw/id329322101?mt=8)
The other is Music Studio by Alexander Gross $14.99 (https://itunes.apple.com/us/app/music-studio/id328608539?mt=8)
Both of these apps have multiple tracks with ways to fade in and out between them and both use Audio Copy and some kind of connection to DropBox for importing and exporting. You can export to either WAV or M4a files, but there’s no way to export as either AIFF or MP3 which is kind of a bummer, but it’s still usable in that it can be downloaded into a Mac version of iTunes and easily converted. Remember I’m not uploading to iTunes. Tim is doing that on his end. Still playing around with them, but this is more like what I really needed this year.
Doing the podcast was painful for probably everyone involved. Because unless you have extra equipment like a multi XLR input USB mixer that also works with iOS, you’re stuck passing around a single microphone or getting everyone really close so you can switch it to whoever is talking next quickly. Now add in all the other participants having to wait for the third section of the podcast because I was determined to make a program work that I had paid for and the second section was filled with show interviews. I should have just recorded the two sections that were live, edited those down with TwistedWave and then exported into BossJock and recorded the show together at that point. That way no one has to wait on me to listen through the other bits.
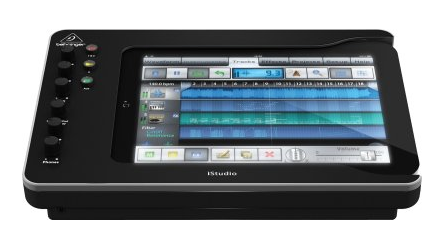
Behringer iS202 (talked about it, didn’t use it)
http://www.behringer.com/EN/Products/iS202.aspx
Lessons learned:
1. Don’t assume that just because a microphone works with one piece of gear that it will work with others. I didn’t check
2. Don’t try to shoehorn software into doing something it wasn’t intended for. I did exactly that
3. Test all software and hardware and think more about the process than the content. Sometimes that is more important. Good content and interesting people like what we had with Elisa, Vicky, and Julie will come naturally if you aren’t trying to jump through unnecessary hoops. I didn’t fully test the process and made others have to wait while I tried to figure it out. Not good.
4. Be prepared with a backup plan if plan A goes terribly wrong! My backup plan was to rely on kindness of strangers!
Guy at @macparrot, [email protected], [email protected], MyMac.com G+ community.
That’s going to wind this up for this week, many thanks to our sponsor for helping to pay the bills, Blue Mango Learning at bluemangolearning.com makers of ScreenSteps and Clarify. Don’t forget to send in your Dumb Questions, comments and suggestions by emailing me at [email protected], follow me on twitter at @podfeet. Check out the NosillaCast Google Plus Community too – lots of fun over there! If you want to join in the fun of the live show, head on over to podfeet.com/live on Sunday nights at 5pm Pacific Time and join the friendly and enthusiastic NosillaCastaways. Thanks for listening, and stay subscribed.
Fantastic chit chat across the pond. I’ve been playing with audio and video editing on my iPhone and iPad for a while. When I record video or audio I’m usually traveling and often backpacking so weight is important. Guy is right it is tough doing this sort of thing to do especially when you need to move things about. Sadly I don’t think Multitrack DAW supports Audio Copy though Music Studio, which I’ve not used, does. I agree TwistedWave is great.
I have been playing around with iOS audio for quite a while, and, like Guy, I love Twisted Wave. If all you need is to put bumpers around an audio file, you can do that using only Twisted Wave using Audio Copy and Paste.
If your audio apps support AudioBus, it is very easy to move audio between apps – and I think Multitrack DAW and Twisted Wave do support it.
There are a couple of other multitrack options. One is Hokusai, a multitrack editor, which, like Twisted Wave, is very easy to use. The downside is that it is limited to short files. Your audio must fit in memory (NOT disk space). On a newer iPad with 1 GB memory, you might get 20-30 minutes, my iPad 1 got 5-10.
At the high end, there are two really sophisticated multitrack editors, Cubasis and Auria. These are expensive ($50 each) but very capable). They are probably overkill for podcasts, but great if you want to do music also. I use Cubasis when Twisted Wave can’t handle what I want to do.
Lastly, if Microsoft would ever add Audiobus support to Skype, we would be able to record and edit multi-location podcasts entirely in iOS.
I thought I would add this note. It really makes a huge difference which audio recording app you use with which microphone. An app that gives you control over the iOS input gain settings is generally going to be a far better choice. When I have tried apps that lack this ability often times the audio quality is quite noisy. This is one reason I particularly like TwistedWave (and why I’ve not found a good way to recrd decent audio when shooting video).
Take a listen to the two field recordings I made and posted to my soundcloud field tests set.
I blog frequently and I genuinely appreciate your content.
This great article has really peaked my interest. I will take
a note of your site and keep checking for new information about once a week.
I subscribed to your RSS feed as well.