
As a tech podcaster, one of my jobs is to constantly buy new gear and then to back into reasons why I needed to upgrade my equipment. It’s in the handbook when you get started in podcasting.
On very rare occasions, though, there is an actual problem to be solved which results in the outlay of funding. I’m happy to tell you that I can justify the $500 I just spent from the money provided by all of the fine Patreon members of the Podfeet Podcasts.
A quick lesson on microphone interfaces
Before we launch into the problem and solution, I want to provide a smidge of background about microphones. I’m sure you’re familiar with the concept of USB microphones. They either come with a built-in USB cable or you connect one between the mic and the PC or Mac and the system automatically recognizes it and you’re ready to use it as a mic input.

But big-girl mics are not USB mics. They have what’s called an XLR connector. A traditional XLR connector is round with 3 large pins. In order to connect an XLR microphone to your computer so the signals are recognized, you need some sort of interface between the mic and computer. You can use a mixer to provide this functionality but there’s a lot of complexity that comes along for the ride. We had Anthony Lemos on Chit Chat Across the Pond #633 to explain mixers to us if you’re interested in learning more. I used to have a mixer and I didn’t like it one little bit.
I prefer to use a simple interface with a built-in preamp that gives me an XLR connector into which I plug my mic, and then a cable that plugs into my Mac. For years I’ve been using a Shure MVi USB interface. They’re pretty inexpensive – $129 at Sweetwater right now.
I like the simplicity of this interface. It has just a few buttons on the front to choose a digital signal processing (DSP) setting which I keep set to voice, and a volume input control and a headphone jack on the front. Really a set it and forget it device.
I monitor my own voice from my mic as I’m recording, because that’s the only true way to know if you’ve got noise or hum or any other problems coming into your recording. It’s annoying as heck to monitor your voice though, because there is latency between when the sound leaves your lips until it goes through the interface and back into your ears from your headphones. With a lot of latency, you tend to start slowing down your speech. I’ve gotten used to it but it’s still annoying.
The problem to be solved
So what’s the problem?
I actually mentioned the problem to be solved when I did the review of the Shure Digital Recording Kit. I’ve been hearing clicking on the line while I’m recording if I’ve got a heavy load on my system. There are two circumstances where I can hear the clicking.
The first is when I’m recording the live show. I’ve got lots of video I’m broadcasting to Steve, I’m recording the podcast, and I’ve got a fair amount of graphics going on between camera video and my recording app being sent in video to the live stream. I’ve repeatedly asked the live audience if they can hear the clicks and they say they can’t and neither can Steve, but I know it’s there.
The second is when I’m recording video tutorials for ScreenCastsOnline. My editor, J.F. Brissette, has a keen ear and has really helped me up my audio game to get my sound as pristine as possible. A single click sound might get past him, but when I’m recording the raw footage, I’ll get as many as 20 or 30 in a 40 minute show. Every single one of these little clicks means I have to do a voiceover of what I was saying when the click occurred, and replace the audio. I can’t just replace a word or it will sound really different and out of place. I have to replace entire sentences or phrases. It’s very tiresome and really adds to the workload.
I thought that my trusty Shure MVi must be failing but when I tested the new one in the Shure Recording kit, the clicking didn’t go away. I sold the kit to Rod Simmons of the SMR Podcast, and his audience is very happy I did as he was using AirPods as microphones before that! I went back to using my original Shure MVi.
I asked my favorite audio guru, Dave Hamilton of the Mac Geek Gab, for help finding a solution to this clicking problem. He’s not just a podcaster, he’s also a musician, so he’s all over this audio stuff. He suggested that the problem was very likely buffering because USB isn’t fast enough, and when it catches up it makes a little click. The solution he suggested was to get a faster interface, in other words one that uses Thunderbolt instead of USB. It was time to go shopping.
My requirements
Before searching I had a set of requirements.
- I didn’t want to have to sell a kidney to buy it.
- I also didn’t want something complicated.
- It positively had to have a mute button on it so I could mute my mic when recording with other people.
- I only need one XLR input since it’s just me here, but I was willing to move up to two XLR mic inputs for the rare occasions when I record with someone in the same room as me.
- I wanted something that would take up a very small footprint on my desk.
- I also figured if I’m going to move Thunderbolt, why would I buy old-and-busted Thunderbolt 2 when I have new hotness Thunderbolt 3 on this computer? No way was I going backwards to Thunderbolt 2.
Universal Audio Apollo Solo Thunderbolt 3 Interface

I looked at a lot of options, and it seemed I could either sell that extra kidney and get Thunderbolt 3, or I could get Thunderbolt 2, but I couldn’t have both. The lost-kidney models were also massive, complex pieces of hardware. The smallest ones had maybe 4 XLR inputs so even those were physically large.
I chatted with J.F. about my hunt and he explained that he and Don McAllister use a Thunderbolt 3 interface, recently rebranded to be called the Universal Audio Apollo Solo Thunderbolt 3 Interface. I decided to look at how well the Apollo Solo might meet my requirements.
Price
At $500, the Apollo Solo isn’t quite kidney-selling territory but it’s at the outer limit of what I wanted to spend. $1000 would be way overboard, and $700 would leave a mark, but at least $500 was way less than most of the Thunderbolt devices out there.
Complexity
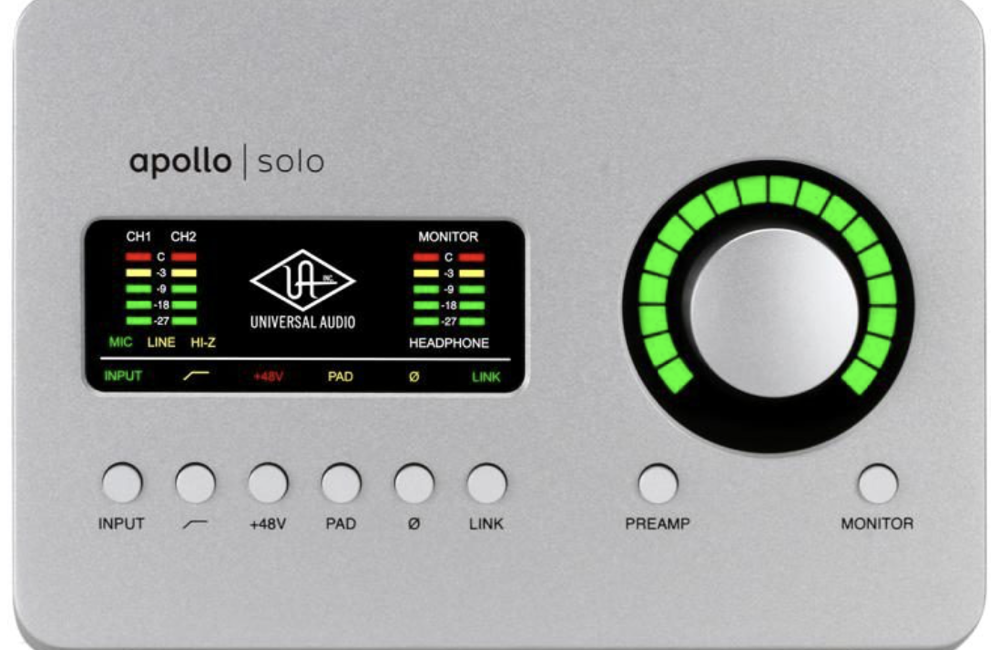
In terms of complexity, the Apollo Solo looked fairly simple compared to a lot of the other devices, but there were a lot of words in the tech section I didn’t understand and it had a few buttons on the hardware that mystified me. One of the buttons is a diagonal line that connects to a horizontal line. One is the Greek ø symbol. But it did have pretty lights and a nice giant dial on it so it was pretty pretty low on the complicated scale.
The Apollo Solo has two XLR inputs so it meets that low-complexity requirement as well.
Mute Button
That giant dial on the front controls the volume, and if you press it in, it mutes! Yay! But then I kept reading and discovered that it doesn’t mute the mic input it mutes the output to speakers or your headphones. I was so bummed! I gave up on the Apollo Solo right then and there because I use the mute on my Shure MVi all the time when I’m recording with someone else.
I started my search again and guess what? None of the Thunderbolt interfaces I could find had input mute buttons. I chatted with J.F. and he suggested a physical mute block that you put inbetween the mic and the interface. I started looking at these devices. They were expensive (around $100) and they were what my father used to describe as “ugly as sin”.
On top of being ugly and expensive, they came in two varieties. Some don’t technically mute your audio, but rather attenuate the signal so it can “barely” be heard. The second variety did completely mute but they made a clicking sound when they muted. Since my main objective is to get rid of clicks, adding them back in, even if predictably so, didn’t sound like a good solution.
I asked Dave if he had a suggestion and he said he didn’t use one because his giant, complicated interface did have a mute button. He said he knew that Leo Laporte used one and suggested I ask him. I did ask Leo and he looked it up for me. It’s the ProCo Short Stop from ProCoSound.com and it can be used as a foot pedal as well. I checked it out … but the reviews said that they could hear it clicking so that one was out too..
This caused me to put a pause on the entire idea of replacing my interface.
But then Rogue Amoeba came out with their new version of SoundSource. In my exploration of the new release, I discovered that they added the ability to put up a menu bar icon of your microphone and when tapped, it would mute your mic!
With SoundSource, I would have a predictable place on my Mac’s screen that didn’t take up my precious screen real estate while recording where I could have my precious mute switch. Problem solved!
Size
You’ve probably figured out by now that I did buy the Apollo Solo so it’s not a spoiler for me to talk about the size. In the pictures, it looked quite diminutive, and it it still way smaller than other devices, but I was surprised by how big it was. The Shure MVi is 2×2”, while the Apollo Solo is 7 inches wide and 5 inches deep. That’s nearly 9X as big. I am still fussing around with where to put it on my desk, but I’m sure I’ll find a good place eventually. The Thunderbolt 3 cable it comes with is pretty short, so my options on desk location are a bit limited by that as well.
Thoughts on the Apollo Solo Thunderbolt 3 Audio Interface
It’s probably time that I finally tell you what I think of the Apollo Solo Thunderbolt 3 Audio Interface. I LOVE it. But let’s get to why I love it after I tell you things that make me a little crazy.
When I first got it I was positively baffled with how to use it to even start recording. I was whining to J.F. about it and he suggested a video call where he walked me through the device at the very simplest level, just enough to get me started. Luckily for me, J.F. has the same interface, and he’s a musician so he understands devices like this, and most importantly he’s a great teacher. Here’s what I learned.
The big round dial on the right with the pretty yellowish-green lights that go around it is the volume dial but it serves several masters. There’s a Monitor button below it that when pushed toggles the volume between between two options: headphones and monitor. Well what the heck is monitor? On the back of the device where the two XLR connectors are located, there are also two jacks to connect external speakers. The idea I guess is people listen to the music they’re mixing on big-girl speakers or headphones and that’s what they mean by monitor. I only need to make sure the button has me set to headphone, not monitor.
But that’s not the only thing that pretty volume dial controls. Also under the volume dial there’s a button that says preamp. When that button is pressed, the volume now controls the input gain of the attached microphones. In a million years I would not have figured that one out on my own. Remember there’s 2 XLR jacks on the back? Hitting the preamp button toggles which mic input you’re controlling. This means that if I’m recording someone else in the same room, I can change our input gain independently. That’s pretty cool.
I don’t want to go through the rest of the buttons on the front because while J.F. did explain what they did, we determined that I don’t have to worry my pretty little head with them just yet.
Last week it was crazy hot and humid around here, and as I explained on the show we don’t have air conditioning , because this close to the beach, it didn’t used to get that hot. Times are changing, though. In any case, I’m super-sensitive to any extra heat, doing things like turning off monitors whenever possible. So when I touched the dial on the Apollo Solo after using it for awhile, I was shocked to find it super hot. I got out my laser temperature gauge (as one does) and it was 104°F! The box itself had some areas in the high 90s but another spot was 103°F. I’m a bit concerned about that but I’m not sure it’s unusual for the device. I’ll shoot a note to my little friend Kenneth Lindsay at Sweetwater and ask him about it.
I was surprised to find that the front headphones jack wasn’t the 3.5mm (≈1/8”) size I’m used to, but instead was the larger 1/4” for professional headphones. Luckily, I kept my giant bag of audio cables and connectors from back when I had a big-girl mixer, so I had an adapter to go from 1/4″ to 1/8″.
What about the problem to be solved?
We should probably spend a brief moment in this tome of an article talking about whether the Apollo Solo solved my main problem. It 100% did fix the problem of the random clicks! I used the interface for the podcast last week and there were absolutely no clicks while broadcasting my audio and video to the live show.
More importantly, I’ve been working on a tutorial for ScreenCastsOnline about the messaging app Telegram, and I have not once had to do a voiceover to remove a click on the audio. I’ve had to do a lot of voiceovers because I messed my words, but that’s a whole ‘nother problem no amount of audio gear will fix.
There’s one thing that’s very hard for me to get used to with the Apollo Solo and that’s near zero latency. I can barely tell that I’m actually monitoring my audio it’s so close to real time. It’s disconcerting after all these years to be honest. I looked up the latency on the Universal Audio website and they say it’s 1.1milliseconds. That’s bananas.
I would have said that I like the Apollo Solo if it only got rid of the clicks and had low latency. But there’s something else that takes it from like to love. When I’m recording for ScreenCastsOnline, as I explained I work very hard to have my audio be pristine. I even hang a moving blanket over the window in my studio to deaden the room echo, which I’m far to lazy to do for my own podcast.
For a long time I’ve been annoyed that I could hear a very low level hiss when recording. I was blown away when I started recording video and audio with ScreenFlow and there was ZERO hiss. I mean nothing. When I have a pause between words, it is simply flatlined. I’ve absolutely never heard my audio sound this good.
I wonder if anyone listening to the NosillaCast has noticed any improvement in the audio as well. I’m not sure you guys are super picky but if you have noticed a change I’d sure like to hear about it.
One complexity annoyance
As much as I love the Apollo Solo, the software that came along with it is crazy complicated and overkill for my needs. J.F. is going to give me another private lesson all about the plugins that came with the hardware so I’m going to withhold judgment on the software for now.
I do have to say that I think their software delivery has a huge upsell feel to it. You see, my device came with about a dozen plugins, but they install 191 more that I don’t own, just so they can try to get me to buy them. And they install these plugins all over the place in your System Library. They even create folders in the Application Support subdirectory of the Library for applications you don’t even own. I have directories full of plugins for apps like VST and Avid now.
Other than filling up my drive with stuff I don’t need and don’t want, there’s another problem with this. When I opened Audio Hijack from Rogue Amoeba, under Audio Unit Effects, I found these 191 plugins I do not own all mixed in with the Audio Unit effects that come with macOS. I couldn’t even tell which Universal Audio plugins I DO own. To say I was annoyed would be an understatement.
I spent hours deleting everything I didn’t own in every directory where they hid them. And then I plugged in my interface and it wouldn’t function at all! I was forced to redownload the multi-gigabyte installer and put them all back.
The good news is I wrote to Universal Audio support, and Michael B has been super helpful trying to help me solve this. He explained where to look to get rid of just the stuff that’s messing up Audio Hijack (/Library/Audio/Plug-Ins/Components), but but he did point out that every time I do a software update I’ll have to remove these unlicensed plugins again.
Then he told me about an open source Ruby script called Hide and Seek UAD Plugins. While he was quick to point out that this script is not endorsed or supported by Universal Audio, he told me others have found it useful and thought maybe it could help me out. I ran the tool from the command line and it moved the plugins to folders entitled “unused” but I haven’t yet figured out yet the process to put back what I do own. At least Audio Hijack is pristine again and I’ve probably got hours of entertainment ahead of me to learn how to get the script to help me even more.
Bottom Line
The bottom line is if you’re starting out podcasting, just get a good USB mic like the Audio-Technica ATR 2100 for $99 on Sweetwater and get going recording some shows. But if you’re going to get a big-girl mic and want pristine audio with zero latency so you can monitor your own sound without your head exploding, then check out the Universal Audio Apollo Solo. You can’t have mine because I love it too much.