
I recently walked you through the process Steve and I went through to deal with a Synology Disk Station that was running out of space. I ended the story by explaining that I pulled two of the 4TB drives, replaced them with 8TB drives, which gained me 4TB on the Synology. Then I bought a dual-bay RAID enclosure from OWC. Our plan was to pull 2TB of old raw video footage and put it on the RAID enclosure. For the cost of 2 drives and the enclosure, we’d gain 6TB total. When I finished explaining our strategy, I was awaiting the RAID enclosure’s arrival, so we’ll pick up the story there.
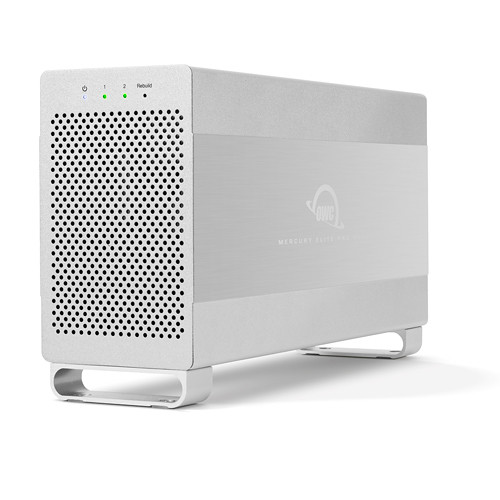
The Synology DS1019+ sports a USB 3.0 port on the front and one on the back, so I didn’t bother buying the snazziest new OWC RAID enclosure. I purchased the OWC Mercury Elite Pro Dual 2-Bay USB 3.0 RAID Enclosure for $89 from B&H Photo. I don’t get to do much hardware work these days so I was looking forward to getting my hands dirty, or as dirty as they get handling electronics.
I’m spoiled by the ease of adding and removing drives from the Synology where it is literally a tool-less process. The drives can be removed by tilting a lever, and then pulling off two plastic constraints that hold the drives in place by their side screw holes. I envisioned the OWC enclosure being much the same. I thought there’d be two sets of guide rails into which I would slide the 5 1/4-inch hard drives, with their connectors seating automatically.

Instead, working on the OWC enclosure felt like the old days. There were two sets of SATA connectors hanging on long wires along with a pair of power and data connectors wires for each of the two drives. The instructions said to drop one hard drive all the way into the enclosure, connect its two cables and then drop the second one on top and connect its cables and only then use the screws on the side to secure the hard drives.
That is a completely impossible process. I was surprised at the amount of contortion required to twist the connector wires literally 180 degrees from their resting positions, and I had to fight between the two pairs because they were intertwined. I say the process described was impossible because there is no way you could execute it with the drive already in the enclosure. The drive simply has to be suspended in the air in order to seat the connectors successfully.
I also disobeyed the instructions to put both drives in before securing their side screws. It would have been much harder to slightly lift the lower drive to move it into position to align the mounting holes. I’m a rebel so I rotated the enclosure onto its side so the drives would stay in place while I let gravity easily drop the screws into the holes.
I do have to say that when the enclosure is reassembled, it really is adorable and compact considering it has two full-size drives inside. As I said in the last article, it looks like a tiny cheese grater Mac Pro.
The OWC enclosure I purchased has eSATA as well as USB 3.1 Gen 1 ports. It comes with its own device cable with USB 3 Type-B to connect to the enclosure and USB Type-A to connect to the Synology. Sadly that cable is only 2 feet long which isn’t near long enough to place the enclosure where I want it. In fact, the OWC Enclosure has to sit on the ground outside of our cabinet because that cable is too short to reach the back of the Synology! A quick trip to Monoprice and $5 (plus shipping) got me a 6 foot replacement.
Configuring the Drives

Now that the hardware is assembled, it’s time to set up the drives as a RAID array. My plan was to set it to RAID 1, which means the data would be mirrored between the two drives. It’s not as good as a true backup from one to the other, but if one drive failed we’d still have all of the data.
I’ve only read about built-in hardware RAID, so I didn’t really know how to configure the drives after the hardware assembly was complete. Steve noticed a little dial on the backplane of the enclosure that indicated the RAID level, so I rotated it to RAID 1, connected the drive bay to my Mac and booted it up. I got two popups telling me that the two drives were not formatted in a way my Mac could read. I had sort of expected some sort of magic to occur and see just a single drive magically formatted.

I opened Disk Utility and formatted them both as macOS Extended (Journaled, on Steven Goetz’s advice) and again expected the RAID enclosure to do its magic, but instead, I got two separately formatted drives on my desktop. Hmmm.
The OWC enclosure came with a small manual, but it was targeted at people who bought it populated with drives. I found the full manual online which explained that after changing the RAID dial to the desired setting, there’s a Set button to push, and only then will it do its magic. In just a minute or two, I had only one 4TB unrecognized drive. Progress! Back to Disk Utility to format as macOS Extended (Journaled), aka HFS+. Now I had a single RAID 1, read/writable drive on my desktop. I’m sure many of you knew this is the process I should follow but for those who haven’t done any hardware (or software RAID), I figured my uninformed process of discovery would be valuable.
Connecting to Synology
Synology has a tool called File Station, which is essentially like the Finder on Mac or File Explorer on Windows. Steven Goetz told me that when the drive was plugged into the Synology, I’d see it in File Station as usbshare1. That’s sort of what happened. Evidently making the two drives into a single RAID 1 drive created two partitions, so I see usbshare1-1 and usbshare1-2.
I opened the External Devices control panel, and it shows one single drive, which was more comforting. Toggling the downward chevron next to the single drive reveals the two partitions.
usbshare1-1 is a 197MB partition formatted as vfat, which is a format I’d never heard of before. I did a wee bit of the googles and found that it has something to do with booting to EFI. The usbshare1-2 is the one I intentionally made that’s formatted hfsplus. This confirmed that everything is working properly but I hope that first partition doesn’t confuse us at some point when I forget this entire story.
Time to Move Off Steve’s Data
Now that we have this fancy new drive ready, it’s time to get to work moving that 2TB of old data off of the Synology and onto the little RAID array. This was going to be a bit of a task for Steve. His plan was to move things like old conference coverage to the RAID array. He saves both the final video he published as well as all of the raw source data. He may want to go back and remix something at a later date so he doesn’t want to throw this data away, but the chances of needing it right away on a NAS device are slim.
He set up a spreadsheet to record what he was going to move and to track how much storage he would be able to save on the Synology and also on the Drobo that backs up this data. As things like this often go, he started doing a little bit of spring cleaning while he was at it.
He identified several projects he could completely delete, but then he asked me to go into his office to look at something. He pointed at File Station on the Synology and asked, “What is this #recycle thing?”
You can only imagine the facepalm we both did at that moment when we realized that there’s a RECYCLE BIN on the Synology! We’ve only had the Synology for 9 months but every single thing we ever deleted was sitting in that recycle bin.
But it gets worse. Remember that I back up the Synology to a Drobo 5N2 using Carbon Copy Cloner. That means Carbon Copy Cloner was copying the recycle bin for every one of our file shares to the Drobo, which is also running out of space.


But it’s even worse than that. Carbon Copy Cloner has a feature called SafetyNet. Let’s say you have 10 files on your internal drive, and you back them up to an external drive with Carbon Copy Cloner. Then let’s say you delete 2 of the files on the internal drive and run the backup again. If you have SafetyNet enabled, on the destination drive when Carbon Copy Cloner runs the backup, it will recognize that those two files got deleted, but instead of throwing them away it puts them in a separate folder called SafetyNet. If you run out of space on the destination drive, it will start to purge the SafetyNet folder.

So now realize what we’ve been doing. We delete files on the Synology, which puts them in the recycle bin. Carbon Copy Cloner backs up the Synology to the Drobo, backing up not just the recycle bin, but also moving those exact same deleted files into the SafetyNet folder! So not only does the Drobo have the deleted files, it now has TWO COPIES of everything we’ve deleted.
At one point I checked just Steve’s large video folder on the Drobo (on which we had stopped using Carbon Copy Cloner a while back) and the recycle bin was 258GB and SafetyNet was 1.18TB!!! My data is mostly audio so normally I’m not a huge contributor to the problem, but my folder had another 426GB of data in the recycle bin. That’s close to 2TB of stuff we thought we had deleted happily backed up on the Drobo. I still can’t get over the fact that we had no idea we were doing this.

Once I got over being so uninformed about what I’d been doing, I realized this was tremendously good news. I knew that throwing $400 at my Synology was going to give us breathing room but that wasn’t going to solve the problem on the Drobo. I was worried I’d need to start adding drives on it pretty soon too.
But after getting rid of everything in #recycle, and everything in SafetyNet from Carbon Copy Cloner and moving the 2TB of videos off to the RAID drive, I’m happy to report that the Synology has nearly 10TB free and the Drobo has 6.2TB free. I feel like we could go ballroom dancing in all that empty space!
There was one, final step to complete before declaring victory. I went into Carbon Copy Cloner and for every shared folder on the Synology, I disabled backup of the #recycle folder and I made careful decisions on whether I wanted SafetyNet on each shared folder. In the end, only our financial/medical folder got to keep SafetyNet.
The Bottom Line
I normally like to finish my stories with a bottom line of what you should learn from the story I’ve just told. At the very least, if you ever get a Synology, remember there’s a recycle bin. I hope you learned a little bit about sizing drives for RAID arrays whether they’re in a Synology or a simple two-bay RAID array. I hope you enjoyed learning all of this along with me.
You’re posts are so often perfectly timed to my needs. I’m currently looking at increasing synology space too. I love the OWC enclosure idea!
I retired my last drobo about a year ago and use S3 S my final backup testing place instead. Since I’ve needed it so rarely, the cloud delay was fine.
And yeah. I got bit with the same recycle bin misunderstanding one the beginning of my synology adventure 🙂