
Back when I was working, I used to make video tutorials for distribution inside my company. At the time, I was forced to use Windows Vista on an HP laptop and the only screencasting game in town was Camtasia Studio. Now I’m sure that in the last decade that software has improved dramatically, but at that time, Camtasia on Windows Vista was the worst software I’ve ever used in my lifetime.
And yet, I still managed to produce video tutorials that taught thousands of people in my company to use one of our important software tools. I still meet people who know me because of those tutorials.
When I was first making them, I remember a guy saying to me, “Creating video tutorials is easy!” In one sense he was completely right. You get some software, you press the record button, do stuff on the computer while talking into a microphone, and then press stop. When you’re done, you do technically have a video tutorial and it was easy.
The point he missed entirely is that making good video tutorials is very, very hard.
I’ve made over 75 video tutorials for ScreenCastsOnline, and over the years I’ve learned a lot of little tricks that have made each video better than the last. I thought maybe if I told you about them, maybe your journey towards making great video tutorials would be shorter than mine.
Even if you have no intention of ever making a screencasting tutorial, I think you’ll enjoy understanding the work that goes into making a good tutorial. Maybe it will make you hate poorly-created tutorials more, but I can live with that!
I’m going to break this up into two parts. The first part will be all about preparing to make a recording. The goal is to teach you how to set things up so that you are as efficient and productive as you can be, while creating a video tutorial that people want to watch. The initial setup will save you time in the long run while increasing the quality of your end product.
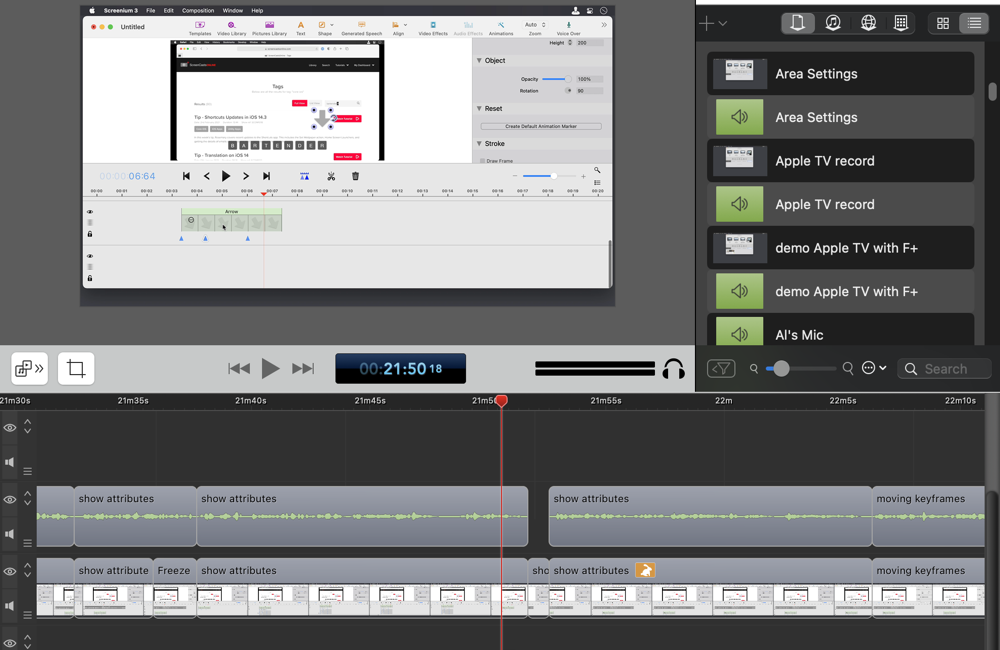
The second part will be tailored to how to actually record and edit efficiently. I think I can provide some tips and tricks that will make you faster at editing and create better edits that don’t distract your viewers. I use ScreenFlow from Telestream on the Mac, and while some of it will be specific to that tool, I’ll try to keep it as generic as I can and describe the technique before the specific implementation.
Organize a Story
I think one of the reasons my video tutorials work is because I organize a story before I start to record. If I’m teaching how to use Copy ‘Em, my clipboard manager, I don’t show what it does. I don’t start in Preference and toggle on and off each setting. I start by telling the audience why they would even want a tool like this in the first place. I don’t always say it this way, but I’m telling them the problem to be solved. I give examples of how I use the tool and how and why it helps me.
Before I start recording, I spend about a week on and off playing with the tool I’m going to demonstrate, poking every single button and testing every single feature. If there’s a manual, I’ve been known to read it cover-to-cover. If I can’t figure out how an option works, I contact the vendor and give them a chance to explain it more clearly to me, before I try to explain it to the audience.
As I learn about the tool, I start splatting topics on a mind map, using my favorite mind mapping tool, iThoughts from Toketaware. I use a mind map for this job because it allows me to ignore organization while I’m learning. In an outline or another kind of text editor, I feel compelled to write in an organized way. With a mind map, I can put ideas down and then rearrange them later as the story forms in my head.
A good example of the story-telling part is deciding when to explain the settings/preferences for an app. Sometimes the settings are pivotal to understanding how the app works. A perfect example of this is Bartender 4. Without looking at its settings, you can’t modify your menu bar, which is the whole point of the app. But other times the settings are just window-dressing, letting you change from light to dark mode, or changing the number of downloads the app allows, so I explain the settings much later in the story.

When I’m making the mind map, sometimes a section requires an explanation, and I’ll use the mind map to document exactly what I want to say. iThoughts has a Notes section that can be added to any topic bubble, which can be handy for writing out those long segments so you get it just right. It’s easier to write out what you want to say and read it once for the recording than it is to try to do it off the cuff and have to keep re-recording and editing audio.
While I’m poking every button and changing every setting in the app I’m going to teach, I’m practicing what I’m going to do in the video. If I figure out a sequence of steps that might be hard to remember when it’s time to record, I’ll document that in my mind map. Why have to figure it out later if you’ve already figured it out once? I’ll tell myself to have a certain type of file ready, like an audio example for an audio editing app, or an image for a photography app. I’ll put down the step-by-step path that tells that story. I certainly don’t document every bit of the tutorial ahead of time, but if I figure something out during my week or so of learning, I’m not going to waste time figuring it out again later.
The gentleman that just turned on the recorder and started to demonstrate a tool never told a story, he just pushed buttons and talked.
“The Most Important Thing about Good Video is Good Audio”
I once went to a talk by Alex Lindsay, the well-known computer graphics and video production specialist and founder of the Pixel Corps, and he said, “The most important thing about good video is good audio.”
I know that’s counterintuitive, but it’s true. We’ll watch videos where the quality isn’t that great but the audio is good, but we won’t watch good-looking video with bad audio. I’m not talking about investing in a $400 mic. I’m talking about removing noise before you record. It’s very difficult to remove noises after you record, so these tips will help you make sure they’re not recorded in the first place.
Turn off your heating and air conditioning. I don’t care how hot or cold you get, your recording will be dreadful if you don’t turn them off. Get yourself a fan and turn it on in-between recordings but turn it off while recording. Wear a blanket over your lap if you have to. Do you have a refrigerator running in the next room on a shared wall? Unplug it. Seriously. Maybe put it on a smart outlet switch so you can turn it off and on remotely, and even set up a schedule so you don’t forget to turn it back on.
The best way to find these sound sources is to make a recording while you’re saying nothing and then listen back to it with good headphones. If you’ve got any hearing loss, ask someone else to do the soundcheck for you.

If you’re in a room with nice, big, sound-reflecting windows and beautiful hardwood floors, it would be a good idea to do some adjustments. Put rugs down, add pillows, do whatever you can to deaden the sound. When I moved from recording in our bedroom to my own den, I moved to the front of the house so the window faced a rather busy street. I could hear the cars and planes go by (never understanding why planes weren’t audible at the back of the house) and spent way too much time doing voiceovers on segments to remove the sounds.
Steve had grommets put in a moving blanket and put hooks on the walls on either side of the window to hang it. Now when I’m recording for ScreenCastsOnline, I always block out the sound with my blanket. It’s dark and makes the room feel oppressive, but it actually speeds me up because I don’t have to rerecord because the trash truck drove by.
Does your dog have a collar you can remove with tags on it that jingle? Do you have birds you can cover to make them think it’s nighttime? Do you have a landline phone you could unplug? Have you put your phone, your watch and your computer in do not disturb so they won’t ding and beep and boop while you’re recording?
I’ve created automations with my home assistant and macros on my computer to disable the things I can, and I have written checklists for things like the dog collar and the sound blanket.
Trust me, your videos will be better and you’ll waste less time rerecording if you stop every noise possible before you start to record.
Computer Setup
Separate User Account
I have environmentally-induced attention deficit disorder. In my real life away from my computer, I can focus on one thing for a long time. I don’t pick my phone up to look at it when people are around (unless it’s to solve an argument or do some fact-checking of course). But when I sit down at my computer to record a video, I’ll start reading Twitter, editing photos, arguing with @STim in Slack, or even worse, watching TikTok and laughing my silly brains out.
My solution is that I have a separate user account I log into when I’m recording, and I don’t launch any of my play applications. I don’t log into my personal iCloud account, instead, I have a demo account. This means I can be sure I won’t accidentally show private photos or people’s personal contact information.
Remove Visual Distractions

On top of removing distractions, having a separate user account allows me to set it up to be as bland as possible. Under the tutelage of Don McAllister in the old days and ScreenCastsOnline editor J.F. Brissette nowadays, I have learned some best practices on computer setup.
First of all, I know you think that picture of your pet turtle wearing a flower lei is adorable, but it doesn’t make a good background for a video tutorial. A solid bland background is best. We use a dark grey for ScreenCastsOnline and while it bores me to tears, that’s its job. It needs to blend into the background so your viewer can focus on the subject at hand.
Viewers can be easily distracted by things like the system tray on Windows or the menu bar on the Mac. I use the app Bartender from MacBartender.com to hide every possible menu bar icon. This makes it harder to use the Mac for sure, but it’s all about the viewer, right?
As you’re recording your video screencast, you’re bound to make mistakes, and if the time is constantly changing in the menu bar at your edit points, the viewers’ eyes will be drawn to it. Remember the T-Rex in Jurassic Park who would notice things if they moved? Our lizard brains are still functioning exactly like that.

Another distraction is a changing clock. Ideally, we’d remove the clock from the menu bar entirely, but as of macOS Big Sur, you can’t. But you can obfuscate the time by changing it from digital to analog. It will still change, but the analog clock will be wee tiny so they’d really have to be looking at it to notice. The control for this is pretty buried on the Mac. It’s in System Preferences / Dock and Menu Bar / Clock (Menu Bar) and then you can flip it from digital to analog.
If you can, remove any desktop icons. If you’ve taken my advice and are using a separate user account, you won’t have all those files sprinkled all over your desktop that you swear you’re going to clean up one of these days. I use an app called Parallels Toolbox that includes a tool to put my Mac into Presentation Mode. This not only removes any files from the desktop, it hides any connected drives and puts the Mac into do not disturb mode, and even stops dock icons from bouncing.
I know this sounds like a lot of work, but most of it is set it and forget it if you use a second login for screencasting.
Screen Resolution
One thing that isn’t set it and forget is screen resolution. I know you’ve got that giant, beautiful display that you love, or even a nice retina display on a laptop, but if you make your screencast at those resolutions, no one will like you. They will be straining to read menus and preferences and they’ll never see your mouse cursor when you click. If you insist on recording in a high resolution, but don’t hate your viewers, you’re going to spend a lot of time and energy putting in animations to zoom in and out.
If you have too many zoom and pans, your audience will get urpy, and again, no one will like you. Plus, this is a lot of work for you and our goal is to make the setup help you be as productive as possible.
Unless the app you’re demonstrating absolutely demands a lot of screen real estate, it will be a great gift to your viewers to lower the resolution of your screen way down. But how far down is way down?
We produce the ScreenCastsOnline video tutorials at 1920×1080 resolution, which is an aspect ratio of 16×9. We could go to a higher resolution than 1080p, but for tutorials of computer software, that would be extra bits that add little to no value. When we record the tutorials, we set our screen resolution to a 16×9 aspect ratio, but I can’t give you a hard and fast rule on the actual pixel resolution you should use. It will be constrained by your display resolution and the tools you have to control that display.
I use the Parallels Toolbox screen resolution tool to change my 16” MacBook Pro to 1280×720 (retina) when the demonstrated application will allow me to go that low. It’s hard to work in a resolution that low, so I keep my attached external display at a higher resolution so I can do the editing and view my mind map and other notes in all that expansive space. Be sure (on a Mac) to choose a retina resolution as it uses pixel doubling, or it will look really bad when produced at 1080p.
And Now for the Hardest Part
The hardest part of making tutorials is starting. In mechanical engineering, we talk about the concept of static vs. dynamic friction. Picture a very heavy rock you have to push along a gravel road. Getting it started moving is much harder than keeping it moving. Starting to push is when you feel static friction. I find enormous static friction in starting to record a tutorial. I can find every single reason in the book not to start.
Wait, I need to look up that section in the preferences for that app to be sure I understand it. Wait, let me check my email one more time to see if the developer got back to me. Wait, there’s that hilarious TikTok guy who explains how absurd the English language is by pretending he’s inventing it in the first place.
The only way I’ve overcome it is to promise myself all I have to do is record my introduction. I don’t have to do anything else.
I switch user accounts to my screencasting account, I check that I’ve removed all my distractions, I put that blanket up on the window, and I launch iThoughts. I create a new ScreenFlow document at 1920×1080 and I save it with a name. Then I record just the audio introduction where I say, “Hi this is Allison Sheridan and welcome to another edition of ScreenCastsOnline.”
I’m allowed to stop right there and come back another time. I usually don’t stop, but I’m allowed to with no guilt. When I’m mentally ready to kick in and really get going, I don’t feel like there’s nearly as much static friction because hey, I’ve already started!
In part two, I’ll give you my top tips on how to record more easily, how to edit to make better cuts, how to deal with fumbling your voiceovers, and most importantly how to make a video that keeps the focus on what you’re trying to teach because you’ve eliminated distracting errors. It’s all about speeding you up while increasing the quality of the end product.