
I write around 5000 words per week for the blog and podcast, and I thought it might be fun to pull back the curtain to tell you about part of my process.
As I’ve mentioned before, I start by writing my raw text in the cross-platform app Ulysses. With Ulysses, I can write in Markdown on my Mac or iPad Pro with the Smart Keyboard and have it perfectly synced at all times. This flexibility is probably the main reason I start in Ulysses.
The one thing I don’t like about Markdown (and it’s not Ulysses’s fault) is that Markdown links are very simplified. You put in the words you want showing in the web browser, and then add the link to where you want to send the reader. But in HTML, I can add more to the link, and one thing I always do is add code to tell the link to open in a new tab, rather than driving traffic away from my website.
My solution is to do my initial writing in Ulysses with ugly links and then export to Markdown and copy/paste into my blogging software of choice, MarsEdit. MarsEdit supports Markdown but I can also intermingle my HTML links with the Markdown.
At this point in writing a blog post, it feels like I’m just minutes away from publishing the blog post because writing the content is the hard part. All I have to do is embed my images and I’m done! This task often takes days to complete.
Part of the problem is I can’t embed images while I’m doing the writing in Ulysses. I take the screenshots for the blog post as I’m writing because that’s when I remember what views would be interesting about what I’m describing. I can drag images into Ulysses but they make these weird little thumbnails and the content isn’t exported so it doesn’t really do me any good. There’s probably a way to do it, but the formatting is definitely not what I want.
Instead, I put placeholders into the text in Ulysses to tell me the name of which image goes where, and when I get over to MarsEdit, I drag them in. With MarsEdit, I have sweet templates set up that will right-justify the image, put some margin on the left, make it into an HTML figure so I can give you a caption, and even put a nice light grey thin border around it. It’s trivially easy with MarsEdit to make these images look good and be informative.
Often though, I run into a barrier to my clean process. Let’s take the example of my recent 2800 word-long post about how Apple apps aren’t really inside your normal Applications folder.

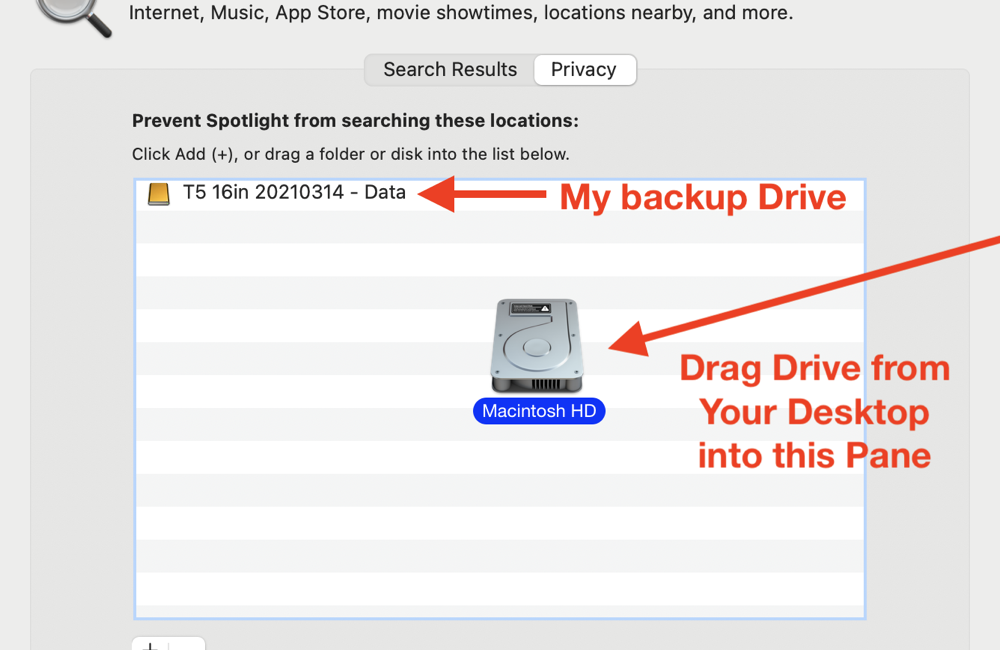
In that post, I explained a problem I was having with Spotlight indexing. I talked about several different ways to kickstart syncing, including the process of dragging your drive into the Privacy window in Spotlight Preferences. I wanted to take a screenshot of that process for the shownotes.
Unfortunately, if you take a screenshot of System Preferences while dragging in the drive, the drive doesn’t show up in the screenshot, which is the whole point.
The process I followed to get a reasonably good screenshot is a perfect example of why it takes me so long to write my blog posts. Here’s what I did to get you a good-looking, informative screenshot for that one blog post.
First I took the regular screenshot of the Spotlight Preference pane showing Privacy. Next, I needed an image of the drive that I could paste into that screenshot. The easiest way to get an icon as an image file is to select the file or drive in question and use Command-I to Get Info. Then select the icon in the Get Info window, and copy it. This will put the image into your copy buffer.

You can then open Preview and you’ll see the beautiful artwork the developer has created for their app. The one problem is that in most cases, the icon isn’t just a single png file, it’s a series of images that represent different states of the app in a file format called .icns.

Unfortunately for me, the drive icon is one of these .icns files. Oddly for Apple, it still says “Internal Hard Disk” even though it’s an SSD and it’s been many years since Apple shipped a spinning hard disk in a Mac laptop.
Anyway, I can’t use this .icns format with lots of different images embedded in it, so from here, I had to export from Preview to a single PNG. Ok great. Now I’ve got the icon for the drive and the screenshot of Spotlight’s Privacy Preferences. I could have used some fancy app like Affinity Designer to place the drive icon into the Preferences image, but I decided to see what would happen if I tried to do it in Apple’s Preview.
I opened both images, and simply copied the drive image and pasted it onto the Preferences image and it worked.

Well, as long as you define “Worked” as having a giant version of the drive nearly completely obscuring the entire Preference pane.
Now things got tricky. I resized the drive icon in Preview while jumping back and forth to System Preferences and test-dragging the drive so I could see the size I was trying to emulate. Once I had it about right, I realized that in the real dragging operation, the name of the drive was showing under the icon.
I added text in Preview and typed in “Macintosh HD” and moved it under the drive. It was the wrong size, the wrong color, and the wrong font. I know Apple uses San Francisco as the system font but even I drew the line at downloading a font just for this dumb screenshot. I set it to something similar and decided that it was close enough.
And then I realized that when you drag in the disk to System Preferences, the text becomes white with a blue background. Ok, FINE. I made the text white and then created a blue, rounded rectangle. But when I dragged the blue rectangle over to the text, the blue rectangle went on top of the text instead of under it since the most recent objects go on top.
Ok, FINE. I duplicated the white text, so the duplicated version of Macintosh HD was newer, deleted the original, and then I was able to drag the blue rectangle under the disk name in white.
Finally, I was ready for the last step: drawing a couple of red arrows indicating movement of the disk onto the window and I was done.
Bottom Line


That was all for one, single screenshot just so I could be as clear as possible in explaining what I was doing. Not every screenshot takes as long as this one did, but it’s surprisingly common for me to have to do a lot of work to get a screenshot just right.
I’m not asking for a medal or anything but hopefully when you see my screenshots on the blog, maybe you’ll smile in the knowledge that I worked really hard to make it look good.
Oh, and for those of you who have been yelling at your devices throughout this explanation, yes, you’re right, I could have used a timed screenshot to show the hard drive being dragged into System Preferences. Which I realized about an hour after I posted the article.
That last paragraph had me LOLing (is that even a word)! I love the fact that you still posted the article to show how much work you put into it, even after you realized the entire article was sort of unnecessary. LOL I laughed because I’ve done this myself! Great post.
Thanks, Todd! You have to have lived through it to realize you have to laugh at yourself.