A few weeks ago I told you about how much fun I was having learning MkDocs to create the user guide for our XKPasswd project. Once I got past the hurdle of fighting with Python (mostly by avoiding it which limited what I could do), I was able to produce beautiful documentation. MkDocs allowed me to write the content for the docs in the simple text format called Markdown, and then using a little YAML configuration file, I could link the pages together. MkDocs did the heavy lifting of formatting the HTML pages and made them easily navigable.
I thought I was done, but when I showed it to Helma van der Linden who is running the XKPasswd project, she explained to me that MkDocs isn’t the only game in town. Tools like this that turn text files into nice web pages are called Static Site Generators, and there are several of them.
Since there was a bit of a struggle with Python to get MkDocs to work, which stopped us from investigating prettier themes, I thought it might be worth investigating some of the other static site generators Helma told me about. The advantage of testing more of them was to see if maybe a JavaScript-based tool would work better for XKPasswd.
Bart taught the Programming By Stealth audience JavaScript, and if others in the audience are going to help with the development of XKPasswd, one of these other tools to create the user documentation might be a better choice.
Of the tools she suggested, so far I’ve had the most success with one called Docsify from docsify.js.org/…
Setup
Let’s start with the initial setup. I’ve spoken often about installing applications on the command line using Homebrew, and we just talked about MkDocs using the pip package manager for Python. Docsify uses a third package manager called the Node Package Manager (NPM) that comes with NodeJS. Bart taught us about NPM back in installment 127 of Programming By Stealth when were just starting to learn JavaScript. With NPM, you can install Docsify with the very simple command:
npm i docsify-cli -g
Step 2 is to initialize a docs directory in a folder of your choosing with another trivially simple command:
docsify init ./docs
Docsify at this point has already created a working website! Just like MkDocs, we can launch a Docsify webserver to see our new static website. The command to launch the web server is:
docsify serve ./docs
When the server launches, it tells you to open the server by going to localhost: followed by a port number in a web browser. It’s usually — but not always — port 3000, so localhost:3000. Just like MkDocs, this little webserver gives you live updates as you add and edit content.

This initial website isn’t very interesting. It’s created by two files, a Markdown file called README.md and an HTML file called index.html.
The README Markdown file simply has a heading that says “Headline” and a greater than symbol to create a quoted line that says “An awesome project”, which is the text of the one web page served by default by Docsify.
The HTML file is pretty simple too. It’s only 21 lines long. The head section is pretty standard, the body includes 3 lines of JavaScript with one object, and then there is a script call to docsify 4 from a content delivery network.

That 3-line script is where we’ll be adding the configuration information to change the way our documentation website appears to the user.
I’ve always said I’m not a fan of reading documentation, but I’m afraid that might not be true any longer. Maybe Bart broke something in me in Programming By Stealth with his constant “read the fine documentation” comments.
In this case, I was pretty sure there would be good documentation because it was built by people who write a tool to make documentation!
You may remember that at the end of my article about MkDocs I said that starting with a new static site generator wouldn’t be all that burdensome. This is because the real work is in writing the text of the instructions for the XKPasswd users in Markdown, and those Markdown files will be portable to any static site generator.
I copied the Markdown files I created when for MkDocs into the docs folder that I just created with Docsify and then got to work learning how Docsify could point to them and make them work together.
Adding a Sidebar
I’m a big fan of left sidebars in documentation. I like to be able to easily jump to the section I want to read, and I wanted that for XKPasswd users. To get a sidebar with Docsify, you create a Markdown file called _sidebar.md and simply put in bullets with Markdown links to each page. For example, to add my about.md document to the sidebar, I would enter a link to it in the _sidebar.md file:
* [About](about.md)
Ordering of the Markdown links defines the order you’ll see the documentation in the sidebar.
Once we have the _sidebar.md file created, we need to tell Docsify to actually render the sidebar. We do that in the HTML file with the wee bit of a script I mentioned earlier. It was pretty simple to add loadSidebar: true to the existing script and magically I now had a sidebar populated with links to each of my pages. Clicking on any of the links in the sidebar changed the body of the webpage to the content I’d created in that portable Markdown file.
I had the documentation working within maybe 15 minutes of when I started learning Docsify.
Subheadings
You could create a large number of individual Markdown pages for each concept you wanted in a manual, but that gets tedious for the user. Instead, these static site generators do a good job of letting you create subheadings for new subjects. If you do it this way, there’s no waiting for page loads because the user is simply scrolled down to the right section in your document.
When I first started working with Docsify, the sidebar had the page names I’d identified in the _sidebar.md file, and if when a page was selected, it would unfold and show the level-two headings. You create those in Markdown simply by typing two hash marks ##. But I also had level-three headings (###) but they weren’t showing in the sidebar and I wanted them to show.
The level-three headings were all of the presets Bart has built and I wanted people to be able to jump right to them in the docs to learn what they were for.
I headed back to the Docsify documentation, and learned that we can add to the wee script in the HTML file a line that says:
subMaxLevel: 3
Instantly upon saving that file, the documentation now allows easy navigation right to each preset. However, it also picked up a few heading level 2s that I didn’t think merited inclusion in this sidebar table of contents. Back to the docs where I learned that if you add a simple “{docsify-ignore}” comment to any heading you don’t want to see, it won’t be visible in the sidebar.
### Generate Password(s) with Default Configuration <!-- {docsify-ignore} -->
While this does make our generic Markdown files a bit Docsify-specific, it’s just a comment so it won’t hurt anything if I move the docs to other static site generators.

Our documentation has several Markdown files, such as how to help the project, what XKPasswd has to do with XKCD, and the maths behind the tool. In the sidebar I named that page Thar Be Dragons as is standard in the industry. Since Bart loves emoji, I added a 🐉 emoji to the title.
The meat of the documentation though is a very long file called User Guide.
When you click on User Guide in the left sidebar, it reveals all of the glorious subheadings I just described. But automatically that long list disappears when you choose another page to read in the documentation and instead expands to show any subheadings on the new page.
The magic of a static site generator doing all of this without any heavy lifting on my part is just delightful.
Navbar
With a lot of separate documents and sections within the document, the left sidebar is definitely ideal for our documentation. But it’s often helpful to also have a navigation bar at the top. Just as the sidebar was created with a simple _sidebar.md file, you create a navbar in Docsify by creating a file called _navbar.md.
If you want to have dropdowns from the items in the navbar, you simply create indented bulleted lists in the _navbar Markdown file. It simply could not be any easier.
The default theme for Docsify puts the navbar items right justified and they slide to the left as you add more. I added just a couple and it looks pretty nice on the desktop.
I’m not fond of how it works on mobile though. Because of the small screen, the sidebar and the navbar aren’t visible by default. They’re both collapsed down into a hamburger menu at the bottom left. When you select the hamburger menu, the navbar and the sidebar are all in the sidebar, which is very confusing.
Everything I put into the navbar is a link to something external, like XKPasswd itself, the GitHub project page, and a link to Programming By Stealth. So the first thing people wanting to read the documentation are likely to click on in the sidebar takes them somewhere else.
I think in the end I’ll have to abandon having a navbar and instead maybe put these links at the bottom of the sidebar so people can see them but not immediately click them and leave the documentation.


.nojekyll
Now that we have our _sidebar.md file and _navbar.md file, there’s one more thing we need to do. By default, GitHub Pages ignores any files that start with an underscore. I don’t understand why this fixes the problem, but if you create a hidden file called .nojekyll in ./docs, it will prevent GitHub Pages from ignoring files that begin with an underscore. You don’t put anything in this file, but its mere existence tells GitHub pages to let you have your sidebar and navigation bar.
Subdirectories
Our documentation isn’t terribly complicated and is only a handful of files, but if you’re creating complex documentation you can create subdirectories for your files. Each subdirectory can have a different navbar and sidebar by including new ones in the subdirectory.
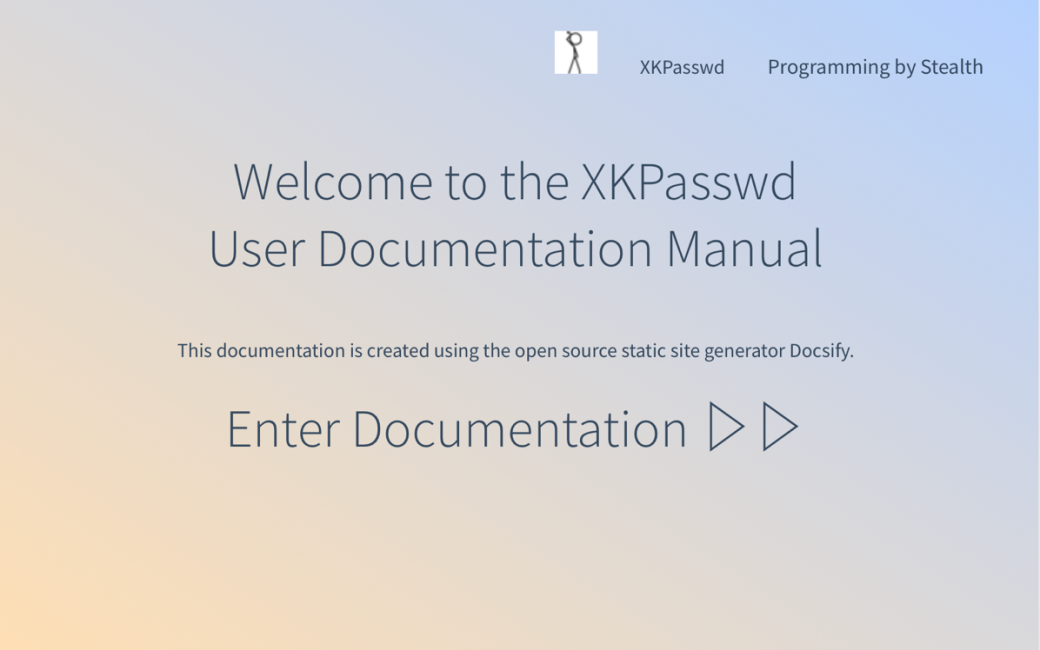
Cover Page
I figured out how to create a cover page for the documentation – I bet you can guess how! You’re right, you create a file called _coverpage.md. I don’t think I’ll keep it because it’s really kind of a waste of the user’s time to have to click through, but it was kinda pretty. It has a nice pastel gradient that changes each time you refresh the page.

Themes
One of my assignments in investigating other static site generators was to see if change themes for the documentation could be any easier.
The user docs for Docsify give links to the content delivery network (CDN) for jsdeliver.net for 3 alternative themes. To switch themes, you simply plop any one of these links into the bottom of the index.HTML file to change the theme.


I put screenshots of the four themes into the article about Docsify, but of the four, I think the default vue theme is the cleanest and most elegant of them all.
But I must carry on and see if I can crack the code on how we could create our own theme just to see if it’s truly daunting like MkDocs or if it follows maybe a bit more standard way of creating themes.
docsify-themeable
The documentation for Docsify linked to one more theme called docsify-themeable. This theme is designed to let you change it using standard cascading style sheet syntax, also known as CSS. They give clear instructions (for those who understand CSS) on how to link to the CDN for the base simple theme, and then how to create a custom CSS file to change the look and feel of your documentation.
They even give quite a few examples of ways to modify your theme using custom CSS.
I am not a CSS person (but Helma is) so it’s possible she’ll become inspired to make our documentation prettier or maybe match the theme of XKPasswd itself, but for now, I like the very simple theme that comes with Docsify. Maybe with docsify-themeable she can figure out how to make there be a navbar on mobile instead of collapsing it into the sidebar.
Search
While I read manuals more than I used to, I’m still a big fan of a search box so I can jump right to what I want to learn. Docsify has a plugin architecture, and one of them lets you add a search box. Again, it’s just a script tag to a CDN for the plugin that you add to the HTML file.
As soon as I pasted in the script link to the search plugin and hit save, the XKPasswd documentation instantly had a search box. The documentation shows a lot of options on how to configure the search box, but I’ll admit that I didn’t understand most of it.
The only tricky thing is I figured out how to change the default text in the search field from “type to search” to “Search me ¯\_(ツ)_/¯”. I felt very clever doing that.
Here’s the thing about Docsify search though. While it appears to search all of the Markdown files and returns accurate and complete results, clicking on those results in the sidebar did not take me right to where it found the result of my search.
For example, if I type in WEB32, which is one of the presets, it finds it in two places, the first of which is under the heading Presets. If I click on that search result, it highlights the heading “Presets” in the sidebar under User Guide, but it does not scroll to the content it found. It doesn’t even scroll down to the Presets level two heading, much less the level three heading for WEB32. It doesn’t start at the top of the User Guide either, it scrolls partway down into the Copying passwords section. This is super confusing because you end up searching the page to try to figure out why search took you there.

I’m hoping somewhere in all of the configuration options for search there was a hidden nugget that meant, “If I click on a search result, scroll to the result of the search”! Maybe someone smarter than me can find that setting for us.
Bottom Line
The bottom line is that as much as I adored learning MkDocs, I have to say I like the resultant documentation much better from Docsify. It’s cleaner and more elegant, and people who are fluent in CSS will be able to make their documentation even prettier with Docsify and the easy theming options. There are more plugins I haven’t even explored yet so there’s lots of fun to be had.
There’s another reason I’m now a Docsify convert. Just like with MkDocs, I can push it up to my GitHub repo and you can view the GitHub Page to see the beautiful documentation in its current form. I don’t even need to run any code to tell GitHub to create the Page – it just works.
But that’s not all. With Docsify docs, you can clone my repo from GitHub and run docsify serve and you’ll have a local copy of the docs in all their beautiful form. No need to install NodeJS to get NPM, and no need to install and run Docsify itself, it just works right from the clone of the repo.
If you’d like to see the docs in the glory that is Docsify, check them out at podfeet.github.io/… or you can clone the repo at github.com/podfeet/docsify-user-docs-xkpasswd.