 I was chatting with my daughter Lindsay the other night about a photo she took using Snapchat. She said she took the photo with Snapchat because it has a built-in low light mode that works much better than the built-in camera on the iPhone. You know I enjoy photography as a hobby with my mirrorless camera, and I like to use the more advanced features, so I thought it was time we took a look at one of the 3rd-party camera apps that brings advanced features to your iOS device.
The app I’d like to tell you about is called ProShot from riseupgames.com/…. It’s free with in-app purchase. The in-app purchase is really cool but I’m going to save it till the end. I should mention that ProShot is available for Android and Windows Phone as well as iOS.ProShot gives you nearly the complete control you’d expect on a fancy pants “real” camera. When you first open ProShot you’ll see controls around the edge of the screen. In the upper right it will say Auto. If you tap on that, it brings up a little wheel where you can change it from Auto to Program mode, full Manual, and two custom options.
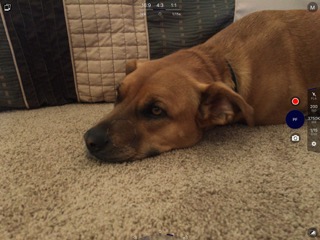
Simply tap the shutter button on the far right to take a photo, or use the red button above it to take a video. If you leave ProShot in Automatic mode, you still have a little dial at the bottom of the screen for exposure compensation. You can increase or decrease the light by up to 3 stops in a very intuitive interface.
 When the camera first comes up it’s in Continuous Auto Focus mode and you know that because the shutter button says C-AF . You’ll see a little circle in the middle of the screen just begging to be moved around. Drag it around to change the focus and exposure to whatever you’ve pointed at with your finger. When you do this, you’ll notice that the shutter button has changed from C-AF to PF. Not sure what PF stands for but if you want to get back to continuous auto-focus, just tap the circle again and it will revert back.
You can also lock the exposure by tapping on the AE lock button on the top of the screen, and then dragging that icon around. Nice if you want to set exposure on one point but then reframe the photo. Tap again to turn it off.
The iPhone camera app does all of this too but it doesn’t invite you the way ProShot does so it’s easy to forget it’s there or not even realize that it’s there.
Across the top you can select from three aspect ratios for your image: 16:9, the default of 4:3 and square at 1:1. Right below the aspect ratios you can see the f-stop and shutter speed that has been selected since we’re in auto mode.
Let’s jump out of Auto mode now and have some fun. I mentioned you can change to Program or Manual mode and you’ll notice on the iPhone that Aperture priority and shutter priority are missing. iPhones have fixed-aperture lenses, so no application can truly change the aperture.
With Program Mode selected, we get new options on the right side of the screen next to the shutter button. In Automatic we could only choose to turn the flash on or off or auto, but now we have control of the ISO from 50 to 1600, which allows you to change how much light is absorbed by the sensor. With high ISO settings you can introduce noise into your images so use this feature with caution.
We can also set the white balance in Program mode. We can choose candlelight, Fluorescent, flash or overcast but we can also choose to set the color temperature manually. Setting the color cast was very easy and intuitive.
With full manual mode, in addition to ISO and white balance we can also control the shutter speed from 1/2 second to 1/8000th of a second. I read the FAQs on the Rise Up Games website and they explained that the options you see here do depend on your hardware so if you’re on Android you might see different options than iOS, and the type of Android phone you have can affect it as well.
But wait, there’s more! In the bottom right is a button that would have been a mystery to me if I hadn’t watched the excellent video on the Rise Up Games Website. This button gives you extra cool functionality.
First off all, you can do bracketed photos. This is super useful for making high dynamic range, or HDR photos. With HDR, you take photos at multiple settings and then blend them together to take one well-exposed image. You can take HDR to an extreme and make artsy fartsy photos but it’s quite useful when you have say a really bright sky and shadows from something in the foreground. The bracketing option on ProShot lets you choose 2 or 3 shots, and change whether it’s the shutter, ISO or exposure that’s changing and move a slider up to ±3.
I tried using ProShot with the Exposure setting to bracket photos and couldn’t get it to work. I suspect it’s operator trouble but I fiddled with it quite a bit. I changed it to ISO for bracketing, and I got both an over and under under exposed picture and a well exposed version just as you would expect.
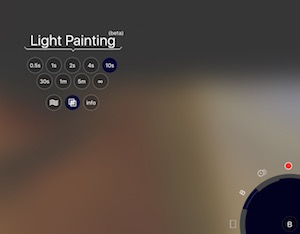
 Light painting is a fun photography technique where you take long exposure images of cars going by at night or you have someone dance around with a flashlight and get interesting images. Within the Light Painting section you choose how long it will expose from 0.5s to infinity. You can choose to use Light Trails mode which works without you needing to know very much, or you can use Light Add mode which acts more like Bulb mode on a traditional camera. The best part of Light Painting in ProShot is that it has an info button that takes you to their web page explaining how to use it. I played with it a little bit during the day with a lamp but it’s just not the same, can’t wait to play with it at night.
In the dial on the bottom right also lets you choose to do Time Lapse photography, where you set the interval and duration. You can even choose it to save each image so you can process with another tool, or to save it as a movie file with control over the frames per second. And finally you can change your video settings from 720p, 1080p, 4K if your camera supports it, and the frames per second from 24 to 240fps.
Whew! That’s a lot of options! Just a few more, I promise! Over by the shutter button there’s a little gear where you can turn on a thirds grid, and show whether your camera is level too. I also liked that you could change the color of the interface. At first it was a pale teal green with white letters and I found that a bit hard to read, so I changed it to dark blue so the white letters were more legible to me.
To view your photos you swipe from left to right on the screen, or tap the little images icon in the upper left. That images button is important because if it’s pulsing it means it’s still processing the images, which can take a little bit of time if you took several shots. After viewing the photos you can swipe back to get into the camera mode again. These photos (if you allow access) will be stored in your camera roll. I found that on occasion, if I bounced out to Photos on the iPhone to delete my test images and came back to ProShot, all of the controls were gone from the camera. I couldn’t even take a photo. A quick quit of the app and relaunch brought it back so it wasn’t a huge deal.
I also had a few screen problems when using it on the iPhone. It sort of jammed up the menus into a pile and made them unreadable. Again a quick quit of the app and a relaunch and it came right back to normal. I didn’t do enough testing to find out if it was related to changing from landscape to portrait but it only happened a couple of times.
Ok, I told you this had in app purchases at the beginning. So what else could ProShot have that you would need? Well it’s not all about you this time, the in-app purchases are donation amounts. So basically this developer has cracked the code on how to make his app shareware from the iOS App Store.
It’s hard to find so I want to tell you where it is. If you tap on the gear on the right that lets you change the color scheme and turn on the grid, there’s a button that says “help make ProShot better”, you’ll get an option to donate anywhere from $1 to $20, whatever you think it’s worth. In the About the app, the dev Eddie Kezeli actually thanks his mom, dad, grandma and grandpa. How can you NOT donate to this guy for such a cool app and honoring those who raised him? Go check it out at Rise Up Games.
