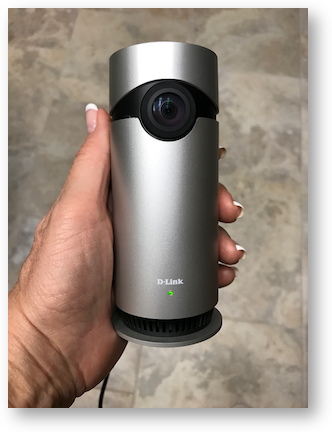
 You’ve heard me complain about the setup process for virtually every device from the Amazon Echo to the Hue Lightbulbs, but this time it’s another story. D-Link just started shipping the Omna 180 Cam HD, the very first HomeKit-compatible indoor security camera and it’s fabulous.
Steve has been wanting an indoor security camera for a long time, but he wouldn’t go with one that wasn’t HomeKit compatible for security reasons. When the Omna was announced, I pre-ordered it directly from Apple, with the plan to give it to him on his birthday in April.
But then I realized two things. A) I couldn’t wait to give it to him, and B) having this installed before we go on a 2 week vacation makes more sense. We have a TSA Agent who lives in our house while we’re gone, but for when she’s not around this would be really useful. The other thing that helped my decision to give it to him early was that it arrived more than a week early!
The Omna is really small. It’s only 2 inches in diameter and round 5 inches tall. It’s a silver cylinder with a fisheye lens about a quarter of the way down from the top. Before I tell you everything it does, let’s talk about what’s normally the annoying part, the setup.
Setup
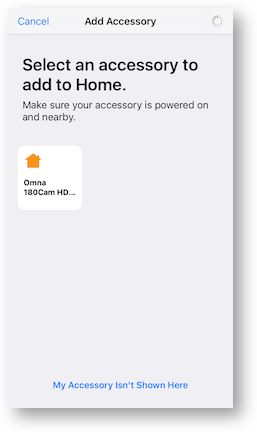 Steve took it out of the box, plugged it into power via the included MicroUSB power adapter. He looked at the wordless picturebook instructions that said to download the app next. He found the Omna App for his iPhone, installed it, and it immediately asked for permission to access our Home data. It’s odd wording but Home is the name of the app for HomeKit. As soon as he pushed ok, it showed the home we added previously for our Hue lightbulbs. Steve tapped the very obvious Add Accessory button on screen.
The instructions said to make sure the LED on the Omna was blinking orange, which it was. The next screen asked us to select an accessory to add to Home, and in a few seconds the Omna 180Cam HD was there ready for the tapping. It then asked permission to add the accessory to our network and he tapped Allow.
The next step was exactly like the Hue lightbulbs. HomeKit-compatible devices have a set of numbers printed on a sticker (and on the packaging). You hold the phone up to the sticker, it scans the number and you’re done. On the next screen we were able to change the name (he called it Fam Cam) and select a room into which we wanted to place the Omna. Homes have rooms and he selected our previously created Family Room.
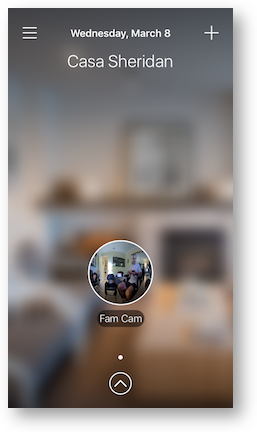 Immediately the Omna App showed the name of our Home, “Casa Sheridan” and had a little round screen showing the Fam Cam. A tap on that and we were looking at live video. Seriously, this entire setup took maybe 10 minutes total including taking screenshots for the show notes. It was a flawless and obvious setup process. I have never set up any device that was less trouble than this … ever.
Before we get dig into the features, I would be remiss if I didn’t make it really obvious to you that the Omna security camera only works with HomeKit, which means you have to have either an Apple TV or an iPad you’re willing to leave home and available at all times. It doesn’t work with Android, only iOS.
Features
Live video from the Omna is beautiful. It’s 1080p and D-Link says they have “de-warping” technology to compensate for that 180 degree view. The de-warping is very effective, so the resulting video is not at all fisheye looking. You’ll notice ceiling corners look like a gradual arch, but it’s not like a fun house mirror like you normally see.
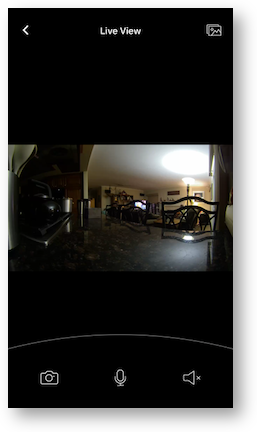 The Omna includes two-way audio so if you give the Omna app permission to access your mic, you can actually speak out of the camera. If there’s someone near the camera they can speak back to you. You can also mute your mic so they don’t know you’re watching, and change the volume of what you hear from the camera.
At the bottom of the main screen of the Omna app, there’s a little up arrow. If you tap on that you get three options: Live view, SD Playback and Settings. Instead of using a cloud service, Omna has a microSD card slot in the bottom so you can record your own videos. The upside to this is there’s no monthly or yearly storage fee and videos of your home are not being sent up to the cloud. The downside is that the videos are only stored in the camera. Steve pointed out that if someone broke into your house and took the camera, you’d have no way to recover the very video you wanted to capture.
We popped in a MicroSD card, went into Settings and turned on Motion Detection. The settings page for that is really quite cool. You get a 4×4 grid overlaid on your live video and then you tap on any of the areas from which you don’t want to detect motion. Maybe you’ve got a fishbowl on the counter right next to the camera, you would’t want your goldfish’s motion sending you alerts, right? You can set the motion retrigger delay from 30sec to 5 minutes. You also have a slider for how sensitive you want the motion detection to be, from 0-100%.
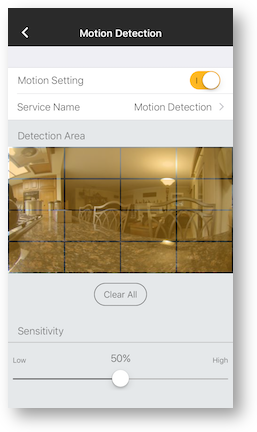 Now that we had motion detection turned on, I wanted to turn on notifications. This required a trip to the Home app from Apple. The Home app also shows the live video feed from the Omna which is cool. In addition to the FamCam there’s also a box for Family Room Motion Detection.
I have to say that the Home app from Apple is about as opaque of an interface as Snapchat. For example, tapping on the Family Room Motion Detection icon does nothing at all. Tapping and holding brings up a Motion sensor Ready page, but also doesn’t do anything. Also on that Ready page, there’s a button that says Details. It’s only after you tap on Details that you canturn on Status and Notifications. Turning on Status means that the main screen of Home will show if motion is detected. Finally I was able to turn on Notifications. Remember, it’s Home making this so hard, not Omna!
With the Motion Detection sensitivity set to the default of 90%, I trotted outside to wash the car. I started getting notifications about every 30 seconds! Ok, maybe 90% sensitivity is too high for a house with two cats and a dog. I brought it down to 75% and then I only got a notification every 2-3 minutes. Ok, how about 50%. That seemed just about right because the next time I got a notification was when Steve walked into the room. That’s perfect for me.
After we’d been playing with the Omna for a few hours, we took a look at the SD card through the Omna app. It had captured a LOT of videos! Of course the best one was of our cat Ada walking up onto the table and looking right at the camera. It practically doesn’t count if you don’t get that shot, right?
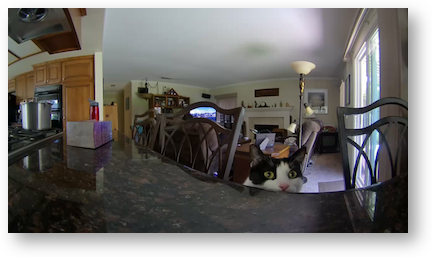 I’d really like the stored videos to be viewable with most recent at the top. While it does have the most recent day at the top, the day’s videos have the most recent at the bottom. But that’s not my biggest problem. When you look at the stored videos from your phone, there is no Share button. It seems obvious that you’d want to do that. The only way to get those videos out is to go home, pull the MicroSD card, find your dongle and drag the videos into your computer. Luckily this is something easily fixed by a firmware update, so hopefully they’d put it in.
Back to stuff to like. After Steve added the Omna to our Home using the Omna app, I was able to see the Omna live video from the Home app on my devices, before installing the Omna app. By adding the Omna app I gained all of the advanced features to control settings but it’s pretty cool that I was able to see the live video through Home without doing anything at all.
With Home you can add people to view your Home, so I tested it with both Lindsay and our TSA Agent house sitter. Two interesting bits. When you add someone, you get to decide whether they can edit anything. I also learned that you have to use their iCloud account and that email address has to be in your address book. An extra level of security. After I added both of them to our Home, they were able to view the live video and mess around with our Hue lights.
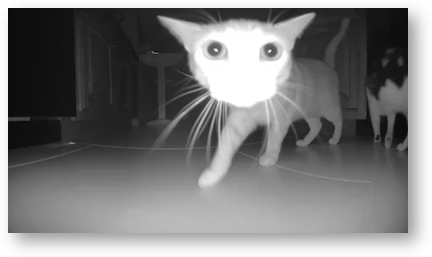 Omna has one other cool trick up its sleeve. It has two infrared LEDs that come on in the dark to light up the room. This allows the camera to see up to 16 feet in complete darkness. We turned it on in complete darkness and recorded our pets wandering around the kitchen and the black and white video from the Omna was fantastic. Of course this means I felt obligated to put a screen shot of an infrared cat into the show notes as well.
Mysterious problems healed themselves
The experience with the Omna wasn’t 100% perfect, but oddly all of the problems seemed to heal themselves. For the first several hours, only Steve could play back stored videos from his iPhone. When I looked at the videos with my iPhone, I could drag the slider through them but hitting play did nothing. Then suddenly many hours later they started working just fine.
Another example of Omna healing itself happened during setup. I tapped on the Firmware button and got an error message. I tried several times with the same problem. Many hours later I tried it again an it worked without issue. Weird.
Here’s a third example of healing. When you’re in live view, you have three icons across the bottom: a still camera, a microphone and a speaker. You can toggle your mic on and off, and the speaker allows you to mute audio coming from the Omna, but the still camera was greyed out and non-responsive. In the upper right there’s an icon that looks like it would take you to Photos. I tapped that and sure enough, it asked for access to to my Photos. It opened up Photos and I could select one, but then it simply went back to the live video. It was a mystery what this was supposed to do.
Many hours later I looked at live video again and now the still camera icon was not greyed out. I tapped it and it instantly took a picture of the live video and whooshed it into Photos! I do not know how it healed itself. I think the purpose is to allow you to take a screen grab if you get a notification and you see something in your house of concern. I still think you should be able to grab the entire video remotely, but a screen grab is better than nothing.
More fiddly bits with Home
If you can’t control your Home devices when you’re away from home, it’s sort of a useless service. When we first added Omna to our Home, I switched over to our 2nd network (the one with the icky non-HomeKit-compatible devices), and I wasn’t able to access anything in Home.
In order to use Home away from home (see what I did there?) you have to have either an Apple TV or an iPad set up as a Home hub. I’d set up our Apple TV as a Home hub back when we got the new Hue hub. For some reason, it had stopped working. I started doing some reading online and some testing. You’re supposed to be able to go into Settings, Accounts, iCloud and see HomeKit. But I did not see it. I bothered Joe Dugandzic of Smarter Home Life and Mikah Sargent of iMore because they’re really good at this HomeKit stuff and I’m pretty much a novice.
After chatting with them, I figured out the problem. Steve had created our Home, and Steve’s account was the one connected in iCloud on the Apple TV, but the documentation warned that you had to have two-factor authentication turned on. I switched the Apple TV to my account with two-factor authentication, then we both deleted the Home he’d created, and then I recreated the Home. Boom, there’s HomeKit showing up in the iCloud settings on the Apple TV.
We left the house to run errands. Steve tried to access the live video and it said it was off line, but I was able to access it just fine. Back to bothering Mikah. We asked him whether only the iCloud account that created the Home would be able to see it remotely and he assured us that wasn’t the problem. He suggested Steve go into iCloud on his phone, and turning Home off and on again. Yup, the age old solution! It didn’t work the first time, so we turned home off, rebooted his phone, turned it on again and this time it said “Saving”. Then and only then was he able to remotely get access to our HomeKit devices again.
Then the next day we were at the gym and I couldn’t access anything from the Home app, but Steve could. I had to restart my phone to get back into Home. I have to say, Home is one of the fiddliest apps I’ve ever used from Apple. Again note, this is not a problem with the Omna app, but rather with the Home app from Apple.
Bottom Line
Bottom line time. The Omna 180Cam HD from D-Link is a fantastic indoor security camera, is super easy to set up with the Omna app, and provides high quality, 180° video of your home, even when your home is in pitch darkness. For $199 directly from Apple, we’re really happy to finally have a secure, HomeKit-compatible security camera. If you’re looking for a device with hours of entertainment trying to set it up, you’re going to have to look elsewhere. The Omna is too easy.

I have a Foscam security camera installed at one residence and after going through the app setup, it worked fine. Since I have a Synology NAS, it also comes with two licenses for security cameras. I had to use the MAC address to add it, but all the recordings are saved there and rotated out based on how much storage I wanted to devote to the recordings. I have the ability through the FOSCAM app to control the camera (change direction, up/down/left/right( as well as speak through the mic. I get quite a few motion alerts, most of which I can easily disregard, but when we were in Hong Kong and Tokyo recently, it was a bit of reassurance.No Homekit futzing.
Glad you’ve had a good experience with FOSCAM. My experience with FOSCAM was 100% horrible. Lindsay and I worked for HOURS and eventually beat it into submission. The next time I went to her house she told me she finally tossed it because it stopped working again. Life was too short to mess with it.
Sure you’re not futzing with HomeKit, but you’re also not as secure as we are. I’m not willing to make that tradeoff so I’ll keep using HomeKit as they improve it.
I’ve enjoyed my omna cam with one exception. I found it odd that there was no way to turn it off other than unplugging it. I don’t like having a camera on me while I’m at home and my wife especially doesn’t. My ultimate solution was to plug it into an idevice so I could control when it was powered on and that does the trick. It would be nice however if a future firmware update could add a power on/off feature.
Jay – that’s a GREAT point! I hadn’t even thought of that. We’ve been using it to communicate during the day between us. I also used it to check to see our lights were on in the family room, and when I found they were on, I used HomeKit to turn them off (they happen to be the Hue lights).
You came up with a great solution!
I was so excited to get his camera! I had the Dropcam for about 3 years and now the Logi circle (24 hours of cloud storage free plus ability to download or share the video). And now this one. I was reallly looking forward to getting a HomeKit compatible camera, where I could activate a scene that said “hey Siri, keep an eye on the kids room”, while my youngest daughter slept so when she woke up I would be notified because She sometimes doesn’t make a peep. Well, like you repeated motion dectedtion alerts later i couldn’t stand it. Like I can’t even have the camera on be it wants to notify me of movement and there isn’t an easy quick way the turn of the notifications. And it seems impossible to setup a scene because “motion detection is always on” the home app told me. What I really like about the logi camera is that it records throughout the day activity, around motion, so a 1-5 minute clip that I can see that has a grey bubble for low activity or a blue bubble for high activity. Then when a nap comes around, I go into its settings and turn on the notifications. That last part I’ve always wanted to get rid of but this OMNA is not solving. So, it has a couple more days, I’m gonna fiddle with it some more but if I can’t get the ability to turn I’d just the motion detection with Siri, it’s gonna get returned. Enjoy! And thanks for writing your article, I found it through iMore.