4 years ago, I told you about my wicked cool new router, the Netgear Nighthawk X8 AC5300 tri-band router. I bought it about 3 minutes before the whole mesh router craze hit the market. A while later, I tested it against Netgear’s Orbi mesh router and the “normal” router actually outperformed the 2-unit Orbi for the shape of my house.
In early 2019, I had Dave Hamilton of the Mac Observer on Chit Chat Across the Pond to talk about mesh routers, and I learned from him that I could add an extender to my network and actually get some meshiness. I bought a Netgear extender and it really helped increase coverage for some of my more challenging devices like my outdoor Ring cameras and floodlights.
But sadly, a few months ago we started running into network problems at Casa Sheridan. At first, it would be weird WiFi dropouts, then sometimes the WiFi would fail first and a few minutes later we’d lose our wired connectivity as well. I’d reboot the router and things would be better for a while but then it would happen again. When I attended MacTech, I asked Dave (and other networking types) about the problems I was having. I asked how to test for the root cause of something like this. No one had a good answer for me. Part of the problem was that it was so intermittent, happening maybe once or twice a month at most, so experiments were difficult to conduct.
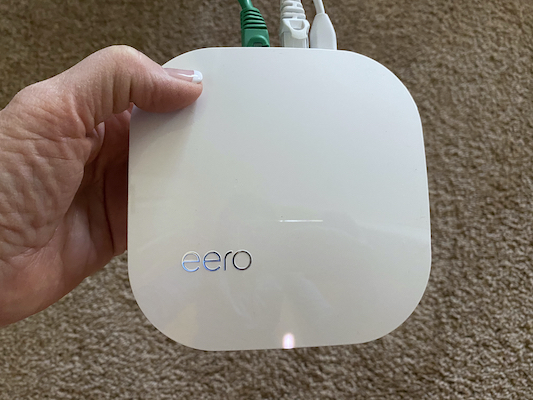
In late November, it failed yet again, and I decided it was time to move on. Black Friday arrived and I found a deal for $50 off a set of 3 eero Pros through Best Buy. The deal is gone now, but since I know you’d ask for it, I put a link to the same system on Amazon. Note that you don’t have to get 3 Pros, they have lower-priced sets with one Pro and 2 Beacons, but I was too lazy and time-constrained to figure out which one I needed so I bought the one with 3 Pros.
You may ask why I chose eero, and it’s because Dave recommends it very highly, and he has extensively tested pretty much every mesh router system out there. I know eero has been a sponsor of his on the Mac Geek Gab, but I also know him to be a man of incredible integrity, and I trust that he wouldn’t continue to recommend them so highly if he didn’t believe in the product. Also, my good friend (and Apple Certified Consultant) Pat Dengler has been singing the virtues of eero for a long time and I figured it was time to join the cool kids.
While I was waiting for my new toys to arrive, I did what I should have done a long time ago; I did some googling on how to fix this kind of problem. One forum suggested resetting the Netgear router to factory settings. That sounded fun, so I used the web interface to export all my settings so I wouldn’t lose my static IP reservations for my Drobos and PLEX server and a few other things. I did the factory reset and reimported my settings.
And wouldn’t you know it, the darn router started working flawlessly. My shiny new eeros arrived and I couldn’t justify opening the box! I’d sit there working along with lovely internet with the eero box mocking me in the corner begging me to open it. But that just didn’t make sense. Plus, I was kinda busy with the holidays and all. But still, I was so bummed that my Netgear was working so well.
And then this week, I got a late Christmas present — my Netgear router failed again! I was so happy!
Plan of Attack
Once I knew I was really going to convert to a new router, I realized I needed some careful, Dorothy-level plan of attack.
Like any good NosillaCastaway, I have a stupid number of devices on my network. Of course, we have iPhones and iPads and Macs and AppleTVs like everyone else. But I also have backup iPhones, iPads and Macs. I have devices I use for ScreenCastsOnline, and I keep at least one device back of every variety in case of hardware failure.
Like any good NosillaCastaway, I also have embraced the Internet of Things to automate my life. I pretty much blame Denise and also Joe for getting me to dive in so deeply. I don’t think you realize how many devices you really have until you start diagramming them out in preparation for a network move like this.
I have been keeping two networks going for a long time. I have my main “good” network which houses my Apple devices and anything HomeKit-compatible. I also keep a guest network for non-HomeKit devices or if a stray Android or Windows device comes into my home looking for WiFi. The cool thing about guest networks is that anything on that network is isolated not only from the good network but isolated from anything else on the guest network. So let’s say that Wyze gets hacked (really hacked, not lost database without passwords hacked). The Wyze devices can’t crawl over and mess with my Ring floodlight cameras.
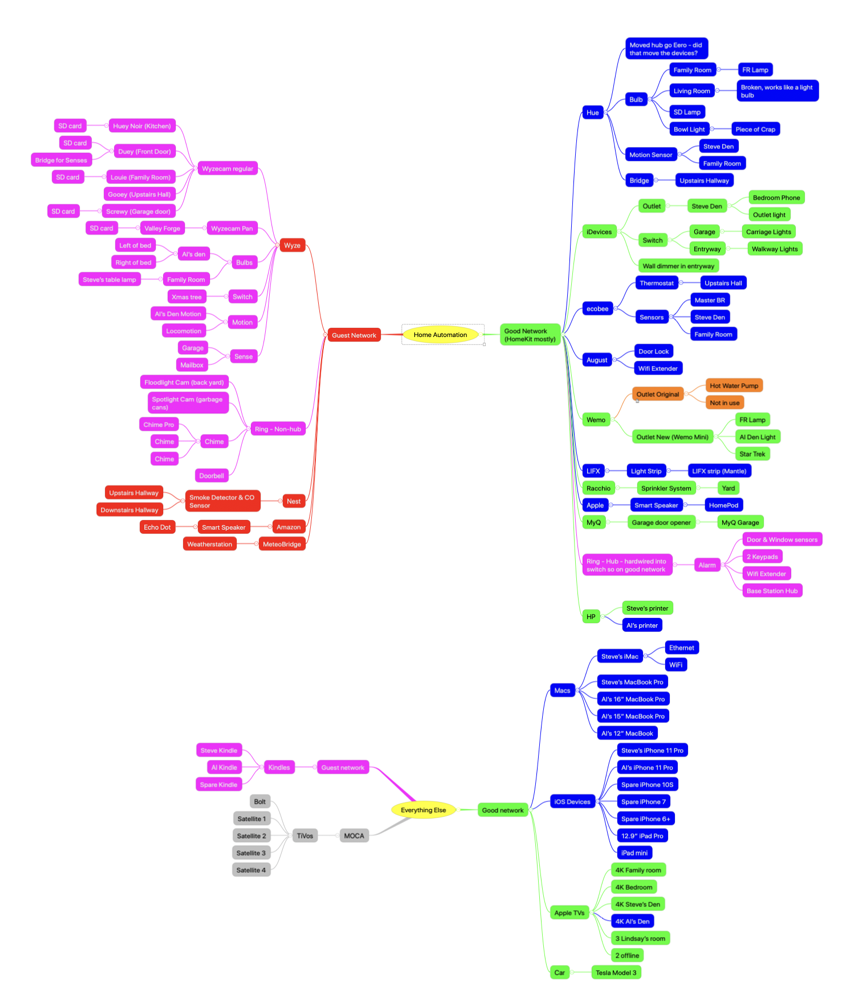
I started a mind map awhile back to document my network and before embarking on moving everything over to the eeros from the Netgear, I brought it up to date as well as I could from memory and as we started moving devices I added anything I’d forgotten to the diagram.
I discovered that I now have 55 IoT devices on my network! That’s bananas, isn’t it? The plethora of vendors is truly astounding too. Hue, iDevices, ecobee, August, Wemo, LIFX, Racchio, MyQ, Ring, HP, Wyze, Nest, Amazon and MeteoBridge. And keep in mind, the 55 devices do not even include any of my Apple devices! And every single one of them has to move.
Perhaps you’re saying to yourself, “But Allison, if you just keep the same SSID of your network, the devices will magically float over to the new router!” Well, that could have been true except for a couple of problems. First of all, on the Netgear, to make some of the IoT devices connect properly, I had to separate my 5GHz and 2.4GHz networks into separate names, or SSIDs. Mesh routers don’t allow you to do that, so by definition, I had to change the name. I also had some devices set up with static IPs as I mentioned earlier and those IP ranges wouldn’t work on the new router. You see, Netgear uses the 10.0.0.x IP range, while eero uses 192.168.4.x.
If any devices couldn’t make the jump automatically, I’d be in a world of hurt trying to move them if the original network was no longer there.
Ok, so now I’ve sized the problem so it’s time for a plan of attack. Here were the options I considered:
Option 1 – Remove the Netgear and put eero in its place
This was a very bad idea. With so many devices to move and with virtually every IoT device being its own little nightmare to mess around with, there was no way I could do it in a single day, or even in several days. I’m lucky in that I have a partner in this kind of activity. Steve doesn’t love the idea of messing around with the network, but given sufficient motivation, he’s all in and willing to do as much of it as he can. The only good news of this plan is that our TiVos, which control our ability to watch cable TV, are all on what’s called MOCA, or Multi-Media Over Coaxial Cable. In other words, they’re on an isolated network and don’t depend on the router in any way. So as long as it would take to change all of the devices, we’d still be able to watch TV.
In any case, swapping routers in one fell swoop was not happening.
Option 2 – I could potentially connect the eero into one of the local area network (LAN) ports on the Netgear. This would let me move devices one by one over to the eero and then when I was done I could swap the routers. But this would undoubtedly involve bridge mode on one router, and I wasn’t sure what would happen to the whole IP range thing.
Option 2 – I could connect the eero directly to the modem and plug the Netgear into the eero. This had all of the disadvantages of the previous idea and would probably break even more things.
I was noodling this with Dorothy at the gym and she asked, “Couldn’t you connect both of them directly to your modem?” I explained that I couldn’t do that because I had only one Ethernet port on my modem. Duh, that’s why I was plotting out these elaborate strategies. But then I got home and thought, maybe I should double-check. I’m an idiot. I totally forgot that my FIOS modem is also a full-fledged router with 4 LAN ports on it. Do you realize how much it pained me to tell Dorothy she was right?
Option 3 – Connect both routers in parallel into the Frontier FIOS modem (router) – WINNER!
eero Setup
I connected one eero to the modem and got to work.
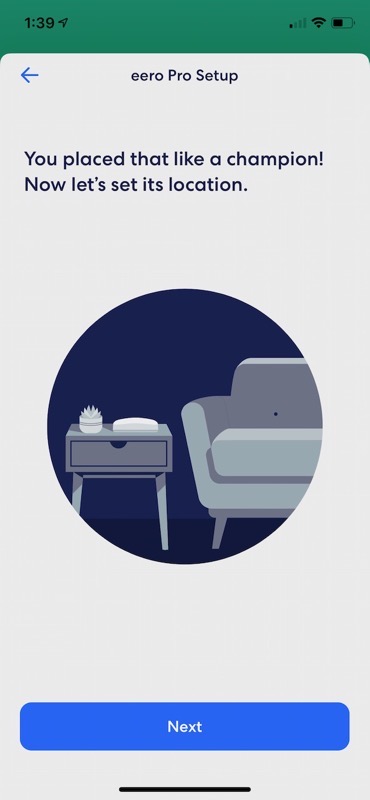
The eero Pros are incredibly easy to set up. You can only use the app on your phone as there’s no web interface. This worried me at first but the app is really lovely. After plugging one eero Pro into my modem, I opened the app and it walked me through things like asking the shape of my home (square vs. long) and how many floors it has. As I plugged the other two eeros into power in the locations I thought would be good, the eero system ran a scan to verify that I had placed them in an area that would be useful. Luckily, the app told me that I placed them like a champion. Made me smile.
We wanted to put one of the eeros on top of the china cabinet in the dining room. There was one little problem. The outlet is nearly in the middle of the cabinet, and it weighs about 2387 pounds and it’s filled with breakable stuff and it’s bolted to the wall for earthquake protection. But we’re engineers, and we know how to use tools. We needed something long that we could somehow attach the plug to, and then try to push the plug 90 degrees into the wall where we could barely see the outlet.
I went hunting in the garage and found the perfect device. We have a rolling awning that has a detachable, long, metal handle. On the end of it is a small hook to attach to the eye in the awning mechanism, allowing it to swivel around.
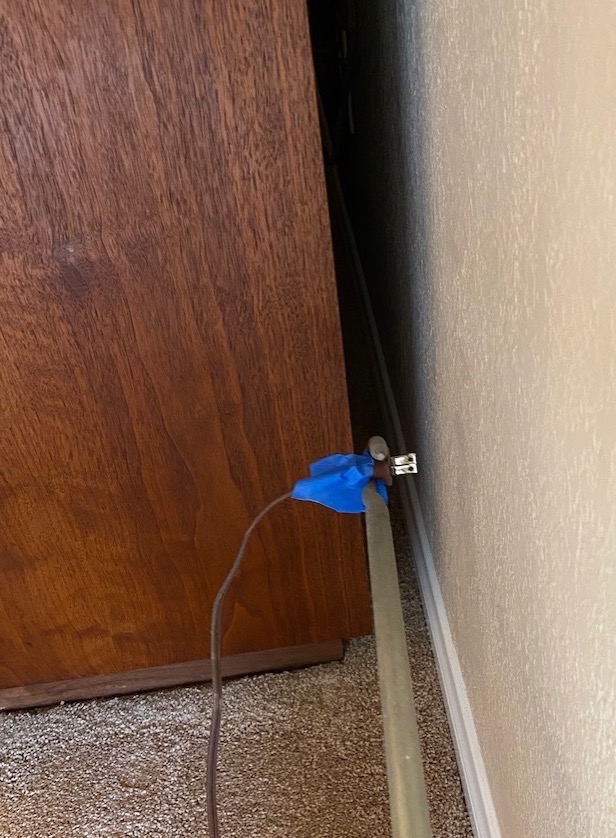
Turns out that the plug for the eero fit pretty snugly into the little hook. Steve then put some blue painter’s tape very loosely holding it in place, and in such a way that if he did succeed in pushing it 90 degrees into the outlet, he could then push straight away from himself to break loose the tape and leave the plug connected. It worked on the very first try!!! The tape stuck to the plug but he went back in with our pole and waggled around and the tape transferred to the hook and we were done. You cannot imagine how proud we were of our little selves!
Enough about the hardware, let’s talk about adding devices to the network.
In the list of things I love already about the eero system is the fact that you get a notification when a new device joins your network. That could be handy if you saw some device jump on that you weren’t expecting. You can kill it if you don’t want it on. With Steve and me adding around 75 devices to the network, it was fun to see them jumping on one by one.
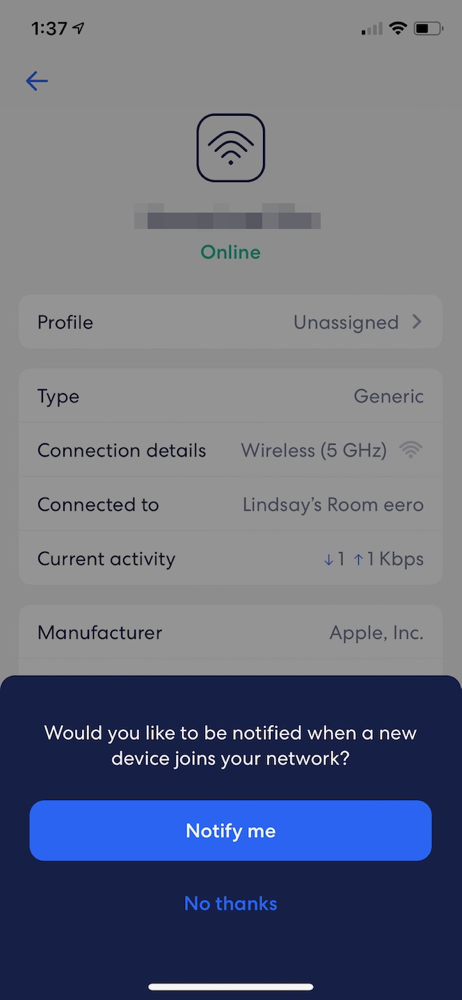
When a new device comes into the network, if the vendor has intelligently provided the device information to the WiFi card, the name will show up correctly in the eero app. For example, the Wyze cams all came in saying “Wyze Labs, Inc.” But if the vendor is dopey, the device name will be the manufacturer of the network. I have a love/hate relationship with Ring, and they failed me again as every device came in calling itself Texas Instruments.
With how slick eero’s app is, I was hoping that they’d have a nickname field like the web interface did on my Netgear router. Unfortunately, I was unable to find the ability to name my devices. They do have a feature called Profiles. This option is designed to put a group of devices into a Profile so that you can limit access. For example, you put your kids in a profile together and then shut off-network access after 8 pm. I figured out that I could create a Profile called Ring, and then just move all of the TI devices in there and at least I’d have them grouped together.
Steve went around the house adding the Ring doorbell, Ring floodlight cam, Ring spotlight cam and 3 Ring Chimes all one by one to our network. He also ran around doing all of our Wyze Cams (I think there’s 5 of them, maybe 6, they seem to multiply like rabbits when I’m not looking) plus 3 Wyze light bulbs and a switch. After he got all that done, I kept thinking about the nickname thing and did an online search.
And guess what? There IS a way to do it, but it’s totally non-obvious. The instructions say to select a nickname and type the name you want. But there is no nickname field! What they mean is that you tap on the name that eero assigned (in the case of Ring, Texas Instruments) and it’s actually editable! They sure could have made that more obvious in the UI. If I’d figured this out the first time I went looking, I could have renamed the devices as they came on the network because we knew which one had just been connected. But now I don’t know which one is which. At some point, we’ll use the eero app to shut them off one by one and then try to figure out which one stopped working so we can rename them. We may be in the old folk’s home by the time we get done with this project!
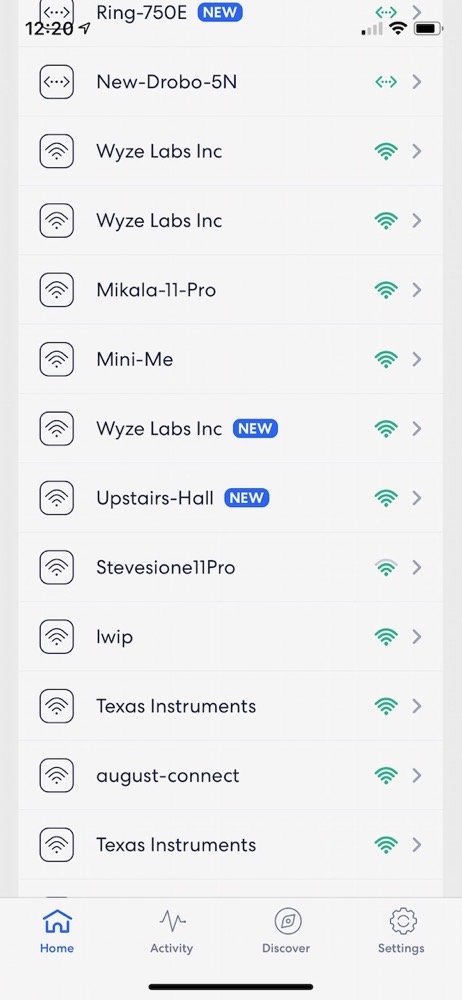
When I added our Macs to the new network, I discovered another thing to like about eero. The Macs have two network cards, one for WiFi and one for wired Ethernet. In the eero app it shows each Mac twice and has a different graphic for each kind of connection. Very cool. You can tap on a device to drill down and learn more about the device, like MAC address, IP, and which eero device its connected to. That’ll be fun to watch as I’ve heard the eeros learn over time.
You can even see the network traffic of each device individually. I can see that being super handy if you’re trying to do a Skype call and your connection gets choppy. You could poke around and figure out who in your house might be running a giant backup or playing a demanding online game. I also like that you can run speed tests of your entire network. I think I’ll be poking that button often just for the fun of it.
Setting up static IP addresses was super easy on the eero app too. I won’t go through the instructions but the eero side was really slick. The Drobos have to have static IPs and I did have to mess around a lot to move them over. I had to change them to DHCP first within the Drobo Dashboard app to give them dynamically assigned IPs by the router. Then I had to reboot them, move their wired connection to the new router, and then reassign new static IPs within the Drobo Dashboard. Not super hard, but time-consuming. It also illustrated how if I’d simply swapped in the new router, I never would have been able to get to them because their IPs would have been incompatible with the new router.
You may remember from grueling tales of yore that I back up one Drobo to the other using Chronosync on a Mac mini. It wasn’t too hard to change my scripts to point to the new IPs but it’s the remembering to do all these little tricky things that is so challenging.
One other thing of note is that while the Netgear has 4 LAN ports on it, the eeros only have one. You pretty much need a switch of some sort if you’re going to hard-wire anything. Luckily, a while back Pat gave me a 16-port Gigabit switch. While it was a luxury in the past, now it was a necessity.
The Easy Ones
Lucky for you, I’m not going to walk you through how each and every vendor has a different process to be followed to move their devices from one network to another. But I do want to talk a little bit about the easiest and most annoying devices we’ve moved. Let’s talk about a few of the devices that weren’t hard since that’s the shorter list!
A few devices were super easy to convert. I had no idea how you move the Home Pod since it really has no interface, and I’m pretty sure Siri doesn’t understand networking. I read online that all I would need to do was move the device that was acting as the hub and the Home Pod would follow along. Ours uses the downstairs Apple TV … I think. But I’m never sure about that. I also read that in the Home app you can just press and hold on the icon for Home Pod and one of the options that pops up is “move to new network”. I tapped that, selected the eero’s name and boom, it was done. No password required at all. Probably sensed it from the iPhone I imagine but I don’t have to worry my pretty little head about it.
Back when IoT just was getting started, every company made its own hub and you had to plug it directly into your router. We all complained about it. But I have to say now I wish every company had hubs! I unplugged the Hue Hub from my Netgear, plugged it into the switch on the eero, pressed the button on top of the Hue hub and boom, all my Hue lights were on the new network. Simply could not have been easier. I should mention that Ring has a hub but it’s only used for their alarm system. Would have been nice if they used it for the cameras and chimes.
Do you know what else was oddly easy? Our Kindles. I know the touch screen is annoying, but it was obvious what to do and it didn’t fail. Sure, it’s weird that our books have WiFi but that’s our lives these days.
The Hard Ones
Now let’s talk about some of the hardest devices to move.
You know you live in a connected home when you realize that your car is on your network. I figured Tesla would make my life easy but it was one of the hardest and only because they have a dumb user interface. At the surface level, it is just like connecting a Mac. You tap on the WiFi symbol, and it shows a list of available networks. You choose the one you want, and a keyboard pops up for you to type the WiFi password. I know my long, complex password by heart so I typed it in. The keyboard has an Enter key on it so I hit that when I was finished. I watched it think about that for a bit, and then it came back and said it didn’t work. I tried 5 times.
Finally, I got Steve in the car with me so he could watch the little disappearing letters as I typed in the password. I typed it correctly but again it said I was wrong. On the 7th try, Steve noticed that in addition to an Enter button on the keyboard, the window where my password was showing up had a button that said: “Confirm”. He suggested I tap that instead of hitting enter, and sure enough, it worked. He was pretty smug about it but I still say that’s super lame UI. If it’s going to accept the Enter key, it should be the same as the Confirm button!
We have WiFi-enabled printers in our house. Entering my 24-digit password with special characters and upper/lower case letters and numbers was really fun on a non-touch screen HP printer. Every character had to be selected by using the arrow keys to go through the alphabet in a grid and then hitting another button to select! It was agony but I got it right on the second try so hooray for me! Steve hasn’t done his printer yet, and I might do it for him as a little gift.
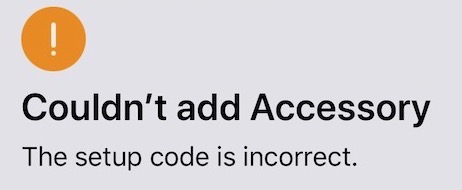
My LIFX Light Strip was another nightmare. I was able to get it on the network pretty easily but it wanted to be in HomeKit too. The app has a special button just to add it to HomeKit. I wanted it on HomeKit, but even though it spoon fed me the instructions, every time I scanned the HomeKit code from the original packaging that I dug out of the closet, it kept telling me that the code was wrong!
After about 12 tries, I gave up. Then I happened to look in HomeKit for something else and there was my darn LIFX light Strip! All I can figure is that it got in there on one of the early tries and scanning the code didn’t work because it already had that code in there. Who knows?
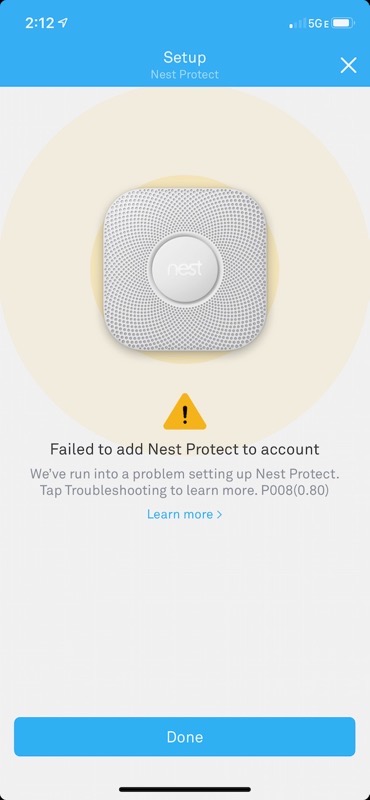
The absolute worst of all devices though, is the Google Nest Protect smoke and CO alarms. The last time we had to mess with it it was a nightmare so we procrastinated on attacking them. I decided to try on my own without Steve. I spent 37 minutes on it and in that time I got one on the network. But to get the second one on, it has to talk to the first one and evidently they were having a spat because it never worked.
Then Steve came home and he tried. 30 minutes later he gave up and called Google. I should mention that we had to call them on the phone last time too. I listened from the other room to Steve’s conversation and in 23 minutes, Google got exactly one device online. They then escalated Steve to upper-tier support, or at least tried to, leaving Steve on hold for another 20 minutes. Finally, they came back and said they’d have to call him again tomorrow. Seriously. They can’t even do it! They did make some noise about sending us new ones and that would be swell if it works out that way!
I was talking to Pat about how annoying the Nests are and she said, “Oh I just helped someone with about 8 of them in her house and it was a breeze!” Yeah, and she’s the one who claims she can wirelessly scan at her house…
Anyway, the folks at Google gave up and told Steve they’d call him back the next day at 11. Of course they didn’t call back. However, while Steve was waiting for them to call back, he figured out what was wrong. It wasn’t Nest’s fault at all.
There may be a few astute folks who have been hollering into their devices that they know what’s wrong. I gave you both clues and I’m kicking myself that I didn’t figure it out myself. I explained earlier:
- The Nest Protect connects to the network by first connecting one, and then the second one connects to the first.
- The Guest network is purposely designed so that devices can’t talk to each other.
Obviously the Nest was never going to work if it was on the Guest network. My first instinct was to be mad at Google for making me allow them to have a device on my trusted network but then I remembered that there’s a good reason for them to talk to each other. If the downstairs Nest Protect notices smoke or carbon monoxide, the upstairs Nest Protect will also sound the alarm. It even tells you in voice that it detected smoke downstairs. So I have to forgive Google for this one, and I have to give Steve full credit for figuring it out.
There are still a few more devices left on our list but we’re coming into the home stretch. The scariest one is Steve’s weather station. It connects to a screen inside our house, and he has an external WiFi card connected to it called Meteo Bridge. The Meteo Bridge, in turn, has a web interface where you can change networks. But think about that for a minute. You’re on network A. You type in the info for network B. As soon as you save, if you messed it up, you’re dead in the water. The Meteo Bridge won’t be on either network so you can’t talk to it. So yeah, I’m procrastinating on that one!
I’m also worried about the Wemo switches. The last time I messed with the network, the older Wemos had problems. Belkin was awesome when we called them but they couldn’t get it to work either. After a ton of work, I realized that the Wemo requires a dedicated 2.4GHz band with its own SSID. In fact, that’s why we had our network separated all this time. Mesh routers don’t even let you separate the bands so I’m not sure what’s going to happen. Might need to buy some new switches.
After those are done, we only have left the sprinkler system from Racchio, the Garage door from MyQ and the iDevices switches so we can see the end in sight!
Bottom Line
Even though we’re not yet finished with the great network migration of 2020, I think we’re going to prefer the new network setup. So far the connectivity seems good but I’ll have to run some real tests to be sure. With my old network, I had 5 SSIDs broadcasting between the 5 and 2.4Ghz networks for both the guest and trusted networks plus the extender. Now we’re down to 2 with the trusted network and the icky network.
After going through more than a week with every single device having its own nightmare of a setup, I’m looking forward some real standards someday on this stuff!

