When Lindsay found out she was pregnant, she asked us if we would come stay a week with her and Nolan like we did when Forbes was born. She really wanted us there to help out, and to keep Forbes out of their hair as they got into the rhythm of the new baby. We happily agreed. They stayed in isolation for two weeks before the baby was born and so did Steve and I, so when our darling Siena was born, we packed up and moved to Lindsay’s house for a week.
First it was Lost
As we were unpacking, Steve discovered that in our haste and excitement, he had packed all of his electronics in his backpack except his laptop. I’m sure everyone listening understands the horror of that realization. I felt terrible for him. It’s not there weren’t enough computers in the house (3 Macs and 2 PCs and a couple of iPads), it was that his Mac wasn’t there.
Even if he could stand to go a week without his Mac, there’s no way we would be able to do the live show without his computer. We run mimoLive from his Mac, then I route all of my audio and video through to him. He in turn broadcasts to YouTube Live and to the Discord chat for the audience to join in. So he really, truly did need his Mac.
As it turns out, there are pretty much no cars on the road right now, so I encouraged Steve to run home and get it (about 90 miles). He said it was the most pleasant round trip drive between our homes he’d ever done. I think having the Tesla to drive was a good part of the enjoyment too.
But there was a problem
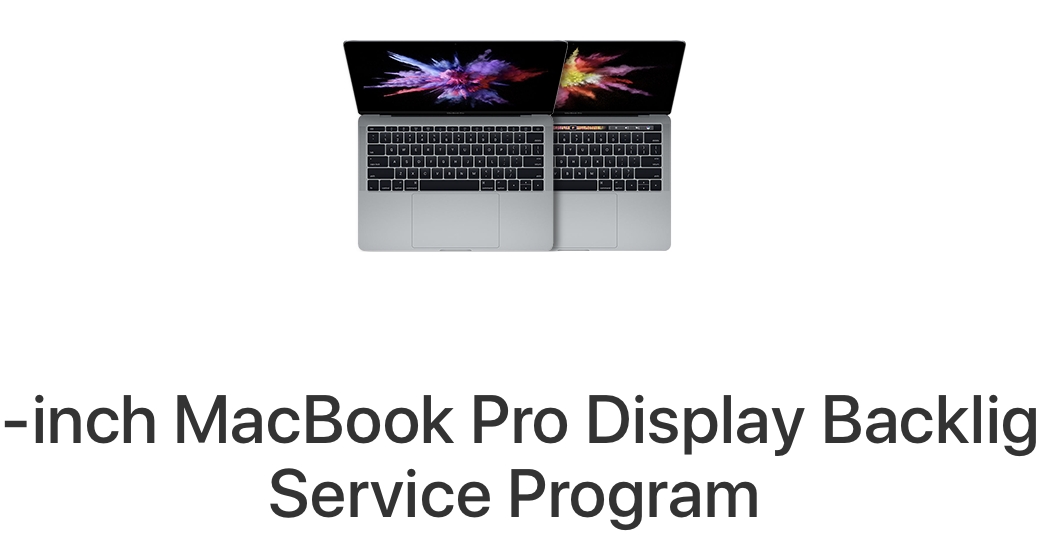
I have to back up in this story a little bit. A few days before Siena was born, Steve noticed that there was some light leak along the bottom of the display of his MacBook Pro. It got more pronounced in a day or two. His laptop is a 2016 13″ MacBook Pro, which means it’s outside of the AppleCare window so this was distressing. If Apple had come out with a new 13″ MacBook Pro it wouldn’t have been the worst thing to get a new machine, but now is actually the worst time to buy a 13″.

But then I had a distant flicker of memory of something the Internet affectionately called Flexgate. I remembered there was a design problem on some era of MacBook where the cable connection from the computer half to the display half was too short, and constant flexing by opening and closing the laptop caused it to eventually fail. I also thought that Apple extended their warranty program because of the problem.
Armed with my faint memory information, Steve went on the hunt and found the support article about the problem. It turns out that Flexgate affected only one model and one model year. It was the 2016 13 inch MacBook Pro, the exact model Steve has. Interestingly, it explains that the 2016 MacBook Pro was sold between October 2016 and February 2018. The support article explains that the program will repair the affected device at no charge which was awesome news.
By the time we got the call that the baby was coming, the display issue wasn’t too bad, just kind of distracting to see the bright “stage lights” at the bottom of the screen. When Steve arrived back at Lindsay’s after driving 3 hours round trip, he was so happy to have his Mac. He then idly said to me, “I wonder how long the display stays like this and does it eventually fail?”
You could hear the ominous minor chord of music come in just then, couldn’t you? Clearly he jinxed it because a few hours after he got back, the display went out completely. I would have lost my ever-loving-mind at this point but he was just kind of sad.
Then we remembered that Nolan has a monitor in the spare bedroom where we’re staying. We carry HDMI dongles just in case, so we were able to hook his MacBook Pro up to the external display and it worked. He was banished to the back bedroom without a TV for entertainment but it was better than nothing.
We decided that he might as well start the repair request with Apple while we were down there. We knew they would have to send us a box, since all of the repair stores are closed. I suppose he could have gone to one of the third-party repair places, but I’ve never gotten a good feel from any of them. Normally when I tell Apple repair stories, I refer to going to the store as visiting the Table of Sadness. Everyone at that table is sad because their devices are sad. I guess we’ll call this episode, the Box of Sadness.
To start the process, Steve hopped on live chat with Apple and explained the problem. It was one of those frustrating examples of tech-support where you know the person is chatting with many many people because they take forever to get back to you with a response.
The tech he was chatting with asked that he reboot the computer . Then she asked him to turn on a flashlight and tell her what he could see on the display. Remember the display is technically still functioning, but the backlight is simply off, so the flashlight can do a very poor job of showing you what is on screen.
The good news was that with a flashlight, he was able to see his avatar for the login. The bad news was that his cursor was of course black and the field in which he needs to get the cursor is a dark gray, so he can’t see either of them. There was no way to get the cursor into that box so that he could then type in his password. Because it was on a reboot, his Touch ID and his Apple Watch both could not log him in. Steve was not particularly happy that the tech had made him do this, as you can imagine.
I started fiddling around moving the cursor to the bottom left, by simply dragging down many times and then dragging left many times until I was certain it had to be in the corner. Then I tried sliding my finger on the trackpad until I felt like I was near the middle, and then trying to go up until I felt like I might be in that box. This did not work of course. But I kept trying it.
Finally, things changed onscreen, but in an unexpected way. I managed to get it to show all of the possible logins on screen. For some reason, it chose to select my login to his computer and I typed my password in, just hoping the password field had keyboard focus. I was able to log in, which was very exciting.
Once I was in my account I was able to use fast user switching from the menu bar to select his login and we were able to connect into his account. We don’t give high-fives around here, but we were certainly happy about this.
He got back in touch with Apple and explained the results and they agreed that his computer needed to be repaired and agreed to send him a shipping box. He worked the rest of the week at Lindsay’s house using the external display and ran a successful live show. When we arrived back home, the box was waiting for him to ship his laptop back to Apple.
Backups
Steve wanted to make a full clone back up of this Mac before he sent it off to Apple. It is not his primary machine, so there isn’t a lot of data that he really cared about, but there are a lot of settings in applications that he didn’t want to set up again when he got the Mac back. There’s always a reasonably good chance that you end up with a new logic board when you send your Mac in for repair. If you do get a new logic board, that means a new drive as well. We also planned to migrate his user account to a spare MacBook so he’d be able to play while his was gone for repair.
In order to do a clone backup, we needed to be able to see a screen on his Mac. I have a spare HDMI monitor at home, but I had loaned it to a friend of mine who is doing remote support for people. Steve has a 27″ Apple Cinema Display that we figured we could use. We spent some time goofing around in Dongle Town, like at one point I had a mini display port to HDMI on one end, and a USB-C to HDMI on the other end with an HDMI cable in the middle. But then we realized that the correct dongle, mini display port to USB-C, was already connected to the monitor’s cable. We were making things much harder than it needed to be!
We hooked up the 13″ MacBook Pro to the Apple Cinema Display and it worked. So far so good. We bought him a copy of Carbon Copy Cloner, which I’ve been meaning to do for a long time anyway. We launched the app and it came up with the familiar screen asking for full-disk access in System Preferences.
 Carbon Copy Cloner is more fun than most apps in this annoying process. The developer, Mike Bombich, obviously has a sense of humor. In the screen where he explains how to give access to Carbon Copy Cloner, he gives you a little fish to drag into the System Preferences window. There is no reason for this fish, it is only for the comedy.
Ok, so we’ve got our fish to drag, all we need is to open System Preferences. And can you guess where System Preferences opened up? Yep, on the internal non-working display. The annoying thing is that earlier in the day, System Preferences had opened on the external display and we’d made a point of going into Displays and dragging the little white bar to the representation of the external display to make sure it was considered the primary display. I have no idea why it reverted back to the internal display.
At this point, we are really in a pickle. I’d like you to imagine how you would solve this problem. Trying to get to System Preferences without being able to see it is like being blind. Luckily, I happen to have some rudimentary skills of using of VoiceOver, Apple’s screen reader software for the Mac, and it was time to exercise those skills.
VoiceOver

On a Mac with Touch ID, you enable Accessibility Options by triple-clicking the Touch ID/power button. This brings up an onscreen menu with the option to enable zoom, VoiceOver, mouse and keyboard accessibility options, and changes to the display such as inverting colors. Luckily this menu came up on the external monitor, but the screen explains in audio how to navigate to the different options so we would have been able to enable VoiceOver even if we had been unable to see it. You can also launch VoiceOver by holding down command-F5.
Once I had VoiceOver running, I used command-tab to bring System Preferences to the forefront on the invisible display. Next, I decided to cheat a little bit. On my own MacBook Pro, I brought up System Preferences to the Displays Preference Pane so I could read along with VoiceOver.
We got a little bit lucky when System Preferences opened directly to the Displays Preference Pane so I didn’t have to find it. VoiceOver also explained that I was interacting with the toolbar. In order to navigate with VoiceOver, you use what they called the VO keys: control + option. With control-option held down, you add other keys to do different functions. For example, I could hold down control-option and tap the right or left arrow keys to navigate around the window.

I tried using control-option-right arrow and VoiceOver called out the buttons across the top, such as the back/forward buttons, the show all preference button, etc. So far so good, but since I was interacting with the toolbar, when I got to the end it just bonked at me. I need to get out of interacting with the toolbar and move down into the preference pane.
For the novice user, VoiceOver defaults to explaining to you how to do things. You can shut this off when you get good at it, but for me it’s invaluable. VoiceOver explained that to stop interacting with this toolbar, I needed to hold down control-option, but also the shift key and the up arrow to get out. It sounds complicated, and it is very hard for me to remember, but with VoiceOver spoon-feeding the instructions, it’s pretty easy to do.
Once I had popped up and out of the toolbar, now I could hold down control-option and just use the arrow keys to navigate around the Preference Pane. I heard Voiceover read the word “Display” to me as I moved around. Looking at my own version of System Preferences, I knew it was reading one of the four tabs at the top of this Preference Pane. I wanted to get to the next tab called Arrangement, so I held down control-option and arrowed once to the right, but it didn’t go to Arrangement. For some odd reason, Apple chose to next highlight the graphic of the internal display and simply say “Image”. Super dumb move, Apple, and the kind of thing that wastes VoiceOver user’s time. At least they could have labeled it!
I hit control-option right arrow again and now I heard it say Arrangement. If I had clicked it with the mouse, it would have changed to that tab, but all I’ve done with VoiceOver is to highlight the Arrangement tab. I need to select it now.
To select something with VoiceOver, you hold down control-option and hit the space bar. The audio feedback wasn’t super useful here, it just said I had selected the Arrangement tab and that it was one of four tabs.
I started using control-option and hitting the right arrow key to move around in the pane. Eventually, it read out to me the instructions on how to change the primary display. That’s the trick I mentioned earlier. It says, “To rearrange the displays, drag them to the desired position. To relocate the menu bar, drag it to a different display.” I was curious what instructions VoiceOver would give me on how to drag the displays, but when I moved past the instructions, it skipped right over the display arrangement section.
Now you might think they skipped letting the blind user drag the displays around because it’s impossible to design a user interface to allow the blind to do that. But that’s the wrong answer. Rogue Amoeba’s Audio Hijack is totally accessible to the blind and the main part of the interface is moving boxes around onscreen. Rogue Amoeba figured out how to do it, why can’t Apple?
Back to control-option right arrow, and finally I heard the checkbox to Mirror Displays. If I can check this box, in theory, everything on Steve’s internal display will be mirrored to the external display. I can hear you yelling at your devices right now asking me why I didn’t check this box the first time I messed around in Displays. Well, I know that NOW…
Once I was on the checkbox, I held down control-option and hit the space bar and it selected the Mirror Displays checkbox. Boom! The external display showed System Preferences and everything that had been hidden on Steve’s Mac’s display.
Steve had wandered off at this point because it took me around a half hour to do this. I hollered to him that I was a genius and he had to come to see that I’d fixed it! He came up, sat down and said, “How did you fix it?” I pointed at the Mirror Displays checkbox and I said, “I checked that box!” And he moved his cursor over the checkbox and UNchecked it. Seriously, everything disappeared again.
While I wasn’t exactly delighted that he’d undone my half hour’s worth of work, it didn’t take me nearly as long to fix it as it did the second time! I really did feel like I made fire that I figured this out using VoiceOver.
Back to Backups

So finally, Steve was able to give Carbon Copy Cloner the privileges it needed and he ran the full clone backup to an external 1TB Samsung T3 SSD We then woke up my 2016 15″ MacBook Pro, the one that just got the new battery and logic board and keyboard right after I got the 2019. I launched Migration Assistant and told it to migrate Steve’s user to my machine. And it failed.
It said, “This source is using a Case Sensitive filesystem while your Mac is not.” This was annoying, and on behalf of Sandy I was also annoyed that they didn’t properly put a hyphen between “case” and “sensitive”. I checked in Disk Utility and while both volumes were formatted APFS, somehow that external drive was case sensitive. At least in Disk Utility, they put the proper hyphen between case” and “sensitive”.
I asked Mike of Carbon Copy Cloner for advice and he said the only option was to reformat the backup drive to case-insensitive and run the backup again. I looked at the options to erase the drive in Disk Utility and oddly there was no option for case-insensitive. There were several case-sensitive options and then just plain old APFS. I had to infer that APFS with nothing else written after it must be case-insensitive.
I reformatted the drive to APFS, ran the backup again and then finally we were able to run Migration Assistant and bring Steve’s account with all its glory into my 15″ MacBook Pro from 2016. He packed his 13″ up in the box Apple sent and drove it to FedEx.
Crazy Fast
And here’s where the story takes a crazy good turn. Steve handed the MacBook to FedEx late afternoon on Thursday. On Friday morning he awoke to find a message from Apple from 3:45 am saying that they’d already received it. Even crazier, Friday afternoon at 12:30 pm they sent him another message saying it was fixed, and that it was on its way back to him. Saturday morning he got another message saying it would be back to him at 1:30 pm. At 1:15 pm the doorbell rang and a UPS driver had just dropped it off on our front doorstep. While the driver was supposed to wait for a signature, and he didn’t, I guess it was ok since nobody is allowed to leave the house so he knew we were home.
From the time Steve dropped off the laptop at FedEx until the time it was back in his hot little hands was less than 48 hours. Isn’t that crazy? Even if we had an open Apple Store nearby, they definitely would not have been able to get us an appointment that quickly, much less actually repaired it in that length of time.
More importantly, he has a gorgeous new display and the Mac works perfectly and he lost no data.
Bottom Line
I’m not sure that there are any lessons to be learned here other than how useful VoiceOver can be in the oddest situations, or how good Apple was in doing the repair, but I thought the whole story was pretty darn cool. I guess it was actually the Box of Happiness after all.