I’ve been a huge fan of the note-taking app Notability from Ginger Labs for ages. I started using it primarily on iPad and wrote my first article about it for the NosillaCast in 2012! Back then I was using a little rubber-tipped stylus on what was probably a 3rd or 4th gen iPad at the time. Just a couple of months ago I again sang Notability’s virtues in my post Why I Use 5 Different Apps to Take Notes.
Over time this app has been improved with more and more enhanced features. I especially love that Notability syncs across my iPad, iPhone and Mac devices. I often find features that delight and surprise me, only to find the functionality was there for a long time before I noticed the feature.
Recently, I figured out a really obscure use of Notability that is a result of one of these enhancements. By demonstrating an obscure problem to be solved that you very likely will never need yourself, I’m hoping it will trigger some ideas of problems you have that could be solved with Notability.
With that preamble, the problem to be solved…I really do need a jingle for that phrase, don’t you think?
Cross Stitch Lettering
I know I’m not the only crafty nerd in the NosillaCast community (I’ve met lots of craft-minded people). One of the crafts I enjoy is counted cross stitch. If you’ve never done it yourself, it’s like paint by number but with thread on a woven fabric. With a needle and thread you stitch these little x’s according to a pattern.
I’ve been cross stitching for decades and one thing that’s alway been problematic is setting up lettering for personalization. Let’s say you’re making a Christmas stocking for someone. It has to have their name on it so no one steals their stuff, right? While the entire pattern down to the shades of gold on Santa’s belt buckle is specified in the instructions, the lettering simply can’t be because they don’t know the name you plan to put on it.
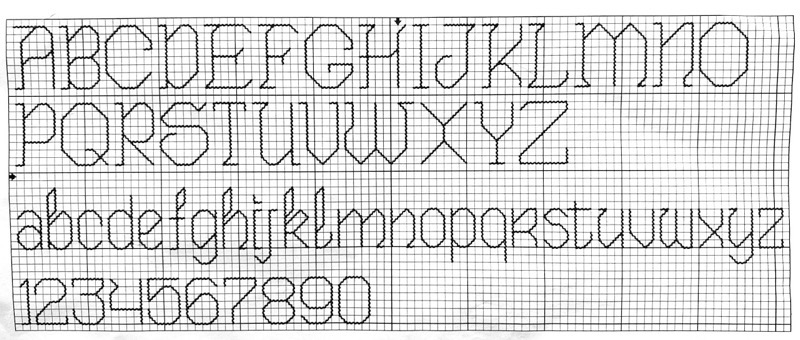
They do usually give you an alphabet to work with that is sized appropriately for the area where the personalization is supposed to go. Counted cross stitch is done on easily-countable fabric called aida cloth, whose weave creates a plainly visible grid of squares with holes for the needle at each corner. If you’ve got an area at the top of a stocking that is 15 rows high, you wouldn’t want letters bigger than say 8-10 rows high. That pre-defined alphabet really matters.
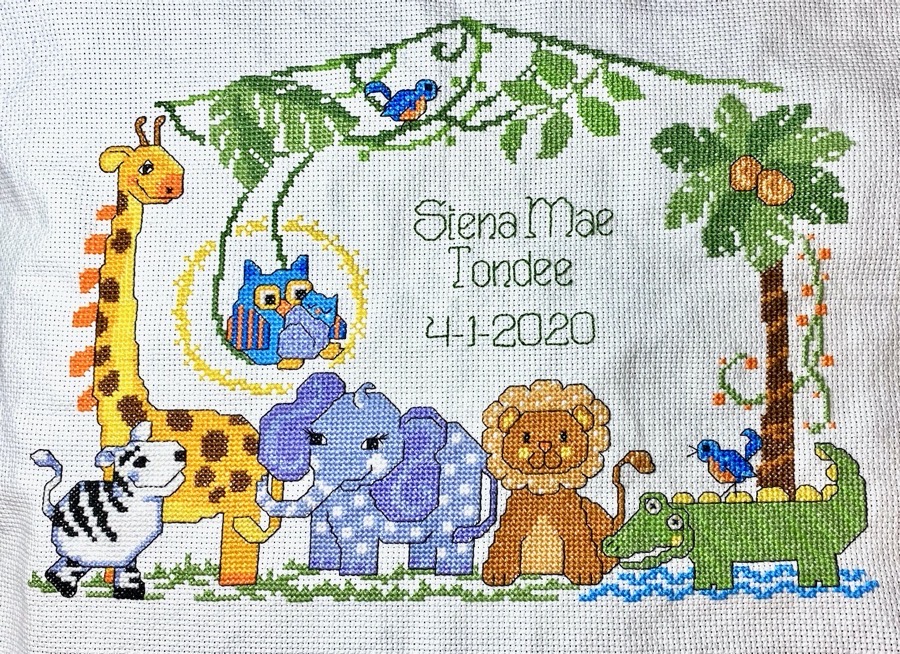
I was working on an adorable pattern for my even more adorable granddaughter Siena, (Lindsay’s daughter). The pattern will be part of a pillow, in theory if I ever do that part of the assembly! The pattern has a bunch of baby animals in the jungle around the outside and a big open space in the middle to write Siena’s name.
The pattern came with an alphabet so it was time to lay out the lettering for her name and birthday with respect to the pattern.
The Traditional Method
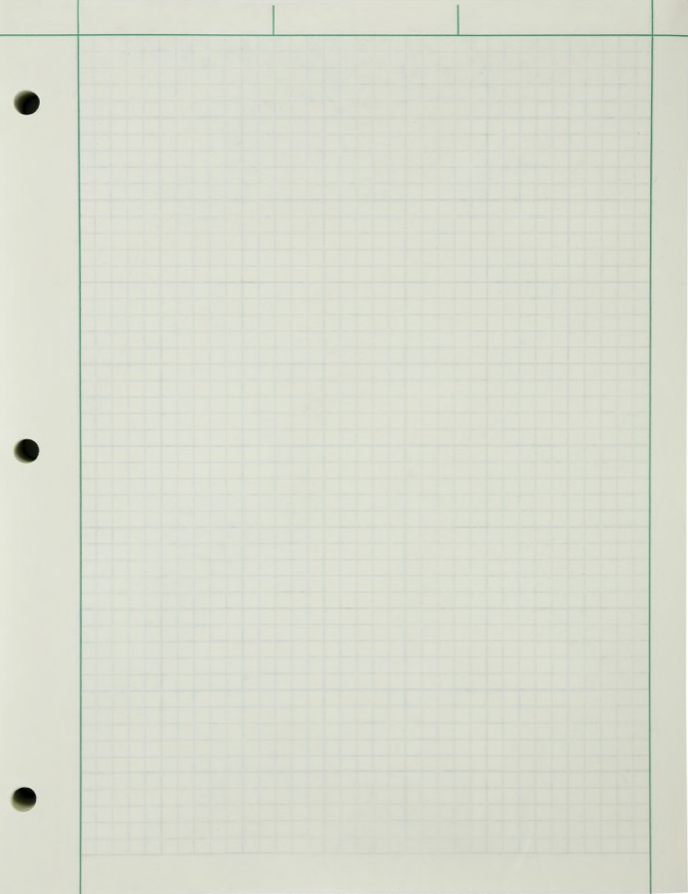
Traditionally, the next step would be to go to the file cabinet and dig out some old graph paper from college. Without squares to work with the task would be ever so much harder. Luckily Steve and I have held onto the green engineering paper we used in school, so I figure I’ve got a leg up on most cross stitchers.
You would think this would be very straight forward at this point, drawing the letters of your choice on the graph paper according to the alphabet you’ve been given. But inevitably you’ve got some variables to the problem that make it harder than it seemed at first.
The pattern I was using suggested some text and then the name and birthday. It looked too busy with all of that so Lindsay and I decided to just have her full name, Siena Mae Tondee, and her birthdate. That meant the little guidelines they gave me in the pattern weren’t going to help me at all. I had to strategize as I was figuring this out on whether her full name would be on one line with the date below, or if her full name was too long, would I put it on two lines, and should the text be centered or justified in some way with the date?
When working on graph paper, that means your eraser is as important as the paper itself. Constant changing of the letters is the norm and to call it a tiresome activity would insult weariness everywhere.
How Notability Made it So Much Easier
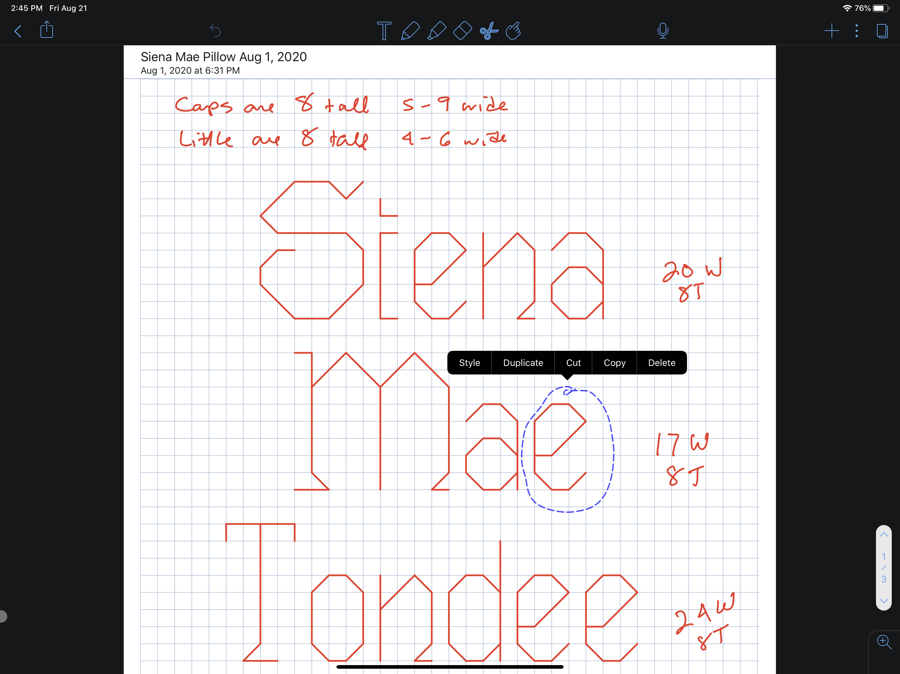
Now let’s talk about Notability and how it came into the game. Some time after 2012 and before 2020, Ginger Labs started enhancing the drawing capability of Notability. In the old days, to draw a rectangle you simply did your best and hoped it looked close enough. Now though, if you draw a rough rectangle and hold still when you’re back to the starting point, Notability will recognize your efforts and reward you with a perfect rectangle. This works with circles and ovals, and even with simple straight lines.
In my “Write by Hand When You Need to Think” article from earlier this year, one of the things I talked about was using Notability. When I’m trying to think, I actually have to resist Notability’s efforts to straighten things up for me. I scribble intentionally and don’t make things pretty because that absolutely stops me from being creative.
But this one little feature of Notability turned out to be exactly the right tool for creating the lettering for Siena’s pillow.
I’m so used to using Notability for my scribbling these days that I instinctively grabbed it for this task. Notability lets you change the paper background and I found they had graph paper options and I used the smallest grid they had.
I started by just hand-drawing in the diagonal and straight lines to match the way the capital S was in the pattern but then I hesitated on one tiny diagonal line, and Notability not only straightened my scribbled line, it did a snap to grid on the end points! It had never occurred to me that Notability could do this!
Once I realized this new feature would work for the pattern, I only had to get close to the points, pause, lift up, draw the next line and it looked perfect.
On paper, what happens next is you realize you started too far to the right and now the word doesn’t fit. That happened with Notability too, but I could grab the lasso, drag around the text I’d drawn and simply drag it all to the left and it snapped to grid again. I was immensely pleased.
Siena’s full name has 4 lower-case ‘e’s in it. I only had to draw the letter ‘e’ one time. I dragged around the first one I made, tapped the screen, selected duplicate, and then dragged the letter down to the next location where I needed it. She’s got two ‘a’s and two ‘n’s as well, so I saved a lot of time with my lettering.
As I worked on this, I was able to mess around with the alignment and what text was on what line and see visually whether I liked it or not. When I didn’t like it, it was easy to drag the names around until it was perfect. I was even able to take a screenshot of my iPad and send the pattern to Lindsay in Telegram for her approval.
But Then There was Arithmetic
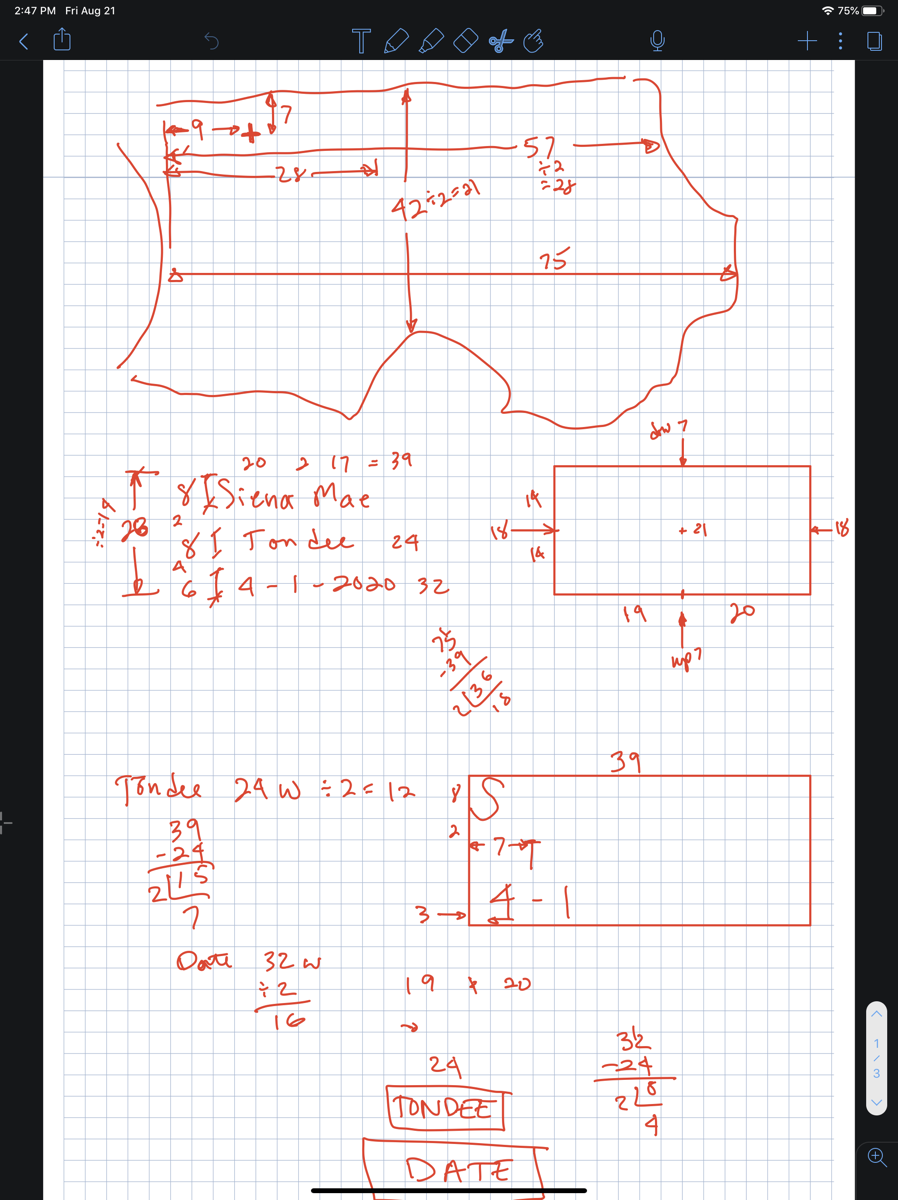
The next problem to be solved was figuring out exactly where on the pattern I was going to put the lettering I’d created. The area wasn’t a nice rectangle, but rather formed by the circular edge of a sun on the left, the edge of a palm frond in one corner, the top of a lion’s mane on the bottom and a leaf hanging down from above.
If I had an enhancement request for Notability it would be for an even smaller grid size. If I’d had a smaller grid, I could have drawn out the constraints in Notability accurately, but the pattern wouldn’t fit on the page because the grid was too big. Instead, I drew freehand and had to do a LOT of arithmetic. You may recall that while algebra, geometry and calculus were a breeze for me, simple addition and subtraction is fraught with error.
Here’s the kind of problem I was having to solve. The longest width from the sun to the palm tree trunk was 75 stitches, but to the palm frond in the corner it was only 57 stitches wide. I decided to center my lettering on that 57 stitches.
Now I need to know where to start the S in Siena with respect to that width. 57 ÷ 2 ≈ 28 stitches to the center. The text was going to be her first and middle names, Siena Mae. I had to count the width of each name, and decide how much space would go between the names. Siena is 20 characters wide, and Mae is 17 wide, and I decided on 2 stitches between them. So 20 + 17 + 2 = 39 stitches wide for the first line. But we need to divide that in half, which is ≈ 20 stitches from the center point. Since the center point of the area in which I have to stitch is 28 stitches, that meant the left side of the S should start 8 stitches from the edge of the sun on the left. WHEW!
But now I have to run the same type of calculation with even more complexity to figure out how far down from the top of the stitching area S should start! This got more complicated because I have to add up the height of Siena Mae on the top line, Tondee on the middle line, and her birth date on the bottom line, and how many stitches are between the rows.
Needless to say, I calculated all of this with elaborate scribbles on Notability, started stitching away, and had to pull it all out three separate times because my arithmetic had errors in it. I think I’ll put in a feature request to Ginger Labs about giving us an even smaller grid and point to my article!
Bottom Line
The bottom line is that while doing lettering on a cross stitch pattern is normally something I dread, I found it an absolute delight with Notability. My daughter-in-law Nikki is making a stocking for my other adorable granddaughter Kennedy and I’ve volunteered to figure out the lettering for her once she picks a font she likes.
As I said up front, there’s a reasonable chance you haven’t ever cross stitched and might never need to use Notability to solve this exact problem, but think about using Notability the next time you need to do something a little bit more precise but you still want to be in “scribble and think mode”.

OMG, Allison! I never knew we shared yet another love: cross stitch! I have sung the praises of Notability as a great note-taking app for our students, but never knew it could help me design lettering for my cross stitch projects! Thank you for always seeing life from a geek’s perspective!
YAY! I found the crossover of one other geek/cross stitcher. You may have just answered a question for me. One of my blind listeners asked about accessibility with Notability. Works well with Voice Over then?
Interesting article, thank you. I don’t cross stitch, but was interested to know how you used notability for cross stitching. Your use of simple math was amusing. I did find a simple autocorrect error with “57 inches” that you will probably correct. Signed ” OCD forever.”
Thanks, Tim! Fixed. I hope you liked my shoutout in my article about my production of the podcast when I said that if I flub up the URL for the Podfeet link in the feed, I know you’re always there to point it out.