In September I talked to you about how I organize my photos (https://www.podfeet.com/blog/2020/09/scanned-photos-organization/) and how I apply this detailed and fastidious organization even when bringing in scanned photos. One thing I didn’t tell you is that I also name a lot of my photos. I do this because I really like to be able to type in “Windride” and find photos of my family’s boat from when I was a little girl, or “bat” and find the amazing bat costume my father made for my brother Grant.
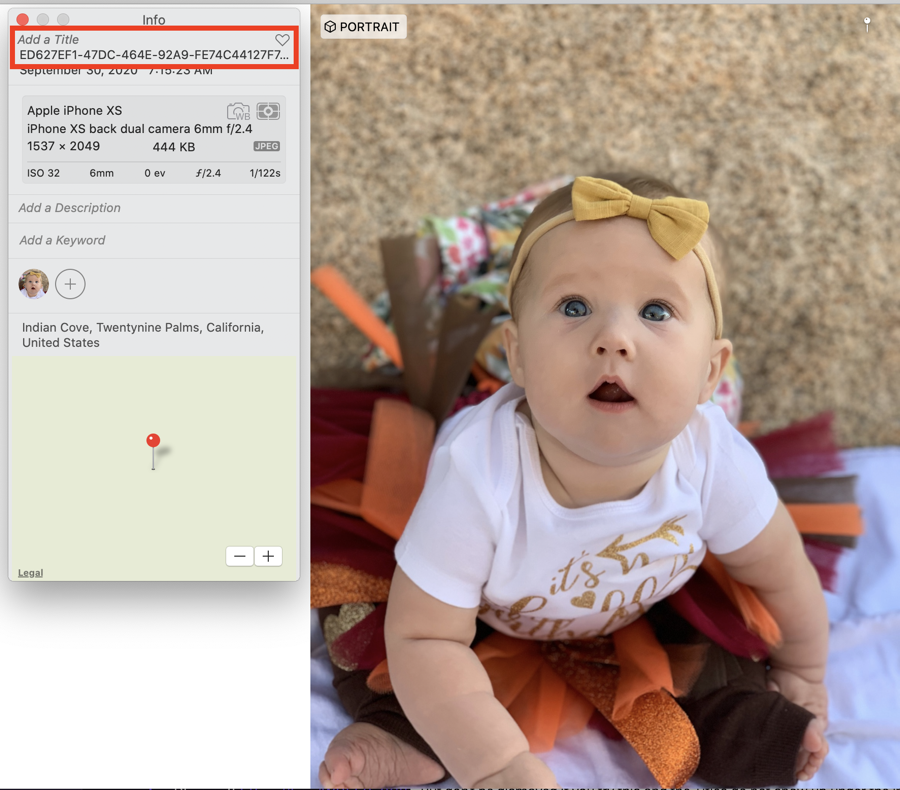
Naming photos on macOS in the Photos app is pretty tedious. First, you need to figure out how to see the Title field which is where the name needs to go. One way to view the title field is to tap the little “i” in a circle in the menu bar to open the Info button or hold down ⌘-I. This will reveal all of the EXIF data about the photo, like the camera make and model, ISO, focal length, etc. about the image and any geotagging. But it also reveals a field that says “Add a Title”.

Click in the field and type in your title. So far so good. Now you want to type the title for the next photo. You have to let go of the keyboard, go to your trackpad or mouse, click on the next picture, then click back into the Title field again and type in the next name. You’d think maybe you could hit the tab key to jump from photo to photo and leave your cursor in the Title field but noooooo.
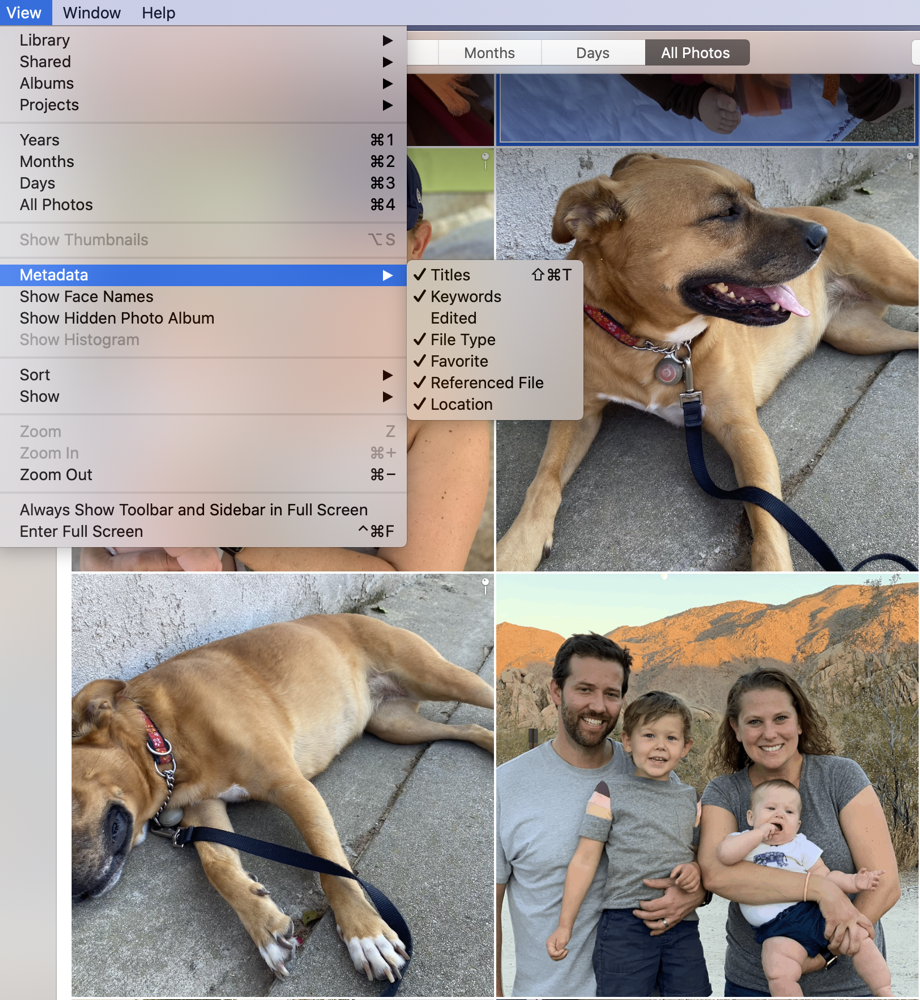
You don’t have to open the Info window to see and edit the Title field on your images. You can turn on the Titles so they’re visible right under the image. In the View menu, you can choose Metadata, and one of the options is to see the Titles. You can even toggle Titles on with the keystroke ⌘-shift-T.
But don’t be dismayed if you try this and the Titles do not show up under the images. By default, Apple doesn’t display your images in the aspect ratio in which they were taken, they’re displayed as squares instead. This is a more efficient way to view photos, but you can toggle the Title on and off till your trackpad wears out and the Titles will never show up.
The other metadata you can toggle on, such as file type, whether it has a keyword, and location all display their icons right on the image itself so those do work in this square thumbnail view, but the squares never move apart to make room for the Title below each one. We need to first change this view to be the original aspect ratios rather than squares.

You can hunt all day through the menus for how to change from square images to the true aspect ratios and you’ll never find it there. It’s not even in Preferences. Instead of in the view menu where it would logically be available, it’s a physical toggle button on the Photos window. The toggle is in the upper left corner next to the red/yellow/green buttons. The toggle looks like a square with an upward and downward chevron inside it. If you hover it says “Show thumbnails as square or in full aspect ratio”.
Once toggled to full aspect ratio, you’ll finally be able to see the titles you enabled in the View → Metadata menu. Each image will have a small title area underneath it, which will be pre-populated by the image name, such as “IMG_5390.HEIC”. This pre-population allows exported images to have unique names identical to the original filename as the image was created.
Now you’ve finally got this field visible and you put in a title for an image, wouldn’t it be swell if hitting tab took you to the next image’s Title field? Oh aren’t you adorable hoping for that? Nope. The first time you hit tab, focus moves from the title field to the image itself, hit tab again and the Photos Library menu in the left sidebar lights up. Hit tab again and for no reason I can discern, the cursor jumps to the Search field. One more time and it selects the single image again. It never advances to the next image.
This poor design decision means that even in this view, after typing in the Title on one image, you have to move your hands from the keyboard and tap in the Title field of the next image. Drives. Me. Nuts it’s so inefficient! But at least you can add titles to your images.
Naming Photos in iOS/iPadOS

I spend a lot of my time on an iPad, and the only thing more aggravating than how inefficient it is to entitle photos on the Mac is that you can’t do at all on an iPad.
If we state the problem to be solved more precisely than I have already, in iOS/iPadOS 14 there is a way to meet my objective. My need is not actually to have titles added to my images, my need is to be able to find my images by some sort of name. Keywords aren’t the answer if that’s where you think I’m going. The words I need to add are often unique like “bat” and “Windride”, so a keywording system wouldn’t be the right solution, and iPadOS Photos doesn’t have keywording anyway.
So if I can demonstrate a way to type in a search term entered in iOS/iPadOS, and Photos in any of the operating systems can find it via search, then I will declare victory.

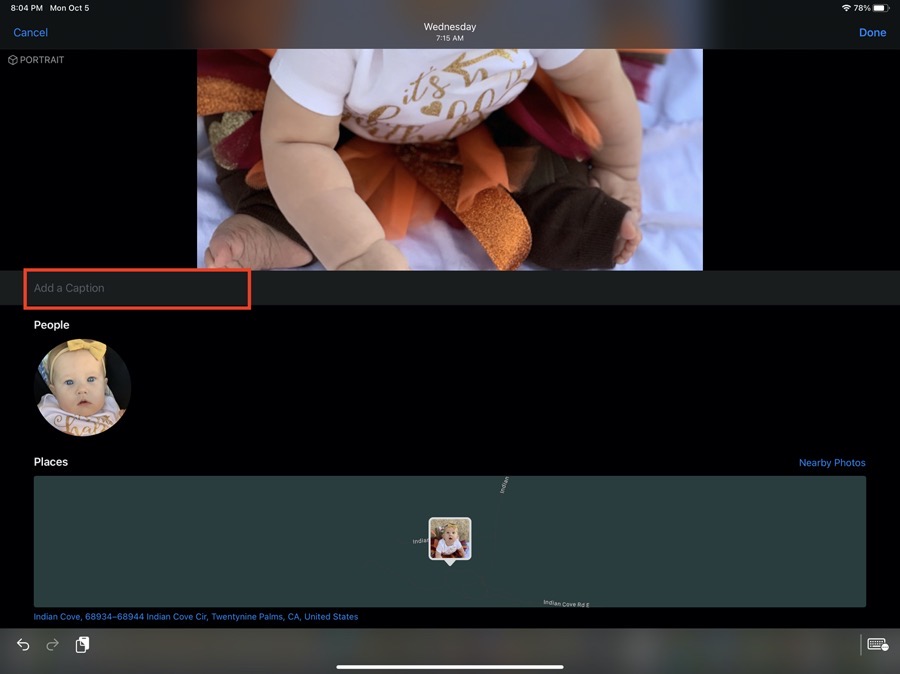
In iOS/iPadOS 14 Photos, if you swipe up on an image, it will reveal several things. If it recognizes a face, it will show you the People bubble, and it will show the Map if the image has geolocation and any nearby photos. If the image is a Live photo you’ll get the fun options of making a bounce, long exposure or loop of the image’s embedded video.
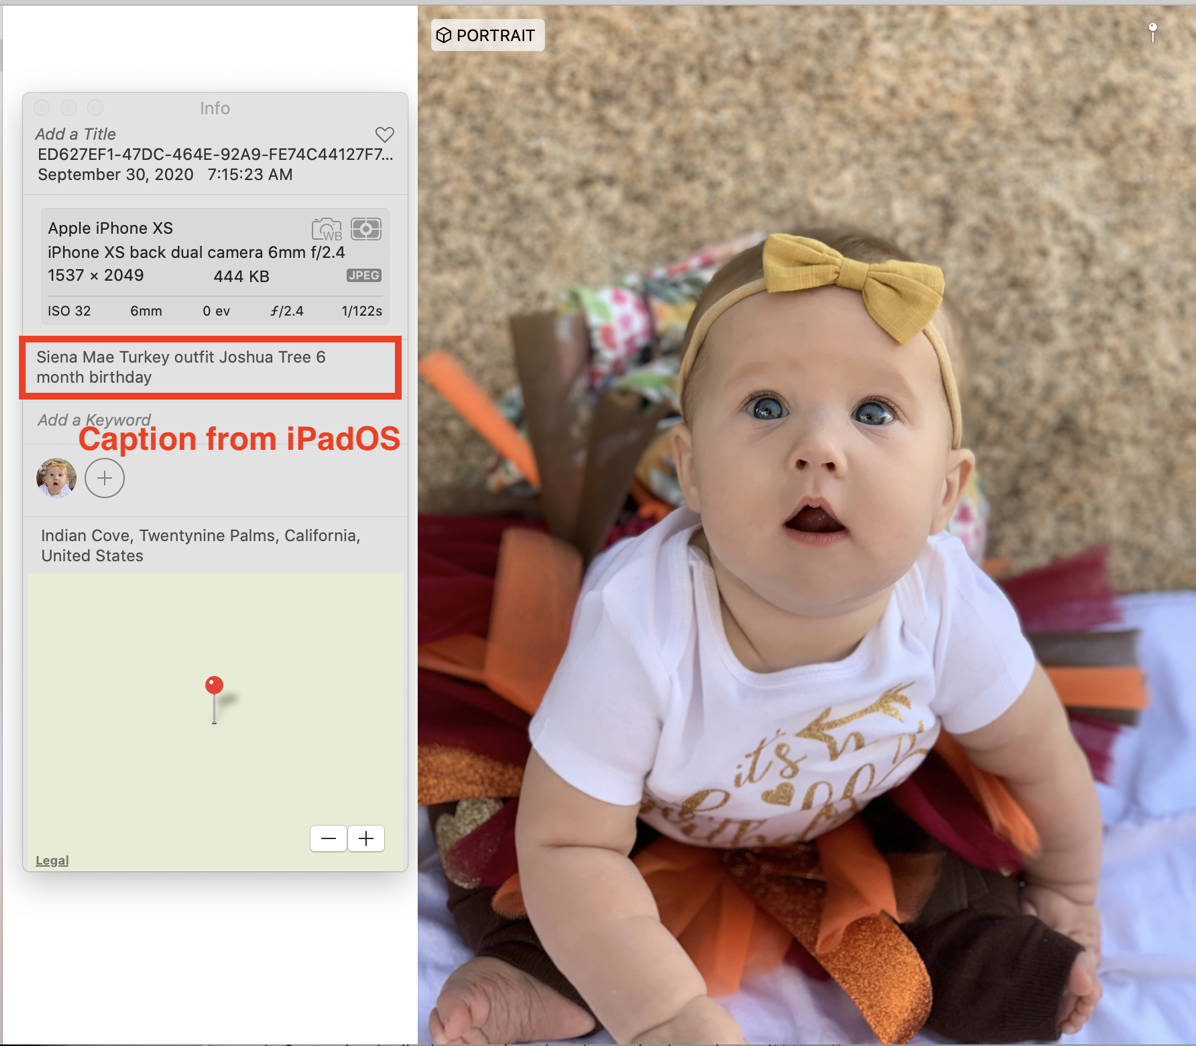
But right under the image itself when you swipe up is the magic. It says “Add a Caption” in a text field. I typed in a caption using my iPad for an image and excitedly switched over to Photos on the Mac, only to discover that there is no Caption field on the Mac version of Photos. However, there is a field called Description, and the Caption from iOS/iPadOS Photos was there! Clearly the developers of the iOS Photos and macOS Photos work on opposite sides of the spaceship because they never even noticed they named the same field two different names.
But the most important thing is that on Mac or on iPad or iPhone, you can search by the words you typed into the Caption or Description field and you more importantly it finds the images with those words on all three platforms.
It’s Still Annoying to Name Photos on Mobile
And I’m sure some of you are already pointing out that if anything, the process of swiping up on a photo, typing in a caption, swiping down, then swiping right to left to get to the next photo and then up and tapping in the Caption field to type the second caption is even MORE annoying than the process on a Mac. And you’d be right.
But at least you can kick back on the couch with an iPad and name photos when relaxing instead of having to use a Mac. On a vacation, you may only have your iPad with you and want to name your photos while you can still remember the name of a mountain or which kind of goat you just saw.
I know this improvement isn’t groundbreaking for most people but it makes me really happy that I can name, I mean title, I mean caption, I mean describe my photos now, even from my iPad.


This is a good find Allison, and thanks for pointing out the inconsistencies between Apple platforms. Apple developers should be required to read important publications such as Podfeet so they get it right.