In part one of my screencasting tip series, I talked about how to set yourself up for a successful recording. In part two I explained some best practices that I’ve found help me create better screencasts. Now we’re going to get a lot more detailed about the recording and editing process. I’ve tried to keep these tips as app-independent as possible and I’ll still strive for that, but some of what I’ll be talking about will be specific solutions available in using Screenflow on the Mac.
Keyboard Shortcuts – Learn Them!
If you’re going to be doing a lot of video recordings, I highly recommend memorizing as many keyboard shortcuts as you possibly can. I know not everyone is wired for keyboard shortcuts, but if you are, it’s a great way to speed up recording and editing.
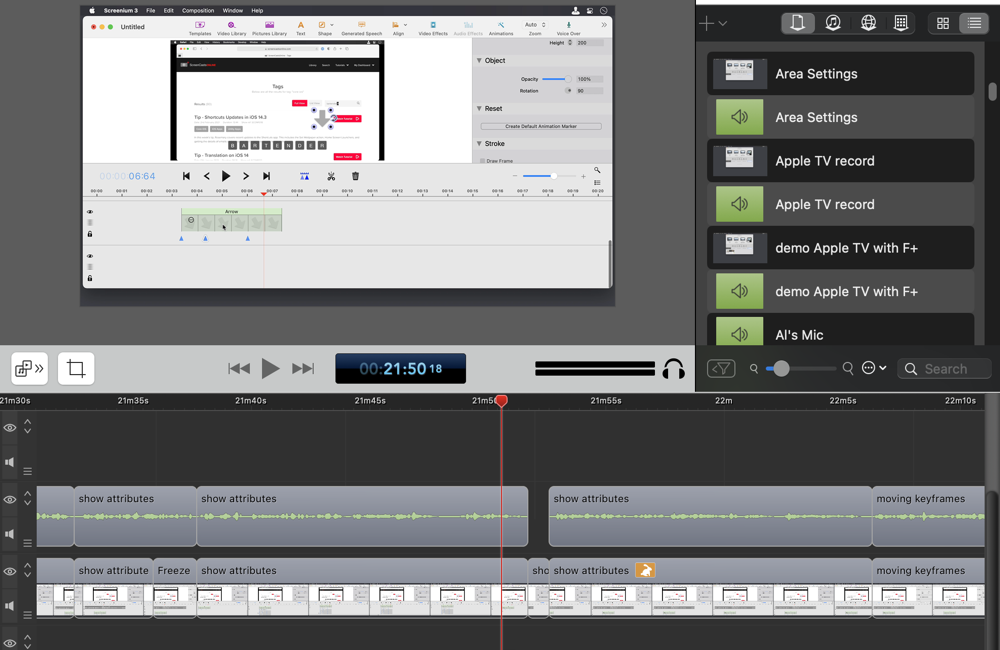
I put a screenshot in the shownotes of the Shortcuts Preferences for ScreenFlow in which you see a really small scrollbar to demonstrate that there are a lot of keyboard shortcuts in ScreenFlow. No matter what tool you’re using, try to train your brain and fingers to use shortcuts.

I’d like to give a few examples of just a couple I use all the time in ScreenFlow.
T and Shift-T to Split
In ScreenFlow, you can use the razor blade icon in the bottom left of the screen to slice a recording, but you have to switch back to the arrow to go back to selecting. Instead, learn that the T key splits whatever tracks are selected right at the play head. If no tracks are selected, the T key splits all tracks.
When you split with T, the bit to the left of your play head will be selected so you can quickly hit the delete key to get rid of it. If you want to split but then delete the bit after the split, simply hold down shift with T, and again it will split but the part of the clip to the right will be selected and ready to delete. I’m still working that one into muscle memory but I love it when I do remember it.
Command-Delete for Ripple Delete
Sadly, deleting parts of your recording will be the thing you do more than anything else in editing. ScreenFlow has a command called a ripple delete. In a ripple delete, you select a region to be deleted, but then all of the video and audio tracks to the right will slide over to fill the gap you just created. Other recording apps have this feature built in as well, but here’s how I do it in ScreenFlow.
I click at the start point, and hold down the shift key while moving the play head to the right until I get to where I want to end my selection. If I click and drag the playhead, it will play back the audio as I scrub so I can be sure to get my cursor right where I want it. My click and drag steps are marking what are called the in and out points.
Don prefers to use the keyboard shortcuts I and O to mark in and out points, rather than clicking and dragging, but I find it harder to get my cursor placed exactly right that way.
If you simply hit the delete key after selecting, the selection will be deleted but it will leave a gap in your recording. If that’s not the desired behavior, command-delete executes the ripple delete. I probably use ripple delete 50-100 times in a recording so it’s well worth learning that particular keystroke.
Quick Transitions
I try to avoid making a lot of video transitions, but there’s one part of my tutorials where I use them extensively. I do an introduction to the show where I have white text that appears on a black background as I explain the tool I’m going to demonstrate. I like these to fade in as I describe each feature, and then fade out when that section is complete.

To add a fade in (or fade out), you can select the track and a little gear will show at the beginning of the track. You can select that gear and then select Add Starting or Ending Transitions. I do these transitions all the time, and reaching allll the way over to the trackpad and then draaaagggging my cursor to the correct track and selecting that tiny little gear and dragging alllll the way down to the add transition selections is a huge waste of time.
Instead, if I want a starting transition, I simply hold down command-option-comma, or for an ending tradition, I use command-option-period. I usually want both a starting and ending transition, so I hold down option-command and then hit comma, then period one after another. When I was doing a screenshot for the shownotes I noticed there’s a keystroke to add both, which is command-option-backslash. We’ll see if I remember that one.
Whether you use the slow and plodding cursor selection or you use the efficient keyboard shortcut, you’ll get the default transition applied to your selected clip(s).
In ScreenFlow’s preferences, you can set the default time for transitions and other effects. It’s worth familiarizing yourself with these preferences, or you’ll find yourself constantly changing the duration because the default is too long or too short.

Add Chapter Marks
If you’re doing long-form tutorials as we do at ScreenCastsOnline, I highly recommend adding chapter marks. Your tutorials will become a more valuable resource if your viewers can come back later to review a specific feature you taught by jumping to a chapter mark. In ScreenFlow, I learned pretty quickly the keystroke to put in a chapter mark was a backtick: ` (the character under the tilde).
Keyboard Maestro Macros from Don
Don McAllister wasn’t content to use just the built-in keystrokes. He created a set of macros with the awesome automation tool Keyboard Maestro and not only shared them with his staff of tutors, he agreed to let me share them with you.
I’m going to admit that I have been blindly using a couple of his Keyboard Maestro shortcuts without actually walking through and understanding them. Because I wanted to tell you about them, I figured I better study them a smidge first and now I can see exactly what he’s doing. Don learns keyboard shortcuts faster and more thoroughly than anyone I know, and I can tell from his macros that they’re simply strings of keystrokes already built into ScreenFlow.
The two I use constantly when I’m recording I’ll call Ripple Delete Plus and Close Gap.
Ripple Delete Plus
Remember I told you that command-delete will do a ripple delete? Don’s macro, using the keystroke command-shift-R not only does a ripple delete, but it also moves the play head back two seconds before the cut point and starts the video playing. This keystroke is such a speedup because 100% of the time that you do a cut, you want to go back and watch and listen to how well you did the cut.

Close Gap
The second one I use really often is Close Gap. On occasion, you’ll create clips on the timeline that have gaps between them. Whether you drag clips in with gaps between them intentionally or use a simple delete to create gaps, you’ll be in this situation from time to time.
You put the play head on the right side of the gap and hit the keystroke. Like the previous macro, after the gap is eliminated, the play head moves to the left by two seconds and the audio and video will play automatically.
Once you realize that Don’s macros are just a series of built-in keystrokes from ScreenFlow’s shortcuts, maybe it will tickle your brain thinking about what more you can automate in ScreenFlow or a different video editor.
Don has a couple of other macros, like ones to trim the beginning or end of a clip. All of these are downloadable at a link in the show notes if you think they might be helpful to you. I’ve tried to add enough comments to them to help you see how they work and maybe help you see how to create your own macros for speeding up your workflow.
These are offered with no warranty of any kind, and I highly recommend you review them before enabling them. You are, after all, downloading executable code from a link you found on the Internet! Create a test file and test these macros before using them on production work so you’re sure you understand what they do.
Download Zip of Don’s ScreenFlow Macros by clicking here.
Keyboard Maestro is $36, which might sound steep unless your time is worth money to you. I’m not being snarky when I say that, but if you can get more work done in less time, $36 is a small price to pay.
Magical Typing Speed
One of the most tedious things to watch in a video tutorial is when the instructor has to type some text. Invariably they say the words very, very slowly trying to match their typing speed, or they may even read it out character by character as they painstakingly type. Or worse yet, they make typos and back up and correct it while you’re watching. I can save your viewers some agony with a very simple, yet elegant trick.
I distinctly remember when I wrote to Don McAllister and asked him how the heck he typed so fast in his videos, all while very naturally saying what he was typing. That’s when he explained the magic behind his typing.
First, without moving the cursor or touching the keyboard, record yourself saying out loud what you’re going to type. Then do the typing without talking. Type it as many times as you need to until you do it once without making a mistake. Now you’ll have an audio track with your explanation followed by silence, and a video track with nothing happening and then followed by the typing.
Next, cut the motionless video out from under your voice, and replace it with the one, correct video of you typing what you needed to type. The typing video will probably be longer than the audio clip. With ScreenFlow, you can change the speed of a video clip by holding down the option key and dragging the length of the clip to speed up (or slow down) the video. In the typing example, simply speed up the typing till it matches the length of your voice clip. You too will look like an amazingly quick typist and multitasker, like Don.
Not only does this look fantastic to the viewer, but it’s also a much less stressful way to record.
Bumbled Voice Recording
The biggest problem when recording a screencast is not when you do the wrong step on screen, it’s when you do the right step but bungle the voice over. There’s a natural tendency to try to fix the bungled bit by stopping and rerecording just the messed-up audio and then trying to splice it in. It’s hard to make a clean cut and it’s hard to get your voice exactly in the same tone and inflection as it would have been if you’d said it correctly. These cuts are nearly always very noticeable to the ear, and there’s a much easier way.
When I mess up what I’m saying, I immediately let go of the keyboard and trackpad, wait a heartbeat or two, and repeat the last long phrase I tried to say (hopefully correctly this time). Since I’ve literally just said it (albeit incorrectly), I automatically speak with the exact same cadence and tone. Even if I bumble the voice over a second or even third time, I can say it until I get it exactly right.
Now I’ve got good video followed by good audio. Time to line them up.
The steps in editing are essentially the opposite of what we did with the magic typing. We’ve got the steps being executed in the video track with the bumbled audio, and then we’ve got static video with the correct audio. I just cut the bumbled audio, replace it with the good audio, and then delete all of the video that was recorded while I was re-recording the audio bit. This method is the least amount of effort and the audio sounds perfectly smooth. I may have to stretch or shrink the video to match the audio but with the option-drag method, that’s easy.
Freeze Frame
One of the most valuable tools in screencasting is Freeze Frame and it’s available in both ScreenFlow and Screenium, the two tools I’ve used recently. I’ve often recorded a great segment and the audio is perfect, but then I remember something I forgot to say.
Simply split the video and audio tracks and drag them apart so you have a nice, wide gap to talk. Record the audio you forgot. Now select the video track that stops right before the gap. In ScreenFlow, from the menu bar find Clip then Add Freeze Frame, or learn the keystroke command-shift-F. I guarantee you that learning this keystroke might be the most important one of all.
The freeze frame will be very short, maybe 1-2 seconds depending on the defaults set in your preferences, but since it’s not moving video, you can simply grab the end of it and shrink or grow the length till it exactly fits your inserted audio.
Narration in ScreenFlow

I’m not sure every tool has this capability, but with ScreenFlow you can add narration without doing a full screen and voice recording. With the narration option, the video plays while you record just your voice, so you can see what’s happening while you’re talking through the steps. I still think it’s better to use my previous tip if you can, again because your voice will be identical. However, there are always times where you’re playing back a recording and realize you said iPhoto instead of Photos, or Parallels Desktop instead of Parallels Toolbox. Not that I’ve ever made similar mistakes myself of course.
I recommend setting the playhead a bit earlier than where you messed up and just don’t start talking until right where you want to cut in the audio. I’ve tried to start my narration with the record head right at the cut point but I have to jump in so quickly that I usually cut off the beginning of the recording. You’ll do a lot of narrations, so you might as well learn the keystroke for it: command-option-semicolon.
The cool thing about the narration option in ScreenFlow is that you don’t have to get it right the first time because it’s very easy to re-record a narration. If you flub the line when rerecording, hit the space bar to stop, and ScreenFlow will ask you if you want to keep or reject the narration. If you hit reject, it puts the play head right back where you had it before and it’s ready for you to record again.
In ScreenFlow 9, if you use the spacebar to stop the narration recording, which is the normal way to stop recording in many applications, it locks up ScreenFlow so you have to force quit and restart. I just tested in ScreenFlow 10 and it looks like they fixed that bug, so you can use the space bar or the cursor to stop recording a narration.
If the new audio track is longer than the flubbed audio, this is a great place to use our freeze frame trick to extend the video to make it long enough for the audio. If the space you need to fill with the freeze frame is more than one second, when you apply a freeze frame, it may cause the video track to the right to drop down to a lower track, which can be disconcerting and could cause errors when putting it back.

J.F. suggests that a way to control this is to move the video to the right down a track yourself before inserting the freeze frame. Then it’s easy to stretch or shrink the freeze frame to match the available gap and only then bring the right video track back up where it belongs. I know that’s a pretty advanced trick but I sure wish I’d thought of that a very long time ago! I wasted so much time watching that right track jump down and try to figure out how to get it back in control.
What do you do if the inserted audio is shorter than the flubbed audio? Your video will be too long. Here’s where you use the trick we learned when talking about speed typing. Simply hold down the option key and drag the right edge of the video clip to the left till it speeds up to match your audio. This advice will work well only if that video clip isn’t too long and you don’t have to change it by much. If you speed up a 3-minute video track, the audio to your left will be out of sync with your video, so use this tip carefully and check your work.
Bottom Line
I hope at least some of the tips and tricks I’ve described will help you speed up your workflow in making screencasting tutorials. If you have some tips you want to share, I’m all ears. I learn something new every day with screencasting and anything you can teach me to help me make better videos faster will be very much appreciated. Many thanks to J.F. and Don for spoon-feeding so many of these ideas to me over the years.
Allison! I use most of these every time I record. However, you gave me the narration trick, which I didn’t know about, AND you refined my quick typing trick and made it even slicker than it already was!
Most Excellent, Terry. So what tips do you have for me?