
You’ve heard me complain at length about trying to get Apple’s help figuring out why the battery doesn’t last as long as it should in my 14” M1 MacBook Pro. You probably also remember that they had me doing so many time-based experiments on it that I bought an M2 MacBook Air so I could continue to get work done. The good news is that I’m in love with the MacBook Air and I’ve been stretching its capabilities and have yet to find a limit to what it can do. It seriously has me questioning whether I even need a “pro” machine.
I decided to see whether I could conduct my part of the live show while on the road at Lindsay’s house using only the MacBook Air. On my first attempt, I carried both laptops just in case the MacBook Air wasn’t actually up to the task.
The main limitation for my work with the MacBook Air is that it only has 2 Thunderbolt USB-C ports. I use a lot of peripherals when I’m doing the live show, and at home I have a CalDigit TS3+ dock and an OWC Thunderbolt Hub which together manage all of those connections. But when I’m on the road, that’s a lot to carry along. Let’s review the list of devices I need to plug into my traveling Mac for the live show.
- Shure mVi USB Interface for my XLR microphone (not my standard interface but the one I take on the road)
- Ethernet since WiFi makes video a bit unpredictable
- External USB-C display, which is currently the 15” 4K KYY Display
- Logitech Litra Glow LED USB light panel
- iPhone for Continuity Camera
USB-C Hub Solution
The first time I tried using the MacBook Air for the live show, I used the Satechi 4-Port USB-C Hub. This hub provides four USB-C 3.0 Gen 1 data ports. It doesn’t provide pass-thru Power Delivery, but I can use the MagSafe charger and not take up a USB-C port.
Remember from my article entitled What’s the Difference Between a Hub and a Dock? that a hub just multiplies the existing ports. In this case, a hub is the right choice because the MacBook Air only has those two Thunderbolt/USB-C ports on it. I’m really comfortable using dongles to make those USB-C ports into anything I want so I don’t need a dock to change the functionality, I only need more USB-C ports.
The challenge of using a USB-C hub was that many devices don’t work properly if plugged in through a USB-C hub, especially a bus-powered hub like my Satechi. For example, the KYY USB-C display simply won’t function if it’s plugged in via a USB-C hub. In my testing at home, I realized that the microphone interface also required a direct connection to my Mac. If both of those devices have to connect directly, then that’s both of my USB-C ports used up and I can’t add any of the other peripherals.
Around the time I was preparing for this exercise, I heard Pilot Pete say on the Mac Geek Gab that he figured out how to trick his mic interface into working through a USB-C hub. He said if the Mac was off, or at least asleep when you plug in the interface when you awaken the Mac, the interface will work. This solution actually worked for me. This meant that I could have the external display take one port, and the USB-C hub from Satechi take the second port and I’d gain 3 USB-ports.
This allowed me to plug in all of my devices while at Lindsay’s. It did require a lot of pre-thinking and organizing of my devices but everything worked. However, we experienced some instability in my audio during the live show. This very likely could have been a problem with StreamYard or the local network, but I was worried that the USB-C hub might have been the problem. Perhaps a Thunderbolt hub would do a better job.
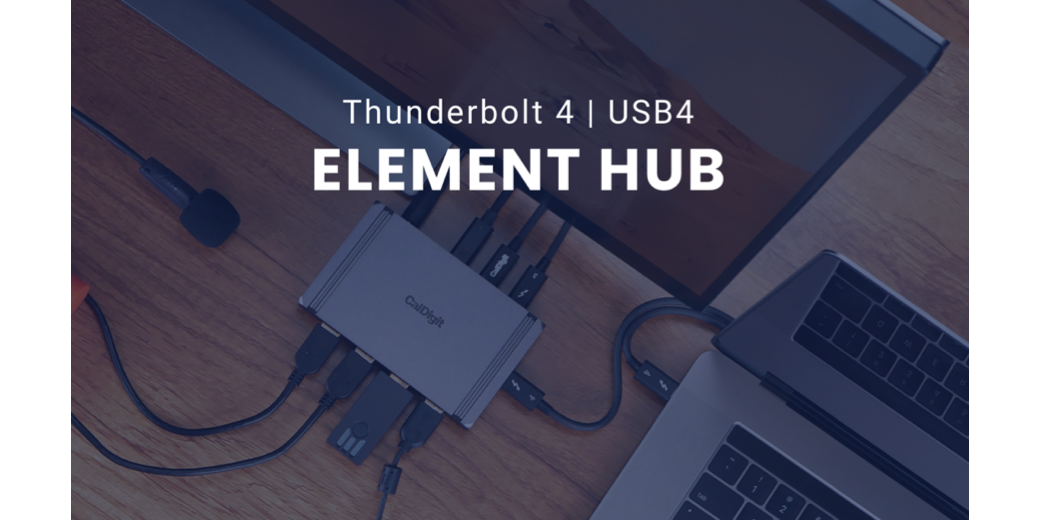
CalDigit Thunderbolt 4/USB4 Element Hub
The ability to have a hub for Thunderbolt only came out with macOS Big Sur in 2020. Before then, Thunderbolt devices ended the Thunderbolt chain. But with Thunderbolt 3 or 4-equipped Macs and Thunderbolt 4-equipped PCs, we can now all enjoy Thunderbolt hubs.
In my article from January 2022 entitled The Wonder of Thunderbolt Hubbing with the OWC Thunderbolt Hub I explained how on my desktop I have an OWC Thunderbolt hub connected to my CalDigit TS3+ Dock which adds 2 more Thunderbolt ports to my Mac setup.
But for travel, I’d need something with even more ports. Back when I wrote that article about the OWC Thunderbolt hub, David Price commented on the post asking me if I’d considered the CalDigit Element Thunderbolt Hub. I had to confess that I hadn’t realized it existed back then.
But a few months ago when Steve and I visited David Roth and his lovely wife Jennifer and more importantly their darling golden retrievers Luna and Melody, I noticed a tiny box on David’s desk next to his Mac. It was the CalDigit Element Thunderbolt Hub. It’s about the size of a deck of playing cards, and similar in size to the OWC Thunderbolt Hub. But sitting on his desk it looked so tiny and portable it really caught my eye.
I tried to take David’s but he caught me, so instead he sent me a note when the CalDigit Thunderbolt Element Hub was on sale. I picked one up to see if it would make my travel setup easier.
The great news is that in our first test, there were zero glitches with my audio or video using the CalDigit Element Hub along with the MacBook Air. Not only that, the hub has so many ports I actually had some left over.
The CalDigit Thunderbolt Element Hub has one Thunderbolt port on the end to connect it to your computer and gives you three Thunderbolt ports in return. Like the OWC Thunderbolt hub, you really only gain 2 Thunderbolt ports. But where the OWC hub throws in one 10Gbps USB 3.2 port, the CalDigit Thunderbolt Element Hub gives you four USB 3.2 ports at 10Gbps.
The side effect of this embarrassment of riches in ports was that I actually had to remove some of the dongles I keep attached to my USB-A devices.
Since all Thunderbolt 4 ports are also USB 4, I plugged my all of my USB-C devices into the Thunderbolt side, and my USB-A devices into the USB 3.2 side.
3 USB-C:
* Ethernet to USB-C dongle
* KYY display
* Logitech Litra glow for power only
4 USB-A:
* Shure MVI interface for my XLR microphone
* USB-A to Lightning to iPhone for Continuity Camera
The included Thunderbolt cable connects the CalDigit Thunderbolt Element Hub for all of the data transfer of all of those devices. Since it’s a powered hub, I didn’t even have to plug the MacBook Air into power using MagSafe. One cable to rule them all.
I know that’s a lot of stuff to keep in your head, so in the show notes I included a handy-dandy diagram of the setup along with a photo of exactly how messy but awesome it was.


There are two things I want to mention about this setup. By our new handy-dandy definition of a hub vs. a dock, a hub should multiply the existing ports, but both the OWC I use at home and the CalDigit I bought for the road multiply Thunderbolt ports but they also add USB-A ports. I guess we’ll allow it since Thunderbolt 4 is also USB 4, but it did make me smile to think it through.
There is also one downside of a Thunderbolt hub for traveling like this. As I said earlier, seeing the CalDigit Thunderbolt Element Hub on David’s desk attracted me because it was so tiny. But what I didn’t take into account is how HUGE the power supplies are for these devices.
The tiny CalDigit Thunderbolt Element Hub by itself only weighs 6.5 oz. But the power supply with its power cable weighs an additional 17 oz! The whole reason to get a MacBook Air is because they’re so thin and light so you don’t have a lot to carry around, but adding this huge weight and size to my bag gave me pause.
I started thinking about whether it makes sense to travel with the MacBook Air when I’m going to do the live show, or whether I should just carry the MacBook Pro since it doesn’t need a hub because it has more ports. It was time for some math.
The MacBook Pro weighs 54 oz, but the MacBook Air + CalDigit Thunderbolt Element Hub including its power supply weighs 66 oz. That makes the MacBook Air combo kit 22% heavier!
It may be illogical, but I’ll still travel with the MacBook Air. It’s easier to take out in the car to get some work done. It’s easier to carry between rooms. It’s easier in just about every way to use than the 14” MacBook Pro. I’m willing to pay the price of the extra weight of the hub just to have that convenience the rest of the time I’m away from home. Don’t forget I’m also carrying a mic, a mic interface, a mic tripod, big headphones, a light, and a 15″ USB-C display, so what’s an extra pound and a half in that bag?
The final reason I won’t travel with my MacBook Pro is that the battery life problem still hasn’t been resolved. I’m afraid it might live out the rest of its days as a desktop. The MacBook Air has a longer battery life even if the MacBook Pro didn’t have problems so it wins on all counts.
Bottom Line
I have to say that the CalDigit Thunderbolt Element Hub is a great little device for expanding the Thunderbolt and USB ports you have on your computer, whether it’s a MacBook Air, a MacBook Pro, or a Thunderbolt 4-equipped PC. You can buy it on Amazon for $230, and as of the time of this writing, there’s a $20 off coupon.