I collect screenshot apps like other people collect shoes. It’s not that I haven’t found a good one, it’s that there are so many good ones to play with.
I probably use the built-in screenshot utility in macOS more than any of them. ⌘⌃⇧4 to copy a screenshot to my clipboard is my constant go-to keystroke. I often grab an entire window by hitting space bar first, or just drag on a region of interest. I use the copy to clipboard because lots of times I’m going to just paste into a Telegram message, or my clipboard manager, Copy’em Paste will hold onto it until I need it.
If I know I’m going to save a screenshot, I’ll often use ⌘⇧4 which opens it right in Preview so I can save it out to disk. But I almost always regret doing that because I often want to add an annotation, and I hate the annotation tools in Preview with a fiery passion.

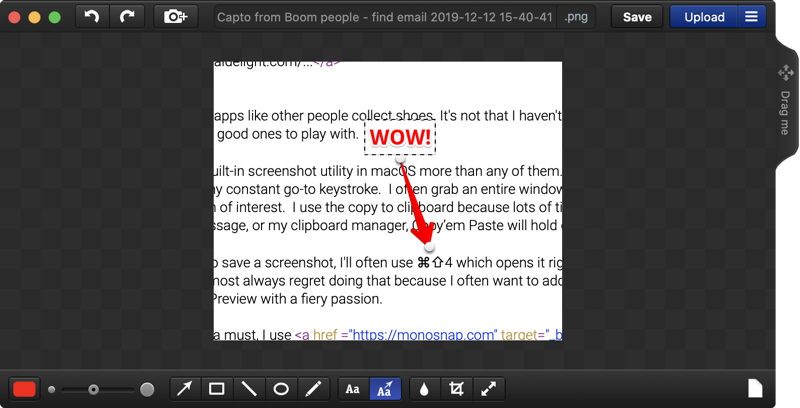
When annotation is a must, I use Monosnap, or ⌥⌘5 in my world. Again I can do a window, or drag for an area, but once I’ve got the shot, the annotation tools are ever so much better than Preview. I can click and drag for a precise location of an arrow or a box to highlight something, and I can change the line thickness after the fact, and I can blur out sensitive information. You can’t do those things with Preview.
I know Monosnap can record video as well as screenshots, but for some reason when I want a quick video to show something off, I use the screen capture tool in Parallels Toolbox. With one click I can grab an area of the screen, hit record, hit done, and then I’ve got the video cluttering up my desktop. Sometimes I’m lazy and send that giant file as is to someone (usually Steven Goetz but Dorothy often “enjoys” my videos of my homework “progress”.) If I’m feeling kind, like when sending a video of a bug to a developer, I’ll open the video in QuickTime and export it to a smaller format.
And yes, I know I can record video of the desktop using QuickTime, but for some reason, I just don’t reach for it to do that. Parallels Toolbox is right there in the menu bar with all those tools I go to all the time.
Enter Capto
You would think that I have enough screenshot tools at my disposal, but I’ve got a new one that’s pretty fun. I had lunch with my buddy Niraj, and he told me about a tool he’d found called Capto. I looked into it, and I think it’s the replacement for a screenshot tool I reviewed a decade ago called Voilà. I’m not kidding about the decade part, it was in 2009!
Capto is from a company called Global Delight (globaldelight.com/…). They also make a tool called Boom, that modifies your system sound. Back when I last looked at Boom, it just made the macOS audio louder, but it looks like they’ve expanded it into 3D sound and it runs on iOS, Android and Windows now.
But let’s talk about Capto, the screenshot utility from Global Delight and see if it’s going to be added to my arsenal of screenshot tools. Capto is $20 with a 15-day free trial, and it’s also included in your Setapp subscription if you’re of that persuasion.
Capto works as a menu bar app and as a normal app. You use the menu bar app (or the keystrokes they give you) for the different things you can capture, and then the image opens in the editor and is stored in the Capto library for future use. None of my other tools have a library function.
Capto will give you the typical type of screenshots: full screen, area or window. But it has more options than I’ve seen in most screenshot utilities. It has a dedicated option to capture a menu, but for the life of me, I can’t get it to work because of macOS Catalina permissions. Support is trying to help me get it to work but they sent me a download version and now I have two versions and things are getting very tangly. Oddly it’s only the menu capture that seems to be annoyed with screen recording permissions. Every single other feature of Capto works flawlessly for me.
So let’s skip the menu option. The next option is something that’s definitely rare in screen capture apps. You can capture an entire web page with Capto. With your web page of interest open in your browser, simply go to the menu bar app and choose Snap Active Browser URL. Instantly you’ve got a PNG of the entire thing. Capto also has a built-in browser and you can navigate in there if you like but I figure the native browser is probably more useful.
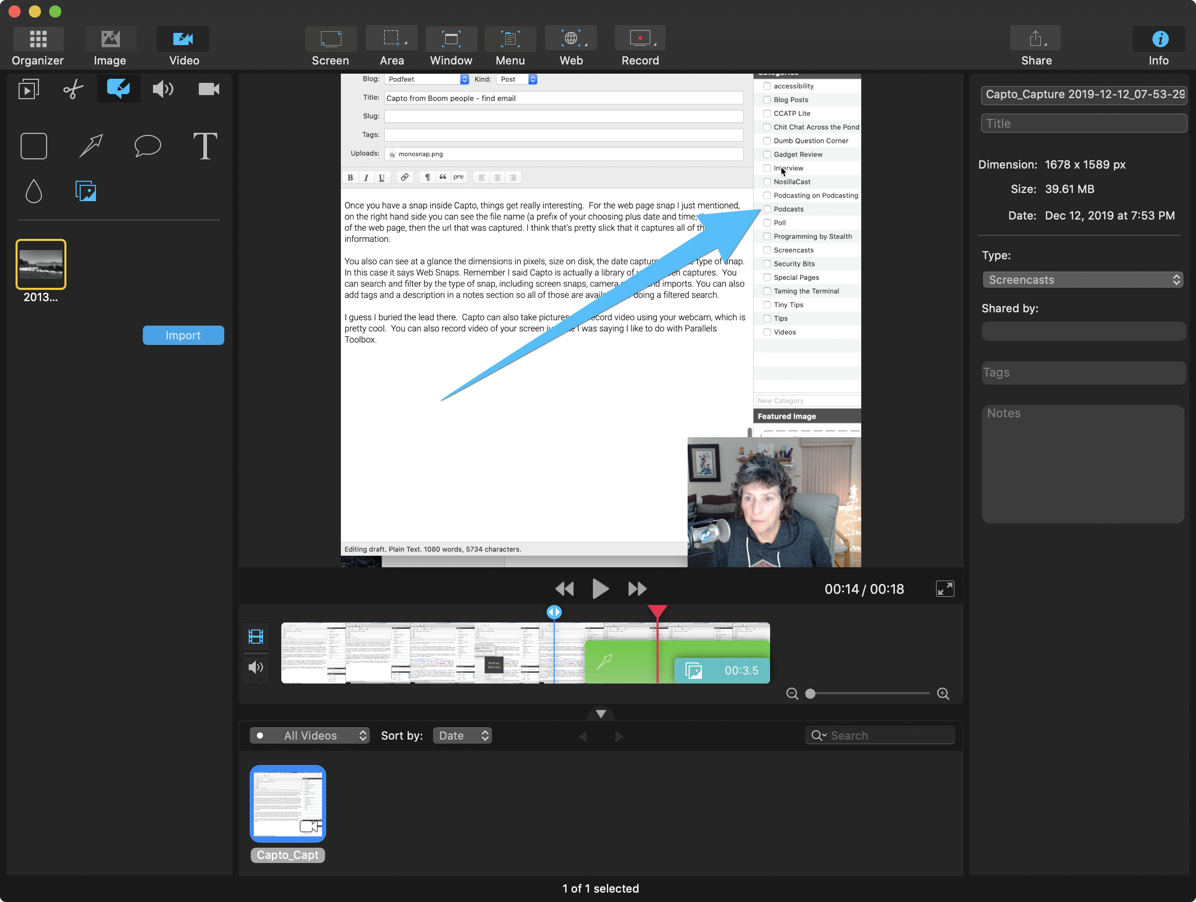
Once you have a snap inside Capto, things get really interesting. For the web page snap I just mentioned, on the right-hand side you can see the file name (a prefix of your choosing plus date and time), then the title of the web page, then the URL that was captured. I think that’s pretty slick that it captures all of that information.
You also can see at a glance the dimensions in pixels, size on disk, the date captured and the type of snap. In this case, it says Web Snaps. Remember I said Capto is actually a library of your screen captures. You can search and filter by the type of snap, including screen snaps, camera snaps and imports. You can also add tags and a description in a notes section so all of those are available for doing a filtered search.
Video Screen Capture
I guess I buried the lead there. Capto records video as well as screenshots, and it can take photos and video with your webcam. You can even record your webcam while recording the desktop, creating a picture-in-picture video. You can choose which microphone you want for your voice and record computer audio at the same time. You can even choose to have mouse clicks recorded into your video! Other than the $100 ScreenFlow, I’ve not seen a tool this inexpensive that can do all of that.
Often when capturing video of my screen to send to someone, they can see what a mess my desktop is. With Capto, you can choose to have your desktop clutter hidden away and replaced by your desktop wallpaper, another image, or a solid color.
You get the option to record a custom size, or you can choose from some standard sizes. I really have wished that Parallels Toolbox had the option for standard sizes because I always end up sending these mutant aspect ratios to people.
Video Editing

Once you’ve captured your masterpiece video you can do some fairly advanced editing in Capto. Like QuickTime, you can trim by dragging the ends of the clip, but you can also crop the video to a new size, and you can cut bits out of the middle of the video.
Capto also lets you do some pretty neat annotations of your video. You can put in rectangles and arrows (even bendy arrows), thought bubbles and plain text, and you can blur sensitive information (in video!) You can even import images to overlay on your video. When you make these annotations, you get an indication in the timeline of when the annotation stops and starts, and you can drag those ends around to get it just right. The annotations show in the timeline with an icon for the type of annotation. For example, I can see an arrow in the timeline where my arrow annotation was inserted. Get this: you can even stack annotations so they overlap on the timeline and you can still move them around and change duration on each of them separately.
After your video is captured, you can modify the computer audio and the microphone audio independently, changing volume and adding fades in and out.
By default, the video from your webcam comes in on the bottom right, but you can change that in the editor to several different positions and change the size of the picture in picture video. If you don’t like the camera’s video you can uncheck the box to include camera video on export.
Screen Snapshot Annotations

I sort of jumped ahead by going straight into the video screencasting capabilities of Capto and skipped over screen snapshots. I explained the type of shots you can take but I skipped a really interesting one. You can capture a free form area on screen. You get a little cursor you drag around to capture any shape you want. Not sure what this would be for but it’s fun to play with if you’re a creative type.
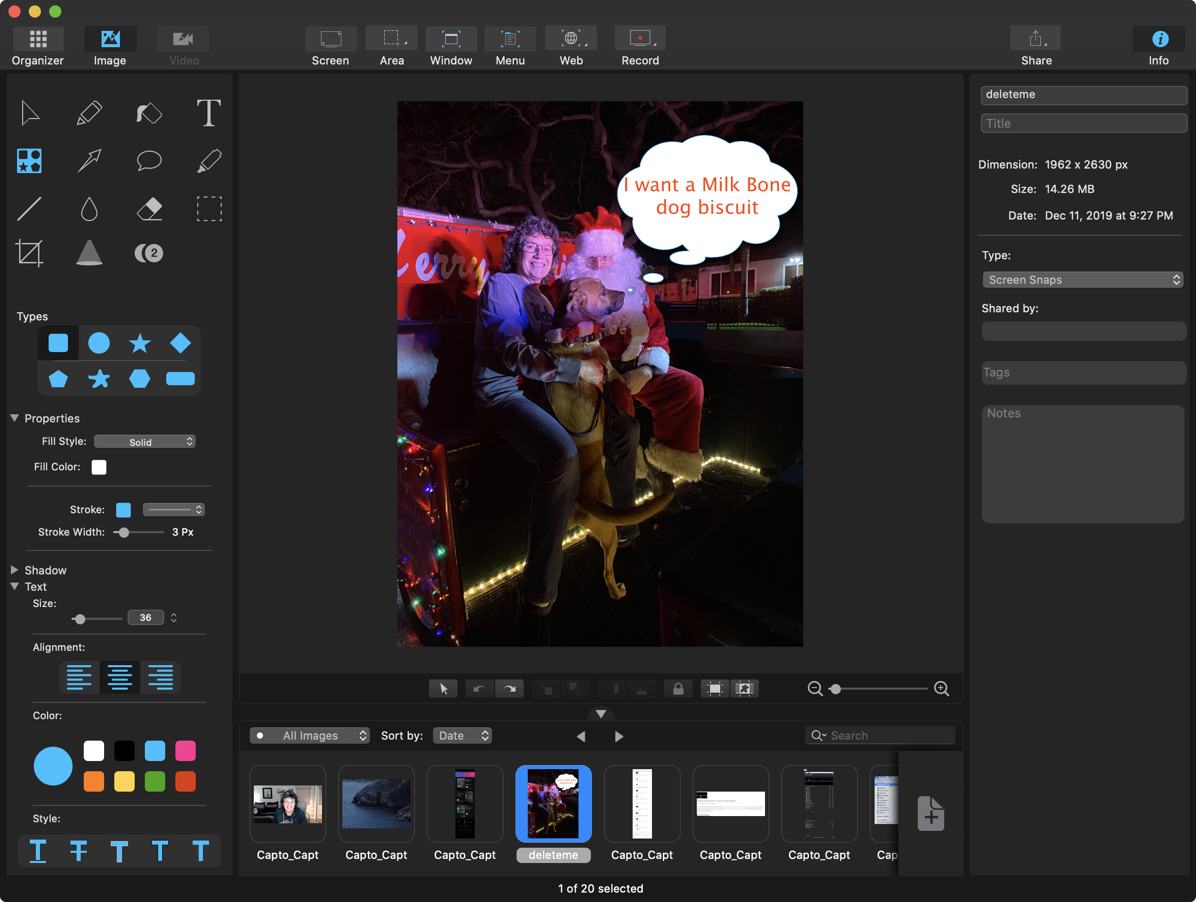
The annotations on images are even more fun than those on videos. You get a pen and a highlighter with controls for the stroke width and color. The thought bubbles can be a few fun different cartoony shapes. You can stamp your image with solid rectangles, ovals, stars, diamonds, pentagons and octagons, and even a free form tool. All of these tools have options to change the stroke of the shape, add shadows and even control the opacity of the shadow.
I mentioned the blur tool a couple of times which is awesome for hiding stuff. But sometimes you sort of want the opposite – you want to add focus to something specific on screen. With Capto you can choose a shape (freeform or predefined) and everything outside of that shape will be darkened, leaving only things in your shape looking bright and important.
I should mention that all of the tools I’ve been describing are non-destructive, allowing you to move them around, delete older ones, edit text and change pretty much anything you desire. Back on the video editing where I said you could cut out part of the video – you can even undo that after adding other annotations.
One thing in my beloved Clarify app was the ability to add sequence step bubbles. Capto has that capability too. One enhancement I’d like to see is that if you put down three sequence bubbles showing 1, 2, 3 and you deleted the second one, the 3 should change to a 2 like it did in Clarify.
There’s one last crazy tool. It looks like a standard-issue rectangular marquee tool, but when you drag it over an area, nothing seems to happen. It turns out if you drag on the rectangle you just drew, it copies that area as a new object on screen! Not only that, you can increase (or decrease) the size of the area you just copied, creating a very interesting effect. I can see using that to show off a part of a screen snapshot.
George from Tulsa often sends me photos of his dogs and they always have a silly thought bubble coming out of their heads. I sent him a picture of Tesla on Santa’s lap with a thought bubble saying “I want a Milk-Bone dog biscuit”. See? I couldn’t have done that with any of my other screen snapshot tools!
Below the image you’ve been editing, there are some more tools. You can move objects on screen forward and back. Note that the image itself is not considered an object so it’s unaffected. You can flip annotations horizontally and vertically too. Sometimes you get a part of an image just perfect and you want to make sure you don’t mess it up, so they’ve provided a button to lock specific annotations in place (and easily unlock them as well).
There’s an option to free-form change the canvas size, which can be handy if you want to add an annotation that’s outside of the screenshot. I need that all the time. For some reason, I always crop my screenshots too close to the material and leave no room for an arrow or some text. Once you make the canvas bigger and add your annotations, Capto has a button to crop the canvas right to the edge of all objects so it’s not bigger than it needs to be.
Organization
In a way, Capto is like a clipboard manager except for images and videos. If you like to store your screen snapshots and videos in case you need them later, you’ll like the library management tools. You can view just images, or just videos, search and filter as I mentioned before, but you can also create collections. They even have smart collections where you can apply some rules to classify your material.
Bottom Line
The bottom line is that I thought I was just going to spend 10 minutes playing with yet another screen snapshot tool, but Capto really surprised me in some of its unique features that I could really use. If you have a Setapp subscription, definitely give Capto a try. If you don’t, remember they have a free 15-day trial at globaldelight.com/… and it’s only $20 if you decide to buy. That’s not bad at all for such a highly capable app.


Thank you.
I have been looking for an app to snap complete web pages, and I bought Capto after reading this.
I used Ember (made by the people who make RapidWeaver) until they stopped development, and then had to extract the snaps in a useable format. Before that there was another app, the name of which I cannot recall. It stopped development also.
Capto snaps are saved as PNGs – so at least they will remain readable if Capto stops development.
Using Firefox, a whole web page (or portion) can be captured as a PNG or copied to the clipboard by simply clicking on the three dots to the right of the Location Bar and selecting “Take a Screenshot”, from the Drop-down. Then there is the option to save the full page or just the visible portion at the top right, or you can select or portion by clicking and dragging…
There is a description here: https://fossbytes.com/firefox-quantum-scrolling-screenshot/
What I’d like is the ability to print the entire web page to PDF, so I don’t need to OCR the PNG…
I really liked this line”I collect screenshot apps like other people collect shoes”. Apart from that the review of Capto looks I can use it. I need to have couple of screenshots sometimes during the day and this tools fits my needs. I was so far only using the snipping tool provided by Windows 10